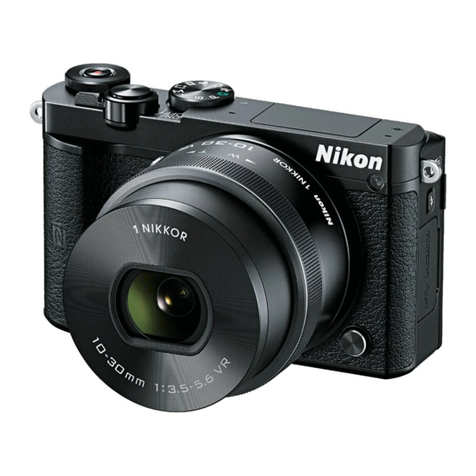
Nikon 1 V1 User manual

Nikon
DIGITAL CAMERA
I vl
Reference Manual

Selected JPEG images can be printed on a PictBridge printer
connected directly to the camera.
Connecting the Printer
Connect the camera using the supplied USB cable.
1Turn the camera off.
2 Connect the USB cable.
Turn the printer on and connect the USB cable as shown. Do
not use force or attempt to insert the connectors at an angle.
l_dUSBHubs
Connect the camera directly to the printer; do not connect the
cable via a USBhub.
3Turn the camera on.
A welcome screen will be displayed in the monitor, followed
by a PictBridge playback display.
1_ PrintingViaDirectUSBConnection
Be sure the EN-EL15battery is fully charged or use an optional EH-5b
ACadapter and EP-5Bpower connector. 93

Printing Pictures One at a Time
I Select a picture.
Press • or • to view additional pic-
tures. Press _ up to zoom in on the
current frame (_ 74; press _ down to
exit zoom). To view nine pictures at a
time, press _ down when a picture is
displayed full frame. Use the multi
selector to highlight pictures, or press
up to display the highlighted pic-
ture full frame.
2Adjust print options.
Press Q to display PictBridge print
options (_ 98). Press • or • to high-
light options and press • to select.
3 Start printing.
Highlight Start printing and press Q
to start printing. To cancel before all
copies have been printed, press (_)
again. ®
[I_ SelectingPhotographs for Printing I
Movies and NEF (RAW) photographs (_ 119) can not be selected for I
printing, If Motion Snapshots are selected, only the photographs will
be printed; the movie portion will not be printed, If photographs taken
with the Smart Photo Selector are selected, only the best shot will be
printed,
94

Printing Multiple Pictures
1Display the PictBridge menu.
Press the MENU button in the Pict-
Bridge playback display (see Step 3 on
page 93).
2 Choose an option.
Highlight one of the following options
and press I_.
• Select images for printing: Select pic-
tures for printing.
• Select bydate: Print one copy of each
picture taken on selected dates.
• Print DPOFprintorder:Print an existing print order created with
the DPOF print order option in the playback menu (_ 99).
The current print order will be displayed in Step 3.
• Index print:To create an index print of all JPEG pictures on the
memory card, proceed to Step 4. Note that if the memory
card contains more than 256 pictures, only the first 256
images will be printed.
95

3Selectpicturesorchoosedates.
If youchoseSelect images for printing
or Print DPOF print order in Step2,
press • or • or rotate the multi selec-
tor to highlight pictures. To select the
current picture for printing, press A.
The picture will be marked with a
icon and the number of prints will be set to 1; press • or •to
specify the number of prints (up to 99; to deselect the picture,
press • when the number of prints is 1). Continue until all the
desired pictures have been selected.
If you chose Select by date in Step 2,
press • or • to highlight dates and
press • to select or deselect.
[] InspectingPictures
To view pictures taken on the date high-
lighted in the Select by date date list,
)ress _ down. Use the multi selector to
highlight pictures, or press _ clown to
return to the date list.
The picture currently highlighted in the
Select images for printing or Print
DPOF print order displays or in the
Select by date thumbnail display can be
inspected by pressing _ up; the picture
will be displayed full screen while the but-
ton is pressed.
96

4Adjust print options.
Press Q to display PictBridge print
options. Press • or • to highlight
page size, border, or time stamp items
and press • to display the options
described on page 98; note that a
warning will be displayed if the
selected page size is too small for an
index print.
5 Start printing.
Highlight Start printing and press Q
to start printing. To cancel before all
copies have been printed, press (_)
again. ®
_Errors
See page 186 for information on what to do if an error occurs during
printing.
97

[] PictBridgePrintOptions
Highlight a page size (only sizes supported by the current
printer are listed) and press Q to select and exit to the previous
menu (to print at the default page size for the current printer,
select Use printer settings).
1-his option is listed only when pictures are printed one at a
time. Press • or • to choose number of copies (maximum 99),
then press (_) to select and return to the previous menu.
1-his option is listed only if supported by the printer. Highlight
Use printer settings (use current printer settings), Yes (print
white borders), or No (no borders) and press _ to select and
exit to the previous menu.
Highlight Use printer settings (use current printer settings),
Yes (print times and dates of recording on photos), or No (no
time stamp) and press _ to select and exit to the previous
menu.
1-his option is listed only when pictures are printed one at a
time on a printer that supports cropping. To exit without crop-
ping, highlight No and press Q. To crop the current picture,
highlight Yes and press I_.
Selecting Yes displays the dialog
shown at right. Press _ up to increase
the size of the crop, down to decrease.
Position the crop using the multi
selector and press _. Note that print
quality may drop if small crops are
ge sizes.
98

Creating a DPOF Print Order: Print Set
The DPOF print order option is used to
create digital "print orders" for Pict-
Bridge-compatible printers and devices
that support DPOF. Press the MENU but-
ton, select DPOF print order in the play-
back menu, and choose from the
following options:
_=_:'I=T Press • or • or rotate the multi selec-
Select/
Reset
tor to highlight pictures (_ I02). To
select the current picture for printing,
press AThe picture will be marked
with a _ icon and the number of
prints will be set to I ; press • or • to
specify the number of prints (up to 99;
to deselect the picture, press • when the number of prints is I).
When the selection is complete, press Q to display printing
options. Highlight Print shooting info (print the shutter speed
and aperture on all pictures in the print order) or Print date
print the date of recording on all pictures in the print order) and
)ress • to select or deselect, and then press Q to complete the
_rint order.
Remove all pictures from the print order.
[_ Print Set(DPOF)
DPOF date and shooting info options are not supported when printing
via direct USB connection; to print the date of recording on photo-
graphs in the current print order, use the PictBridge Print time stamp
option (_ 98).
The Print set (DPOF) option can not be used if there is not enough
space on the memory card to store the print order. For restrictions on
the types of images that can be selected for printing, see page 94.
Print orders may not print correctly if images are deleted using a com-
3uter or other device after the print order is created.
99

100

ThePlaybackMenu
To display the playback menu, press MENU and select the play-
back menu tab (F_q).
MENU button
The playback menu contains the following options:
Delete Delete multiple images (_ 75).
_Slicl_esi_ =!!!_:_'°View movies and photos in a slide show (_ 77).
Rotatetall Rotate "tall" (portrait-orientation) pictures for display
during playback (_ 103).
DPOFprint order Create digital "print orders" (_ 99).
Protect Protect pictures from accidental deletion (_ 103).
Rating Rate pictures (_ 103).
D-Lighting retouched copy that is saved separately from the unmod-
ified original (_ 104).
Resize Create small copies of selected pictures (_ 105).
Crop Create cropped copies of selected pictures (_ 106).
Editmovie Create copies of movies from which unwanted footage
has been trimmed (_ 107).
[] Playback
The camera may be unable to display or retouch images that were cre-
ated or have been edited with other devices.
[] Image Quality
Copies created from JPEG photos are the same quality as the original,
while copies created from NEF (RAW) photos are saved as fine-quality
JPEG images.
101 !!!!_!i!!i_!!_!!

Selecting Multiple Images
Choosing the options listed below dis-
plays an image selection dialog. Press •
or • or rotate the multi selector to high-
light pictures (only pictures to which the
operation applies are available for selec-
tion).
• Delete>Deleteselectedimages(_ 75)
• DPOFprintorder >Select/set (_ 99)
•Protect>Select/set(_ 103) • Rating(_ 103)
•D-Lighting(_ 104) • Resize>Selectimages(_ 105)
•Crop(_ 106) • Editmovie(_ 107)
[] InspectingPictures
The picture currently highlighted in the
thumbnail display can be inspected by press-
ing _ up; the picture will be displayed full
screen while the button is pressed.
102

Choosewhethertorotate"tall"(portrait-orientation)picturesfor
displayduringplayback.Notethatbecausethecameraitselfis
alreadyintheappropriateorientationduringshooting,images
arenotrotatedautomaticallyduringimagereview.
_--_i__l"Tall"(portrait-orientation)picturesareautomaticallyrotated
0_for display in the camera monitor. Pictures taken with Off
n/selected for Auto image rotation (_ 159) will be displayed in
________
off I"Tall" (portradt-orientation) pictures are displayed in "wide"
_scape) orientation.
Protect selected images from accidental deletion. Note that this
option does NOTprotect files from deletion when the memory
card is formatted (_ 153).
Press • or • or rotate the multi selector to highlight pictures
(_ 102) and press • or •to choose a rating (_ 76). Press _ to
exit when the operation is complete.
103

Appliedtoselectedimages,D-Lightingcreatescopiesthathave
beenprocessedtobrightenshadows.Usetoretouchdarkor
backlitphotographs.
Before After
Press • or • or rotate the multi selector
to highlight an image (_ 102) and press
C) to display the options shown at right.
Press • or •to choose the amount of
correction performed (the effect can be
previewed in the display; hold _ up to
zoom in) and press Q to create a
retouched copy.
[I_ D-Lighting
Noise (randomly-spaced bright pixels, fog, or lines) may appear in cop-
ies created with D-Lighting. Uneven shading may be visible with some
subjects.
[] Image Size
Copies created from JPEG photos are the same size as the original,
while copies created from NEF (RAW) photos are saved as JPEG images
with a size of 3,872 x 2,592.
104

Createsmallcopiesofselectedphoto-
graphs.SelectChoose size and choose a
size from 1.1 M(1,280 x 856 pixels),
0.6 M (960 x 640 pixels), and 0.3 M
(640 x 424 pixels), and then choose
Select images. Press • or • or rotate the
multi selector to highlight pictures (_ 102) and press • or • to
select or deselect When the selection is complete, press Q to
display a confirmation dialog and select Yes to save the resized
copies.
_ResizedCopies
Playback zoom may not be available with resized copies.
105

Createacroppedcopyofselectedphoto-
graphs.Press• or• orrotatethemulti
selectortohighlightapicture(_ 102)
andpressQ todisplaytheimagewith
thedefaultcropshowninyellow.Usethe
controlsbelowtochooseacropandsave
thecopy.
Choose size
Choose
aspect ratio
Position crop _&_
Create copy _
Press _ up or down to choose the crop size.
Rotate the multi selector to choose between
aspect ratios of 3 : 2, 4 : 3, 1 : 1, and 16 : 9.
Press A, I_, V, or • to position the crop. Press
and hold to move the crop rapidly to the desired
position.
Save the current crop as a separate file.
[_ CroppedCopies
Playback zoom may not be available with __
resized copies. The size of the copy varies @ _,,,,;
|
with crop size and aspect ratio and appears j_ _-_ ]
at upper left in the crop display. _/_ /
106

Trim footage from movies to create edited copies.
1 Select Choose start point or Choose end point.
Choose from the following options:
•Choosestart point: Trim the opening
footage,
•Chooseend point:Trim the closing foot-
age.
2 Select a movie.
Press • or • or rotate the multi selector to highlight a movie
(_ 102) and press Q to select.
3 Pause the movie on opening or closing frame.
Play the movie back, pressing Q to
begin and resume playback and • to
pause (_ 42; the first frame is indi-
cated by a _ icon in the display, the
last frame by _). Pause playback
when you reach the frame that will
become the new opening or closing
frame.
4Delete the unwanted frames.
Press • to delete all frames before (Choose start point) or
after (Choose end point) the current frame.
5 Save the copy.
Highlight Yes and press Q to save the
edited copy. If necessary, the copy can
be trimmed as described above to
remove additional footage. Edited
copies are indicated by a _ icon in
full-frame playback.
107

TrimmingMovies
Movies must be at least two seconds long. If a copy can not be created
at the current playback position, the current position will be displayed
in red in Step 4 and no copy will be created. The copy will not be saved
if there is insufficient space available on the memory card.
To prevent the camera from turning off unexpectedly, use a fully-
charged battery when editing movies.
108

The ShootingMenu
To display the shooting menu, press MENU and select the shoot-
ing menu tab (1_1, _, _!_, or _).
MENU button
The shooting menu contains the following options:
_Reset_si_°°ti_ng°_optionS::rl___.ir_t shooting options to default values (110).
............... _........ ° Choose ho_th_ came set_ shutt speed °an_
Exp0surem°de ture (_ 11 I). aper-
/°ma_g_e_ _aiiiy=:_ _hoose a fiie format and compression ratio i_
Image size Choose a size for new photos (_ 119),
Continuous 1-akephotos one at a time or in a burst (_ 121).
Shutter type Adjust shutter settings for still image mode (_ 122).
Framerate Choose a frame rate for slow-motion movies (_ 122).
........... oo__
Metering Choose how the camera meters exposure (_ 124).
White balance Adjust settings for different types of lighting (_ 126).
ISOsensitivity Control the camera's sensitivity to light (_ 131).
Picture Control Choose how the camera processes pictures (_ 132).
109
!!!!!!X_!!i!!i!!!_!!_!!!

Custom Picture
Control Create custom Picture Controls (_ 136).
Colorspace Choose a color space for new pictures (_ 138).
ActiveD-Ughting Avoid loss of detail in highlights and shadows (_ 139).
Longexposure NR Reduce noise in long time-exposures (_ 140).
+Hi+gh+/S+O+noisei_ Reduce noise at high ISO sensitivities (_ 140).
reduction
+F+_°de+i+n_+deou_° ...... ....
Moviesound Choose sound recording options (_ 141).
options
Intervaltimer Take photos at a pre-selected interval (_ 142).
shooting
Vibration Adjust settings for lenses with vibration reduction
reduction (_ 143).
AF-areamode Choose how the focus area is selected (_ 144).
Face-priorityAF Turn face-priority AF on or off(_ 147).
Built-inAF assist Control the built-in AF-assist illuminator (_ 147).
Flashmode Choose a flash mode for optional flash units (_ 63).
++_+-+_'_'_+_+_+ Choose a flash control mode for optional flash units
Flashcontrol (_ 148).
Flash
compensation Control the output of optional flash units (_ 149).
Select Yes to reset the options in the shooting menu and other
shooting settings to default values (_ 177).
110

The options in the exposure mode menu offer varying degrees
of control over shutter speed and aperture.
_, Sceneauto An automatic, "point-and-shoot" mode in which the
camera not only chooses shutter speed and aperture
selector but adjusts other settings to suit the subject (_ 23).
o_o_i_i ....
PProgrammed exposure (_ 113). Recommended for snapshots and in
auto other situations in which there is little time to adjust
camera settings.
SShutter.pri0rity You choose the shutter speed; the camera selects an
aperture for best results (_ 114). Use to freeze or blur
auto motion.
You choose the aperture; the camera selects a shutter
AAperture: speed for best results (_ 11S). Use to blur the back-
priority auto ground or bring both foreground and background into
focus.
_-===...... ='_'You control both shutter speed and aperture (_ 116).
MManual Set shutter speed to "Bulb" or "Time" for long time-expo-
sures.
111
Other manuals for 1 V1
4
Table of contents
Other Nikon Digital Camera manuals

Nikon
Nikon Digital Camera System User manual

Nikon
Nikon Coolpix L29 User manual

Nikon
Nikon 1 V1 User manual

Nikon
Nikon CoolPix S710 User manual

Nikon
Nikon Coolpix L19 User manual

Nikon
Nikon FE2 User manual

Nikon
Nikon D800 User manual

Nikon
Nikon D5300 User manual

Nikon
Nikon CoolPix S51c User manual

Nikon
Nikon Coolpix S3100 User manual

Nikon
Nikon Photomic-T Finder User manual

Nikon
Nikon Coolpix 300 User manual

Nikon
Nikon D5100 User manual

Nikon
Nikon CoolPix S70 User manual

Nikon
Nikon D60 User manual

Nikon
Nikon Z50 Guide

Nikon
Nikon Coolpix L100 User manual

Nikon
Nikon CoolPix P500 User manual

Nikon
Nikon D780 User manual

Nikon
Nikon COOLPIX L110 User guide