manuals.online logo
Brands
  1. Home
  2. •
  3. Brands
  4. •
  5. Nikon
  6. •
  7. Digital Camera
  8. •
  9. Nikon Coolpix S3100 User manual

Nikon Coolpix S3100 User manual

Nikon
COOLP DIGITAL CAMERA
X s3 oo
User's Manual
Auto Sort Mode Categories
Category Description
...... _ ........... Pictures taken in smart portrait mode ([_] 66) with the smile
[] Smile timer setting set to On are displayed.
Pictures taken in I_1 (auto) mode (_ 22) with the face detection
[_ 48 and those taken in Portrait _,Night portrait _,Party/
• Portraits indoorr and Backlighting _ scene mode ([]_] 52) are displayed.
Pictures taken in smart portrait mode ([_] 66) with the smile
timer setung set to Off are displayed.
_ Food Pictures taken in Food scene mode ([_j 52) are displayed.
Pictures taken in Landscape * scene mode (_ 52) are
[] Landscape ]inDia/ed.
[] Dusk to dawn Pictures taken in Night landscape _,Sunset, Dusk/dawn and
Fireworks show scene modes ([_] 52) are displayed.
Pictures taken in I_1 (auto) mode with the macro mode settin 9
Close-ups _ 34 are displayed.
Pictures taken in Close-up _ scene mode (_ 52) are displayed.
Pictures taken in Pet portrait scene mode (_ 52) are
Pet portrait ]lsrala/ed.
_P,Movie Movies ([_) 115 are displayed.
Retouched copies Copies created using editin 9 functions ([_) 104) are displayed.
I_] Other scenes s other pictures that cannot be defined by the categories
described above are displayed.
Pictures taken in scene auto selector scene mode ([_) 53) are also sorted to the
appropriate categories.
o_
o
g-
wNotes on Auto Sort Mode
• Up to 999 pictures and movie files can be sorted to each category in auto sort mode. If999
pictures or movies havealready been sorted to a specific category, new pictures and movies
cannot be sorted to that category nor can they be displayed in auto sort mode. Display pictures
and movies that could not be sorted to a category in normal playback mode (_ 28)or list by date
mode (_ 89).
• Picturesor movies copied from the internal memory to a memory card, or vice versa (_ 103),
cannot be displayed in auto sort mode.
• Pictures or movies recorded by a camera other than the COOLPIX$3100 cannot be displayed in
auto sort mode. 87
tlitIt
o_
s
o
Operations in Auto Sort Mode
The following operations are available in the auto sort mode category list screen
shown in step 2 on page 86.
To Use Description
@ Pressthe multi selector A, V, _1,or I1"to 9
Select a Category ,_ _ select a category.
Y
Switch to full: _ Pressthe _) button to display the first
frame playback )icture in the selected category. 72
category, and a confirmation dialog will be
Delete pictures _ displayed. Choose Yes and press the _) 29
button to ddete all pictures sorted to that
category.
Switch to another Pressthe [] button to display the
playback mode [] playback- mode selection menu. 79
Pressthe I_1 button or shutter-release
Switch to _, button. Pressing the • (_J_lmovie-record) 28
Shooting made button will also switch the camera to
........................................................shooting mode.
Auto Sort Menu
Press the MENUbutton in full-frarne playback mode or thumbnail playback mode in
auto sort mode to apply the following menu options.
Quick retouch -'_ 106 D-Lighting -'_ 107
Skin softening -,_ 108 Filter effects -'_ 110
Print order -,_ 93 Slide show -,_ 97
Protect -,_ 98 Rotate image -,_ 1O0
Small picture -,_ 112 Voice memo -,_ 101
88
In "11_1list by date mode", pictures taken on the same date can be played back
• Infull-frame playback mode, just as with normal playback mode, pictures can be
displayed as thumbnails, picture display can be enlarged, pictures can be
edited, and movies can be played back Pictures can also be added to albums
• When the MENUbutton is pressed, the list by date menu (_ 91) isdisplayed and
all pictures taken on a specified date can be selected for viewing in a slide show
or for applying print order or protection setting
Viewing Pictures in List by Date Mode
IPress the_ button in playback ®
mode, press the multi selector • or [_-_
V to choose _,and then press the _;
_) button.
Datesfor which pictures existarelisted
2Press the multi selector • or • to select the
desired date.
Camera lists up to 2g dates. If pictures exist for more than
29 dates, all pictures recorded earlier than most recent 2g
dates will be combined under Others.
For information about operating the list by date screen,
see "Operations in List by Date Mode" ([_) g0).
Pressthe O button to display the first picture taken on
the selected date.
To select another date, repeat steps 1 and 2.
Select an image and press the _) button to sort the
image to the album (_ 80).
o
?-
_1_ Notes on List by Date Mode
•Up to g,000 of the most recently recorded pictures can be dispbyed in list by date mode. if more
pictures exist, "_" is displayed next to the number of pictures for the date containing the 9,001 st
most recent picture,
• Pictures taken when the camera's date is not set are treated as pictures taken on January 1,2011, 89
tlitIt
o
o
n
Operations in List by Date Mode
The following operations are available in the list by date screen shown in step 2 on
page 8g.
To
Select date
Switch to ful[_
frame playback
: :
Delete pictures
View list by date
menu
Switch to another
playback mode
Use Description
A
Pressthe multi selector • or • to select a g
date.
Pressthe _) button to display the first
_) )icture taken on the selected date. 72
'................................................................................................Pressthe I_1 button or shutter-rdease
switch to _" button. Pressing the • (_1_I movie-record)
sh0oting mode button will also switch the camera to
shooting mode.
Pressthe "_ button to delete after selecting
a date, and a confirmation dialog will be
displayed. Choose Yes and press the _)
button to delete all pictures taken on the
date.
MI:Nu Pressthe MI:NUbutton to display the list by
date menu.
[] Pressthe [] button to display the
playback-mode selection menu.
29
91
79
28
90
List by Date Menu
Pressthe MENUbutton in list bydatemode to displaythe following menusfor only
the pictures taken on the specified date.
Quick retouch _ -,_ 106 D-Lighting _ -,_ 107
Skin softening 1 -,_ 108 Filter effects _ -'_ 110
Print order 2 -,_ 93 Slide show -,_ 97
Protect 2 -,_ 98 Rotate image 1 -,_ 1O0
Small picture 1 -,_ 112 Voice memo 1 -,_ 101
1 During full-frame playback only.
2 When the MENUbutton is pressed in the list by date screen shown in step 2
on page 89,options can be applied to all pictures taken on the selected
date. When the MENUbutton is pressed in full-frame playback mode, options
can be applied to individual pictures. o_
o
fg-
91
o_
o
r_
92
The following options are available in the playback menu.
Quick retouch _ q06
Easily create retouched copies in which contrast and saturation have been enhanced.
_1_ D-Lighting _ 107
Enhances brightness and contrast in dark portions of pictures.
Skin softening _ 108
The camera detects faces and creates a copy of the picture with softer skin tones in
the faces of portrait subjects.
I_1 Filter effects _ 110
Apply a variety of effects using digital filter,
_1, Print order _ 93
Select pictures to print and the number of copies for each.
Slide show _ 97
View pictures stored in the internal memory or on a memory card in an automatic
slide show.
O'n Protect _ 98
Protect selected { Jc_uresfrom accidents deletion.
i_ Rotate image _ ! 00
Change _ne onen_a_lor of olc_ures.
[] Sinai picture _ 112
Create a small cod of the current oJc_ure.
Voice memo _ 101
Record voice memos foi alc_ures
C"_ Copy _103
Copy files between memory card and internal memory.
Displaying the Playback Menu
Pressthe [] button to enter playback mode (_ 28).
Pressthe MENUbutton to display the playback menu.
• Usethe multi selector to chooseand apply settings (_ 9).
• Press the MENUbutton to exit the playback menu.
Print Order (Creating a DPOF Print Order)
] button mode) _ MENU _ _ Print order
(Playback (Playbackmenu)
When printing pictures stored on the memory card using any of the following
methods, the Print order option in the playback menu is used to create digital
"print orders" for printing on DPOF-compatible devices.
•Inserting the memory card into a DPOF-compatible (_ 176) printer's card slot.
• Taking the memory card to a digital photo lab.
• C}onnecting the camera to a PictBridge-compatible (_ 176) printer (_ 129).A
print order can also be created for pictures stored in the internal memory if the
memory card is removed from the camera.
The playbackmenu isdisplayed. _ _°S°_
2Use the multi selector to choose _ Print
order and press the _) button.
Proceedto step4 when playingbackin favoritepictures
mode,auto sortmode,or listby date mode.
3Choose Select images and press the _)
button.
93
tlitIt
o_
o
n
4Choose pictures (up to 99) and the number of
copies (up to nine) of each.
Pressthe multi selector • or • to select pictures, and
press • or • to specify the number of copies to be
printed.
Picture selected for printing can be recognized by the
check mark (%_) icon and the numeral indicating the
number of copies to be printed, if no copies have been specified for pictures, the
selection is canceled.
Rotate the zoom control to T (% to switch to full-frame playback.
Rotate the zoom control to W ([]) to switch back to 12-thumbnail display.
Pressthe _) button when setting iscomplete.
5Choose whether or not to print shooting date
and photo information.
Choose Date and press the _) button to print the
shooting date on all pictures in the print order.
Choose Info and press the _) button to print shutter
speed and aperture value information on all pictures in
the print order.
Choose Done and press the _) button to complete the print order and exit.
Pictures selected for printing are recognized by the
icon displayed with playback.
P4
Notes on Print Order
When a print order is created in _vorite pictures mode, auto sort mode or list by date mode, the
screen shown below is displayed if pictures other than those in the album, the selected category, or
taken on the selected shooting date, have been marked _r printing.
• Select Yes to add pictures in the selected album or category, or taken on the selected shooting
date, to the existing print order.
• Select No to remove print marking from previously marked pictures and restrict the print order to
pictures in the selected album or category, or taken on the selected shooting date.
Favorite pictures mode/
auto sort mode List by date mode
If the total number of the pictures in a print order exceeds 99, the screen shown below will be
displayed, o
• Select Yes to remove pictu res previously added from the print order and restrict the print order to ._
pictures just marked.
• Select Cancel to remove the pictures just added from the print order and restrict the print order to g-
pictures previously marked.
Favorite pictures mode/
auto sort mode List by date mode
95
_1_ Notes on Printing Shooting Date and Photo Information
When the Date and Info options are enabled in the print order option, shooting date and photo
information are printed on pictures when a DPOF compatible (_ 176) printer which supports
printing of shooting date and photo information is used.
• Photo information cannot be printed when the camera is connected directly to a printer, via the
supplied USB cable, for DPOF printing (_ 134),
• Note that Date and Info settings are reset when the Print order option is displayed.
• The date printed is that recorded when the picture was taken,
Changing the camera's date using the Time zone and date
option in the setup menu after a picture has been taken has no
effect on the date printed on the picture.
tlitIt
[] Canceling Existing Print Order
o_ Select Delete print set in step 3of"Print Order (Creating a DPOF Print Order)" (_ 93) and press the
_) button to remove print marking from all pictures and cancel the print order,
o
[] Print Date
When date and time of recording are imprinted on pictures using the Print date option (_ 143) in
_- setup menu, pictures are recorded with shooting date and time imprinted on the picture when they
are taken, Pictures with the date imprinted on them can be printed from printers that do not
support printing of the date on pictures.
Only the date and time imprinted on pictures using the Print date option will be printed, even if
the date print option is enabled in the Print order menu.
96
Slide Show
[ I-_'1button mode) -) MENU -) _ Slide show
(Playback (Playback menu)
Play back pictures stored in the internal memory or on a memory card one by one
in an automated "slide show."
IUse the multi selector to choose Start and
press the _) button.
To change the interval between pictures, choose Frame
intvl, select the desired interval time, and press the _)
button before choosing Start.
To repeat the slide show automatically, choose Loop and
press the _) button before choosing Start. The check
mark (_) will be added to the loop option when enabled. o_
2The slide show begins, o
While the slide show is in progress, the following
operations are available:
Pressthe multi selector • to display the subsequent g-
picture or _1 to display the previous picture. Hold down
either button to fast forward or rewind.
To end or pause slide show, press the _) button.
The screen shown on the right is displayed when the
slide show has ended or is paused. Choose End and press
the _) button to return to the playback menu, or choose
Restart to play the slide show again.
_1_ Notes on Slide Show
•Only the first frame of movies (_ 120) included in a slide show is displayed,
• The maximum playback time is up to 30 minutes even if loop is enabled (_ 147). 97
O_ Protect
] button mode) -) MENU "_ a-_ Protect
(Playback (Playbackmenu)
Protect selected pictures from accidental deletion.
Select pictures to protect or cancel protection for previously protected pictures
from the picture selection screen. See "Selecting Pictures" (_ 99) for more
information.
Note that formatting the camera's internal memory or the memory card will
permanently delete protected files (_ 148).
Protected pictures are recognized by the _ icon (_ 7, 75).
o_
o
n
98
Selecting Pictures
Tile picture selection screen like that shown at right is
displayed with tile following menu selections:
•Print order>Select images (_ 93)
• Protect (_ 98)
• Rotate image (_ 100)
• {}opy>Selected images (_ 103)
• Welcome screen>Select an image (_ 137)
• Delete>Erase selected images (_ 29)
Follow the procedures described below to choose the pictures.
.... I8
IPress the multi selector _ or b to choose the
desired picture. °_
Rotate the zoom control (_ 4) to T(q) to switch to full-
frame playback or W(_;_) to switch back to 12- o
thumbnail display. _
Only one picture can be selected at a time for Rotate __
image and Welcome screen. Proceed to step 3.
2Press • or • to select or deselect (or to
specify the number of copies).
When a picture isselected, a check mark (_) is displayed
with the picture. Repeat steps 1and 2to select additional
pictures.
3Press the _) button to finalize selection.
When Selected images is selected, a confirmation dialog isdisplayed. Follow the
instructions displayed in the monitor.
99
Rotate Image
] button mode) -) MENU "_ _ Rotate
(Playback (Playbackmenu) image
Specify the orientation in which recorded pictures are displayed with playback.
Still pictures can be rotated 90 degrees clockwise or 90 degrees counterclockwise.
Pictures that were recorded in portrait ("tall") orientation can be rotated up to 180
degrees in either direction.
Select a picture in the picture selection screen (_ 99). When the Rotate image
screen is displayed, press the multi selector _ or _" to rotate the picture 90
degrees.
_- Rotate go degrees Rotate 90 degrees
counterclockwise clockwise
Pressthe _) button to finalize display orientation, and saveorientation data with
the picture.
100
Voice Memo
[ r-_l button mode) -) MENU -_ _ Voice
(Playback (Playback menu) memo
Use the camera's builbin microphone to record voice memos for pictures.
Recording Voice Memos
1Displaythe desired picture in full-frame
playback mode ([_[_ 72) or thumbnail
playback mode ([_[_ 74) and press the MENU
button.
The playback menu is displayed.
2Use the multi selector to choose _ Voice
memo and press the _) button.
The screen for recording voice memos is displayed.
3Press and hold the _) button to record a voice
memo.
Recording ends after about 20 seconds or when the _)
button is released.
Do not touch the built-in microphone during recording.
During recording, _ and _ bEinkin the monitor.
When recording ends, the voice memo playback screen is
displayed. Follow the instructions in step 3 of "Playing
Voice Memos" ([_ 102)to play the voice memo.
Pressthe multi selector • before or after recording a
voice memo to return to the playback menu. Press the
MENUbutton to exit the playback menu.
o_
o
[] More Information
See"Image/Sound Fileand Folder Names" (_ 161)for more information, 101
Playing Voice Memos
Pictures for which voice memos have been recorded are indicated by _ in full-
frame playback mode.
1 Select the desired picture in full-
frame playback mode ([_ 72) or 1_8_:,_
thumbnail playback mode ([_ 74) I TI'v
and press the MENUbutton.
The playbackmenu isdisplayed.
2Use the multi selector to choose _ Voice
memo and press the I_) button.
Thevoice memo playbackscreenisdisplayed.
o_
o
_3Press the _) button to play the voice memo.
n
_- Pressthe _) button againto stop playback.
Rotatethe zoom control to T or W during playbackto
adjustplaybackvolume.
Pressthe multi selector • beforeor afterplaying back a
voicememo to return tothe playbackmenu.Pressthe
MENI.Ibutton to exit theplaybackmenu.
Deleting Voice Memos
Select a picture with avoice memo and press tile
button. Pressthe multi selector • or • to select
Current image and pressthe _) button (_ 29).When
the confirmation dialog is displayed, pressthe multi
selector • or • to choose [_] and press the _) button.
Only the voice memo will be deleted.
102
wNotes on Voice Memos
•Whena picture with avoicememoattachedisdeleted, boththepicture anditsvoicememoare
deleted,
• if a voice memo already exists for the current picture, it must be deleted before a new voice memo
canberecorded,
•TheCOOLPIX$31O0isnotableto recordavoicememofor pictures takenwith anothermakeor
modelof digital camera,
E'3Copy (Copy Between Internal Memory and Memory Card)
[] button (Playback mode) -) MFNU(Playback menu) -') C_ Copy
Copy pictures between the internal memory and a memory card.
1Use the multi selector to select an option
from the copy screen and press the _) button.
I_1_ 1% Copy pictures from internal memory to memory
card.
_1_!: Copy pictures from memory card to internal
memory.
2Select a copy option and press the _) button.
Selected images: Copy pictures selected from the picture
selection screen ([Z_) 99).
All images: Copy all pictures.
_1_ Notes on Copying Pictures
JPEG, AVI, and WAV format files can be copied. Files recorded in any other _rmat cannot be
copied.
If voice memos (_ 101) are attached to pictures selected for copying, voice memos are copied
with the pictures.
Operation is not guaranteed with pictures taken with another make of camera or that have been
modified on a computer.
When copying pictures selected for a Print order (_ 93), the print marking is not copied.
However, Protect (_ 98) settings are copied with pictures.
Pictures or movies copied from the internal memory or a memory card cannot be displayed in
auto sort mode (_ 86).
When pictures added to albums (_ 80) are copied, the copies are not automatically added to the
same albums as the original pictures,
[] "Memory contains no images." Message
If there are no pictures stored on the memory card when playback mode is applied, the message
Memory contains no images, will be displayed. Press the MENUbutton to display the copy option
screen, and copy the pictures stored in the camera's internal memory to the memory card.
[] More Information
See "image/Sound File and Folder Names" (_ 161) for more irfformation.
o_
o
g-
103
Use the COOLPIX 531O0to edit pictures in<amera and store them as separate files
(_] 161). The editing functions described below are available.
Editinq function Description
Quick retouch (_ 106) Easily create retouched copies in which contrast and saturation
have been enhanced.
_,ti_i,_,,,_ -_,,_Create a copy of the current picture with enhanced brightness
D-Lighting ([_[_J 107) and contrast, brightening dark portions of the picture.
Skin Softening ([_[_J 108) The camera detects faces and creates a copy of the picture with
softer skin tones in the faces of portrait subjects.
Apply a variety of effects using digital filter. The available effects
Filter effects (_ 1! 0) are Soft, Selective color, Cross screen, Fisheye, and
Miniature effect.
_'2"_ _°_ Create a small copy of pictures suitable for use as e-mail
Small picture (_] 112) attachments.
_i_ Enlarge the image or refine the composition and create a copy
Crop ([_ 113) containing only the portion visible in the monitor.
104
_1_ Notes on Picture Editing
•Pictures taken at an Image mode setting of _ 4224x2376 (_ 38) cannot be edited.
• The COOLPIX 53100 editing functions are not available for pictures taken with another make or
model of digital cameras,
• if no face is detected in a picture, a copy cannot be created using the skin softening option
(_ _08).
• Edited copies created with COOLPIX 93100 may not be displayed properly on another make or
model of digital camera. It may also be impossible to transfer them to a computer using another
make or model of digital camera.
• Editing functions are not available when there is not enough free space in the internal memory or
on the memory card to store the edited copies.
[] Restrictions on Picture Editing
When an edited copy is further modified with another editing function, check the following
restrictions,
Editing function Used Editing function to add
Quick retouch The skin softening, small picture and crop functions can be added,
D-Lighting Tile quick retouch, D Lighting, and filter effects functions cannot be
Filter effects used together.
Skin softening Editing functions other than the skin softening function can be
added.
Small picture Another editing function cannot be added,
Crop
• Copies created with editin_ functions cannot be further edited with the same function used to
create them,
• When combining the small picture or crop function and another editing function, use the small
picture and crop functions after other editing functions have been applied,
• The skin softening function can be added to the picture taken with skin softening (_ 68),
[] Original and Edited Pictures
• Copies created with editing functions are not deleted when the original pictures are deleted, and
the original pictures are not deleted when copies created with editing functions are deleted,
• Edited copies are stored with the same recording date and time as the original,
• Print order (_ 93) and protect settings (_ g8) are not applied to edited copies.
105

Other manuals for Coolpix S3100

4

Other Nikon Digital Camera manuals

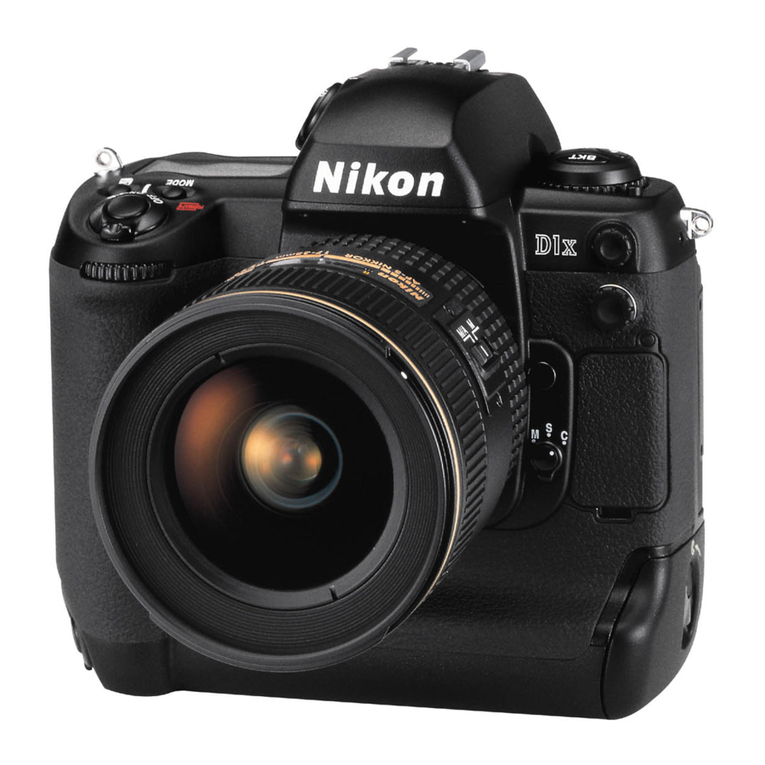
Nikon CoolPix S52c Owner's manual

Nikon

Nikon CoolPix S52c Owner's manual

Nikon D750 Operating instructions

Nikon

Nikon D750 Operating instructions

Nikon D300 User manual

Nikon

Nikon D300 User manual
Nikon D7000 User manual

Nikon

Nikon D7000 User manual

Nikon D7500 Assembly instructions

Nikon

Nikon D7500 Assembly instructions

Nikon D80 User manual

Nikon

Nikon D80 User manual

Nikon COOLPIX P310 User manual

Nikon

Nikon COOLPIX P310 User manual

Nikon Z 6 User manual

Nikon

Nikon Z 6 User manual

Nikon D2XS User manual

Nikon

Nikon D2XS User manual

Nikon COOLPIX S6700 User manual

Nikon

Nikon COOLPIX S6700 User manual

Nikon Coolpix L31 User manual

Nikon

Nikon Coolpix L31 User manual

Nikon Z 9 User manual

Nikon

Nikon Z 9 User manual

Nikon 25593 - Coolpix P60 8.1MP Digital Camera User guide

Nikon

Nikon 25593 - Coolpix P60 8.1MP Digital Camera User guide

Nikon Coolpix S6600 User manual

Nikon

Nikon Coolpix S6600 User manual

Nikon Coolpix S3000 User manual

Nikon

Nikon Coolpix S3000 User manual

Nikon COOLPIX S205 User manual

Nikon

Nikon COOLPIX S205 User manual

Nikon Coolpix P90 Owner's manual

Nikon

Nikon Coolpix P90 Owner's manual
Nikon collpix L16 User manual

Nikon

Nikon collpix L16 User manual

Nikon CoolPix S570 User guide

Nikon

Nikon CoolPix S570 User guide

Nikon Coolpix L30 User manual

Nikon

Nikon Coolpix L30 User manual

Nikon D800 Quick start guide

Nikon

Nikon D800 Quick start guide

Nikon D500 Service manual

Nikon

Nikon D500 Service manual

Nikon D800 General instructions

Nikon

Nikon D800 General instructions

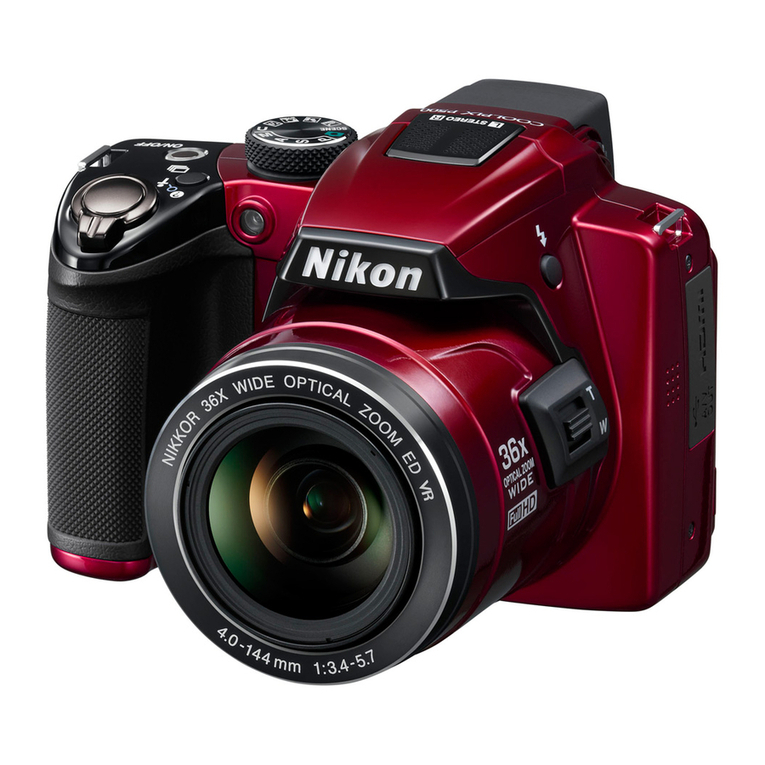
Nikon COOLPIX P510 User manual

Nikon

Nikon COOLPIX P510 User manual

Popular Digital Camera manuals by other brands

GE POWER series E1480W Manual do utilizador

GE

GE POWER series E1480W Manual do utilizador

Canon PowerShot G10 - Digital Camera - Compact Service manual

Canon

Canon PowerShot G10 - Digital Camera - Compact Service manual

QHYCCD QHY1253 manual

QHYCCD

QHYCCD QHY1253 manual

Samsung VLUU WB210 user manual

Samsung

Samsung VLUU WB210 user manual

Samsung HZ50W Quick start manual

Samsung

Samsung HZ50W Quick start manual

Olympus OM-10 Repair manual

Olympus

Olympus OM-10 Repair manual

Canon PowerShot SX1IS user guide

Canon

Canon PowerShot SX1IS user guide

Canon IXUS 870 IS user guide

Canon

Canon IXUS 870 IS user guide

Zero Image Zero 6 x 12B instruction manual

Zero Image

Zero Image Zero 6 x 12B instruction manual

Sony Cyber-shot U DSC-U30 Service manual

Sony

Sony Cyber-shot U DSC-U30 Service manual

ZEPCAM T3 LIVE Bodycam instruction manual

ZEPCAM

ZEPCAM T3 LIVE Bodycam instruction manual

Panasonic LUMIX DMC-LZ1GC operating instructions

Panasonic

Panasonic LUMIX DMC-LZ1GC operating instructions

Nytech DS-8310 User manual and service information

Nytech

Nytech DS-8310 User manual and service information

Samsung WB151 quick start guide

Samsung

Samsung WB151 quick start guide

Atmel CAMELIA 1.6M user guide

Atmel

Atmel CAMELIA 1.6M user guide

Halo S3 manual

Halo

Halo S3 manual

Samsung ES10 Quick start manual

Samsung

Samsung ES10 Quick start manual

Argus K Instructions for operating

Argus

Argus K Instructions for operating

manuals.online logo
manuals.online logoBrands
  • About & Mission
  • Contact us
  • Privacy Policy
  • Terms and Conditions

Copyright 2025 Manuals.Online. All Rights Reserved.