manuals.online logo
Brands
  1. Home
  2. •
  3. Brands
  4. •
  5. Nikon
  6. •
  7. Digital Camera
  8. •
  9. Nikon D800 User manual

Nikon D800 User manual

Introduction
Throw away your cheat-sheets and command cards! Are you tired of squinting
at tiny color-coded tables on fold-out camera cards? Do you wish you had the
most essential information extracted from my comprehensive David Busch’s
Nikon D800/D800E Guide to Digital SLR Photography in a size you could tuck
away in your camera bag? I’ve condensed the basic reference material you need
in this handy, lay-flat book, David Busch’s Compact Field Guide for the Nikon
D800/D800E. In it, you’ll find the explanations of why to use each setting and
option—information that is missing from the cheat-sheets and the book pack-
aged with the camera. You won’t find the generic information that pads out the
other compact guides. I think you’ll want to have both this reference and my
full-sized guide—one to help you set up and use your Nikon D800, and the
other to savor as you master the full range of things this great camera can do.
About the Author
With more than a million books in print, David D. Busch is the world’s #1
selling digital camera guide author, and the originator of popular digital pho-
tography series like David Busch’s Pro Secrets,David Busch’s Quick Snap Guides,
and David Busch’s Guides to Digital SLR Photography. As a roving photojour-
nalist for more than 20 years, he illustrated his books, magazine articles, and
newspaper reports with award-winning images. Busch operated his own com-
mercial studio, suffocated in formal dress while shooting weddings-for-hire,
and shot sports for a daily newspaper and upstate New York college. His pho-
tos and articles have appeared in Popular Photography & Imaging, Rangefinder,
The Professional Photographer, and hundreds of other publications. He’s also
reviewed dozens of digital cameras for CNet and Computer Shopper, and his
advice has been featured on NPR’s All Tech Considered. Visit his website at
www.dslrguides.com/blog.
(c) 2014 Cengage Course Technology. All Rights Reserved.
Chapter 1
Quick Setup Guide
This chapter contains the essential information you need to get your Nikon
D800 prepped and ready to go. You’ll learn how to use a few of the basic con-
trols and features, and how to transfer your photos to your computer. If you
want a more complete map of the functions of your camera, skip ahead to
Chapter 2. Live view is touched on only briefly in this chapter; if you want to
begin using live view or shoot movies immediately, check out Chapter 6.
Pre-Flight Checklist
The initial setup of your Nikon D800 is fast and easy. You just need to learn a
few controls, charge the battery, attach a lens, and insert a memory card.
Charging the Battery
When the battery is inserted into the MH-25 charger properly (it’s impossible
to insert it incorrectly), an orange Charge light begins flashing, and remains
flashing until the status lamp glows steadily indicating that charging is fin-
ished, generally within two to three hours. When the battery is charged, slide
the latch on the bottom of the camera and ease the battery in, as shown in
Figure 1.1.
Figure 1.1
Insert the battery
in the camera; it
only fits one way.
(c) 2014 Cengage Course Technology. All Rights Reserved.
David Busch’s Compact Field Guide for the Nikon D800/D800E2
Introducing Menus and the Multi Selector
You’ll find descriptions of most of the controls used with the Nikon D800 in
Chapter 2, which provides a complete “roadmap” of the camera’s buttons and
dials and switches. However, you may need to perform a few tasks during this
initial setup process, and most of them will require the MENU button and the
multi selector pad.
■ MENU button. It’s the top button to the left of the LCD monitor. When
you want to access a menu, press it. To exit most menus, press it again.
■ OK button. Located at the bottom of the column containing the MENU
button, OK is used to confirm your choices.
■ Multi selector pad. A thumbpad-sized button with projections at the
north, south, east, and west “navigational” positions, plus a button in the
center (see Figure 1.2). With the D800, the multi selector is used exclu-
sively for navigation; for example, to navigate among menus on the LCD
monitor or to choose one of the 51 focus points, to advance or reverse
display of a series of images during picture review, or to change the kind
of photo information displayed on the screen. The center button is used to
confirm your choices and send the image currently being viewed to the
Retouch menu for modification.
Figure 1.2
The MENU but-
ton (upper left),
OK button (lower
left), and multi
selector pad
(right).
Setting the Clock
The in-camera clock might have been set for you by someone checking out
your camera prior to delivery, but if you do need to set it, the flashing CLOCK
indicator roughly in the center of the monochrome control panel on top of the
camera will be the giveaway. Press the MENU button to the left of the
(c) 2014 Cengage Course Technology. All Rights Reserved.
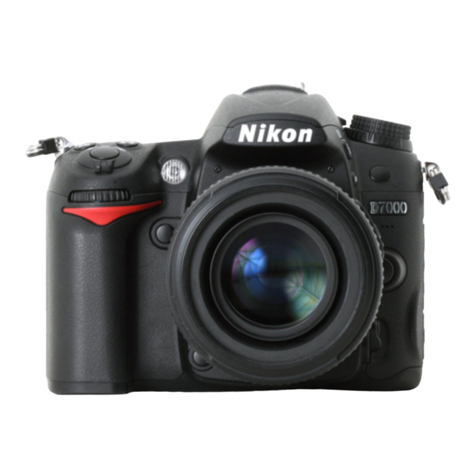
Chapter 1 ■Quick Setup Guide 3
monitor, and then use the multi selector to scroll down to the Setup menu (it’s
marked with a wrench icon), press the multi selector button to the right, and
then press the down button to scroll down to Time Zone and Date, and press
the right button again. The options for setting the 24-hour clock will appear
on the screen that appears next.
Mounting the Lens
If your D800 has no lens attached, you’ll need to mount one before shooting:
1. Select the lens and loosen (but do not remove) the rear lens cap.
2. Remove the body cap on the camera by rotating the cap away from the
shutter release button.
3. Once the body cap has been removed, remove the rear lens cap from the
lens, set it aside, and then mount the lens on the camera by matching the
alignment indicator on the lens barrel with the white bump on the cam-
era’s lens mount (see Figure 1.3). Rotate the lens toward the shutter release
until it seats securely.
4. Set the focus mode switch on the lens to AF or M/A (Autofocus). If the
lens hood is bayoneted on the lens in the reversed position, twist it off and
remount with the “petals” (if present) facing outward. A lens hood pro-
tects the front of the lens from accidental bumps, and reduces flare caused
by extraneous light arriving at the front of the lens from outside the pic-
ture area.
Figure 1.3
Match the indica-
tor on the lens
with the white
dot on the camera
mount to prop-
erly align the lens
with the bayonet
mount.
(c) 2014 Cengage Course Technology. All Rights Reserved.
Other manuals for D800

4

This manual suits for next models

1

Other Nikon Digital Camera manuals

Nikon D800E User manual

Nikon

Nikon D800E User manual

Nikon Coolpix L120 User manual

Nikon

Nikon Coolpix L120 User manual

Nikon COOLPIX S9600 User manual

Nikon

Nikon COOLPIX S9600 User manual

Nikon COOLPIX S3500 User manual

Nikon

Nikon COOLPIX S3500 User manual

Nikon FR User manual

Nikon

Nikon FR User manual

Nikon 1 v2 User manual

Nikon

Nikon 1 v2 User manual

Nikon One touch zoom User manual

Nikon

Nikon One touch zoom User manual

Nikon DXM1200C Assembly Instructions

Nikon

Nikon DXM1200C Assembly Instructions

Nikon D720 User manual

Nikon

Nikon D720 User manual

Nikon Coolpix S500 User manual

Nikon

Nikon Coolpix S500 User manual

Nikon COOLPIX S3200 User manual

Nikon

Nikon COOLPIX S3200 User manual

Nikon MD-3 User manual

Nikon

Nikon MD-3 User manual

Nikon 2500 - Coolpix Digital Camera User manual

Nikon

Nikon 2500 - Coolpix Digital Camera User manual

Nikon D3200 User manual

Nikon

Nikon D3200 User manual

Nikon LiteTouch Zoom 80 User manual

Nikon

Nikon LiteTouch Zoom 80 User manual

Nikon COOLPIX S6500 User manual

Nikon

Nikon COOLPIX S6500 User manual

Nikon 1 J1 User manual

Nikon

Nikon 1 J1 User manual

Nikon FE10 User manual

Nikon

Nikon FE10 User manual

Nikon D700 User manual

Nikon

Nikon D700 User manual

Nikon Coolpix S3100 User manual

Nikon

Nikon Coolpix S3100 User manual

Nikon D3000 User manual

Nikon

Nikon D3000 User manual

Nikon D2H User manual

Nikon

Nikon D2H User manual

Nikon D700 User guide

Nikon

Nikon D700 User guide

Nikon D100 User manual

Nikon

Nikon D100 User manual

Popular Digital Camera manuals by other brands

Sankyo SUPER CME666 instruction manual

Sankyo

Sankyo SUPER CME666 instruction manual

Panasonic Lumix DMC-FS5P Service manual

Panasonic

Panasonic Lumix DMC-FS5P Service manual

Polaroid izone550 user guide

Polaroid

Polaroid izone550 user guide

Sony Alpha 6700 Startup guide

Sony

Sony Alpha 6700 Startup guide

Sena SP43 manual

Sena

Sena SP43 manual

HP Media Center m500 - Desktop PC user manual

HP

HP Media Center m500 - Desktop PC user manual

Samcon ToughCam IP1355 user manual

Samcon

Samcon ToughCam IP1355 user manual

Olympus 226090 - Stylus 790 SW Digital Camera Manual Avanzado

Olympus

Olympus 226090 - Stylus 790 SW Digital Camera Manual Avanzado

Olympus TG-625 instruction manual

Olympus

Olympus TG-625 instruction manual

KAYA JetCam19 user guide

KAYA

KAYA JetCam19 user guide

Nexxt NHC-P710 user guide

Nexxt

Nexxt NHC-P710 user guide

Sony MPK-THH Service manual

Sony

Sony MPK-THH Service manual

Olympus CAMEDIA D-555 Zoom Basic Manual

Olympus

Olympus CAMEDIA D-555 Zoom Basic Manual

Balluff SMARTCAMERA IO user guide

Balluff

Balluff SMARTCAMERA IO user guide

Canon PowerShot G2 parts catalog

Canon

Canon PowerShot G2 parts catalog

Samsung SCC-C4253P user manual

Samsung

Samsung SCC-C4253P user manual

Minolta 125 instruction manual

Minolta

Minolta 125 instruction manual

Casio EX-M1 - EXILIM Digital Camera release note

Casio

Casio EX-M1 - EXILIM Digital Camera release note

manuals.online logo
manuals.online logoBrands
  • About & Mission
  • Contact us
  • Privacy Policy
  • Terms and Conditions

Copyright 2025 Manuals.Online. All Rights Reserved.