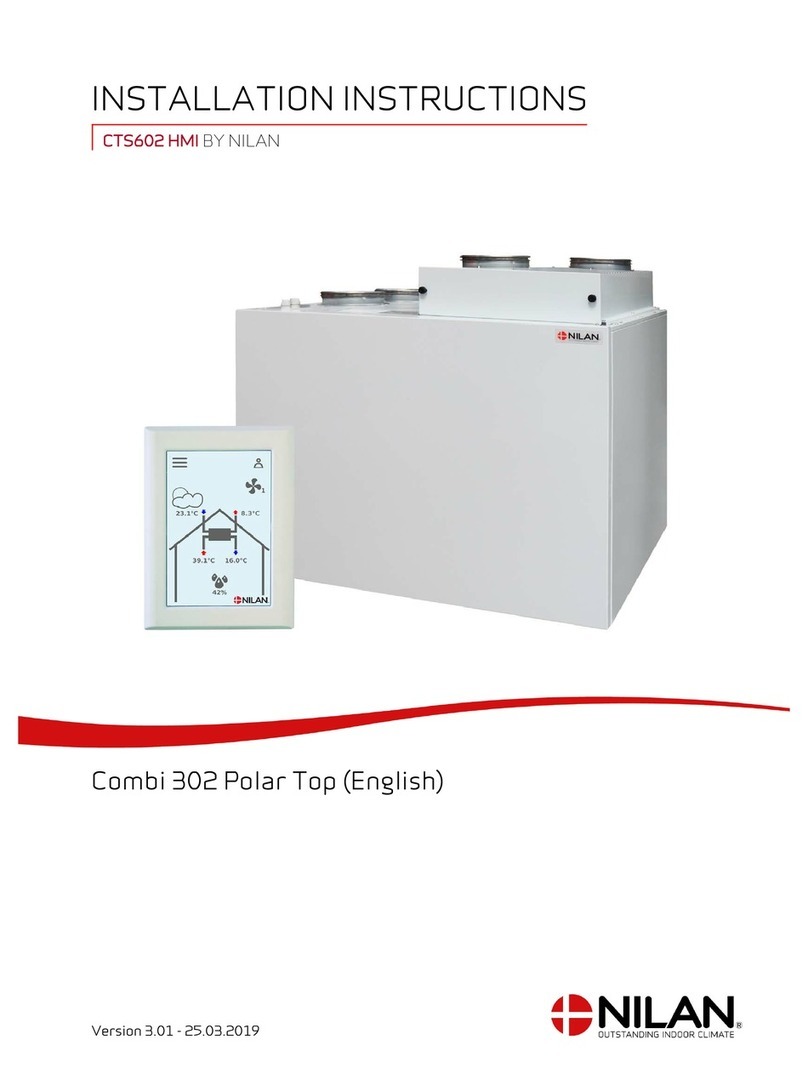
nilan Compact S CTS 602 User manual

INSTALLATION INSTRUCTIONS
Comfort 350 Top / Comfort 350 Top Polar
CTS602 LIGHT BY NILAN
Version 5.00 - 27.10.2021
M24 Comfort 350 Top GB

2
Table of contents
General information
Safety ............................................................................................................................................................................................................4
Power supply .........................................................................................................................................................................................4
Introduction ..................................................................................................................................................................................................4
Documentation ......................................................................................................................................................................................4
Unit type ........................................................................................................................................................................................................5
Product description ..............................................................................................................................................................................5
Dimensional drawing Comfort 350 Top ............................................................................................................................................6
Dimensional drawing Comfort 350 Top Polar ..................................................................................................................................7
Functional block diagram ....................................................................................................................................................................8
Accessories ...................................................................................................................................................................................................9
Electrical pre-heating element for frost protection of the unit ...................................................................................................9
Electrical after-heating element for duct installation ...................................................................................................................9
Water after-heating element incl. control system for duct installation .....................................................................................9
EM-box ....................................................................................................................................................................................................9
DTBU damper ........................................................................................................................................................................................9
Expansion PCB .................................................................................................................................................................................... 10
CTS602 Connection Box ................................................................................................................................................................... 10
Fire Connection Box ........................................................................................................................................................................... 10
Connection box for user selection and EM-box together with fire automation system ....................................................... 10
Heating cable ...................................................................................................................................................................................... 10
Vibration absorbers .......................................................................................................................................................................... 10
Flexible sound damper ...................................................................................................................................................................... 11
Pollen filter .......................................................................................................................................................................................... 11
Cooker hood filter box ....................................................................................................................................................................... 11
Extension cable HMI control panel .................................................................................................................................................. 11
Functional cable ................................................................................................................................................................................. 11
Gateway with App option ................................................................................................................................................................. 11
Set-up
Mounting .................................................................................................................................................................................................... 12
Positioning of the ventilation unit ................................................................................................................................................... 12
Top unit ................................................................................................................................................................................................ 12
Mounting the ventilation unit .......................................................................................................................................................... 12
Duct connections ............................................................................................................................................................................... 13
Electrical installation
Electrical connections .............................................................................................................................................................................. 14
Safety ................................................................................................................................................................................................... 14
Connections overview ...................................................................................................................................................................... 14
Electrical connection unit ........................................................................................................................................................................ 14
Power supply ...................................................................................................................................................................................... 14
Control panel ............................................................................................................................................................................................. 15
HMI User panel ................................................................................................................................................................................... 15
Wall bracket ........................................................................................................................................................................................ 15
Electrical connection accessories .......................................................................................................................................................... 16
CTS602 Connection Box ................................................................................................................................................................... 16
Functional cable ................................................................................................................................................................................. 16
User selections 1 and 2 (cooker hood) ........................................................................................................................................... 17
Modbus ................................................................................................................................................................................................ 18
Fire thermostat / external fire automation system .................................................................................................................... 19
EM-box (damper solution) ................................................................................................................................................................ 20
DTBU (damper option) ....................................................................................................................................................................... 21
External pre-heating element ......................................................................................................................................................... 22
Installation of expansion PCB on CTS602 Light circuit board .................................................................................................... 23
Electrical after heating element ..................................................................................................................................................... 24
Water after heating element ........................................................................................................................................................... 25
Joint alarm ........................................................................................................................................................................................... 26
Plumbing installation
Connection of water trap ................................................................................................................................................................. 27
Water after-heating element - duct installation .......................................................................................................................... 28
Fire automation system
General information ................................................................................................................................................................................. 29
Safety ................................................................................................................................................................................................... 29
Usage .................................................................................................................................................................................................... 29
Electrical connection fire automation system .................................................................................................................................... 30

3
Connection of fire damper ................................................................................................................................................................30
Connecting two fire dampers ...........................................................................................................................................................31
Connection Box for user selection and EM-box/DTBU simultaneous with fire automation system ..................................31
Alarm code ...........................................................................................................................................................................................32
Start-up and annual testing .............................................................................................................................................................32
Schedule for functional testing ........................................................................................................................................................33
Ventilation installation
Duct system ...............................................................................................................................................................................................34
Legislation ............................................................................................................................................................................................34
Ducts .....................................................................................................................................................................................................34
Ventilation unit ...................................................................................................................................................................................34
Extract air ............................................................................................................................................................................................35
Supply air .............................................................................................................................................................................................35
Roof terminals .....................................................................................................................................................................................35
Installation example ...........................................................................................................................................................................35
Balancing ....................................................................................................................................................................................................36
Important information .......................................................................................................................................................................36

4
General information
Safety
Power supply
Introduction
Documentation
The following documents will be supplied with the unit:
• Quick guide
• Wiring diagram
In the Quick guide you will find important information regarding installation and start-up of the unit. If you require further information
regarding, for instance, installation of accessories or additional settings in the software, or if you need an extended user manual, the
following documents can be downloaded from the Nilan website:
• Installation instructions
• Software instructions
• User Manual
• Wiring diagram
The instructions can be downloaded from www.nilan.dk.
If you have questions regarding installation and operation of the unit after having read the instructions, please contact your nearest
Nilan dealer. A list of Nilan dealers is available on www.nilan.dk.
From factory, the unit has been tested and is ready for operation.
CAUTION
Always disconnect the power supply to the unit if an error occurs that cannot be rectified via the control panel.
CAUTION
If an error occurs on electrically conductive parts of the unit, alway contact an authorised electrician to rectify the error.
CAUTION
Always disconnect the power to supply to the unit before opening the unit doors, for instance for installation, inspection,
cleaning and filter change.
ATTENTION
The unit must be started up immediately after installation and connection to the duct system.
When the ventilation unit is not in operation, humidity from the rooms will enter the duct system and create condensate
water that can run out of the valves and cause damage to floors and furniture. Condensation may also form in the ven-
tilation unit, which can damage its electronics and fans.

5
Unit type
Product description
The Comfort 350 Top is an energy efficient ventilation unit, offering heat recovery for homes and smaller commercial buildings with
ventilation requirements of up to 407 m3/h.
Comfort 350 Top is a system with compact dimensions that can be built into a cabinet with a width of 60 cm. Comfort 350 Top is deliv-
ered tested and ready for operation.
The unit is used primarily in residential buildings. Due to its low sound level it is particularly suitable for ventilation in apartments. The
unit ventilates the dwelling by drawing out damp and vitiated air through valves placed in, for instance, bathroom, lavatory, kitchen
and utility room. It then blows fresh outdoor air in through valves placed in living areas such as sitting room, family room and bedrooms.
The cold outdoor air is heated up by the warm extract air in the high efficiency counterflow heat exchanger. This ensures limited heat
loss through ventilation.
As standard, the unit is supplied with ISO Coarse> 60% (G4) plate filters, which are intended to protect the unit from dirt. If you need
better filtration of the outdoor air, an ePM1 50% (F7) pollen filter can be ordered as an accessory.
Right version:
1. Duct connections (nozzle for inlet ring)
2. Electrical connections
3. Extract air filter
4. Outdoor air filter / Pollen filter
5. Extract air fan
6. Supply air fan
7. 100% Bypass damper
8. Counterflow heat exchanger
9. Automation
10. Condensate drain

6
Dimensional drawing Comfort 350 Top
All listed measurements are in mm.
Right version:
Left version:
Connections:
1. Outdoor air
2. Supply air
3. Extract air
4. Discharge air
5. Condensate drain
NB! Spouts for inlet ring
13
42
5 550
Ø 160
119180
119180
109 109
148148
105
559
790
3
4
1
2
5 550
Ø 160
119180
119180
109 109
148148
105
559
790

7
Dimensional drawing Comfort 350 Top Polar
All listed measurements are in mm.
Right version:
Left version:
Connections:
1. Outdoor air
2. Supply air
3. Extract air
4. Discharge air
5. Condensate drain
NB! Spouts for inlet ring
Ø 160
119180
119180
109 109
148148
790
906
1
2
3
4
5 550
105
559
5
Ø 160
119180
119180
109 109
148148
559
790
906
3
4
1
2
550
105

8
Functional block diagram
Connections
1. Outdoor air
2. Supply air
3. Extract air
4. Discharge air
5. Condensate drain
6. Electrical or water after-heating element connec-
tions
Automation
T2/T7: Supply air temperature sensor
T3: Extract air temperature sensor
T4: Discharge air and de-icing temperature sensor
T1/T8: Outdoor air temperature sensor
T9: Water after-heating element temperature sensor
1
T4
T3
T1 /T8
T2
2
5
4
6
3
T7
T9

9
Accessories
Electrical pre-heating element for frost protection of the unit
Electrical after-heating element for duct installation
Water after-heating element incl. control system for duct installation
EM-box
DTBU damper
If your ventilation unit is not a Polar version with an integral pre-heating element, we recommend that you
purchase an external pre-heating element as frost protection of the ventilation unit.
During prolonged periods of frost, the high efficiency counterflow heat exchanger will ice up. To prevent ice
formation, we recommend that you install an electrical pre-heating element.
The pre-heating element consumes limited energy and it ensures efficient heat recovery without periods of
defrosting the counterflow heat exchanger. You thereby achieve an overall reduction in energy
consumption.
Installing an after-heating element allows you to control the supply air temperature in the following cases:
• You want to use the ventilation air to heat the dwelling
• You want to control the supply air temperature to avoid potential cold draughts and coldness from the
ventilation
The electrical after-heating element is for installation in the supply air duct. It would be an advantage to
place it within the climate screen. It comes with the necessary sensors and connectors.
Installing an after-heating element will allow you to control the supply air temperature in the following
cases:
• You want to use the ventilation air to heat the dwelling
• You want to control the supply air temperature to avoid potential cold draughts and coldness from the
ventilation
The water after-heating element is for installation in the supply air duct. It would be an advantage to place it
within the climate screen. It comes with the necessary sensors and connectors as well as a two-way
regulation valve for the hot water.
If you want to run the cooker hood via the ventilation unit, in some cases there may be insufficient air for
cooker hood extraction.
If you install an EM-box, you can regulate the extracted air when the cooker hood is in operation, so that less
air is drawn from, for instance, the bathroom and the utility room. This will allow enough air for the cooker
hood to extract sufficiently.
The EM-box is fitted with a metal filter that cleans the air in the cooker hood of grease particles efficiently. It
thereby protects the ventilation unit.
If there is insufficient space for mounting an EM-box in the installation, you can achieve the same effect by
controlling the extract air with a DTBU damper.
You then have to adjust the duct system yourself with a connection to the cooker hood.

10
Expansion PCB
CTS602 Connection Box
Fire Connection Box
Connection box for user selection and EM-box together with fire automation system
Heating cable
Vibration absorbers
With an expansion PCB, it is possible to expand the functions within the control system.
• Connecting an after-heating element (supplied with the heating element)
• Connecting a CO2-sensor
• Connecting a joint alarm
Following external functions are connected to the ventilation unit via a Connection Box with a RJ45 connector:
• User selection 1 og 2
• Modbus communcation
• Fire thermostat or external fire automation system
There is a 0.5 meter cable from the box to an RJ45 plug, which is connected directly to the ventilation unit.
The Comfort ventilation unit has a function in its control system that can control 1-2 fire dampers.
If you want to activate this function, Nilan can supply you with a Fire Connection Box, with the following con-
nection options:
• Connection of 1-2 fire dampers
• Connection of external fire thermostat
• Connection of user selection 1 (cooker hood)
• Connection of Modbus communication to, for instance, CTS unit
You connect the box up with the supplied 1 m cable with RJ45 connector.
If you want to run the cooker hood function simultaneously to the fire automation system, Nilan can supply a
separate Connection box that can be connected up to the Nilan Fire Connection Box.
The box comes with a 2 metres power cable.
If you install the ventilation unit outside the climate screen, it is important to protect the condensate drain
from frost.
Nilan can supply an external heating cable that you run along the exterior of the condensate drain before
insulating it. This way you will have a frost free condensate drain that does not get blocked. The heating
cable has an integral thermostat that regulates the level of heating in accordance with the temperature of
the surroundings.
The cable is available in two lengths: 3 m or 5 m.
It is important to ensure that the ventilation unit does not transfer vibrations to the building. The ventilation
unit should therefore be placed on a vibration absorbing material.
Nilan can supply effective vibration absorbers to place under the ventilation unit. They are sold in packs of 4.

11
Flexible sound damper
Pollen filter
Cooker hood filter box
Extension cable HMI control panel
Functional cable
Gateway with App option
To make it esay to service the unit in the future, we recommend that you fit a flexible connection between
the unit and the duct system.
Nilan flexible sound damper absorbs sounds effectively from both the duct system and from roof stacks.
The ventilation unit comes, as standard, with a plate filter to protect the unit.
If the dwelling is used by anybody with, for instance, pollen allergies, you may benefit from purchasing a
pollen filter. This should be placed in the outdoor air intake, which will reduce the pollen count in the dwelling.
If the extract air needs extra filtration, Nilan can supply a Cooker hood filter box.
This can provide extra protection of the ventilation unit if you connect a cooker hood that has not got good
filters. It can also help air extraction from, for instance, dormitory rooms where cooker hoods are rarely
installed.
The control panel for the ventilation unit is connected up with a short wire so it can be installed close to the
unit.
If you place the unit so the control panel is out of sight, for instance in a cupboard or
in the loft, you can order a 15 m extension cable with plug. This allows you to place the control panel where it
is visible to the user.
It is important that the control panel is visible so the user can see alarms when, for example, filters need
replacing.
The following external functions can be connected to the ventilation unit via an RJ45 connector:
• User selection 1 and 2 (cooker hood)
• Modbus communication
• Fire thermostat or external fire automation system
You can adapt an RJ45 connector yourself in line with the instructions. To facilitate installation, Nilan can
supply a 10 m LAN cable with the correct RJ45 connector for the three functions.
You can control your ventilation unit with a smartphone app via a gateway connection.
Connect the Nilan Gateway to a CTS400 or a CTS602 control system. This way, a cloud connection to the unit
can be established. The Gateway is available in two different versions - with either a LAN or a WiFi connec-
tion to a router.

12
Set-up
Mounting
Positioning of the ventilation unit
The unit makes little noise and it produces only weak vibrations, but you should still take into account potential vibrations that can
spread from the unit to individual building components. In order to separate the unit from its underlying surface, it is therefore
recommended that you fit vibration absorbers under the unit. There should be approx. 10 mm distance to other building components
and to permanent fixtures.
Top unit
Mounting the ventilation unit
ATTENTON
When positioning the unit, you should always consider future service and maintenance.
It must be easy to replace filters, and it must be possible to remove, for instance, the exchanger, and to replace fans or
other components.
ATTENTON
A free space is recommended in front of the ventilation unit of at least 60 cm.
It must be easy to replace filters and e.g. it must be possible to remove the exchanger, replace the fan or other
components.
ATTENTON
The unit must be level to enable proper drainage from the condensate tray.
ATTENTION
If you fit flashings above the unit, there must be
enough space to remove these easily.
The unit is equipped with two mounting brackets with holes for
wall mounting at the top back of the unit.

13
Duct connections
An inlet ring needs to be fitted (not supplied by Nilan).
1. Use size Ø160mm inlet ring. 2. Press the inlet rings firmly into the ventilation nozzles.

8
Electrical installation
Electrical connections
Safety
It is important to check that wires are not damaged or squeezed during connection and use.
Connections overview
All connections are placed at the top of the ventilation unit.
Electrical connection unit
Power supply
ATTENTION
All work must be carried out by qualified persons and in compliance with existing legislation and regulations.
ATTENTION
It is important that the power is off, if you do work to the electrical components of the unit.
1. Connection to control panel
2. Connection 230V (remember electrical grounding)
3. External connections / accessories via RJ45 plug
4. Connection to PC
CAUTION
The power supply is plugged into a 230V socket with a safety switch. It is important that the unit has earth connection.
The ventilation unit is supplied with an EU Schuko plug for 230V
power supply.
This means that if you have not installed a shoko socket with
side earth or pin earth, an Adapter schuko plug with pin earth
must be used.
This Schuko adapter can be plugged into the ventilation unit's
Shuko plug and then into a socket with earthing. Schuko socket
with side earth
Schuko socket
with pin earth
Example of Adapter
Schuko plug with pin
earth

9
Control panel
HMI User panel
The user panel comes with 1.5 meter cable.
Wall bracket
Mount the HMI panel on the wall using the integrated wall bracket..
The panel should be placed in a visible spot so it is possible to change settings and to monitor warnings or alarms regarding operation
of the unit.
ATTENTION
If you want a longer cable, use a standard LAN cable, max 50 meters.
Nilan offers a 15 meter cable with plugs on both ends.
The wall bracket is located at the back of
the panel. You can detach it by loosening
the bracket at the bottom of the panel.
You can remove it.
Mount the wall bracket on the wall using
2 screws.
Click the RJ12 plug into place at the
bottom of the HMI panel. The wire can
run down along the wall, into the wall or
through the groove at the back of the
panel.

10
Electrical connection accessories
CTS602 Connection Box
You can connect the following external connections via the Connection Box that has 0.5 m wire and an RJ45 plug:
• User selection 1
• User selection 2
• Modbus
• Fire thermostat / external fire automation system
Functional cable
Many of the external connections are made via an RJ45 port that is installed on the ventilation unit. See the connections overview to
locate the RJ45 port. From factory, a shunt plug for fire thermostat connection has been plugged into the RJ45 port. This must be re-
moved before the LAN cable is plugged in.
The LAN cable enables the following functions:
• User selection 1
• User selection 2
• Modbus
• Fire thermostat / external fire automation system
Connections in relation to the function cable that has an RJ45 connector in one end and loose wires in the other:
The length of the LAN cable is 10 m.
User selection output
Fire thermostat/external fire automation system
Modbus B1 (-)
Modbus A1 (+)
User selection 2
User selection 1
GND
GND
ATTENTION
If you only want to connect 1 function, we will recommend that you purchase a LAN cable, type A, of the length required.
Plug either end of the cable into the RJ45 port on the unit. Cut off the connector at the other end of the cable and connect
up the wires that are required. The colours for different types of connections to the connection box are listed above.
1. Green/white
2. Green
3. Orange/white
4. Blue
5. Blue/white
6. Orange
7. Brown/white
8. Brown
GND
User selection 1
User selection 2
Modbus A1 (+)
Modbus B1 (-)
Not used
Fire thermostat / external fire automation system
User selection output (Cookerhood function)
ATTENTION
If you adapt an RJ45 cable yourself, be aware that wire 8 (Brown) can become live with 12V and must not be short
circuited.
In Nilan’s LAN cable the wires that are not used are not connected up to the RJ45 connector. With Nilan’s LAN cable there
is therefore no risk of short circuits.
500 mm
8
7
6
5
4
3
2
1
1
RJ45
Brown
Brown/white
Orange
Blue/white
Blue
Orange/white
Green
Green/white

11
User selections 1 and 2 (cooker hood)
If the fire automation system has not been activated in the software, you will have access to both User selection 1 and User selection
2. If the fire automation system has been activated, you will only have access to User selection 1.
The user selection functions are used to override standard operation. The input signal must come from a potential-free contact. When
connection is established, the function with the settings that have been selected on the control panel under Service/User Selection is
activated.
The following are examples of situations when user selection functions are used.
Connection via Nilan Functional cable
Connection of User selection 1
A potential-free signal is connected to User selection 1 via the following:
1. Green/white
2. Green
NB: If fire thermostat/external fire automation system is not connected up, make a shunt between:
1. Green/white
7. Brown/white
Connection of User selection 2 (overriding the operation)
A potential-free signal is connected to User selection 2 via the following:
1. Green/white
2. Orange/white
NB: If fire thermostat/external fire automation system is not connected up, make a shunt between:
1. Green/white
7. Brown/white
Cooker hood If you choose to run the cooker hood via the ventilation unit, the cooker hood will send a potential-free sig-
nal to the ventilation unit when you switch it on. When this happens, the ventilation unit increases the air
volume to the set level, so that enough air is drawn through the cooker hood.
Fireplace/wood-
burning stove
Normally, ventilation is balanced with slightly negative pressure in the dwelling so that dampness is not
pressed into the building components. This, however, is a disadvantage if you light a fire in your fireplace/
wood-burning stove as the smoke will then enter the dwelling instead of being drawn out through the
chimney.
When lighting a fire in the fireplace/wood-burning stove, you can activate the user function with a
potential-free contact that ensures positive pressure in the dwelling. Smoke is then drawn out of the
chimney as intended.
Prolonged
operation
If the ventilation unit is used in an office or a school where ventilation is reduced outside opening hours, it
may be necessary to increase ventilation temporarily if the building is used in the evening for, for instance,
meetings.
In that case you can have a potential-free contact that is activated, causing ventilation to increase, for
example for an hour, before operation ceases again.
1. Green/white
2. Green
3. Orange/white
4. Blue
5. Blue/white
6. Orange
7. Brown/white
8. Brown
GND
User selection 1
User selection 2
Fire thermostat / external fire automation system
User selection output (Cookerhood function)
ATTENTION
If you are not using the Cooker hood setting in User selection, you will be able to use any RJ45 cable. In that case, wire 8
Brown will not carry 12V.

12
Modbus
The CTS602Light control system has open Modbus RS485 communication that allows you to communicate with and control
the ventilation unit via external control systems.
Please consult the software instructions and the Modbus protocol for further information on settings and registers.
Connection via Nilan Functional cable
Connection of Modbus communication
Establish the Modbus connection via the following:
1. Green/white
4. Blue (+)
5. Blue/white (-)
NB: If fire thermostat/external fire automation system is not connected up, make a shunt between:
1. Green/white
7. Brown/white
1. Green/white
2. Green
3. Orange/white
4. Blue
5. Blue/white
6. Orange
7. Brown/white
8. Brown
GND
Modbus A1 (+)
Modbus B1 (-)
Fire thermostat / external fire automation system
ATTENTION
If you are not using the Cooker hood setting in User selection, you will be able to use any RJ45 cable. In that case, wire 8
Brown will not carry 12V.

13
Fire thermostat / external fire automation system
The ventilation unit can be connected up to an external fire thermostat that will stop the ventilation unit in the event of fire. The same
port can be used for connection of an external fire automation system.
The control system identifies a broken input signal as fire, and stops. It will only restart once connection to the fire thermostat has been
established or the external fire automation system starts signaling again. This must be done manually via the control panel.
When you connect up an external fire automation system, it will be necessary for the ventilation unit to restart automatically. You can
set for this to happen on the control panel. Please consult the software instructions for further information.
Connection via Nilan Functional cable
Connection of fire thermostat or external fire automation system
Establish the connection via the following::
1. Green/white
7, Brown/white
1. Green/white
2. Green
3. Orange/white
4. Blue
5. Blue/white
6. Orange
7. Brown/white
8. Brown
GND
Fire thermostat / external fire automation system
ATTENTION
If you are not using the Cooker hood setting in User selection, you will be able to use any RJ45 cable. In that case, wire 8
Brown will not carry 12V.

14
EM-box (damper solution)
The system works as follows:
When you switch on the cooker hood, User selection 1 or 2 will be activated. The ventilation unit increases ventilation and sends an out-
put signal to the EM-box that it is to close the damper for extraction from other rooms. However, the damper does not close completely
and a reduced level of air extraction from other rooms will still take place.
When balancing the damper, the small stop blocks on the damper must be positioned so that the basic ventilation rate is maintained
from the other rooms.
The EM-box damper option it easy to connect up to Nilan’s CTS602 Connection Box.
If you want to run the cooker hood via the ventilation unit, there may be times
when the air volume is insufficient for cooker hood extraction.
If you install an EM-box, you can regulate the extracted air when the cooker hood
is in operation, so that less air is drawn from, for instance, the bathroom and the
utility room. This will allow enough air for the cooker hood to extract sufficiently.
The EM-box is fitted with a metal filter that cleans the air in the cooker hood of
grease particles efficiently. It thereby protects the ventilation unit.
Dimensional drawing:
ATTENTION
Information on connecting User selection output and GND can be found under: CTS602 Connection Box.
NB: Wire for 230V power supply for the EM-box damper is not included.
ATTENTION
If you want to connect the EM-box together with a Fire automation system, you can find a solution in the section about
“Connection box for user selection and EM-box” in the chapter “Fire automation system”.
Other manuals for Compact S CTS 602
11
This manual suits for next models
2
Table of contents
Other nilan Air Handler manuals
Popular Air Handler manuals by other brands

RDZ
RDZ DWC 200 Technical installation manual

BLAUBERG
BLAUBERG KOMFORT LE350-3 user manual

VTS Medical Systems
VTS Medical Systems Ventus VVS021 Operation and maintenance manual

Daikin
Daikin ATM18MV2S Service manual

Armstrong Air
Armstrong Air BCE7S Series installation instructions

Allied
Allied A93UH1E Service manual