10 Quick Start Guide
STEP 1SET UP STEP 2 ADD PELLETS STEP 3PROGRAM
• Press START to begin preheating.
If using WOODFIRE FLAVOUR
TECHNOLGY, the pellets will go
through an ignition cycle (IGN), then
the grill will begin preheating (PRE).
STEP 4PREHEAT
• Place the grill on a level,
flat surface like a garden
table or stand.
• Open the lid and install the
grill plate by positioning it
flat on top of the heating
element so it sits into place.
• Install the grease tray
by sliding it into place at
the back of the grill.
• Choose a flavour - All
Purpose or Robust.
• Using the pellet scoop, reach
scoop into bag to fill scoop to the
top. Level o to avoid spilling.
NOTE: The scoop is designed
to measure pellets needed
for one smoke session.
• While holding the smoke
box lid open, pour pellets
into the smoke box until
filled to the top. Then,
close the smoke box lid.
DON'T WANT SMOKE?
Skip step 2
For easier, faster clean
up, line the grease tray
withaluminumfoil.
TIP
STEP 5COOK
• Once grill has preheated,
“ADD FOOD” will appear
on the screen.
• Open the lid to add
ingredients to the grill.
• Close the lid. The grill will
begin cooking and the timer
will begin to count down.
STEP 6SERVE
• When cook time is complete,
the grill will beep and “DONE”
will appear on the display.
• Remove food from grill,
then enjoy!
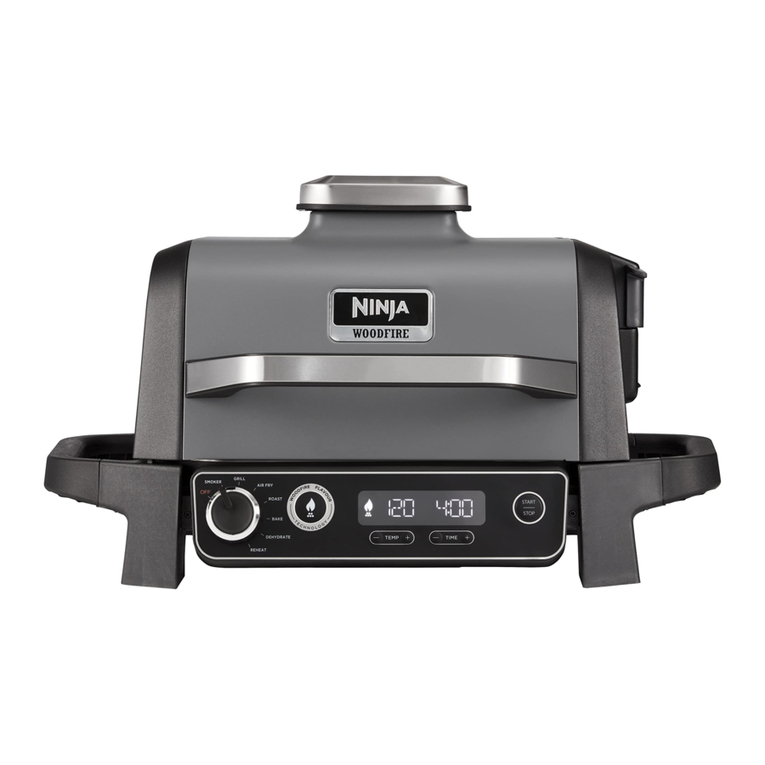
• Turn the unit on by rotating
the dial clockwise from
the OFF position to select
GRILL, AIR FRY, ROAST,
BAKE or DEHYDRATE.
If you added
pellets, press the
WOODFIRE FLAVOUR
TECHNOLOGY button.
• Use the buttons to
adjust the temperature.
• Use the buttons
to adjust the cook time.
• Press START/STOP to begin
preheating. If using WOODFIRE
FLAVOUR TECHNOLGY, the pellets
will go through an ignition cycle
(IGN), then the grill will begin
preheating (PRE).
W
O
O
D
F
I
R
E
F
L
A
V
O
U
R
STEP 1STARTING UP STEP 2COOK STEP 3 SERVE
• Follow instructions as per
Step 1 & 2 on adjacent page.
• Add ingredients to the
grill then close the lid.
• Turn the grill on by rotating
the dial clockwise from
the OFF position to select
the SMOKER function.
• Use the buttons to
adjust the temperature.
• Use the buttons to
adjust the cook time.
• Press the button to the right
of the display labelled
START/STOP to begin cooking.
• Close the lid. The grill will
begin cooking and the timer
will begin to count down.
• When cook time is complete,
the grill will beep and “DONE”
will appear on the display.
• Remove food from grill,
then enjoy!
NOTE: There is no preheat
time for the Smoker function.
HELPFUL TIPS
• For optimal smoke flavour, keep ingredients cold before putting them on the grill.
• For optimal smoke flavour, minimise the time the lid is open when adding or flipping food.
• We do not recommend use any oils or non-stick sprays when smoking because smoke will
not adhere to the food as well.
• Smaller food loads such as vegetables and minced meat absorb more smoke.
• If you want to add more pellets, pour in another full scoop of pellets after the first batch has
completely burned. Press and hold WOODFIRE FLAVOUR TECHNOLOGY for 4 seconds to
ignite the smoke box of pellets. DO NOT re-fill more than 2 times.
• Whilst preheating is strongly recommended, you can skip it by pressing and holding the
START/STOP button for 4 seconds.
QUICK START GUIDE QUICK START GUIDE
11
Questions? ninjakitchen.co.uk
Using the Grill, Air Fry, Roast, Bake & Dehydrate functions Using the Smoker function
Let the grill fully preheat before adding
food or this may lead to overcooking.
Pellet ignition times will take
an additional 2-4 minutes.
Preheat times by function:
Grill: HI 8-12 | MED 6-11 | LO 5-9mins
Air Fry, Roast, Bake: 3 mins
Dehydrate: No preheat
NOTE: When using the
Smoker function, there may be
a lot of smoke initially, which
will reduce during cooking.
Even though the smoke may
not be visible, it is still adding
flavour to food.
NOTE: We don’t advise to use Woodfire Technology with reheat, as
your food is already full of flavour.
