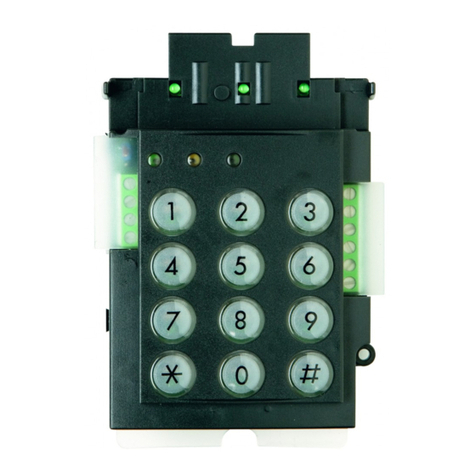
Nista Devices IP39-4 Series User manual

IP39-4x
IP Secured Access Control
Edition 3.01

IP Door Phones
IP 39-4X
Installation and Programming Manual
Document Release: 3.01
Release Date: 01/04/18

Notification
Notification is hereby given that Nista Devices GmbH. reserves the right to modify, change, update or revise this
document from time to time as required without the prior obligation to notify any person, company or organization.
Further, Nista Devices GmbH. makes no warranty or representation, either express or implied, with respect to
merchantability, or fitness of its products for a particular purpose.
© 2013 Nista Devices GmbH
This document or any parts thereof are not to be reproduced or transmitted in anyform or byany means, electronic or
mechanical, including photocopying, recording, or information storage and retrieval systems for any purpose
whatsoever without the express written permission of Nista Devices GmbH.

Table of Contents
1Introduction ...................................................................................................................................................................1
1.1
Model Nomenclature:....................................................................................................................................................1
1.1.1 List of Available Models.......................................................................................................................................2
2Product Overview..........................................................................................................................................................3
3IP Door Phone Package Content..................................................................................................................................4
3.1
“What’s in the Box”........................................................................................................................................................4
4IP Door Phone Front Panel...........................................................................................................................................5
5IP Door Phone Main Functionality ................................................................................................................................6
6Installation.....................................................................................................................................................................7
6.1
Mounting .......................................................................................................................................................................7
6.2
Connections..................................................................................................................................................................8
6.3
Reset Device to Factory DefaultConfiguration...........................................................................................................14
6.4
LED Panel Indication ..................................................................................................................................................15
7Programming ..............................................................................................................................................................16
7.1
Access to Web Management Interface.......................................................................................................................16
7.2
Home Screen..............................................................................................................................................................17
7.3
Network Parameters...................................................................................................................................................19
7.3.1 Network Configuration Parameters...................................................................................................................19
7.3.2 Network -> HTTPS Activation...........................................................................................................................20
7.3.3 Network / NAT Traversal ..................................................................................................................................21
7.3.4 Auto Provision...................................................................................................................................................22
7.3.5 IP39-4x APS Configuration File’s Naming rules: ..............................................................................................23
7.3.6 IP39-4x APS Firmware update.........................................................................................................................23
7.4
SIP Parameters...........................................................................................................................................................25
7.4.1 SIP Account Screen..........................................................................................................................................25
7.4.2 SIP / Port Settings ............................................................................................................................................25
7.4.3 SIP Audio Codecs.............................................................................................................................................26
7.4.4 SIP Video Codecs.............................................................................................................................................27
7.4.5 SIP Advanced Settings.....................................................................................................................................27
7.4.6 SIP -> Transport ...............................................................................................................................................28
7.4.7 SIP -> Upload Certificate..................................................................................................................................28
7.5
Telephony ...................................................................................................................................................................29
7.5.1 Telephony Parameters......................................................................................................................................29
7.5.2 Day and Night Settings.....................................................................................................................................30
7.5.3 Speed Dial and System Subscribers Table......................................................................................................31
7.6
Door Functions............................................................................................................................................................33
7.6.1 Door Functions / Parameters............................................................................................................................33
7.6.2 Door Access Codes..........................................................................................................................................34
7.6.3Sensor...............................................................................................................................................................36
7.6.4 Master-Slave HTTPS Door opening via Ethernet network...............................................................................40
7.6.5 LED Display Settings........................................................................................................................................45

7.7
System Parameters.....................................................................................................................................................46
7.7.1 Sound Volume ..................................................................................................................................................46
7.7.2 NTP and Time (System Time Configuration)....................................................................................................47
7.7.3 Video.................................................................................................................................................................49
7.8
AdministrationParameters..........................................................................................................................................53
7.8.1 Save Configuration File / IP Door Phone Backup.............................................................................................53
7.8.2 Restore Configuration.......................................................................................................................................54
7.8.3 Firmware Update ..............................................................................................................................................55
7.8.4 Set to Default....................................................................................................................................................61
7.8.5 Restart / Cold Reset .........................................................................................................................................61
7.8.6 Web-Management Credentials.........................................................................................................................62
7.8.7 Syslog Server Settings......................................................................................................................................63
7.8.8 Ping Test...........................................................................................................................................................69
8User Operations..........................................................................................................................................................70
8.1
Access by using the ‘Door AccessCode’....................................................................................................................70
8.1.1 To open the door: .............................................................................................................................................70
8.2
Door Opening by Using the External SwitchButton....................................................................................................71
8.3
The Door Status Sensor / Serial Doors Opening........................................................................................................71
8.3.1 Serial Door Opening* ( *- feature required special firmware )..........................................................................71
8.4
Call to the Day / NightOperator..................................................................................................................................72
8.4.1 To dial the Operator:.........................................................................................................................................72
8.4.2 Peer-to-Peer Calls ............................................................................................................................................72
8.5
Direct Call to Destination Number...............................................................................................................................73
8.5.1 To dial directly to a destination number:...........................................................................................................73
8.6
Dialing by Using Speed DialDestinations...................................................................................................................73
8.6.1 Speed Dialing by Using the SPD Code ............................................................................................................74
8.6.2 Speed Dialing by Using the LED Display Search.............................................................................................74
8.7
Door Opening from IP Extension by Using the Extension’s Door Opening Code ......................................................74
8.7.1 To open a door from an Extension: ..................................................................................................................74
8.8
Setting the Maximum ConversationTime ...................................................................................................................75
8.9
Case Opening/Tempering Alarm ................................................................................................................................76
8.10
Door Opening/Tempering Report in the Syslog Server...............................................................................................76
8.11
Door opening via Ethernet network by HTTPS commands........................................................................................80
8.11.1 Configuration Door Opening via Ethernet network...........................................................................................81
8.11.2 To open a door by using HTTPS commands via Ethernet network: ................................................................84
9TechnicalSpecification ...............................................................................................................................................85

NISTA DEVICES GmbH 2013 © All Rights Reserved
1Introduction
The IP39-4x Series IP Door Phones offer a wide range of options for both indoor / outdoor access control and door
entry options, based on industry standard SIP protocol.
The IP39-4x IP Door Phones are standalone SIP phones, which enhance the functionality of a VoIP network by
providing entrance door connectivity, access control, video monitoring and more.
The IP39-4x Series are designed using cutting edge technology, incorporating a high quality full duplex
speakerphone with microphone and speaker volume settings for optimum environmental performance as well as a
built in electromagnetic lock controller.
All models are simple to set up, have modern aesthetics and are made of durable construction and provide “plug and
play” installation.
1.1
Model Nomenclature:
IP39-4X-P/PC IP39-4X–This is the IP39-4x Series Model
X –Model Number –“0” Keypad / “1” Single Call Button
P –Piezo Faceplate
A - Acrylic Faceplate
C - Camera
IP39-40PC IP39-40P
IP39-41PC IP39-41P

NISTA DEVICES GmbH 2013 © All Rights Reserved
1.1.1 List of Available Models
Model
Description
IP39-40PC
IP Door Phone, Piezo Keypad, Integrated Internal Video Camera
IP39-40P
IP Door Phone, Piezo Keypad
IP39-41PC
IP Door Phone, Piezo Single Button, Integrated Internal Video Camera
IP39-41P
IP Door Phone, Piezo Single Button

NISTA DEVICES GmbH 2013 © All Rights Reserved
2Product Overview
Nista Devices GmbH IP39-4x Door Phones are smart, surface mounted access control devices connected to an IP
network allowing door entry control and monitoring. They are designed for both indoor and outdoor use and are
constructed in an aluminum case with piezo or touch keypads.
The Nista Devices GmbH IP Keypad and Single Button versions support the following features:
Feature
Keypad
Single
Button
Multiple door access codes
V
X
Remote Door opening from extension
V
V
Master/Slave –secured HTTPS Door opening
V
X
Programmable day and night destinations
V
V
Integration with local LAN and VoIP networks
V
V
Network Configuration: DHCP or Static
V
V
Authorized registration with existing VoIP switching system (SIP Proxy)
V
V
Automatic busy & disconnect detection
V
V
99 Speed Dialing Memories
V
X
Up to 99 System accounts
V
X
Up to 10 Personal Door Opening codes for each relay
V
X
Destination No answer call forwarding
V
V
Day and Night weekly time profiles
V
V
System Clock and Auto DST
V
V
Informative Display
V
V
Speed dial memory directory listing / scrolling
V
X
External switch buttons
V
V
Door Status Sensors
V
V
Two separate doors control
V
V
POE-Power over Ethernet
V
V
High quality speakerphone with WEB volume control
V
V
Keypad volume control
V
X
High quality Video over IP (for models with internal video camera)
V
V
Video Streaming (HTTP; RTSP) (for models with internal video camera)
V
V
Configurable and adaptive video resolutions: QCIF; CIF; QVGA; VGA; 720p
V
V
Web Management interface
V
V
Web GUI password protection
V
V
Weather resistant and anti-vandal PIEZO keypad
V
V
Case Opening Alarm
V
V
Automatic configuration and software updates –Auto Provisioning
V
V
Media Encryption
V
V

NISTA DEVICES GmbH 2013 © All Rights Reserved
3IP Door Phone Package Content
3.1
“What’s in the Box”
•IP Door phone unit
•Set of connectors
•Hex key wrench for securityscrew
Note:
1. If POE equipment is not available, it is possible to use External Power Supply (not supplied). External Power
Supply shall be:
•Input: 100 –240 V AC
•Output: 5VDC; 2A
2. 5VDC Power Supply shall be connected to IP Door Phone in accordance with the required polarity.
3. The External Power Supply does not include in standard Ip39-4x package.
4. The 5 VDC source is connected to the unit via a terminal block. Observe polarity on the PCB where the
terminal block is located.

NISTA DEVICES GmbH 2013 © All Rights Reserved
4IP Door Phone Front Panel
Figure 4-1 The IP Door Phone Unit Front Panel
•▲▼ –scroll a speed dial directory.
•–enter the programming mode or use as a“Backspace”
•–dial predefined day/night extensions and hang up acall.

NISTA DEVICES GmbH 2013 © All Rights Reserved
5IP Door Phone Main Functionality
•The IP Door Phone unit can be integrated with IP PBX (Server / SIP-Proxy) as a SIPextension.
•IP Door Phone can be connected to IP PBX directly or via IP router, HUB orSwitch.
•The unit dials to predefined ‘Day’ and ‘Night’ extensions via IP PBX.
•The unit dials to local extensions or externaldestinations.
•The unit dials pre-programmed destinations using Speed Dialdirectory.
•The unit opens doors from local extension or remote conversationparty.
•The unit opens doors using External Switchbuttons.
•The unit management is handled by Web Managementinterface.
Figure 5-1 the unit schematic setup.
Figure 5-1 The IP Door Unit Schematic Setup
Remote IP Extensions
Remote IP Extensions

NISTA DEVICES GmbH 2013 © All Rights Reserved
6Installation
6.1
Mounting
The Entry Control unit shall be mounted on the wall using the rear mounting cover and the rubber mat provided with
the unit.
•Unscrew the secret screw on the bottom part of theunit.
•Measure and mark location of the holes on the wall, where they are to bedrilled.
•Drill the holes and insert the wall dowels into theholes.
•Place the rubber mat on the wall and then the rear metal cover using provided wall screws. (See Figure 6-1)
•Figure 6-1Make all requiredconnections.
•Put Entry Control unit on the base latch mechanism, close the case and lock with providedscrew.
Figure 6-1 Entry Control unit Wall Installation

NISTA DEVICES GmbH 2013 © All Rights Reserved
6.2
Connections
For the safety reason and to avoid electrical damage to the unit. All Power source like an external power supply
or POE must be disconnected during installation process.
Note: The External Power Supply is not included in standard IP39-4x package
The External Power Adapter shall correspond to following technical parameters:
Input: 100 –240 V AC
Output: 5VDC; 2A
5VDC Power Adapter shall be connected to IP Door Phone/Entry Control unit in
accordance with the required polarity: 5VDC and GND, see Figure 6-4 )
Usage the incorrect External Power Adapter can damage the door phone
1.
Connect and screw door lock(s), push button(s) or sensor(s) wires to the provided two-wire terminalconnectors.
2.
Insert wired terminal connectors into the matting sockets on PCB (Figure6-2).
3.
Connect POE/LAN cable to RJ-45 socket.
4.
Connect door lock to ‘REL 1’ (Relay 1) and/or ‘REL 2’ (Relay 2).
5.
If an external switch button is used (See also Chapter 7.5: Web GUI Door Functions -> Sensor), connectthe
external switch button wires to ‘SEN 1’ (Sensor 1) and/or ‘SEN2’ (Sensor2)
The internal Relay’s functional modes: ‘Normally Open’ or ‘Normally closed’ can be configured by Hardware PCB
Jumper or by software configuration via web-browser
Relays ½NO/NC Jumper configuration.
1. Relay 1: can be configured to work in Normally Open mode only.
2. Relay 2 :
Closed/Jumper center Pin (2) + ’NO’- (1) means the ‘Normally Open’ relays status in powered mode.
Closed/Jumperd center Pin (2) + ’NC’ - (3) means the ‘Normally Closed’ relays status in powered mode.

NISTA DEVICES GmbH 2013 © All Rights Reserved
Relays ½NO/NC software web setup.
Relay 1 –is setting for NC (NO/NC is programmable) and Electrical door lock connected via relay number 1. If Entry control unit’s power is lost the
door will unlocked for exit the room.
Navigate to Door Functions >Parameters screen and Select required Relay 1 functional mode
Figure 6-2 Relay 1 NO/NC mode web-gui setup
Figure 6-3 The IP Door Phone PCB Module

NISTA DEVICES GmbH 2013 © All Rights Reserved
Attention:
Note: The internal relay’s maximum supported current is 2A.
Important: To set device in operational mode, switch 1 on PCB shall be switched to “Normal” position.
PCB elements
Description
1: (SW2)
Factory Default Settings switch:
‘Normal’ – Door Phone normal working position
‘Default’ – Set to default procedure mode
2:
Hardware Reset (Cold Reset Switch)
3: (NO/NC Jumper)
Relay 1 and Relay 2 Normally Open and Normally Close status jumper.
Closed Central Pin (2) + ’NO’- (1) pin means the ‘Normally open’ mode.
Closed Central Pin (2) + ’NC’ - (3) pin means the ‘Normally Close’ mode
Note: Relay 1 can be configured to work in Normally Open (NO) mode only by PCB jumper
and to work in Normally Closed mode via web administration interface
4:
Microphone Connector
5:
Speaker Connector
6: Ethernet
POE/LAN connection
5VD (5V DC)
External power supply 5VDC 2A input (if no POE applied).
Draw attention on connection polarity: +5V and GND marked on PCB
(Figure 6-2)
The External Power Supply does not include in standard ZP-10X package
SEN 1/2 (Sensor 1/2*)
Door status detector.
Also can be used as external Switch button connection (Chapter 8.3).
Note: The short circuit closer type External Switch button can be used for manual door
opening
REL 1/2 (Relay 1/2)
Support 30VDC 2A
Internal relays Normally Open and Normally Close status depends on JP1 jumper
position.
Audio Out*
Reserved for future release
*feature support depends on firmware version release

NISTA DEVICES GmbH 2013 © All Rights Reserved
You can remove the boot if
Figure 6-4 shows the IP Door Phone connections with External Switch button, which is connected to SEN 1 (‘Sensor
1’) socket.
Note:
It is recommended to use an Ethernet cable that comes without the strain relief boot.
your cable comes with one.

NISTA DEVICES GmbH 2013 © All Rights Reserved
Figure 6-4 IP39-4x Connections Diagram with External Switch Button
Note:
The door electrical Lock requires separate powering follow by door lock manufacture’s requirements

NISTA DEVICES GmbH 2013 © All Rights Reserved
Figure 6-5 Connections diagram with POE, Door Lock, Switch button and Door Status Sensor

NISTA DEVICES GmbH 2013 © All Rights Reserved
6.3
Reset Device to Factory DefaultConfiguration
IP39-4x Door phone can be reset to its Factory default configuration by using following actions:
1.
Via WEB-Management interface (See 7.8.5)
2.
By using hardware ‘Factory Default Settings’ switch (See Figure 6-6)
To set IP Door Phone to Factory Default Setting by using hardware ‘Factory Default Settings’ switch:
•
Power off the device.
•
Put the switch to “DEFAULT” position.
•
Power on this device will restore the factorydefault.
o
Note: The front panel LED Display can show the message “Destination not set “if Day or Night
destinations not specified and case is open –CLOSE the Case
o
Mandatory wait until LED DisplayShows ’Set to default’ message
oIn case if the unit’s housing doesn’t include LCD monitor, so wait approximately 2 minutes until Reset
to default procedure will be done, and updated software number will be shown in the web-management
Home page.
•
Power off the device.
•
Put the switch back to “NORMAL” position
•
Power on the device
Figure 6-6 Factory Default Settings switch SW2

NISTA DEVICES GmbH 2013 © All Rights Reserved
6.4
LED Panel Indication
The IP Door phone’s front panel includes the LED Line (panel), which indicates the Door Phone’s functional status with
specific light activity.
Figure 6-7 LED Panel
IP Door Phone Action
LED Line lighting Activity
The Door phone is ready in idle status and SIP .
Permanently ON
Network is down.
Permanently OFF
Registration in SIP Server failed.
Permanently OFF
Outgoing Dialing; Conversation
Slow Flashing
Relay Working
Slow Flashing
Power is On but door phone is not ready and not
enter to IDLE mode.
Fast Flashing
Software Update procedure runs
Fast Flashing
APS Updating software runs
Fast Flashing
Save & Reboot
Fast Flashing
Set to Factory Default procedure runs
Fast Flashing
Unit restarted
Fast Flashing
Remote Restart operation from Remote server
Fast Flashing
Note:
This feature requires the IP Door Phone KPU software V.17 or higher and Main unit software 2abw-01 and
later. Please contact your local dealer in order to update the IP Door Phone’s firmware.
Table of contents
Popular IP Access Controllers manuals by other brands
Rosslare
Rosslare InteliDoor AC-Q41H instruction manual
POLIMEX
POLIMEX iCON 50 user manual
ViziT
ViziT KTM602F operating instructions
LifeSafety Power
LifeSafety Power FLEXPOWER PAXTON NET2 quick start guide
SoundCraft
SoundCraft Secura Key Radio Key RK-65K operating guide
Accentronix
Accentronix Cellswitch INFINITY user manual
Control iD
Control iD iDFlex quick guide

Genie
Genie GDG800BT user manual
Livewire Connections
Livewire Connections FB-10 quick start guide
Roger
Roger OSR88M-IO operating manual
ACT Technology
ACT Technology ACT1000 - ACCESS CONTROL UNIT - INSTALLERS installation instructions
Dahua Technology
Dahua Technology ASC1202B-S user manual
