Nitelighter NL55 User manual

NL55
Installation/Operation Manual
Saf ty . . . . . . . . . . . . . . . . . . . . . . . . . .Pag 2
Installation . . . . . . . . . . . . . . . . . . . . . . .Pag 3
Op ration . . . . . . . . . . . . . . . . . . . . . . . .Pag 5
Warranty . . . . . . . . . . . . . . . . . . . . . . . .Pag 6

SAFETY
his product meets or exceeds applicable standards established by Underwriters
Laboratories Standard 676, Intertek esting Services, and required standards for
use worldwide. It uses only low 12V energy (equivalent to a 12V battery) with
multiple layers of redundant safety checks, is constructed of approved materials
and is assembled in agency inspected facilities. Please use the following
guidelines for your further protection:
!
WARNING: o reduce the risk of fire, electrical shock, injury, or
damage to your product or to bathers:
Do not use if unit is damaged in any way.
Use this product only for its intended use as described in this manual.
Unit must be submerged in water to operate properly.
Plug only into 110 V receptacles protected by a ground fault circuit interrupter.
Make sure NiteLighter is unplugged from its power supply before replacing the bulb
or lens or performing any other maintenance.
o protect risk of electrical shock, do not put the transformer in water or other liquid.
o avoid damage to the transformer and cord, never carry the transformer by the cord or
yank to disconnect from an outlet. Instead, disconnect by pulling the plug itself from the
outlet. Do not pull cord around sharp corners or edges.
Do not operate with a damaged cord or transformer.
Disconnect transformer from outlet when not in use.
If light is not working as it should or has been dropped or damaged in any way,
contact SmartPool customer service before using at (732) 730-9880.
DO NOT USE E TENSION CORDS, DEATH OR INJURY CAN RESULT.
!
he sole purpose of this product is for use as an underwater light in an aboveground
pool; any modification or other use will void the warranty (see warranty).
!
!
!
!
!
!
!
!
!
!
!
2

1.0 Installation
The unit is designed to be installed to any existing in
ground pool using the deck mounting kit. The powder
coated stainless steel metal bracket can be either
bolted onto the deck or by 3M Dual-Lock.
1.1 If using Dual-Lock pads,
paint the deck with any
water resistant paint to
seal the porous holes and
get a smooth surface
where pads will be set.
1.2 If the deck has a sloped
edge, attach the two
square plastic pieces to
the end of metal bracket
to make it level.
1.3 Attach the 4 pieces of 3M
Dual-Lock on the bottom
of the metal bracket and
the other 4 pieces on the
painted deck.
1.4 Use the two plastic “U”
clamps to hold the unit
onto the metal bracket. Do
not tighten up the screws.
.
1.5
1.4
1.3
1.1
1.2
3

1.8 Attach the wire cover at
the top of the metal
bracket. Finally, tighten up
all screws including the
“U” clamps.
1.9 If you want to cover the
wire leading to the
transformer, you can use
the 4 sections of wire
cover. Attach the bottom
piece to the deck by
water resistant glue such
as silicone (not included).
1.6
1.7
1.8
1.5 Put the control unit onto
the metal bracket. Engage
the two keyholes on the
back of the control unit to
the two studs on the metal
bracket.
1.6 Push the control unit
forward until it stops.
1.7 Attach the plastic piece at the
end of the metal bracket to hold
the control unit in place. This
plastic piece is not symmetrical
and the smaller opening should
face outside.
1.9
1.9
4

2.0 Operation
The unit can be turned on for
either 3 hours or 6 hours
and will then shut off
automatically.
2.1 Tur n the knob to the left for
3 hours or turn to the right
for 6 hours.
2.2 Press the black rubber
button to turn on the unit.
Press it again to turn it off.
2.3 Snap the color filter onto
the clear cover
2.2
3 hrs
6 hrs
2.1
SmartPool Inc.
687 Prospect Street
Lakewood NJ 08701
Tel: (732) 730-9880
3

SIX MONTH LIMITED WARRANTY
Six month limit d warranty from dat of original purchas for manufacturing d f cts
und r normal and r asonabl us , and subj ct to th maint nanc r quir m nts and
installation guid lin s s t forth in th product instruction manual.
THIS WARRANTY IS SUBJECT TO THE TERMS, LIMITATIONS AND EXCLUSIONS DESCRIBED
BELOW, AND THERE ARE NO OTHER WARRANTIES OR REPRESENTATIONS, EITHER EXPRESS
OR IMPLIED, WHETHER OF MERCHANTABILITY, FITNESS FOR A PARTICULAR PURPOSE, OR
OTHER, MADE BY THE MANUFACTURER, OTHER THAN THOSE SPECIFICALLY SET FORTH IN
THIS WRITTEN WARRANTY
What is Covered: SmartPool, Inc. warrant it electronic product to be free from defect in material and
workman hip when leaving the factory.
What is not Covered: Any type of damage to the product due to improper in tallation, maintenance, or failure to
provide nece ary and rea onable maintenance; any damage or injury cau ed by mi u e and/or unrea onable u e of
the product; batterie (if applicable); damage due to or related to improper draining, winterizing, torage or Act of
God; SmartPool, Inc. will not honor any claim for damage to any product in tran it unle damage to the hipping
container i noted at the time of delivery on the tran fer company’ delivery bill.
THE WARRANTY OBLIGATIONS OF SMARTPOOL, INC. ARE LIMITED TO REPAIR OR
REPLACEMENT OF THE PRODUCT OR OF ANY DEFECTIVE COMPONENT, AT THE OPTION OF
SMARTPOOL. UNDER NO CIRCUMSTANCES WILL SMARTPOOL, INC. BE LIABLE OR
RESPONSIBLE FOR ANY CONSEQUENTIAL OR INCIDENTAL DAMAGES, AND/OR CHARGES FOR
LABOR. SMARTPOOL SHALL NOT BE LIABLE OR RESPONSIBLE UNDER ANY CIRCUMSTANCES
OR ANY AMOUNT FOR ANY CONSEQUENTIAL OR INCIDENTAL DAMAGES, OR FOR ANY
INJURIES OR DAMAGES TO PERSON OR PROPERTY USING OR USED IN CONNECTION WITH THE
PRODUCT, OR FOR ANY OTHER LOSS OF PROFITS OR OTHER COSTS OR EXPENSES OF ANY
KIND OR CHARACTER. IF SMARTPOOL, INC. DETERMINES THAT EITHER REPAIR OR
REPLACEMENT OF THE PRODUCT IS NECESSARY, SMARTPOOL MAY EITHER REPAIR THE
PRODUCT AT A NOMINAL CHARGE TO THE CUSTOMER OR REPLACE THE PRODUCT. THE
CUSTOMER BEARS THE SOLE RESPONSIBILITY FOR PRE-PAID RETURNS OF THE PRODUCT TO
SMARTPOOL, AND ALL REPAIRED OR REPLACED PRODUCTS WILL BE RETURNED AT THE
HOMEOWNER’S EXPENSE.
NO PERSON, FIRM, OR CORPORATION IS AUTHORI ED TO MAKE REPRESENTATIONS OR INCUR
ANY OBLIGATIONS IN THE NAME OF OR ON BEHALF OF SMARTPOOL, INC., EXCEPT AS STATED
HEREIN. THE REMEDIES SET FORTH IN THIS WARRANTY ARE EXPRESSLY UNDERSTOOD TO BE
THE EXCLUSIVE REMEDIES AVAILABLE TO THE PURCHASER, AND THIS WARRANTY CONTAINS
THE FULL AND COMPLETE AGREEMENT BETWEEN SMARTPOOL, INC. AND THE PURCHASER.
THIS WARRANTY SETS FORTH THE ONLY OBLIGATIONS OF SMARTPOOL, INC., WITH REGARD
TO THIS PRODUCT, AND THERE ARE NO WARRANTIES WHICH EXTEND BEYOND THE
DESCRIPTION ON THE FACE HEREOF.
1) Call 1-732-730-9880 to initiat a claim.
2) You will r c iv an instruction packag within 10 days.
3) Pl as allow 2-4 w ks for warranty claims to b s ttl d.
4) If you do not r c iv your product within 6 w ks, pl as cal SmartPool Warranty
D partm nt b tw n 1pm-4pm Monday through Friday EST at 1-732-730-9880.
What you must do to file a claim:
This warranty giv s th original consum r purchas r sp cific l gal rights. You may hav oth r rights
d p nding on wh r you liv .

GARANTIE LIMITÉE DE SI MOIS
Garantie limitée de six mois à compter de la date de l’achat d’origine en cas de vice de fabrication dans des
conditions normales d’utilisation, compte tenu des conditions d’entretien et des directives d’installation
prescrites dans le manuel d’instructions du produit.
LA PRÉSENTE GARANTIE EST ASSUJETTIE AU MODALITÉS, RESTRICTIONS ET E CLUSIONS DÉCRITES
CI-DESSOUS. IL N’E ISTE AUCUNE AUTRE GARANTIE NI REPRÉSENTATION, E PRESSE OU IMPLICITE,
RELATIVE À LA QUALITÉ MARCHANDE ET À L’ADAPTABILITÉ NI AUCUNE AUTRE, ACCORDÉE PAR LE
FABRICANT, EN DEHORS DE CELLE SPÉCIFIQUEMENT STIPULÉE DANS CETTE GARANTIE ÉCRITE.
Éléments couverts : SmartPool Inc. garantit on produit électronique exempt de vice de matériaux et de
fabrication, à la ortie de l’u ine.
Éléments non couverts : Tout type de dommage au produit uite à une in tallation ou un entretien
inadapté ou faute d’a urer l’entretien néce aire et rai onnable; tout dommage ou ble ure ré ultant de
l’emploi abu if et (ou) de l’utili ation dérai onnable du produit; le pile (le ca échéant); le dommage
ré ultant d’une vidange, d’une hivéri ation ou d’un entrepo age inadapté ou encore d’un ca de force
majeure; SmartPool Inc. n’honore aucune réclamation ré ultant de dommage à tout produit en cour de
tran port, auf i le dommage au conteneur d’expédition ont noté ur le bulletin de livrai on de la
ociété de tran port, au moment de la livrai on.
LES OBLIGATIONS DE SMARTPOOL INC. EN VERTU DE LA GARANTIE SE LIMITENT À LA RÉPARATION OU
AU REMPLACEMENT DU PRODUIT OU DE TOUT COMPOSANT DÉFECTUEU , À LA DISCRÉTION DE
SMARTPOOL INC. CELLE-CI N’EST EN AUCUN CAS RESPONSABLE DE TOUT DOMMAGE INDIRECT OU
ACCESSOIRE ET (OU) DES FRAIS DE MAIN-D’ŒUVRE. SMARTPOOL INC. N’EST RESPONSABLE EN AUCUN
CAS OU EN QUOI QUE CE SOIT POUR TOUS DOMMAGES INDIRECTS OU ACCESSOIRES OU POUR TOUTE
BLESSURE À QUICONQUE OU POUR TOUS DOMMAGES À LA PROPRIÉTÉ RELATIVEMENT À L’UTILISATION
DU PRODUIT, POUR TOUTE AUTRE PERTE DE PROFIT OU AUTRES FRAIS OU CHARGES DE QUELQUE
GENRE OU CARACTÈRE QUE CE SOIT. SI SMARTPOOL INC. DÉTERMINE QUE LA RÉPARATION OU LE
REMPLACEMENT DU PRODUIT EST NÉCESSAIRE, ELLE PEUT RÉPARER LE PRODUIT MOYENNANT DES
FRAIS NOMINAU POUR LE CLIENT OU REMPLACER LEDIT PRODUIT. LA SEULE RESPONSABILITÉ DU
RETOUR PRÉPAYÉ À SMARTPOOL INCOMBE AU CLIENT; TOUS LES PRODUITS RÉPARÉS OU REMPLACÉS
SERONT RENVOYÉS AU FRAIS DU PROPRIÉTAIRE.
NULLE PERSONNE, PHYSIQUE OU MORALE, N’EST AUTORISÉE À FAIRE DES REPRÉSENTATIONS OU À
CONTRACTER DES OBLIGATIONS AU NOM DE SMARTPOOL INC., SAUF TEL QUE STIPULÉ DANS LES
PRÉSENTES. IL EST E PRESSÉMENT ENTENDU QUE LES RECOURS FORMULÉS DANS CETTE GARANTIE
SONT LES RECOURS E CLUSIFS À LA DISPOSITION DE L’ACHETEUR; CETTE GARANTIE COMPREND LE
CONTRAT COMPLET ET ENTIER ENTRE SMARTPOOL INC. ET L’ACHETEUR. CETTE GARANTIE STIPULE LES
SEULES OBLIGATIONS DE SMARTPOOL INC.À L’ÉGARD DE CE PRODUIT; IL N’E ISTE AUCUNE GARANTIE
EN DEHORS DE LA DESCRIPTION FORMULÉE DANS LES PRÉSENTES.
Étapes à suivre pour présenter une réclamation :
Appelez le 1 (732) 730-9880 pour ouvrir un dossier de réclamation.
Vous recevrez des instructions complètes dans les 10 jours qui suivent.
Veuillez allouer de deux à quatre semaines pour le règlement de la réclamation.
Si vous ne recevez pas votre produit dans les six semaines qui suivent, appelez le service de la garantie
SmartPool, du lundi au vendredi, entre 13 h et 16 h (HE), au 1 (732) 730-9880.
Cette garantie donne des droits légaux spécifiques à l’acheteur d’origine. Il se peut que vous jouissiez
d’autres droits selon votre province de résidence.

2.0 Mise en marche
L’unité peut être en mise en
marche pendant 3 heures
ou 6 heures et s’éteindra
automatiquement.
2.1 Tournez le bouton vers la
gauche pour 3 heures ou
vers la droite pour 6
heures.
2.2 Pressez le bouton de
caoutchouc noir pour
mettre l’unité en marche.
Pressez de nouveau pour
l’éteindre.
2.3 Enclenchez le filtre de
couleur sur le couvercle
clair.
SmartPool Inc.
687 Prospect Street
Lakewood NJ 08701
Tel: (732) 730-9880
2.2
3 h
6 h
2.1
5

1.6
1.7
1.8
1.5 Placez l’unité de contrôle
sur le support de métal.
Engagez les deux trous de
serrure à l’endos de l’unité
de contrôle sur les deux
montants sur le support de
métal.
1.6 Poussez l’unité de contrôle
vers l’avant jusqu’à ce qu’elle arrête.
1.7 Attachez la pièce de plastique à
l’extrémité du support de métal pour
tenir l’unité de contrôle en place.
Cette píèce de plastique n’est pas
symétrique et la plus petite
ouverture devrait faire face
vers l’extérieur.
1.8 Attachez la housse du fil au
haut du support de métal.
Fianalement, serrez toutes
les vis y compris les pinces
en “U”.
1.9 Si vous désirez couvrir le fil
qui méne au transformateur,
vous pouvez utiliser les 4
sections de la housse du fil.
Attachez la pièce inférieure
au patio avec de la colle résistante à l’eau tel que de la
silicone (non incluse)
1.9
1.9
4

1.0 Installation
L’unité est conçue pour être installée sur une piscine
creusée existante en utilisant le nécessaire pour patio.
Le support d’acier inoxydable enduit de plusieurs
couches de poudre cuite
peut être, soit verrouillé
sur le patio ou par
<Dual-Lock> de 3M.
1.1 Si vous utilisez les
tampons <Dual-Lock>,
peignez le patio avec
une peinture résistante à
l’eau pour sceller les
trous poreux et pour
obtenir une surface lisse
où les tampons y seront
installés.
1.2 Si le patio a un rebord
incliné, attachez les deux
pièces de plastique carré
à l’extrémité du support
de métal pour le mettre
de niveau.
1.3 Attachez les 4 piéces du
<Dual-Lock> 3M sous le
support de métal et les 4
autres pièces sur le patio
peint.
1.4
Utilisez
les
deux
pinces
de
plastique
en “U”
pour tenir l’unité sur le support de
métal. Ne pas serrez les vis.
1.5
1.4
1.3
1.1
1.2
3

SÉCURITÉ
Ce produit est conforme aux normes applicables établies par Underwriters
Laboratories, norme 676, Intertek esting Services, ainsi que les normes
d’utilisation dans le monde entier, ou les dépasse. L’appareil utilise une faible
énergie de 12 V (équivalent d’une pile de 12 V), incorpore de multiples niveaux de
sécurité redondante, est construit de matériaux approuvés et est assemblé dans
des installations inspectées par des agences compétentes. Veuillez suivre ces
directives pour plus de protection :
2
!
AVERTISSEMENT :pour réduire le risque d’incendie, de choc électrique,
de blessures ou de dommages à votre produit ou aux nageurs :
Ne pas utiliser l’unité si elle est endommagée de quelque façon que ce soit.
Utiliser ce produit uniquement tel que prévu et tel que décrit dans ce manuel.
Pour fonctionner convenablement, l’unité doit être submergée.
Brancher uniquement dans des prises de 100V protégées par un interrupteur de
défaut à la terre.
S’assurer que la lampe NightLighter est débranchée de sa source d’alimentation
électrique avant de remplacer l’ampoule ou la lentille ou d’effectuer tout autre entretien.
Pour éviter le risque de choc électrique, ne pas placer le transformateur dans l’eau
ou dans un autre liquide.
Pour éviter tout dommage au transformateur et à son cordon, ne jamais transporter
le transformateur par son cordon, et ne jamais tirer brusquement sur le cordon
pour le débrancher d’une prise. irer plutôt sur la fiche elle-même pour la retirer
d’une prise. Ne jamais tirer le cordon à travers les rebords coupants.
Ne pas faire fonctionner l’appareil si le cordon ou le transformateur est endommagé.
Débrancher le transformateur de la prise lorsqu’il n’est pas en service.
Si la lampe ne fonctionne pas convenablement, ou si elle est tombée ou
endommagée de quelque façon que ce soit, communiquer avec le service à la
clientèle SmartPool au (732) 730-9880 avant d’utiliser l’appareil.
NE PAS UTILISER DE RALLONGES ÉLECTRIQUES, QUI PEUVENT CAUSER DES
BLESSURES OU LA MORT.
Le seul et unique but de ce produit est de servir comme éclairage sous l’eau d’une
piscine creusée; toute modification ou autre utilisation rendra la garantie caduque.
!
!
!
!
!
!
!
!
!
!
!
!

NL55
Installation/Operation Manual
Sècuritè . . . . . . . . . . . . . . . . . . . . . . . . .Pag 2
Installation . . . . . . . . . . . . . . . . . . . . . . .Pag 3
Mis n march . . . . . . . . . . . . . . . . . . .Pag 5
Garanti . . . . . . . . . . . . . . . . . . . . . . . . .Pag 6
Table of contents
Other Nitelighter Lighting Equipment manuals
Popular Lighting Equipment manuals by other brands
Lightolier
Lightolier MIC100 specification
Whelen Engineering Company
Whelen Engineering Company L22 LED Beacon installation guide

Clas Ohlson
Clas Ohlson LR-450036 quick start guide
Prilux
Prilux Arisa TOP4 quick start guide
Sygonix
Sygonix 1437987 operating instructions
Chauvet
Chauvet Line Danser LED user manual
Glos
Glos RETRO Series installation manual
Daniamant
Daniamant SL-450 Installation and maintenance instructions
PR Lighting
PR Lighting XLED 590 user guide
Dexter Laundry
Dexter Laundry SPIKE manual
Lightolier
Lightolier Lighting Systems IS_PTS5-6-8 Assembly and installation instructions
SCANGRIP
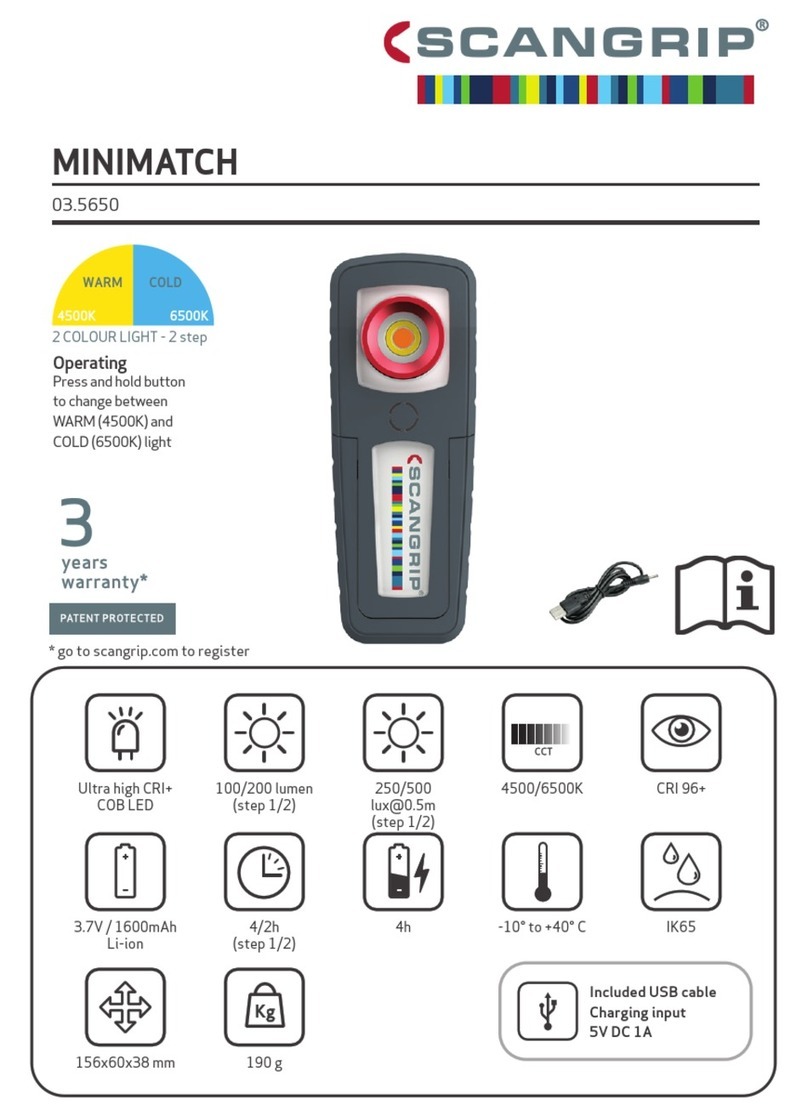
SCANGRIP MINIMATCH quick start guide
