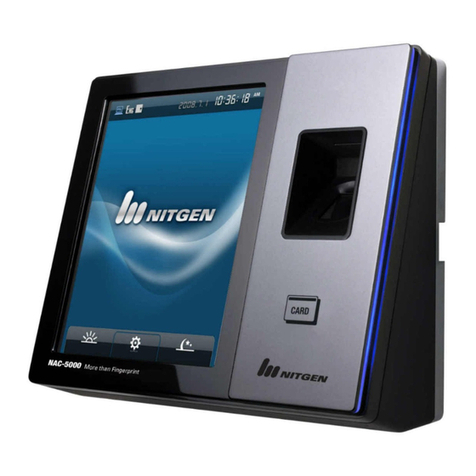
Nitgen NAC-3000 User manual


-2-
ⓒCopyright 2003, NITGEN Co., Ltd.
All rights reserved
To Contact Us
Tel. 82-2-3415-1800
Fax. 82-2-3415-1601
URL : http://www.nitgen.com
Features and specifications are subject to change withou
t notice. No part
of this guide may be copied or reproduced for any purpose without the
prior written authorization from NITGEN.
NITGEN holds the copyright on the brands NITGEN and NITGEN logo.

-3-
Table of Contents
Chapter 1 Before You Start
1.1 About the product ------------------------------------------------5
1.2 Features and specifications ----------------------------------- 8
1.3 Product details ---------------------------------------------------- 11
1.4 LCD screen -------------------------------------------------------- 14
1.5 How to input fingerprint ----------------------------------------- 16
1.6 Authentication types --------------------------------------------- 17
Chapter 2 Environment Setup
2.1 Menu configuration ------------------------------------------------ 21
2.2 Fingerprint Option -------------------------------------------------- 24
2.3 UI (User Interface) Option ---------------------------------------- 30
2.4 Door Option ---------------------------------------------------------- 32
2.5 System Option ------------------------------------------------------ 34
2.6 Gate Permission ---------------------------------------------------- 39
2.7 Network --------------------------------------------------------------- 42
2.8 Factory Initialization ----------------------------------------------- 46
Chapter 3 How to Use the Terminal
3.1 User Manager ------------------------------------------------------- 50
3.2 Information ----------------------------------------------------------- 64
Appendix ⅠNetwork Connection Problems ------------------------ 66
Appendix ⅡTerminal Initialization Problems ----------------------- 69
Appendix ⅢSound Modification Guide ------------------------------ 70
Appendix ⅣDirect Sunlight problems -------------------------------- 71
Appendix ⅤFAQ (Frequently Asked Question) -------------------- 73

-4-
Chapter 1
Before You Start
1.1 About the product -5
1.2 Features and specifications -8
1.3 Product details -11
1.4 LCD screen -14
1.5 How to input fingerprint -16
1.6 Authentication types -17

-5-
1.1 About the product
nOverview
Biometric systems are recently used in various authentication
systems. They are increasingly used not only in environments that
require high level of security but also in many other places
because they are convenient and economical. Among various
biometric systems, the fingerprint recognition system takes up
most of the market because it is easy to use as well as economical
and capable of developing various types of applications. NITGEN,
a global leader in the fingerprint recognition industry, provides
various fingerprint authentication solutions such as PC security,
knowledge management, vaulting service, access control,
electronic approval, and financial payment. NITGEN actively
responds to customer needs through continuous research,
development and quality management.
The NITGEN access control system is an advanced product in
which core technologies of NITGEN recognized worldwide such as
fingerprint recognition algorithm, optical sensors, embedded
design technology, and software application technology are
organically combined and optimized. In addition, unlike other
existing access control systems that use passwords or ID cards
only, it is free from such risks as loss of password and abuse or
duplication of card, providing excellent convenience and security. It
is designed to maximize operational efficiency, enabling integrated
monitoring and systematic management of terminals which have
been operated independently on a remote location via the network.
The NITGEN access control system can use various combinations
of RF card, password and fingerprint authentication. Designed to
meet both universal uses and specific uses, it can be used in
various customer environments including enterprises and

-6-
government agencies due to such convenient built-in features as
group ID, short ID, 1:N authentication, interphone and voice
instruction.
This manual describes how to use NITGEN’s access control
terminal (NAC-3000).
nSystem configuration
Component Main Features
Server PC
1. Server software: Access Sever
2. Terminal communication and log data
collection
3. User information and log database
4. Performing authentication
Client PC
1. Client software: Remote Manager/Remote
Monitor
2. User registration and management
3. Monitoring terminal status and events
Network
Server PC
Terminal
Client PC
NAC-3000
Access Server
Remote Manager
Remote Monitor

-7-
Terminal
(NAC-3000) 1. Performing user authentication
2. Door control
You can use all features with the NITGEN access control terminal
(NAC-3000) only. If you use it with the management programs
(Access Server, Remote Manager and Remote Monitor ) in network
environment, you can manage a number of terminals more easily
and efficiently. You can use the server and client software in one
PC.

-8-
1.2 Features and specifications
nProduct features
The NITGEN access control system (NAC-3000) has the following
features:
①Control and manage access of a large number of people.
②Combine several authentication types (fingerprint, password,
and RF card).
③Control multiple access control terminals via the network.
④Manage remote systems easily (running server and client PCs
independently).
⑤Provide various additional features including user access
lookup and interphone.
⑥Real-time monitoring of access status.
⑦Access control by period and time.
⑧SDK (Software Developer’s Kit) is provided for development of
various applications such as time & attendance (not supplied).
⑨High speed 1:N authentication is available.
⑩Enhanced user convenience (short ID/group ID authentication
and Auto-on).
nSystem specifications (when connected with the
server)
Section Content
Access terminal Connection allowed up to 255 terminals
Remote
management Simultaneous server access up to 8

-9-
Number of users
to register 5,000 users (2 fingerprints per 1 user)
10,000 users (1 fingerprint per 1 user)
Network 10 Mbps, TCP/IP
Authentication
type Fingerprint, password and RF card
(optional)
nTerminal specifications
Section
Content
Size 128 * 64 Dots LCD
Display Language English, Korean
Model OPP01
Type Optical
Resolution
500 DPI
Sensor
Additional Auto on / Latent Image Check
Speed
1:1 mode: T < 1sec.
1:N mode
-Avg. 2.5sec(1,000FP, Server)
-Avg. 2sec (500FP, Terminal)
-Avg. 1sec (300FP, Terminal)
※PentiumⅣ1GHz, 512MB RAM
Authentication
Algorithm FRR: 0.1 % or less, FAR:
0.001 % or less
Number of
users to
register Terminal 2,000 users (2 FP per 1 user)
4,000 users (1 FP 1 user)
TCP/IP 10 base-T EthernetCommunication
RS-232C Max 115200 bps (optional)

-10 -
Wiegand 26 bit, 34 bit mode(output only)
※ID Length : 4digit
Case 135 (W)*45 (L)*202.5 (H) mm
Size Bracket 102.4(W)*26.6(L)*157.5(H) mm
Supported
doors Deadbolt / Strike / EM Lock / Auto door
Power Adaptor Input: AC 100 V ~ 240 V, 50/60
Hz
Output: DC 12 V, 3 A
Interphone
MIC and Speaker included
Voice instruction (English / Korean)
Downloading Logo / Firmware
Additional
features
Variable ID length (4 ~ 15 digit)
RF Module (HID)
Option UPS (12V / 2.9Ah)
Storage -25℃~ 65℃
Temperature Operation -20℃~ 60℃(With no icing or
condensation)
Storage 15% ~ 90% RH
Humidity Operation 25% ~ 85% RH

-11-
1.3 Product details
4. LED lamps: They indicate the terminal operation status.
The below table shows what they mean from the left:
Lamp Operation Status Color
Power Power status. The LED is on while the
power is supplied. Red
Network
Network connection status. The LED is
on while connected to the network. Green
Door Open/close status of the door. The LED
is on while the door is open. Green
②LCD screen: It displays menus and options for all operations.
③Keypad: It is used to enter user ID or set up environment. For
each key description, please see the following table:
①
②
③
⑦
⑤
④
⑥
⑧

-12 -
Keys Description
0 ~ 9 Number keys.
*, # Direction keys. Move the cursor up and down
when selecting menu items.
*(Backward), # (Forward)
Enter Press this key to complete such operation as ID
input or environment setup.
Cancel Delete the entered numbers one by one, or move
to the upper-level of the menu.
Call A guest can use it to talk to someone inside with
the interphone.
Menu Set or modify the settings.
F1 ~ F4
Define time & attendance features: arriving,
leaving, going out for outside duty and coming
back from outside duty. You can freely set the
function keys in accordance with the
requirements of the related software.
④Speaker: For voice instruction, interphone communication, and
alarms.
⑤Fingerprint input sensor: Put the fingerprint here.
⑥Auto-On switch: No keyboard operation is required. Fingerprint
is automatically read in when placing the
finger on the fingerprint input sensor.
⑦Microphone: It is connected to the internal interphone.
⑧Reset Switch : In case the terminal is halted during operation

-13-
cause of unknown reason, you can push this switch to reset terminal.

-14 -
1.4 LCD screen
nInitial screen
The initial screen of the terminal is as below. The icons in the
upper part of the LCD screen indicate the status of the terminal.
The logo in the middle of the screen can be defined by the
manager, and current date and time are displayed at bottom.
1 1
-JAN
09:25
:34
nInitial screen
The below table describes the icons in the LCD screen.
Icon Description
The door is connected to the door lock
device.
The door is open after the user
authentication is validated.
The display language is English.
The display language is Korean.
Terminal mode
SO (Stand Alone): All operations take place
in the terminal alone.
NS (Network Server): Authentication is done
in the server.
NL (Network Local): Authentication is done
in the terminal
and the log is saved in the

-15-
in the terminal and the log is saved in the
server.
The terminal is connected to the server.
The terminal is not connected to the server.

-16 -
1.5 How to input fingerprint
When you enroll and authenticate user fingerprint, do the
followings to avoid authentication error:
5. Press your finger evenly to maximize the input area. If
we say the weakest push as 0%, and the strongest
push as 100%, apply 50~70% of force.
②Make sure that the core of the fingerprint is at the center of the
fingerprint input window. In general, the core of the fingerprint is
on the same line as the lunula of the fingernail. So locate the
lunula of the fingernail at the center of the fingerprint input
window.

-17-
1.6 Authentication types
With the NITGEN access control system, you can use fingerprints,
passwords, and RF cards (optional) for authentication. Depending
on customer environment, you can use one of the following
authentication types as you need.
nFingerprint authentication
Use fingerprints to validate access authentication with the following
types:
•1:1 authentication
In this mode, enter apre-registered ID first and then a fingerprint.
The enrolled fingerprint corresponding to the ID will be compared
to the entered fingerprint on a 1:1 basis. The 1:1 authentication
type takes a short time regardless of the number of users. There
is no need to make any special settings in the system. After
entering the ID, enter the fingerprint to perform authentication.
•1:N authentication
Only enrolled fingerprints are used for authentication. Though the
authentication procedure is simple, this method will take a little
longer than the 1:1 authentication if there are many users. There
is no need to make any special settings in the system. But
because there were many users, so it takes too much time to
authenticate, use ‘1:N Timeout’. The user who wasn’t
authenticated in timeout will have fail message. Refer to the ‘1:N
Timeout’for more information.
•Short ID (SID) authentication
The user ID can be 4 –15 digits long depending on the initial
setting. This method simplifies ID input procedure. Instead of
entering the entire registered ID, you can enter only the first part

-18 -
of the ID for authentication. For example, if the user ID is 1234
567, enter 12 only and then the fingerprint. Then the system will
perform 1:N authentication for all Ids that start with 12xxxxx.
There is no need to make any special settings in the system.
•Group authentication
For group authentication, you can specify a group ID of 1 –4 digits
long for each user group. You will enter a group ID and a
fingerprint for authentication. For example, you can use the unit
number for public housing like an apartment as a group ID. You
can specify a group ID when you register a user. Unlike other
methods, you must enter the group ID, and then press F1
before entering the fingerprint to perform group authentication.
•T/A authentication (Time & attendance)
Using the function keys (F1~F4), you can use the T/A mode. If you
press any function key before authentication, a T/A authentication
log will be saved. The T/A authentication log has the ID and the
function key code. For example, if your ID is 1234 and you press
the F1 key before authentication, the authentication log would be
1234+F1.
nPassword authentication
A password of 4 –8 digits long is used to validate access
authentication. You can use this method in such a special case as
when the fingerprints are damaged.
nRF card authentication (optional)
The RF card of a user is used to identify the user. You can register
the RF card number to the system in advance to provide against
loss or theft of the RF card.
nAuto T&A (time & attendance) Mode

-19-
In this mode, 1:N identification will give you log data of the T&A
without pressing the function Keys (F1~F4). In Auto T&A Mode,
the initial screen will be change as below. In this mode, even
though you try just 1:N identification, you’ll successfully get the log
data that you want. You don’t have to press any function key.
F1
INPUT ID
:
11-JUL 09:25:34
1) How to get in the Auto T&A Mode
At first, you should setect the T&A mode in the menu of the
Function Mode and go to the initial screen. And then press the
function key you want for more than 4 second.
2) How to get out of the Auto T&A Mode
Press the cancel key for more than 1 second.
* TIP : You don’t have to input group ID during user registing,
if a terminal is used in T&A Mode.

-20 -
Chapter 2
Environment Setup
2.1 Menu Configuration -21
2.2 Fingerprint Option -24
2.3 UI Option -30
2.4 Door Option -32
2.5 System Option -34
2.6 Gate Permission -39
2.7 Network -42
2.8 Factory Initialization -46
Other manuals for NAC-3000
2
Table of contents
Other Nitgen Security System manuals
Popular Security System manuals by other brands
LifeFone
LifeFone VIP flex manual
Sprue
Sprue CO-FA-9B user manual
Spectare
Spectare SP 06241 user guide
Bosch
Bosch Security Escort SE2000 Series Training manual
Upgrading everyday security
Upgrading everyday security iconnect Quick start installation guide
Edwards Signaling
Edwards Signaling Adaptatone 5530M-485 Series installation instructions
