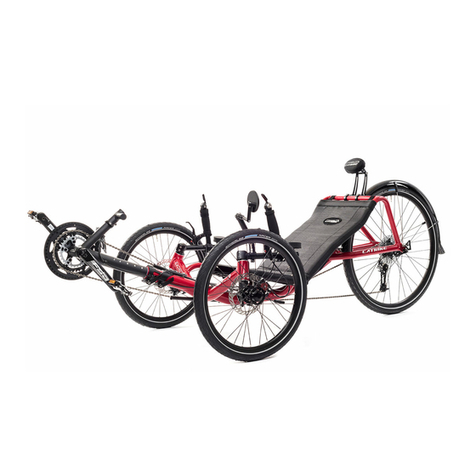
Nitrox Explore 250W User manual

Attention: Dear users, according to the relevant national regulations,please do not use electric bicycles before carefully reading the
instructions and understanding the performance of electric bicycles. And please property keep this manual and the product certificate of the vehicle.
Electric Bicycle Instruction Manual
Nitrox Explore 250W

Important Safety Information
Parts Identification
Display screen recognition
Configuration Table
Pre-Ride Safety Checklist
Assembly Instructions
Guide to Electric bike installation
Gears Operation
Charging Procedure
Battery Charging Information
Maintenance
Troubleshooting
Safety Notes
1
2
3
5
6
9
10
14
15
17
18
19
21
Table of Contents

Helmets significantly reduce the rate of head injuries.Always wear a helmet that complies with your state laws when riding the E-bike .Check
with your local police department for requirements in your community.Make yourself more visible by wearing bright reflective clothing. Keep
your reflectors clean and eye protection Also check your state laws concerning other protective gear that may be required when riding fhe
E-bike.
Electric bikes can be dangerous to use. The user or consumer assumes all risk of personal injuries, damage, or failure of the bicycle or system and all
other losses or damages to themselves and others and to any property arising as a result of using the bicycle. It is important for you to understand your
new bicycle. By reading this manual before you go out on your first ride, you'll know how to get better performance, comfort, and enjoyment from your
new bicycle. It is also important that your first ride on your new bicycle is taken in a controlled environment, away from cars, obstacles, and other
cyclists.
Important Safety Information
WARNING:
1. Always Wear A Helmet
Your new E-bike incoiporates many features and functions that have never been built into a bicycle before. Read this manual thoroughly to
understand how those features enhance your riding pleasure and safety.
2. Know Your E-bike
Take it slow until you are miliar with the riding conditions that you encounter. Be especially careful in wet conditions as traction can be
greatly reduced and brakes becoming less effective.Never ride faster than conditions warrant or beyond your riding abilities.Remember that
alcohol,drugs, fatigue and inattention can significantly reduce your ability to make good judgement and safely.
3. Ride Within Your Limits
For your safety and enjoyment,and to insure a long life for your E-bike. Inspect and maintain your E-bike regularly.Follow the inspection and
maintenance guidelines beginning on page 3. Check critical safety equipment before each and every ride.
4. Keep Your E-bike In Safe Condition
1

Parts Identification
Display
Handlebar
Power button
Speed mode
T
LED Headlight
Front fender
Disc brake rotor
ire
Front Fork
Battery
Pedals
Chain Crank
Tire
Derailleur
Bike motor
Rear fender
Light
Controller
Seat
Bike Frame
2
Gear adjustment
Gear adjustment

3

Configuration Table
Item Name
Vehicle Size
Packing Size
Color
Frame Material
Net Weight
Gross Weight
Max. Support Weight
Max Speed
Inner Tire Pressure
Model No.
Charger
Battery
Brake System
Tire Size
Pedal
Product specification
164*68*115(CM)
142.5*27*86.5(CM)
Black
Steel
Approx.33.3kg(73.41lb)
Approx.41.8kg(92.15"lb)
120kg(264.55lb)
25KM/H (pls contact with seller if you have questions )
20PSI / 140KPA
AC-DC 54.6V 2A 100-240V
V8F 2.0
AC DC5.5X2.1
48V15AH
Front and back brake
20x4.0
Aluminum alloy pedal
4

Instructions before riding
Safety Check
1. Brakes
2. Wheels and Tires
3. Steering
4. Chain
5.Bearings
Basic Steps
Notice:Before every riding,and after every 25-45 miles,we advise following the pre-riding safety checklist in the table below.
5

6. Cranks and Pedals
7. Derailleurs
8. Frame, Fork,
and Seat
9. Motor Drive
Assembly and Throttle
10. Battery
11. Electrical Cables
6

12. Accessories
Your cables,spokes,and chain will stretch after an initial break-in period of 50-100 mile (80-160km),and bolted connections can loosen.Always have a
certified,reputable be mechanic perform on your E-bike after your initial break-in period of 50-100 mile (80-160km) (depending on riding conditions such as
total weight,riding characteristics,and terrain).Regular inspections and tune-ups are particularly important for ensuring that your bike remains safe and fun
to ride.
7

Assembly Instructions
The following assembly steps are only a general guide to assist in the assembly of your bike from electric bikes and is not a complete or comprehensive
manual of all aspects of assembly, maintenance, and repair.
We recommend you consult a certified, reputable bike mechanic to assist in the assembly, repair, and maintenance of your bike.
Please recycle packaging materials especially cardboard and foam (all #6 EPS foam).
Ensure all pieces are included in the package including:
• V8FE-bike
• Manual(s)
• Assembly Tool kit
• Front fender
• Front Wheel
• Handlebar
• Handlebar holder
• Charger
• Pedals (marked left and right)
• Battery Keys (two, identical with number)
Step 1: Unpack e-bike from the carton and carefully set out all contents of the box. Remove packaging material protecting the bike frame and
components.
8

Guide to vehicle installation
1. Check whether the outer carton
is complete and unpack it.
2. Take out the bicycle frame. 3. Take out the accessories and
tooling kit.
4. Use the M5 Allen wrench to
unscrew the screw.
6. Pull out a fixed shelf.5. Unscrew the screw and remove
the trim cover. 9

7. Put the steering in front.8. Install retainer and top cover
and tighten all screws.
10. Install the front and tighten
all the screws.
11. Take out the wheels and
accessories.
12. Install the wheels and pay attention to
the order of the accessories
9. Loosen the screws and
remove the lid.
10

13. Tighten the screws on both
sides.
14. Install the fender and tighten
all the screws.
15. R for Right Pedal and L for
Left Pedal.
16. Install the pedal and tighten
the screw.
17. Fill the tires with air. 18. Install the dashboard and
tighten all screws. 11

Note: It is suggested to check other screws in the frame. If they are loose, you need to tighten them with tools.
19. Connect the ports of cables
according to the direction of
arrow.
20. Press power button for 3
seconds around to turn it on.
12

Gear Operation
AVOID THESE GEARS!
Multi speed bicycles can have internal or derailleur gear systems. WARINNG Improp-
er shifting can result in the chain jamming,or becoming derailed resulting in loss of
control or a crash. Always be sure the chain is fully engaged in the desired gear
before pedaling hard.
To shift properly,pedal the bicycle with little pressure on the pedals, and move the
shifter (1) gear at a time,ensuring that the chain is fully engaged in that gear before
applying more pressure on the pedals. For bicycles with 3 front chain rings;avoid
"Cross Chaining",which is the position when the chain is in the smallest cog in the
rear combined with the inner or smallest chain ring in the front or the largest cog in the
rear and the outer or largest chain ring in the front.These gear positions put the chain
at the most extreme angle and can cause premature wear to the drive train.Bicycles
with 3 front chain rings have enough gear "overlaps" that these gears are not needed.
Avoid shifting while standing up on the pedals or under load.
13

Charging Procedure
1. Remove the rubber cover on the charging port on the opposite side of the battery from the key switch.
2. With the battery on or off the bike, place the charger in a flat, secure place, and connect the DC output plug from the charger (round barrel
connector) to the charging port on the side of the battery.
3. Plug the charger into the outlet, then the charging port. Connect the charger input plug (100-240-volt plug) to the power outlet. Charging should
initiate and will be indicated by the LED charge status light on the charger turning red.
4. Unplug the charger from the outlet, then the charging port. Once fully charged indicated by the charging indicator light turning green, unplug the
charger &om the wall outlet first and proceed to remove the charger.
14

Before charging make sure that charger light faces upwards; Full charge normally takes 3-7 hours; Charge battery in clean and safe place
and do not over charge.
Red light means the battery is charging. Green light means the battery is full
charged.
Attention:
15

Battery Charging Information
Always charge your battery in temperatures between 50 °F - 77 °F (10 °C - 25 °C) and ensure the battery and charger are not damaged before initiating
charge. If you notice anything unusual while charging, please discontinue charging and use of the bike and contact for help. Charging the battery fully
normally takes 3-7 hours. In rare cases, it may take longer to allow the battery management system to balance the battery, particularly when the bike is
new or after long periods of storage.
The battery can be recharged on or off the bike.
Do not charge the battery for more than 12 hours at a time or leave a charging battery unattended.
Ensure the lights face upwards when using the charger. The charge indicator lights on the charger will stay red while the battery charges and one will turn
green when charge is complete.
Always charge in dry, indoor locations away from direct sunlight, dirt, or debris. Charge in a clear area away from potential to trip on the charging cords or
for damage to occur to the bike, battery, or charging equipment while parked and/or charging. Do not use with the charger inverted, which can inhibit
cooling and reduce charger lifespan.
The battery should be recharged after each use, so it is ready to go the full range per charge next ride. There is no memory effect, so charging the battery
after short rides will not cause damage.
Ensure the battery is turned off whenever it is being removed or off the bike. Avoid damaging the exposed connector terminals and keep them clear of
debris.
Do not touch the "+" and terminal contacts on the bottom of the battery when the battery is removed from the bike.
16

Maintenance
To ensure safe riding conditions you must properly maintain your bike from e-bikes. Follow these basic guidelines and see a certified, reputable bike
mechanic at regular intervals to ensure your bike is safe for use and fun to ride.
1. Properly maintain batteries by keeping them fully charged when between uses of up to two weeks apart. See Long-Term Battery Storage section of
manual for information on storing the battery for longer than two weeks between rides.
2. Never immerse or submerge the bike or any components in water or liquid as the electrical system may be damaged.
3. Periodically check wiring and connectors to ensure there is no damage and the connectors are secure.
4. To clean, wipe the frame with a damp cloth. If needed, apply a mild non-corrosive detergent mixture to the damp cloth and wipe the frame. Dry by
wiping with a clean, dry cloth.
5. Store under shelter; avoid leaving the bike in the rain or exposed to corrosive materials. If exposed to rain, dry your bike afterwards and apply anti-rust
treatment to chain and other unpainted steel surfaces.
6. Riding on the beach or in coastal areas exposes your bike to salt, which is very corrosive. Wipe down your bike frequently and wipe or spray all
unpainted parts with anti-rust treatment. Damage from corrosion is not covered under warranty so special care should be given to extend the life of your
bike when used in coastal areas or areas with salty air or water.
7. If the hub and bottom bracket bearings have been submerged in water or liquid, they should be taken out and re-greased. This will prevent accelerat-
ed bearing deterioration.
8. If the paint has become scratched or chipped in the metal, use touch up paint to prevent rust. Clear nail polish can also be used as a preventative
measure.
9. Regularly clean and lubricate all moving parts, tighten components, and adjust as required.
17

Troubleshooting
Symptoms Possible Causes Most Common Solutions
1 It doesn’t work
Reduced range
2
3
4
1. Insufficient battery power
2. Faulty connections
3. Battery not fully seated in tray
4. Improper turn on sequence
5. Brakes are applied
1. Insufficient battery power
2. Loose or damaged throttle
1. Charge or replace battery
2. Replace throttle
1. Loose wiring
2. Loose or damaged throttle
3. Loose or damaged motor plug wire
4. Damaged motor
1. Repair and or reconnect
2. Tighten or replace
3. Secure or replace
4. Repair or replace
1. Low tire pressure
2. Low or faulty battery
3. Driving with too many hills,headwind, braking,
and/or excessive load
4. Battery discharged for long period of time without
regular charges(aged or damaged)
Brakes rubbing
1. Adjust tire pressure
2. Check connections or charge battery
3. Assist with pedals or adjust route
4. Replace the battery
5. Adjust the brakes
1. Charge the battery
2. Clean and repair connectors
3. Install battery correctly
4. Turn on bike with proper sequence
5. Disengage brakes
When powered on the
motor does not respond
Irregular acceleration and/
or reduced top speed
18
Table of contents
Other Nitrox Bicycle manuals
