Nitto Kohki MYTON MYG-70 User manual

Professional tool Pneumatic Grinder
Model: MYG-70
The end tool in the drawing is not included with the tool.
[Specifications]
Model
MYG-70
Maximum operating pressure MPa 0.6
Air consumption (No load) m3/min 0.70
Rated speed (No load) min-1 7600
Depressed Center Grinding Wheel outer diameter mm (inch) 180 (7")
Depressed Center Grinding Wheel hole diameter mm (inch) 22.2 (7/8")
Mass (weight) kg 2.5
Sound pressure level *1 dB (A) 92
Sound power level *1 dB (A) 103
Vibration level *2 m/s23.2 (Main unit)
8.2 (Handle)
Thread size of Air Inlet Rc 3/8
*1 Based on the ISO15744 measurement standard.
*2 Based on the 3 axes combined value measurement standard of the
ISO28927-1 of the hand-held tool frequency correction vibration
acceleration effective value.
Please read manual carefully before you attempt to use your tool so that you may use it
properly and safely.
Keep the manual handy - so you can use it whenever necessary.
• Due to continuous product development/improvement, the specifications and configurations in this
document are subject to change without prior notice.
TQ15277-0 08/2017
INSTRUCTION
MANUAL
Manufactured by.
NITTO KOHKI CO., LTD. 9-4, Nakaikegami 2-chome, Ohta-ku, Tokyo, 146-8555, Japan
Tel : +81-3-3755-1111 Fax : +81-3-3753-8791
(Original Instructions)
TQ15277-0MYG-70en.indbi 2017/08/0713:23:44

EN
Instructions
Thank you very much for your purchase of this NITTO KOHKI product.
Before using your tool, please read this manual carefully so that you may use it properly to get the most out of it.
Please keep the manual handy - so you can use it whenever necessary.
English : Please ask your dealer or distributor for instruction manual in local language(s).
German : Bitte fragen Sie lhren Händler nach eine Betriebsanleitung in Landessprache.
French : S'il vous plait, veuillez demandez á votre foumisseur de manuel instruction en langue locale.
Spanish : Por favor, cantacte con su distribuidor para el manual de instrucciones en español.
Portuguese : Por favor pessa ao seo agente ou distribuidor o manual de instrucces ih linguagen local.
Italian : Per Manuale Istruzioni in lingua locale Vi preghiamo di rivolgervi al rivenditore o distributore.
Dutch : Vraag uw handelaar om een nederladstalige gebruiksaanwijzing.
Swedish : Be er lokala Åtreförsäljare eller distributör om manualer pá svenska.
Danish : Venligst henvend Dem til den danske distributør for instructions manualer.
Polish : Prosze pytac swojego dealera lub dystrybutora o instrukcje obslugi w jezyku localnym.
中文 : 請向當地供應商或經銷商詢問中文使用說明書
The following Safety notations are used throughout the manual to highlight safety precautions for the user and for the
tool.
WARNING: Indicates a potentially hazardous situation which, if not avoided by following the
instructions given, could result in death or serious injury.
CAUTION: Indicates a potentially hazardous situation which, if not avoided by following the
instructions given, could result in injury or material damage.
* Please note, however, that failure to observe safety precautions under the “ CAUTION” category could result in
a serious occurrence depending on the situation.
Please observe all safety precautions in the manual.
CAUTION: Important precautions for tool setup, operation and maintenance.
About pictograms
WARNING: It might be dangerous to operate the tool if the instructions supplied are not followed.
Using this tool improperly could result in serious injury. Read the instruction manual before using.
Always wear suitable eye protection.
Always wear suitable hearing protection.
Always wear respiratory protective equipment (PPE).
TQ15277-0MYG-70en.indbii 2017/08/0713:23:45

1
EN
California Proposition 65
WARNING
Some dust created by power sanding, sawing, grinding, drilling, and other construction activities contains
chemicals known [to the State of California] to cause cancer birth defects or other reproductive harm.
Some examples of these chemicals are:
Lead from lead-based paints,
Crystalline silica from bricks and cement and other masonry products, and
Arsenic and chromium from chemically-treated lumber.
Your risk from these exposures varies, depending on how often you do this type of work. To reduce your exposure
to these chemicals: work in a well ventilated area, and work with approved safety equipment, such as those dust
masks that are specially designed to filter out microscopic particles.
Contents
Precautions on Use (Make sure to follow the
instructions given)................................................. 2
General Power Tool Safety Warnings ...................2
General Pneumatic Tool Safety Warnings ............5
Safety Warnings for PNEUMATIC GRINDER.......5
Product Specific Safety Rules.............................10
1 Application ....................................................... 12
2 Checking Inside the Package.......................... 12
3 Part Names...................................................... 13
4 Air Supply ........................................................ 14
5 Preparation...................................................... 15
Attaching the Wheel Guard Ass'y .......................15
Attaching the Handle Ass'y .................................16
Replacing the Grinding Wheel ............................17
Start and stop......................................................18
Adjusting the rotation speed ...............................18
6 How to Use...................................................... 19
Grinding work......................................................19
7 Maintenance and Inspection............................ 20
Storing the tool....................................................20
Storing the Grinding Wheel.................................20
Maintenance and Inspection...............................20
Disposal ..............................................................21
8 Exploded View/Parts List................................. 22
MYG-70 Exploded View/Parts List......................22
TQ15277-0MYG-70en.indb1 2017/08/0713:23:45

2
EN
Precautions on Use (Make sure to follow the instructions given)
Before using your tool, to avoid personal injury always take the basic precautions explained in later sections.
General Power Tool Safety Warnings
Personal safety
WARNING
Dress properly.
Do not wear loose clothing or jewelry. There is a
danger of being caught in moving parts. Wear a
pair of non-slip shoes. If your hair is long, wear a
protective hair covering to contain your hair.
Always wear eye protection.
Corrective glasses are not considered eye
protection. Always wear appropriate eye
protection.
Wear a dust mask.
When dust is generated in the workplace, wear a
dust mask.
Use a dust collector or dust collection
equipment correctly.
If a dust collector or dust collection equipment
are being used, check that these are connected
and used properly. Use of a dust collector can
reduce risk caused by dust.
When loud noise is generated in the workplace,
wear a hearing protection.
Do not overreach.
Keep proper footing and balance at all times.
Be on your guard when working.
Do not use the tool when you are tired.
When you use the tool, be sure about the handling method, how to work, and pay sufficient attention to the
surrounding environment.
Never touch the tip of moving parts when the tool is running.
Also, do not direct the tip of moving parts toward people or animals.
Be aware of tool vibration and recoil. Some tools can cause a considerable amount of vibration.
Depending on how the product is operated, the type of tool setting, and the length of operation, it could place a
tremendous burden on your hands, arms and body.
The tool could cause a vibration injury or tendonitis. Avoid long-term use and take appropriate breaks.
Consult a doctor if you experience any discomfort or pain while operating the tool.
Protective hair
covering
Dust mask
Work clothes
Safety shoes
Protective
goggles
Earplugs
TQ15277-0MYG-70en.indb2 2017/08/0713:23:45

3
EN
Work area safety
WARNING
Do not use the tool at home.
This is a professional tool (industrial or work tool for business). Do not bring the tool home and use it there.
Keep the work area clean.
Working in a messy work area or work table could cause an accident.
Be cautious about the work area.
Do not expose the tool to rain.
Do not use the tool in a damp or wet place.
Keep the work area well lit.
Do not operate the tool in an explosive atmosphere, such as in the
presence of flammable liquids (thinner, lacquer, gasoline, etc.) or
gas.
Do not let children come close to the work area.
Keep children and bystanders away while operating tool.
Some tools generate loud noise.
Check that the noise regulations of each area are complied with.
When work has to be done in high locations, make sure there is
nobody underneath the work area.
If the tool or material is dropped, it could cause an accident or
injury.
Before starting operation, make sure that there is no conduit,
water pipe or gas pipe by your work area.
If a tool touches a buried object, it could cause electrical shock or leakage, which could cause an accident.
Before starting to work
WARNING
Perform inspection before using the tool.
Before using the tool, check for loose screws on the tool and for damage on the protective cover or other parts,
and make sure that the tool operates normally and demonstrates prescribed functions.
Check the position adjustment and tightening status of moving parts, parts damage, attachment status, and all
other locations for issues that could affect operation.
For parts replacement and repair, follow the instructions indicated in the instruction manual.
If there are no instructions in the instruction manual, contact the retailer where you purchased the tool or the
nearest NITTO service member store.
Do not use the power tool if the switch does not turn it ON and OFF.
Make sure to properly attach the tip tool.
If the tip tool is not attached properly, there is a risk of jumping out or damage, which could result in injury.
After adjustment, be sure to remove tools such as spanners, wrenches, etc.
Use appropriate tools.
Do not force small tools to do the job of a heavy duty tool. Do not use tools for purposes not intended.
Do not use tools in an unreasonable manner.
When the specifications are followed, tools can be used efficiently and safely.
Secure workpieces.
Where possible use clamps or a vise to hold the work. It is safe to hold the workpieces by hand and both hands
can be used for operation.
TQ15277-0MYG-70en.indb3 2017/08/0713:23:45

4
EN
Handling tools
WARNING
Storing the tool
When the tool is not used, store the tool in a dry location. Also, store the tool out of the reach of children.
For some tools, the storage temperature and humidity are specified. Store the tool in an appropriate location.
Be cautious about how the tool is carried.
Do not carry the tool with your hand touching the operation switch.
Do not leave the tool while the tool is still running.
Do not leave the work area until you turn off the operating switch, remove the power source and the tool
completely stops.
Do not allow the following chemicals to come into contact with the tool, as parts could deteriorate.
Acetone, benzine, thinner, ketone, ether, trichloroethylene and other similar chemicals
Maintenance and Inspection
WARNING
Do not disassemble or alter the tool.
Using the tool after disassembling or remodeling it could cause an accident or injury.
Inspect tip tools and accessories.
Always inspect tip tools and accessories for damage or deterioration before attaching them to the tool.
If damage or deterioration is found, request repair from the retailer where you purchased the tool or the nearest
NITTO service member store.
Inspect for damaged sections.
Sufficiently check for damage on accessories or other parts, that the tool operates normally, and that work can
be performed appropriately.
If there are accessories or parts that have been damaged or could hinder work, request repair from the retailer
where you purchased the tool or the nearest NITTO service member store.
Request repair from a dedicated store.
For repair or replacement of parts, request service from the retailer where you purchased the tool or the nearest
NITTO service member store.
Repair requires special knowledge and skills. If repair is performed at a place other than a specialty store, the
tool may not demonstrate its full performance or it could lead to an accident or injury.
Request repair with the failed status kept intact. When requesting a repair, do not throw away damaged parts. It
could be important information for investigating the failure cause so do not change the status.
Use genuine parts.
If inappropriate parts are used, it could cause accident or injury.
Genuine parts are listed in the instruction manual or brochure. Inquire at the retailer where you purchased the
tool or the nearest NITTO service member store.
Do not remove the labels or plates on the tools.
If labels or plates are broken or peeling, for a replacement label or plate contact the retailer where you purchased
the tool or the nearest NITTO service member store.
Precautions on Use
TQ15277-0MYG-70en.indb4 2017/08/0713:23:45

5
EN
General Pneumatic Tool Safety Warnings
WARNING
Use the tool with proper air pressure.
If the air pressure is high, the rotation speed and reciprocation frequency become faster, causing damage such
as damage or accelerated wear. Also, unexpected accidents could occur.
Connect the tool to air piping.
In some factories, other than air piping, there may be other piping such as oxygen, nitrogen, gas, etc. Before
connecting to piping, make sure it is the correct piping.
Do not start the tool carelessly.
Turn off the operation switch, then attach the Connecting Hose to the tool.
When attaching, removing, and maintaining accessories, make sure to detach the Connecting Hose from the
tool.
Be cautious about exhaust.
Pneumatic tool exhaust contains oil and drainage, etc. Be careful about the exhaust direction so that the exhaust
does not directly hit people nearby.
Do not allow sources of electricity to touch the tool.
The pneumatic tool is not insulated against contact by electric sources. Because there is a risk of electric shock,
do not allow sources of electricity to touch the tool.
CAUTION
Handle the tool with care.
Rough handling could cause accidents or malfunctions. Do not exert an impact on the tool by throwing or
dropping it.
Handle the Connecting Hose with care.
Do not carry the tool by holding the Connecting Hose, and do not pull the Connecting Hose to remove it.
Safety Warnings for PNEUMATIC GRINDER
The following warnings are those required to be displayed as instructed by ISO11148-7.
General Safety Rules
WARNING
For multiple hazards, read and understand this instruction manual before installing, operating, repairing,
maintaining, changing accessories on, or working near this tool. Failure to do so can result in serious bodily
injury.
Only qualified and trained operators should install, adjust or use this tool.
Do not modify this tool. Modifications can reduce the effectiveness of safety measures and increase the risks
to the operator.
Do not discard this instruction manual; hand it to the operator.
Do not use this tool if the tool has been damaged.
This tool shall be inspected periodically to verify the ratings and markings. When a label/nameplate is
damaged, worn or missing, contact the sales agent through which you have purchased your tool or NITTO
KOHKI Co. Ltd. directly for a replacement.
TQ15277-0MYG-70en.indb5 2017/08/0713:23:45

6
EN
Projectile Hazards
WARNING
Be aware that failure of the workpiece or accessories, or even of the inserted tool itself can generate high-
velocity projectiles.
Always wear impact-resistant eye protection while operating this tool. The grade of protection required should
be assessed for each operation.
Ensure that the workpiece is securely fixed.
Ensure that the abrasive product is safely clamped to this tool.
Check that the maximum operating speed of the abrasive product, converted to revolutions per minute, is equal
to or greater than the rated speed of the spindle.
Ensure that the guard is in place, is in good condition and is correctly mounted; ensure that the guard is
regularly inspected. It is possible for internal grinding to not require a guard, provided the workpiece encloses
the abrasive product.
Check regularly that the speed of this tool is not higher than the speed marked on it. These speed checks shall
be carried out without the abrasive product mounted and in accordance with the instructions given by the
manufacturer.
Check that the flanges, as specified by the manufacturer, are used and are in good condition, e.g. free from
cracks and burrs, and are plane.
Check that the spindle and spindle threads are not damaged or worn.
Ensure that sparks and debris resulting from use do not create a hazard.
Disconnect this tool from the energy supply before changing the abrasive product and servicing.
Entanglement Hazards
WARNING
Choking, scalping and/or lacerations can occur if loose clothing, personal jewelry, neckwear, hair or gloves are
not kept away from the tool and its accessories.
Operating Hazards
WARNING
Avoid contact with the rotating spindle and mounted wheel to prevent cutting of hands and other body parts.
Use of this tool can expose the operator's hands to hazards, including cuts, abrasions and burns. Wear
suitable gloves to protect hands.
Operators and maintenance personnel shall be physically able to handle the bulk, weight and power of the tool.
Hold the tool correctly; be ready to counteract normal or sudden movements and have both hands available.
Maintain a balanced body position and secure footing.
Release the start-and-stop device if the energy supply is interrupted.
Use only lubricants recommended by the manufacturer.
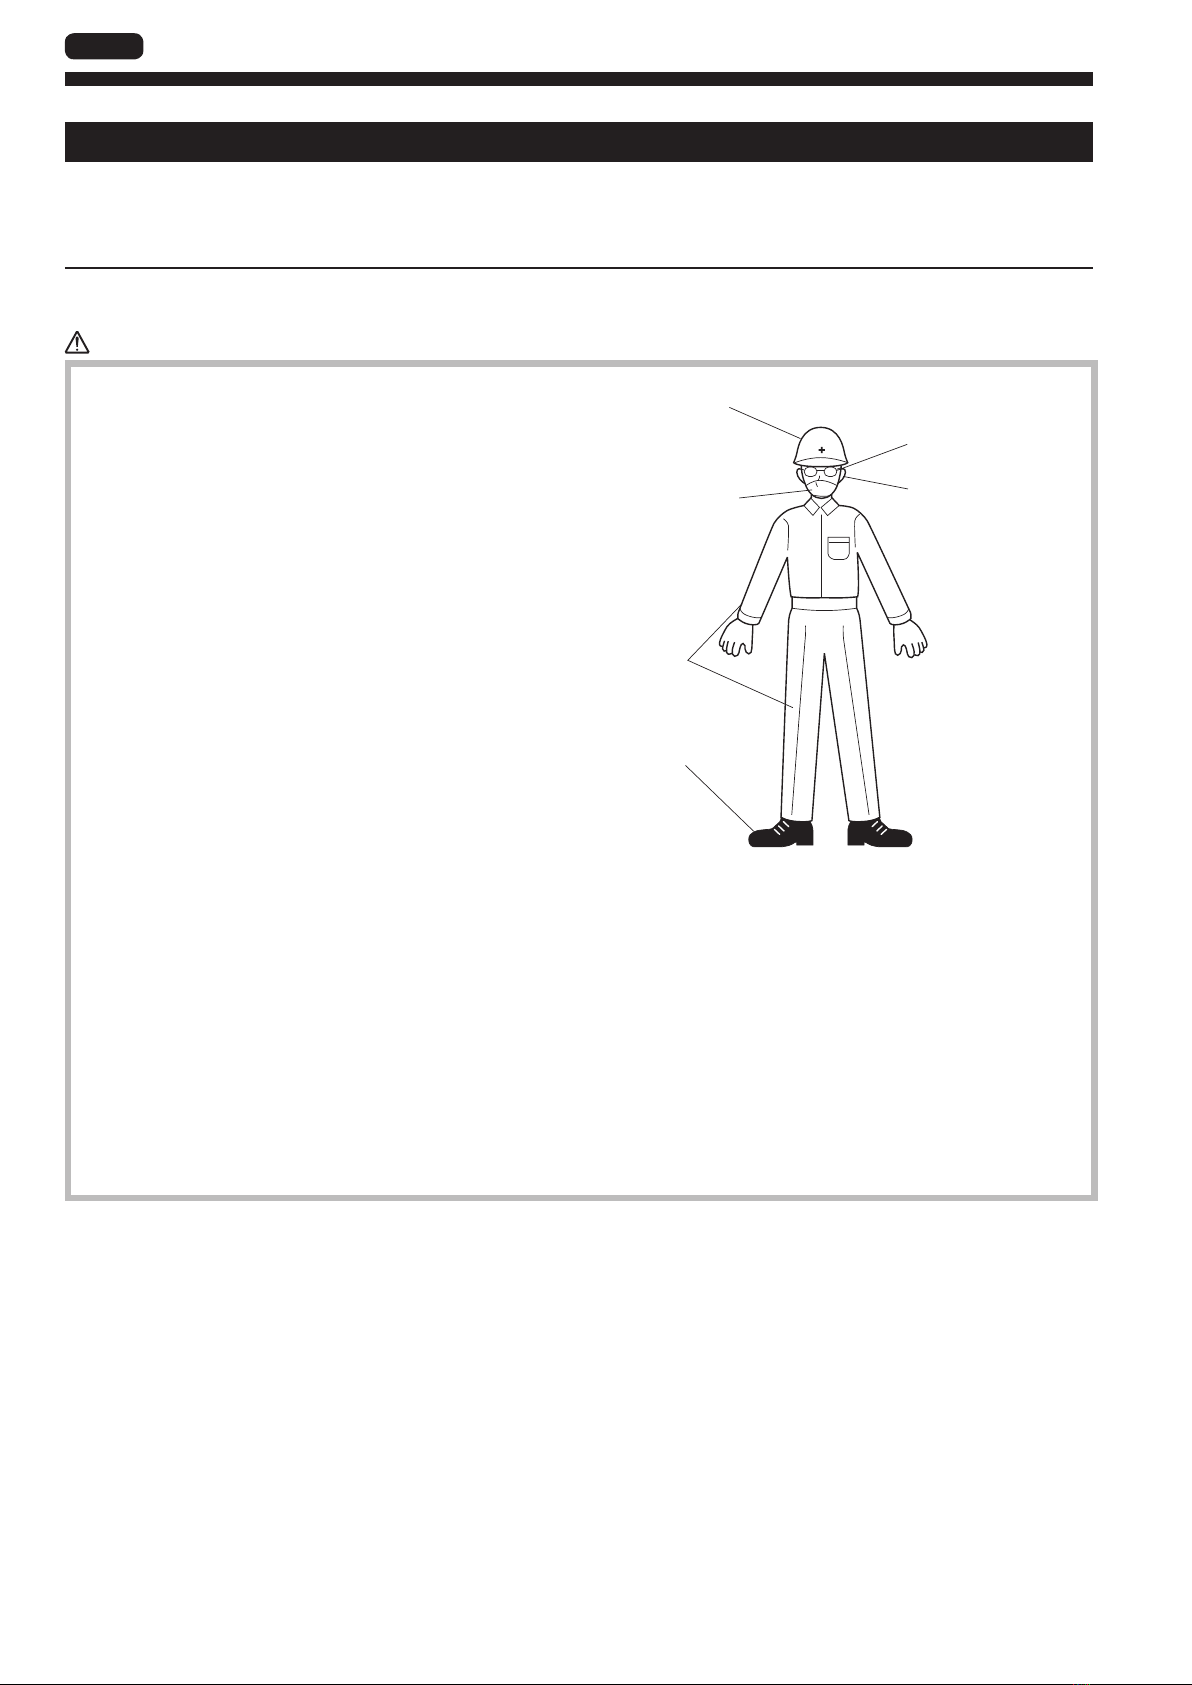
Personal protective safety glasses shall be used; suitable gloves and protective clothing are recommended.
For overhead work, wear a safety helmet.
When cutting off the workpiece, it shall be supported such that the slot is kept at constant or increasing width
during the complete operation.
If the abrasive product becomes jammed in a cut slot, shut off the grinder and ease the wheel free. Check that
the wheel is still correctly secured and not damaged before continuing the operation.
Grinding wheels and cutting-off wheels shall not be used for side grinding. (Exception: grinding wheels
designed for side grinding.) Grinders shall not be used over the maximum peripheral speed of an abrasive
product.
The operator shall pay attention and ensure that no bystanders are in the vicinity.
Personal protective equipment, such as suitable gloves, an apron and a helmet, shall be used.
Grinding sparks can ignite clothing and cause severe burns. Ensure sparks do not land on clothing. Wear fire-
retardant clothing and have a bucket of water nearby.
Precautions on Use
TQ15277-0MYG-70en.indb6 2017/08/0713:23:45

7
EN
Repetitive Motion Hazards
WARNING
When using this tool to perform work-related activities, the operator may experience discomfort in the hands,
arms, shoulders, neck or other parts of the body.
While using this tool, the operator should work in a comfortable posture while maintaining secure footing and
avoiding awkward or off-balance postures. The operator should change posture during extended tasks; this
can help avoid discomfort and fatigue.
If the operator experiences symptoms such as persistent or recurring discomfort, pain, throbbing, aching,
tingling, numbness, burning sensations or stiffness, these warning signs should not be ignored. The operator
should tell their employer and consult a qualified health professional.
Accessory Hazards
WARNING
Disconnect the tool from the energy supply before fitting or changing the inserted tools or accessories.
Use only accessories and consumables that are the sizes and types recommended by the manufacturer of this
tool; do not use accessories or consumables of other types or sizes.
Ensure that the dimensions of the abrasive product are compatible with this tool and that the abrasive product
fits the spindle.
Ensure that the thread type and size of the abrasive product exactly match the thread type and size of the
spindle.
Inspect the abrasive product before use. Do not use abrasive products which could (possibly) have been
dropped or which are chipped, cracked or otherwise defective.
Ensure that the abrasive product is correctly mounted and tightened before use and run this tool at no-load
speed for at least 1 minute in a safe position; stop immediately if considerable vibration or other defects are
detected and determine the cause of these defects.
Prevent the spindle end from touching the bottom of the hole of cups, cones or plugs with threaded holes
intended to be mounted on machine spindles, by checking their dimensions and other relevant data.
Where abrasive products are supplied or used with reducing adaptors or bushings, the user shall ensure that
the adaptor or bushing does not contact the face of the flange and that the clamping force provides sufficient
rotational driving action to prevent the abrasive product from slipping.
In cases where flanges are supplied for several types or sizes of abrasive, always fit the correct flanges for the
abrasive being used.
Avoid direct contact with the inserted tool during and after use, as it can be hot or sharp.
Store and handle the abrasive product with care in accordance with the manufacturer’s instructions.
Workplace Hazards
WARNING
Slips, trips and falls are major causes of workplace injury. Be aware of slippery surfaces caused by the use of
the tool and also of trip hazards caused by the air line or hydraulic hose.
Proceed with care in unfamiliar surroundings. There can be hidden hazards, such as electricity or other utility
lines.
This tool is not intended for use in potentially explosive atmospheres and is not insulated against contact with
electric power.
Ensure that there are no electrical cables, gas pipes, etc., which can cause a hazard if damaged by the use of
the tool.
TQ15277-0MYG-70en.indb7 2017/08/0713:23:45

8
EN
Dust and Fume Hazards
WARNING
Dust and fumes generated when using this tool can cause ill health (for example cancer, birth defects, asthma
and/or dermatitis); risk assessment and implementation of appropriate controls for these hazards are essential.
Risk assessment should include risks such as the dust created by the use of the tool and the potential for
disturbing existing dust.
Operate and maintain this tool as recommended in these instructions to minimize dust or fume emissions.
Direct the exhaust so as to minimize disturbance of dust in a dust-filled environment.
Where dust or fumes are created, the priority shall be to control them at the point of emission.
All integral features or accessories for the collection, extraction or suppression of airborne dust or fumes
should be correctly used and maintained in accordance with the manufacturer's instructions.
Select, maintain and replace the consumable or inserted tool as recommended in the instruction handbook to
prevent an unnecessary increase in dust or fumes.
Use respiratory protection in accordance with the employer's instructions and as required by occupational
health and safety regulations.
Working with certain materials creates emissions of dust and fumes, causing a potentially explosive
environment.
Noise Hazards
WARNING
Exposure to high noise levels can cause permanent, disabling hearing loss and other problems, such as
tinnitus (ringing, buzzing, whistling or humming in the ears). Therefore, risk assessment and implementation of
appropriate controls for these hazards are essential.
Appropriate controls to reduce the risk can include actions such as damping materials to prevent workpieces
from “ringing”.
Use hearing protection in accordance with the employer's instructions and as required by occupational health
and safety regulations.
Operate and maintain this tool as recommended in the instruction handbook to prevent an unnecessary
increase in the noise level.
If this tool has a silencer, always ensure it is in place and in good working order when the tool is being
operated.
Select, maintain and replace the consumable or inserted tool as recommended in the instruction handbook to
prevent an unnecessary increase in noise.
The noise-emission value in this manual is measured in accordance with ISO standards. Since the real value
may change depending on the work condition, please use this tool with measurements in the actual condition.
Please don't operate beyond the time set by the region where the tool is used.
Precautions on Use
TQ15277-0MYG-70en.indb8 2017/08/0713:23:45

9
EN
Vibration Hazards
WARNING
Exposure to vibration can cause disabling damage to the nerves and blood supply of the hands and arms.
Wear warm clothing when working in cold conditions and keep your hands warm and dry.
If you experience numbness, tingling, pain or whitening of the skin in your fingers or hands, stop using this
tool, tell your employer and consult a physician.
Operate and maintain this tool as recommended in the instruction handbook to prevent an unnecessary
increase in vibration levels.
Do not allow the inserted tool to chatter on the workpiece as this is likely to cause a substantial increase in
vibration.
An improperly mounted or damaged inserted tool can cause excessive vibration levels.
Select, maintain and replace the consumable or inserted tool as recommended in the instructions handbook to
prevent an unnecessary increase in vibration levels.
Support the mass of the tool in a stand, tensioner or balancer, if possible.
Hold the tool with a light but safe grip, taking account of the required hand reaction forces, because the risk
from vibration is generally greater when the grip force is higher.
Use blotters when using the bonded abrasive product.
The vibration-emission value in this manual is measured in accordance with ISO standards. Since the real
value may change depending on the work condition, please use this tool with measurements in the actual
condition. Please don't operate beyond the time set by the region where the tool is used.
Additional Safety Instructions
WARNING
Air under pressure can cause severe injury:
—always shut off air supply, drain hose of air pressure and disconnect tool from air supply when not in use,
before changing accessories or when making repairs;
—never direct air at yourself or anyone else.
Whipping hoses can cause severe injury. Always check for damaged or loose hoses and fittings.
Whenever universal twist couplings (claw couplings) are used, lock pins shall be installed and whip check
safety cables shall be used to safeguard against possible hose-to-tool or hose-to-hose connection failure.
Do not exceed the maximum air pressure stated on the tool.
Never carry an air tool by the hose.
When a tool is taken permanently out of service, it is advised that the tool be disassembled and degreased, and
parts be separated by material and recycled locally in the appropriate manner.
TQ15277-0MYG-70en.indb9 2017/08/0713:23:45

10
EN
Product Specific Safety Rules
WARNING
Protect your body from chips.
During grinding, hot chips scatter. Since it could cause blindness, respiratory disorders, burns or hearing
impairment, when working, to protect your body use protective eyewear, a dust mask, earplugs, gloves
(excluding knitted gloves), long-sleeved work clothes, etc. In addition, do not bring your face close to the tool.
Do not use a Grinding Wheel with an allowable rotational speed (indicated on the Grinding Wheel top label)
lower than the actual rotational speed of the machine. Also, please make sure that the specified dimensions of
the Grinding Wheel conform to the specifications of this machine.
When attaching the Grinding Wheel, check that there are no abnormalities such as cracking, chipping, or
excessive wear.
Do not use the tool if there is a slight abnormality such as a Grinding Wheel containing moisture, damage, loss,
etc. of the display label.
Use our genuine Outer Flange.
Do not use Outer Flanges that are damaged, bent or severely worn out.
Also, do not use a substitute flange or flat washer.
Check that the Grinding Wheel is suitable for the Outer Flange.
Tighten the Grinding Wheel moderately.
When aligning the Grinding Wheel to the Outer Flange do not use a reduced bushing unless the bushing to be
used is supplied from the parts maker or is as specified.
When attaching the Grinding Wheel, make sure that the label on the top of the Grinding Wheel comes into
contact with the mounting surface of the Spindle.
For the label on top of the Grinding Wheel, use one with the same diameter as the outer diameter of the end face
of the Spindle, or larger.
Precautions on Use
TQ15277-0MYG-70en.indb10 2017/08/0713:23:45

11
EN
WARNING
Always inspect the Spindle's threaded part and Outer Flange for breakage, deformation and wear.
If an abnormality is found, stop using the tool immediately.
Never use the side other than the usage surface of the Grinding Wheel.
Be sure to install a Wheel Guard on the air grinder having a tip Grinding Wheel tool maximum diameter of 50
mm or more.
Be sure to use the Wheel Guard provided with this machine.
Use of equipment other than as specified could cause an accident.
Always replace damaged, deformed, or excessively worn Wheel Guards.
Do not use a Wheel Guard that could cause damage to the Grinding Wheel.
The intake air pressure during operation of this tool should not exceed 0.6 MPa.
Do not abruptly operate or stop the tool.
When starting, be sure to open the Throttle Lever or Valve Ring gradually.
When performing any work, before attaching the Grinding Wheel be sure to use a tachometer to check the no-
load rotation speed of the tool.
Make sure the Valve Ring of the main unit is at the maximum rotation position and that the rotation speed at 0.6
MPa does not exceed the rotation speed stated on the Wheel Guard.
Also, when you use this unit after repair, check in the same way.
During trial operation, make sure that there is no one near the rotating Grinding Wheel.
At startup, push the Grinding Wheel slowly against the workpiece until the Grinding Wheel gets warm.
Always work at the correct angle of 15 to 30 degrees.
15 to 30°
Use surface
TQ15277-0MYG-70en.indb11 2017/08/0713:23:45

12
EN
1 Application
This tool is a pneumatic hand-held grinder for grinding a workpiece using the Grinding Wheel shown below according
to the shape of the Type 27 Depressed Center Grinding Wheel.
MYG-70
MYG-70
A Depressed Center Grinding
Wheel diameter
180 mm
(7")
B Depressed Center Grinding
Wheel hole diameter
22.2 mm
(7/8")
C Depressed Center
Grinding Wheel thickness
6 to 8 mm
(1/4 to 5/16")
2 Checking Inside the Package
When you open the package box, check the contents of the package and also check for any damage that may have
occurred during transportation.
If an abnormality is found, request service from the retailer where you purchased the tool or the nearest NITTO service
member store.
Package content and accessories Quantity Check
1MYG-70 (main unit) 1
2Wheel Guard Ass'y 1
3Handle Ass'y 1
46 mm Hex. Socket Screw Key 1
510 mm Hex. Socket Screw Key 1
Package content and accessories Quantity Check
6
Instruction Manual (this document)
1
7Caution for Use 1
8Bushing R 3/8 × NPT 3/8 1
9EC Declaration of Conformity 1
1452 83
M12
A
C
6 to 8 mm
B
TQ15277-0MYG-70en.indb12 2017/08/0713:23:45

13
EN
3 Part Names
1
2
3
4
5
6
7
1Spindle Lock Button
2Handle Ass'y
3Throttle Lever
4Bushing
5Wheel Guard
6Driving Flange
7Outer Flange
TQ15277-0MYG-70en.indb13 2017/08/0713:23:45

14
EN
4 Air Supply
CAUTION
Remove drainage before stating work.
When drainage enters the tool, the vicinity of the exhaust port freezes, which could cause a loss of power.
1
2
3
4
5
6
7
8
1Compressor
2Air Filter
3Air Regulator
4Lubricator
5Connecting Hose
6Machine Oil
7Coupler
8Tool
Air pressure used
Use the tool with air pressure at 0.6 MPa. If the pressure is too low, the tool cannot demonstrate the required
performance. If it is too high, it could damage parts of the tool. Use an Air Regulator (3) to adjust the pressure to the
appropriate level.
Air line
Use a Connecting Hose (5) with an internal diameter of 9.5 mm (3/8”) between the Compressor (1) and the tool
(8). Compressed air exits the Compressor and cools and moisture condenses. Some moisture could condense
inside the Connecting Hose and get inside the tool, causing a malfunction. Install the Air Filter (2) and Lubricator (4)
between the Compressor and the tool.
Machine oil
Install a Lubricator between the Compressor and the tool, and be sure to use machine oil (ISO VG-10).
Failure to do so could cause damage to the tool. Also, if lubricating oil with high viscosity is used, it could cause
performance degradation.
Refueling
Each day before starting work detach the Connecting Hose and refill a few drops of machine oil (ISO VG-10) (6) from
the Coupler (7) to the tool.
After refueling, connect the Connecting Hose and perform idle operation for a few seconds to allow the oil to blend in
the entire tool.
TQ15277-0MYG-70en.indb14 2017/08/0713:23:45

15
EN
5 Preparation
WARNING
During work, be sure to wear eye protection, earplugs, a dust mask, and gloves (other than knitted gloves).
When replacing or adjusting the Grinding Wheel or parts, be sure to detach the Connecting Hose from the tool.
Never touch moving parts while the tool is running.
After stopping work, the tip of the grinding tool will continue to rotate for a while.
Never touch moving parts until the tool completely stops.
Attaching the Wheel Guard Ass'y
WARNING
Before replacing the Wheel Guard Ass'y, always turn OFF the Throttle Lever and detach the Connecting Hose
from the tool.
1 Fit the Wheel Guard Ass'y (1) into the groove
of the main unit (3)
2 Use the 6 mm Hex Socket Screw Key (4) to
tighten the bolt (2) to secure the Wheel Guard
Ass'y
Make sure to use the product after attaching the
Wheel Guard Ass'y.
1Wheel Guard Ass'y
2Bolt
3Groove on main unit
46 mm Hex. Socket Screw Key
1
2
3
4
TQ15277-0MYG-70en.indb15 2017/08/0713:23:45

16
EN
Attaching the Handle Ass'y
WARNING
Before replacing the Handle Ass'y, always turn OFF the Throttle Lever and detach the Connecting Hose from
the tool.
1 Screw into the Boss (2) at the front part of the main unit
The Handle Ass'y (1) can be attached to either the left or right side.
Make sure to use the product after mounting the Handle Ass'y.
1
2
1
2
1Handle Ass'y
2Boss
Preparation
TQ15277-0MYG-70en.indb16 2017/08/0713:23:45

17
EN
Replacing the Grinding Wheel
WARNING
Before replacing the Grinding Wheel, always turn OFF the Throttle Lever and detach the Connecting Hose from
the tool.
Attaching
1 Insert the Outer Flange (5) into the Grinding
Wheel (4)
2 While holding the Spindle Lock Button (1),
turn the Driving Flange (3) by hand, and push
the Button at the position where rotation stops
3 Align the notch of the Outer Flange (5)
with the Key and mount it together with the
Grinding Wheel (4)
4 Using a 10 mm Hex Socket Screw Key (7),
tighten the Outer Flange Bolt 12×25 (6) to the
Spindle (2)
When you release your hand from the Spindle Lock
Button (1), the lock is released automatically.
1
2
3
4
5
6
7
1Spindle Lock Button
2Spindle
3Driving Flange
4Grinding Wheel
5Outer Flange
6Outer Flange Bolt 12×25
710 mm Hex. Socket Screw Key
Removing
1 While holding the Spindle Lock Button (1),
turn the Grinding Wheel (4) by hand, and
push the Button at the position where rotation
stops
1 Using a 10 mm Hex Socket Screw Key (7),
loosen the Outer Flange Bolt 12×25 (6)
This makes it possible to remove the Grinding Wheel.
2 Remove the Grinding Wheel
TQ15277-0MYG-70en.indb17 2017/08/0713:23:45

18
EN
Start and stop
Start
1 Check that the Throttle Lever is in the OFF
status and insert the Connection Hose into the
Coupler of this tool
Lock Lever Throttle Lever
2 Hold the tool and while pressing the Lock
Lever (1), press the Throttle Lever (2)
The tool starts.
1
2
Stop
1 Release your hand from the Throttle Lever
The Throttle Lever automatically returns to the OFF
status.
Adjusting the rotation speed
WARNING
Never touch the tip of moving parts.
1 Use a flathead screwdriver to turn the Adjust Valve
The air flow rate changed that allows the rotation speed to
be adjusted.
The maximum rotational position is when the screwdriver
groove of the valve coincides with the axis center of the
main unit. Adjust the position according to the purpose of
use.
Adjust Valve
Close
Full open
Preparation
TQ15277-0MYG-70en.indb18 2017/08/0713:23:45
Table of contents
Other Nitto Kohki Grinder manuals

Nitto Kohki
Nitto Kohki DIMMER MONOCANALE MULTIPROTOCOLLO COSTANT... User manual

Nitto Kohki
Nitto Kohki L-25B User manual

Nitto Kohki
Nitto Kohki MLG-25 User manual

Nitto Kohki
Nitto Kohki MYG-40 User manual

Nitto Kohki
Nitto Kohki Myton MYG-25 User manual

Nitto Kohki
Nitto Kohki L-25B User manual

Nitto Kohki
Nitto Kohki MG-40 User manual

Nitto Kohki
Nitto Kohki MLG-40 User manual

Nitto Kohki
Nitto Kohki MYTON MYG-50 User manual

Nitto Kohki
Nitto Kohki MYTON MLG-70 User manual