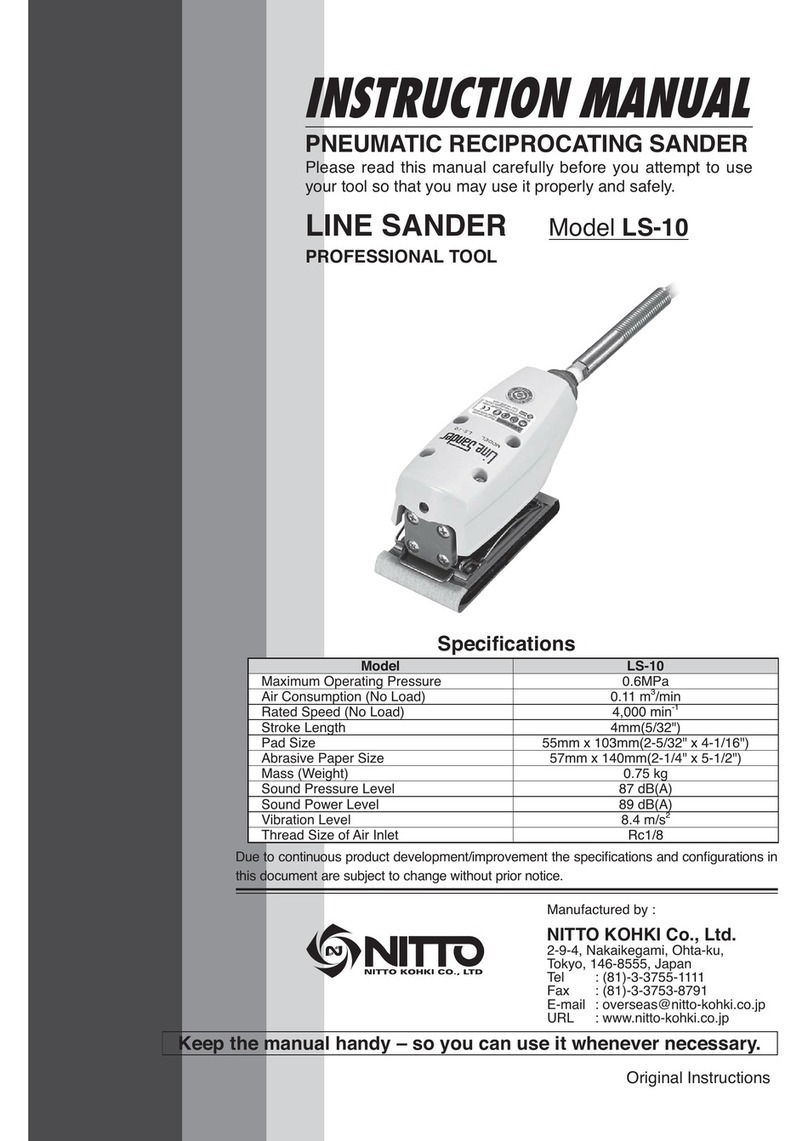
Nitto Free Sander FS-100C User manual

lJrFJrrrar励
嘔JИ
:R OSCILLATING SANDER
ALLiNSTRUCT:ONS BEFORE OPERAT:NG THIS T00L
REE SANDER
I FSⅢ
100C,FS‐ 50A
FESS10NAL T00L
ONlコ
驚Manufaclured by:
Nl■
TO KOHKICO"LTD
9‑4,Naka kegami
2‑chome,Ohta‐ ku,
Tokyo 146‑8555,」 apan
Tol:(03)3755‐ 1111
Fax:(03)3753‐ 8791
specifications
These specr calions and the prolle may be changed lorimp101 ement wlhOut pr or nOlice
SAVE THESE INSTRUCT10NS

△〇◎
CONTENTS
IMPORTANT SAFETY INSTRUCnONS FOR ALL ttR TOOLS
IMPORTANTINSTRUCl10NS FOR OSC LLATING SANDER
1 0SAGE …… 3
2 CHECK THE CONTENTS OF THC PACκAGE …
… 3
3 AIR SUPPLY…
…………………………………………… 4
4P… ■
ONS… …
…
…
……4
5 ATACH SANDPAPER…
…………………………
……… 4
6 HOW T0 0PERATE THE T00L… …
…
…
…
5
7 REPLACING RUBBEn SuPPoH[υ …
……
…
…
5
8 STORAGE ……
……
……
……
…
…
6
9 0PT ONAL ACCESSORIES ……
……
…
6
10 0RDERING SERViCE PARTS …
…
…
…
6
1l FS‐100C ASSEMBLY AND PARTS uST …
…
7
12 FS 50A ASSEMBLY AND PARTS LIST ……
…
8
PIC70GRAM
VVarningiit might be dangerous to opefate the powortool
if the instructions suppled are not fo‖
owod
Befofo operat ng the tool lead and undeletand a‖ in―
structions supplod Koop it for future'reforence
Personal pЮ tective equipment as eye and ear protec‐
tion and prOtective gloves must always be used when
oporating the tool

Operatois assigned to use the tools should be lnstructed in the
safe use of the tool
No person shOuld use this tool vythout frst having read and
understooO this instiuct on manual
ll)07038 PrOper!ソ Do not vvear loose clothing o7 αnaments
They can be caughtin moving parts Non― skid foomeaiis re
commended VVea子 protect ve ha r covei ng to contain 10n9
ha r
(2)Alway8 Wear eye p70teCtlon Everyday ey891asseS Only
have impactresistantlenses They Oo l10T protecl eyes Also
use Face or dust mask f operations creato Oust
(3)Alwaye w r protectlvo o87 0qul●mont
△ WARNING
VVhen using a r toois. basio safety precautions
should always be fo‖owed to reduce the risk of
personal iniury,including the fo‖
owing
(1)Be Sure ail external screws, nu峰 and bo13 are u9hlly
secured prior to each use
(2)Oo not use danaged frayed or deteriorated hoses and
fittings
(3)Remove adlu3ting k●ys and wrencho3 Fgm hab"of
checkin9 1o see that adlust ng keys and、 vrenches are remo―
ved from tool befoie turning lt on
14)use righi too: Do notforce a sma‖ tool or attachment to
do the Job of a heavy― duty tool Do not use too1lor a purpOse
not intended
15,Do notforco tool n wll● 。the,ob better and sarer at the
rate for、vhich it was designed
(6)Secure wo7k USe Clamp8 0r a Vise lo hold 、vork when
pract cal lt is saler than using your hand and t irees both
hands to operate tool
(7)Al,pro38ure atthe inlet mu3t not exceed O SO MPa(O k9r′
cm1 85 p3り ,5 9 bar)
(1)St070日 10 too 3 VVhen not in use,lools 8hOuld be stored
in d。
,and locked―
up places out of reach of ch‖
dlen
(2)Avold unin10ntbna1 3tartlng Do not ca子 ry ar po、 vered
tool w th fingo「on th子ottle VVhen car子 yin1 0o. be Sure the
connectinl hose to the oompre330 13 disoonnected
(3)Reduce the口 3k01 unintentiona1 3tarung Mako 3ure
throttte ls in oFF postlon before connect ng ol,ho30 10 tOol
(4)Do nol abu30 h030 Never carry tool 、″th a,r supply hose
connected or yank on hOse to disconnect
(5,Nev● 了
│●ave tool「unning unattended Always turn tt the
air supply and disconnect the a r supply い
ose Do not leave
tool unattended untl it comes to a completo stop
senge
Do not operate tool when you are tred
(6)Sone tOO13 1000rate 8ub31anual vlbratlon3 r dSCOm
foit o子
pain is encountered dur ng use, you should cease op‐
erations and check w th your physician pr o子 to fu"her use
17)Bo 8ure tO keep handB cloar of movinO part3
(1)Koop work area cloan Clutte(゛ work areas and ben
ches invite accldents and inlur,es
(2)Oon3 00r WOrk area onvlronmont Do not expose tЮ s
to rain Do not use tools in damp or、vet locatlons 卜鑽 p work
area wel lt
14)Do not overoocll
al times
(5)● いy al●
rt vVatch
(3)Do not operate n 7■8mmaue
eXp1031Ve abno3phere8
(4)Koop childtton away Also a'
away from work area Do not lot
compressor α conooct ng hoses
Keep proper footing and balance at
what you are dolng U30 COmmon
liquUs or in g8800u8 0r
visitors should be kept
vis tors contact the tool
(5)SOme t00 8 generate h19h no18e leVe18 CheCk to be sure
thatthe use of this tool conforms to aI Iocal noise requlations

││││││││1賢 団国=回目│■
■■■■■■■ ∠N WARNING
(1)Do■ot reconstruct or modily
(2)Check damaged paⅢ Before further use of the tool an
accessory Or other pan that is damaged shou10 be carefuly
checked to determine tha t wl1 0perate prOpery and perorm
is intended funct ons Check o( a19nment Of mOving parts
binding of moving patts breakage o(pans mOuntng and any
other cOnd tions that may areci ts Operat on An accessory
or other partthatis damaged or inoperable should be propery
repa red or replaced
(3)Repalrs by autho子 Zed Personne: Any repa rs on the tool
o「inSalat on oF replacement pans shOu10 be performed only
by the sales agent from 、vhom you purchased the tool or the
manulacturer use only genuine replacement parts Fa ure to
utilze the expertise oF an author zed sales aOent frOm 、
″
hom
you purchased the tool or the manuracturer or ialure to use
genuine replacement parts may resut in an increased risk of
iniury to the user and may inv81dab your、 varranty
(4)U8e reCOmmended accessorios Consu t this manual of
the sales agent from whom you purchasedthetoolorthe manu‐
facturerfor recommended accessor es The use of improper
accessoles may cause risk of iniury tO persons
(5)A[waysturn O the alr 8upply and disconnectthe a r supply
いose bo,ore instali ng,70mOVing Or adiusting any accessory on
the too[or before performing any maintenance oo lhe tool
(6)● o not removo any[abel placed on the tool ( the la
bels become damaged obegin to peel a、 ″ay contactthe sales
89ent from、 ●hom you purchased the tool orthe manじ (acttrer
for the r immediate replacement
(1)A[ways turn off the air supply and disconnect the air sup‐
ply hose leforehand whenever replacing abrasive papers
(2)Be sure to keep hands clear of moving parts
(3)Ai,pressure at the sander in10t with the Sander running
must not exc88● 0 59 MPa(6 kgf/cm′ ,85 psig,5 9 bar)
(4)Always rep18Ce damaged,bent or severe[y worn Pads Do
not use a Pad that has been subieCted to an AOrasive Paper
f810re
This tool is for sandingヽ vo「kpieces using an abrasive paper
Check the cOntents and make sure thatthe tool does not have
any damage due to an accident durng the transportaton if
any The contents should correspOndto the ist as iolo、 ″s Just
in case there are some damaqes or miss n9,arts contact the
sales agentirom whom yOu pJrclヽ iSed the tool or an autho‐
12ed dealer
FS 100C
PaCk890 COntent3
FREE SAllDER FS i00C
Hose E Assy
Bushlng PTl,4,NPTl,4
Sandρ8per 180
SandOaper r 240
Part Nb
TB02359
T P02236
T P04248
TP04249
TP15853
里
1
1
1
5
5
1
Check
INSTR∪ CT10N l.lANuAL
FS‑50A
繹 鍔1駄
1町 L
Hose E Assy TB02359
Bじshing PTl′
4× NPTl′4 TP02236
Sandpaper 1180 TP05713
SandOaper ■240 TP05714
INSTRUCT10N MANUAL i TP15858

3‑l Alr Pre3Sure
Air pressure largely ddermines tool performance This tool is
des'9■od to be operated at a r pressure of 0 59 1.4Pa(6kgl cm2,
35 ps9,59 ban max mum
3‐2 Air llne{F191)
use a 95 mm (3/8)ar hoSe between the compressor and
the tool Compressed a ris cooled and its drain separat」 , as
soon as the a r leaves the compressor The drain hovvever is
condensed in the piping and can enter the tool mechanism
and may cause trouble So insta‖ an arf‖ ter an a r iegulator
and an o‖ er between the compressor and the tool
5‑l Sandpaper
Cut,andard s ze paper(9'× 11')nto 4,ieces for Mode FS
,00C and into 8 pieces for 卜Иodel FS‑50A as showo in F19 2
Fo′ diy sanding use an open coat type sandpaper、 v th silcon
carbide or aluminum oxide abrasive grains to口 event clo99in9,
improve gr nding tticiency and prolong the lfe of the paper
F92
5‐2 AttaCh Sand Paper
Raise the c rcular knob atthe end ofthe clamp spr n。 (2 pOints,
pu‖ tO the side and push t down The papei clamp、 vil then
open push in sandpaper at th,8 point iai30 the C'icular knob
anO insert the clamp spr n9 in3ide the clamp stopper This
completes fi"in9 the sandpaper RerertO日 13 3 and 4 (both
sides aie nOt clamped completely(800 Fi● 5, cutting and san‐
ding powe「 w l drop Compare F198 4 and 5 Nolce how in the
incorrect y clamped f Oure. the cutting surfaco ol the paper
does not come in contact vyth the rubber pad
3‑3 Lubrca」 on
lnstal an。│lo子
bOtwOon the compressor and the tool Use ■10
machine oil Ne91eci ng the o supply v.1l cause damage The
use ofthick ol、 vil lead to p00r pedormance Always use 1lo
mach ne ol
4‑l Thread s120 0f H030 Fitting
The pioduct comes w h a metalitting w th PT(metlC)thread
Connectthe Bushing PT l′ 4 thread× NPT,/4 thiead in the vinyl
bag containing standarO accessor es, f yOu would ike to have
Amelcan NPT i卜 read instead
△ WARN:NG
A vvays turn or the air supply and disconnect the
ai「
supply hose
Read and thoroughlソ understand lMPORTANT
INSTRUCT10NS FOR OSCILLATING SANDER be‐
fore carrying Out these operation
F93
F94
AIRe901ato「
96mm(ν 8)
AiSupply Ho3。
Fg 5

5‐3 1n C88e Of UЫ ng oOubb― Sided Adheslve Tape
Attach dOuble― sided adhesive tape to the sponge part then
arach the sandpaper to the tape
5‑4 1n Ca30 0f U31nO spray Adheslve
Spray the sandpaper with adhesive then attach itto the sponge
Since the 3andpaper must be removed ater t ha3 been used
Avoid using permanent adhesive Paper adhesives are ava
lable
6‐l Start and stop
(1)FS‑100C
To stan press the tr 99er untl itis'ocked Hold the Tr ggerin
thi3つOSitiOn
To stop, pless the Cancei Switch and retuin the TrOger to it8
0子
ginal position
F96
(2)FS‐ 50A
To stan, push the tr 99or al the way to、 vards the body
To stop,pul the tri90or al the way out awayrom the body
F97
6‐2 Sanding Pre33ure
Sand ng pressure rOr FS■ CKCis2toSkg144tc ll bslandfOr
FS 50A l to O kO(2 2 to 6 6 1bo)Applying excessive rorce w‖ │
lower sanding efriclency
Fo子'lat work,ad,uSt pressure so iorce 18 appled evenly to the
entre surace Of the rubber pad uneven pressure wll resu t
in an iregular surace
△WARNING
Always turn off the air supply and disconnect the
al「supply hose
7 1 FS‑100C
Dlsa3Sembly sequelFe
l)PlaCe the t,99er at oFF loosen 4 screws(Crc SS Rece3sed
Pan HeaO Screw wth Sprng Lock Washg M 4× 101 and
iemove the rubber pao Loosen 4 nuls oi the rubber suppOrt
and remove the base plate
NOTE:Do nOt iemove the artube
2)Loosen 4 8CreWS(CiosS Recett Pao HeaO Tapping Sciew
M4× 20, and remove the housin9 cover(See F,9 8)The
t,99oi and the cancel sw,lch can be also taken Ofr at the
same time
0)Loosen 4 nuts of
supports,「 om the
od (Seo F19 9)
F98
the rubber suppOrt and tako out 4 rubbe子
housing Now the disassemblyis eompler
F99
A380muy sOquence
l)Flx 4 rubber supports to the housing with the nut Place the
tr 99er and the cancel s、vitch and sprng o 45× 31× 17 on
the housing and mount the housing cover on them and
t9hten 4 screws lcroSS Recessed Pan Head TappinO Screw
M4× 20)
2)Fix the base plate to the rubber 3uppOrts w th 4 nuts taking
care to prevent the rubber suppo蔵 frc m being Ⅲ isted
NOTE: lf the fubber support is instaled beinO lwi,ed, the
rubbe,support wll be quickly damaged (See F,9 9)
3)Thereafter re88Semble in the reverse of disassembly !f the
screws are not tightened securely they wil bcて xyne loose
doe to vibration leading to parts damage
Therefore t ghten them sufficiently

7‐2 FS‐
50A
D― bly Sequence
',Loosen 4 sc,o″ S(Cr∝ S ReCeSSed Pan Head Sciew with
Spang Lock Washer M 4× 8)and remove the rubber pad
〈
―Fig lo)
││
F,9 10
^ヒ "oぃ ooss R℃ o3sed Countersunk Flat Heed Screw MG
X● び " base plate and remove the ba30 plate iom
Ⅲ…plate(3oO Fi9 10)
●
,7E Don(■ ,帥 Ove the a r tube
3‑い e rr― at both sioes o(the rubber suppon and
…・e …S。
。。
。
" ThiS Completes di38880mbly
―F● ,1,
‐
…
…R― M PanH● nd Sor●●
一口th T・
・・
d tck
W hM4× 8
Robb●,Su…
0ぃ R― C●●l・
・
uほ 曰讚
Hd So智 M4×6
NOTE:The above sandpapercan notbe usedror● ust cb‖ector
Ass y use the Sandpaper exclusive For the Dust Ooloctor
Ass y
〔認 Plete
F911
… …
F・
=t
―
¨n… soppyttO the housing by screws(CrOss
―
Pan Head象 】ew wth Toothed Lock Washe子 M4
X8,
―
薇 ●■ end口 ate Oy scres lCrOSS Rece3801 COunter8unk
FIC― Sc■ew M4× 6 )0′ asping l19htly the bo"om of the
…・
X〕
〕蔵W th plo,s etc and takinO care tc prevent the
…alppOrt,。 m be n9ヽ ″sted
O For fulther operat onal and handi n● Informat on of ror iOp‐
!acement of pan3 and component8, COntact the sale a● 8nt
from whom yOu purchased the tool or an author zed dealel
●ln ordering palts and celmpOnents 91ve each part number
patt name and quantty 70quired
●U80 NITTO genuine parts
Aま"d藪 "o9the tool n a ocation sublectto h gh hun dity r
lヽ
et】 メis left as it is us3d,reSidual moisture on the insido can
ca
目en面 00 Before storing, and after operatlon o i the tool
at ar ntet wlh machine ol and run lor a short
ne
FS‐100C
T―Type Or center Pad Ass y
T Type Center Pad A3S y
Floxible Pad Ass y
Adhesive spray
Oouble Side AIい osive Tape
Sandpaper ■100(200 pc8/8etl
Sandpaper 1 120(200 pes′ set)
Sandpaper l 150(200 pc8′ 8et)
Sandpaper 1 100(200 pcs/set)
Sandpaper Ⅲ240(200 pc8/3et'
Sandpaper 1 230(200 pcs/set)
Sandpaper 1320(200 pcs′ setl
FS‑50A
Sandpaper ♯loo(200 pcs′ 3et)
Sandpap07 ■120(200 pcs′ 3et)
Sandpaper 1150(200 pcs′ 301)
SandpapOr 1180(200 pc8′ set,
Sandpaper 1240(200 0cs′ 30t)
Sandpaper 1280(200 pcs′ set)
Sandpaper 1320(200 oc313et)
Dust Collector A38 y

∠ゞ
CAUT10N
The llustration is fo「
info「
mation only users should never disassemble parts
Contact the sales agent from whom you purchased the tool o「autho「zed dealer should the tool need
service,repatr or replacement of parts
ノ
ヽ
3
iヾ
´
14‑―
――――――
24
ら
シ
│■´
The parte numbers w th( )are included in the Ass y part3 vvritten abore them
辣IT
WarninO Label CE M8rk 1 1
TP15374 1 Tr9987 1 1
Sping Lock Washer M4
Tapplng screw 4× 20
Splng 0 6× 31× 17
Cross RecesSed Pan Head
Tハ91647
B388 Plat Sub Assy
Throllle Valve Ass y
Cross Recessed Pan Hoad
Sc,ew 4× 8A3sy
日ubber Supporl Ass y
End Cap Assy
Screw 5× 12
Rubbe,Pad As y

∠ゝCAUT10N
The‖ lustration is for informat on only Users should never disassemble parts
Contact the sales agent from vvhom you purchased the tool or authorized dealer should the tool need
service,repa r or replacement of parts
ε目== u尋
6
7
8 9 Ю
The pans numbers w th( )are included in the Ass y pans written above them
Pa市 LI Patt N3me JO'
25
1
一
22
・23
24
T802338 1 Houslng Sub Assy
(TP05700) I HoUSing
稀誌性曇墨■i6― ││ │
(T02207)I Warttng Labd CE Mark
(TP05745)I Name f ate
¬505698 1 Va〜
o MoⅢ
e
TA― α AsSy
(TP12004, O Rin9 P 10
TA91647 Tube As y
TP05708 Clamp Stopper
TP05707 Clamp Splng
TQ1725 1 Hex SOCket
Screw 3 X 6
Countrsunk Flat Head
Scro″ 6× 14
RubOer Pad Ass
TA91575 Cross Recessed Pan
Screw 4× 8 Assy
Countersunk Head
Screw 4× 10
Rubber Suppo■ Ass y
End Plate
16 TP05712
Coootersunk Flat Head
Cylnder subハ ss y
Cyinder
Cross Recessed Pan Head
Screw w th Sprn9 Lock
VVぉ her 4× 8
4 setS
,
2
4s‐ts

JJSIttJrrroJJ‖
‖AI
AIR OSC‖:▲
¬NG SANDER
FREE SANDER ModelFS‑100C,FS‐ 50A
READ ALLINSTRuCl10NS BEFORE OPERA■ NG THIS TOOL
TP15858‑4‑60205A
This manual suits for next models
1
Other Nitto Sander manuals
Popular Sander manuals by other brands

Black & Decker
Black & Decker Powerfile KA902E Original instructions
Scheppach
Scheppach BTS900 Translation from the original instruction manual

Rupes
Rupes RX153A Original operating instructions
Casadei
Casadei LIBRA 10 Operation and maintenance manual
Makita
Makita BO6030 instruction manual

GMC
GMC GPDA manual

General International
General International 15-155 M1 Setup & operation manual
Struers
Struers LectroPol-5 instruction manual

Craftsman
Craftsman 320.39587 Operator's manual

EINHELL Bavaria
EINHELL Bavaria BSS 150/1 operating instructions

King Canada
King Canada KC-702CN instruction manual

Ryobi
Ryobi ERO240VK Owner's operating manual
