manuals.online logo
Brands
  1. Home
  2. •
  3. Brands
  4. •
  5. NIVELCO
  6. •
  7. Measuring Instrument
  8. •
  9. NIVELCO NIVOTRACK MT 2 Series User manual

NIVELCO NIVOTRACK MT 2 Series User manual

Thank you for choosing a NIVELCO instrument
We are sure that you will be satisfied with it throughout its use
1. APPLICATION
NIVOTRACK MT-2 series float type magnetosrictive level transmitter is a two-wire precision measuring
instrument for clean liquids both in normal and hazardous location. These instruments re quire minimum
maintenance since the float is the only moving part.
2. TECHNICAL DATA
Insertion length L 0.5 m … 3.7 m according to the Order Codes
Range maximum: up to the bumping point of the float
minimum: 0,6 x Insertion length
Zero offset maximum: 0,4 x Insertion length
Process pressure (maximum) 2,5 MPa (25 bar) for steel floats ; 0,3 MPa (3 bar) (20°C) for plastic floats
Medium density min. 0.7 g/cm3 with float 52 mm ; min. 0.5 g/cm3 95 mm
Medium temperature - 40 °C…+130 °C *PP: - 20 °C…+80 °C *PVDF: - 20 °C…+130 °C *
Ex : - 40 °C… +70 °C
Ambient temperature - 40 °C … +70 °C *
Float size / material 52x59 mm / 1.4571 95 mm / 1.4571 76x87 mm / PP or PVDF
Material of wetted parts Stainless steel : 1.4571(DIN) PP or PVDF float: see Order Codes
Output Normal operation 4 mA bottom… 20 mA top
Reverse operation 20 mA bottom… 4 mA top (on special request)
Accuracy ±0.04% or 1 mm
Linearity 0.035% or 0.8 mm
Repeatability 0,01% or 0,4 mm
Maximum load resistance Rt= ( Ut -10.5 V) / 0.02 A Ut= power supply voltage
Maximum output / Fault indication
value 24mA
Damping 1 sec, 5 sec adjustable
Supply voltage 10.5 … 36 V DC
Ex protection
Ex power supply
EEx ia IIB T5
Umax = 28.4 V DC Imax = 99 mA Pmax = 0.67 Watt
Electric protection III. Protection Class
Ingress Protection IP 67
Process connection According to the order codes
Electric connection 2 x Pg 16 and 2 x 1/2" NPT thread, shielded cable: 0,75 ... 1.5 mm2
Enclosure Powder paint coated aluminium
Mass 2.2 kg + guiding tube 0.35 kg/m
* See derating diagram under 3.!
USER’S MANUAL
Manufacturer:
Nivelco Process Control Co.
H - 1043 Budapest, Dugonics u. 11.
Telephone: (36-1) 369-7575 Fax: (36-1) 369-8585
E-mail: [email protected] http://www.nivelco.com
2.1 ACCESSORIES
User’s Manual
Warranty sheet
2 x Pg 16 cable gland,
Sealing ring for connection
with BSP thread only (klingerit
oilit)
2.3 DIMENSIONS
2.2 ORDER CODES
NIVOTRACK M - 2 -
Model Code Process connection Code Insertion
lenrth Code Insertion
lenrth Code Version / Ex Code
Transmit T1” BSP 1.4571(DIN) A0 m 00 m 0Steel ball float 95 mm 1
1 1/2”BSP1.4571 B1 m 10.1 m 1Steel cylindrical float 52 mm 2
2” BSP 1.4571 C2 m 20.2 m 2Steel ball float 95 mm Ex 5
1” NPT 1.4571 D3 m 30.3 m 3Steel cylindrical float 52 mm Ex 6
1 1/2”NPT1.4571 E0.4 m 4PP cylindrical float 76mm , flange PP A
2” NPT 1.4571 G0.5 m 5PVDF cylindrical float 76mm, flange PP B
1” BSP sliding sleev H0.6 m 6PVDF cylindrical float 76mm, fl. A38+PVDF C
1 1/2”BSP sleeve J0.7 m 7PP cylindrical float 76mm , flange PP Ex E
2” BSP sleeve K0.8 m 8PVDF cylindrical float 76mm, flange PP Ex F
1” NPT sleeve L0.9 m 9PVDF Cylindr float 76mm, fl. A38+PVDF Ex G
1 1/2”NPT sleeve M
2” NPT sleeve N
DN 80 P
DN 100 RNote: 1. Reverse operation on request (20 ... 4 mA)
DN 125 S2. Not all code variations can be selected
89
2xPg16
2x1/2"NPT
~156
Benyúlásihossz0,5-3,7m
~337
UP
89
~335
~156
2xPg16
UP
According to the order code
**
**
**
**
**
2x1/2"NPT
4 mA
20 mA
4 mA
20 mA
inactivemax.meas.
trackrange
inactivemax.meas.
trackrange
insertionlength
0.5-3.7m
insertionlength
0.5-3.7m
3. INSTALLATION
The NIVOTRACK MT-2 should be
located in an area, which allows easy
access for service, calibration and
monitoring. Accuracy of the
measurement will be affected by
waves on the surface or excessive
vibration. Therefore the instrument
should be located away from the inlet
and outlet as far as possible. The
process fluid should be free of any
70
45
130
70
°C
°C
Medium temperature
Ambienttemperature
suspended solids or material that could stick between the float and the guide rod. If used at
temperatures in exess of 70 °C the maximum ambient temperature allowed will be in
accordance with the derating diagram.
The unit should be protected against
heat radiation!
NIVOTRACK MT_-2 series is offered
with a variety of process connections.
The process connection on the tank and
its opening should be arranged so that
the float can be inserted. Should it not
be possible, the float should be
removed from the sensor shaft. After
inserting the shaft, the float should be
pulled onto the guide tube inside the
vessel. The word UP etched on the float
is to ensure mounting the float in correct
position. To complete procedure, the
retaining pin should be inserted into its
hole and legs bent.
Note: before installation it is advisable
to perform a preliminary operational
check similar to the procedure
described in the Calibration section.
UP
Lnévl.
liquid
Suggested opening
greater than 54 mm
∅
Shaft
4. WIRING
After unscrewing and removing the housing cover from the unit the cable
should be pulled through the conduit opening. The unit contains CMOS
components, which can be damaged by static electricity. Therefore the
shielding of the cable should be connected to the ground screw first. After the
shield is grounded, the (+) wire and (–) wire of the terminal J1 should be
connected. Is the shield also grounded at the power supply an equaliser cable
should be applied between the two ground screws.
.
+
Terminal J1
21
5. SETUP PROCEDURE, CALIBRATION
After power up the unit is fully operational.
Factory Setting
Operation mode: in accordance with the order (normal or reverse).
Range: maximum or in accordance with the order.
Damping: 1s
Operating mode selection (Jumper J1)
Direction of the output change assigned to the level change can be the same
or reversed. Note: Jumper J1 is factory set. It must not be changed in the
field!
Normal operation Reverse operation
JP1 position
2
1
5
6
2
15
6
Low level 4 mA 20 mA
High level 20 mA 4 mA
Local current meter (Jumper JP2).
Jumper JP2 allows for the connection of an auxiliary current meter:
-Move Jumper JP2 from pins 1-2 to pins 2-3.
312
3
12
The (yellow) LED will illuminate indicating possibility of the measurement.
Connect the meter J4 (positive) and J5 (negative), and the LED will go
out.
-Move the Jumper JP2 back to pins 1-2 after measuring the current.
Calibration
Normal operating mode Move the float to the desired top position for the 20 mA
output. Adjust SPAN: clockwise to increase and counter-clockwise to decrease
the output to 20 mA ±0.01 mA.
Move the float to the desired bottom position for the 4 mA output. Adjust
ZERO: clockwise to increase and counter-clockwise to decrease the output to
4 mA ±0.01 mA. Repeat steps 1 and 2 several times until the outputs at the set
points remain ±0.01 mA.
Reverse operating mode: It is the same procedure as with the normal
operation. The only difference is that the 4 mA in the top position should be set
by the potentiometer SPAN and that the 20 mA in the bottom position should
be set by the potentiometer ZERO.
Adjustment of damping (Jumper JP3)
Jumper JP3 allows for the adjustment of the damping time. This jumper is
factory set between pins 1 2 for 1 second.
Damping 1s 5s
JP3 position
1s 5s 1s 5s
5S1S
JP2
J5 (-)
1
2
5
6
3 2 1
LED
5.1. POWER SUPPLY FOR EX PROOF UNITS
The unit can be connected to a current loop with duly certified EEx ia IIB power
supply and with technical data according to the Technical Data.
Ex Ex
+
max
U = 28.4 V DC
I = 99 mA
max
P = 0.67 W
max
C = 150 nF
i
L = 1.2 mH
i
Galvanical
isolation
230V AC
6. MAINTENANCCE AND REPAIR
The unit does not require routine maintenance, however the shaft may need
occasional cleaning to remove surface deposits. Repairs will be performed at
the manufacturer premises. Units returned for repair should be cleaned or
desinfected by the customer.
7. STORAGE CONDITIONS
Ambient temperature: -30°C … +60 °C
Relative humidity: max. 98%
8. WARRANTY
Nivelco provide a warranty for the period of 2 (two) years.
Repairs under warranty are performed at the Manufacturer's premises; costs of
dismantling, reinstalling or shipping are borne by the Customer.
Claims for guarantee are not valid in respect of failures due to abnormal usage,
breakage, disaster, or incompetent installation or usage.
mtc2092a0601h
2002.01.02
Technical specification may be changed without notice.

Other NIVELCO Measuring Instrument manuals

NIVELCO NIVOFLIP MAK-100 Series User manual

NIVELCO

NIVELCO NIVOFLIP MAK-100 Series User manual

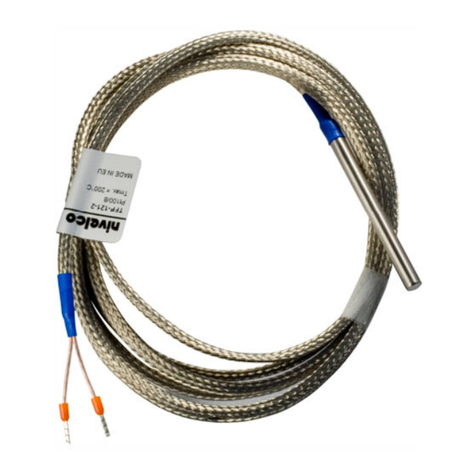
NIVELCO THERMOCONT TFP Series User manual

NIVELCO

NIVELCO THERMOCONT TFP Series User manual

NIVELCO UNICONT PDF 01-2 Series Assembly instructions

NIVELCO

NIVELCO UNICONT PDF 01-2 Series Assembly instructions

NIVELCO THERMOCONT TXP-1 Series User manual

NIVELCO

NIVELCO THERMOCONT TXP-1 Series User manual

NIVELCO NIVOCONT User manual

NIVELCO

NIVELCO NIVOCONT User manual

NIVELCO NIVOSONAR SLM-308 User manual

NIVELCO

NIVELCO NIVOSONAR SLM-308 User manual

NIVELCO PiloTREK W-100 Owner's manual

NIVELCO

NIVELCO PiloTREK W-100 Owner's manual

NIVELCO NIVOROTA EL 7 Series User manual

NIVELCO

NIVELCO NIVOROTA EL 7 Series User manual

NIVELCO MicroTREK HT Owner's manual

NIVELCO

NIVELCO MicroTREK HT Owner's manual

NIVELCO UNICONT PDF Assembly instructions

NIVELCO

NIVELCO UNICONT PDF Assembly instructions

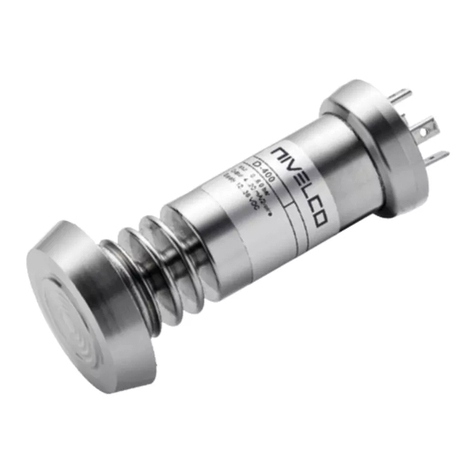
NIVELCO NIPRESS D-400 Series User manual

NIVELCO

NIVELCO NIPRESS D-400 Series User manual

Popular Measuring Instrument manuals by other brands

Sper scientific 800015 instruction manual

Sper scientific

Sper scientific 800015 instruction manual

HBM Paceline CMC Series operating manual

HBM

HBM Paceline CMC Series operating manual

GAGEMAKER CA-9001 Operation manual

GAGEMAKER

GAGEMAKER CA-9001 Operation manual

Knick Stratos Pro A4..MSPH series instruction manual

Knick

Knick Stratos Pro A4..MSPH series instruction manual

Sony Ipela NSR-S20 Service manual

Sony

Sony Ipela NSR-S20 Service manual

MONARCH INSTRUMENT 6180-022 instruction manual

MONARCH INSTRUMENT

MONARCH INSTRUMENT 6180-022 instruction manual

WIKA RTD operating instructions

WIKA

WIKA RTD operating instructions

MMG TQI-021/1 user manual

MMG

MMG TQI-021/1 user manual

Metrohm 912 manual

Metrohm

Metrohm 912 manual

Gill E73708 CUSTOMER INSTRUCTIONS

Gill

Gill E73708 CUSTOMER INSTRUCTIONS

GW Instek PEL-3000 Series user manual

GW Instek

GW Instek PEL-3000 Series user manual

JDS Uniphase FI Series user manual

JDS Uniphase

JDS Uniphase FI Series user manual

ATSI LF-22 operating guide

ATSI

ATSI LF-22 operating guide

QEO Multi-Pointer Service manual

QEO

QEO Multi-Pointer Service manual

Endress+Hauser Levelflex FMP53 Brief operating instructions

Endress+Hauser

Endress+Hauser Levelflex FMP53 Brief operating instructions

Fluidwell F011-A user manual

Fluidwell

Fluidwell F011-A user manual

LSI LASTEM Alpha-Log user manual

LSI LASTEM

LSI LASTEM Alpha-Log user manual

Endress+Hauser Micropilot S FMR540 operating instructions

Endress+Hauser

Endress+Hauser Micropilot S FMR540 operating instructions

manuals.online logo
manuals.online logoBrands
  • About & Mission
  • Contact us
  • Privacy Policy
  • Terms and Conditions

Copyright 2025 Manuals.Online. All Rights Reserved.