Nivona Cafe Romatica User manual

5 6 7 89 10
Cafe Romatica
GB User manual

2 Foreword2
NOTE
This symbol draws your attention to special infor-
mation.
CAUTION
This symbol draws your attention to possible
dangers.
WELCOME TO THE NIVONA FAMILY!
We are delighted at the confidence you have shown in us by choosing
a quality product from NIVONA.
We would like to express our sincere THANKS.
To ensure maximum enjoyment of your NIVONA machine, please
read through this document carefully and pay attention to the safety
instructions before using the machine for the first time.
Please keep this document in a safe place. Then you can use it as a
reference or pass it on to any subsequent owner.
We hope you enjoy your NIVONA product and, with it, a good, flavour-
ful cup of coffee.
Best wishes to you from the NIVONA team!
SYMBOLS USED
The following symbols are used in these instructions:
TIP
This symbol indicates helpful advice on how to use
the machine.

Contents 3
DE
GB
FR
NL
PL
RU
CONTENTS
1. SAFETY INSTRUCTIONS.................................................. 4
1.1. Correct use.............................................................................................4
1.2. General instructions for the user...........................................4
1.3. Limits to the range of users......................................................5
2. CONTROL ELEMENTS ......................................................6
3. OPERATION OF THE MACHINE .......................................7
3.1. Function switches..............................................................................7
3.2. Operation with the rotary dial..................................................7
3.3. Operation with the touchscreen ............................................8
3.4. Functions of the buttons..............................................................8
4. INITIAL STARTUP...............................................................9
4.1. Preparation.............................................................................................9
4.2. Initial Start menu...............................................................................9
5. MENU NAVIGATION.......................................................... 11
6. PREPARE SPECIALTY COFFEES ....................................12
6.1. Draw specialty coffee...................................................................12
6.2. 2-cup function..................................................................................13
6.3. COFFEE quantity function (can symbol)............................ 13
6.4. Cappuccino Connaisseur......................................................... 14
6.5. Flavour profiles ................................................................................14
6.6. MY COFFEE (for individual specialty coffees)......................... 14
6.7. Permanent recipe settings ......................................................15
6.8. Prepare ground coffee................................................................16
7. BASIC SETTINGS..............................................................17
7.1. General settings ...............................................................................17
7.2. Set grind fineness..........................................................................19
7.3. Aroma Balance System ............................................................19
7.4. NIVONA app.....................................................................................20
8. CLEANING & MAINTENANCE....................................... 20
8.1. Rinse frother........................................................................................21
8.2. Clean frother.....................................................................................22
8.3. Rinse system.....................................................................................23
8.4. Clean system....................................................................................23
8.5. Descale system................................................................................24
8.6. Remove & clean brewing unit..............................................25
8.7. Clean regularly by hand...........................................................26
8.8. Disassemble and clean frother............................................27
8.9. Change filter.......................................................................................27
8.10. Maintenance status .....................................................................28
9. SOLVING PROBLEMS YOURSELF.................................29
10. ACCESSORIES & COFFEE ASSORTMENT .................32
11. CUSTOMER SERVICE & WARRANTY ...........................32
12. PACKAGING & DISPOSAL..............................................32
13. TECHNICAL DATA............................................................33

4 Safety instructions 1.
1. SAFETY INSTRUCTIONS
1.1. Correct use
The machine is intended for use in the home and
similar applications such as kitchens for person-
nel, shops, offices and other commercial premises,
agricultural estates, by customers in hotels, motels
and other residential establishments and in bed and
breakfasts (see warranty terms attached). Other-
wise the warranty will be void.
1.2. General instructions for the user
Set the machine on a dry, level and stable surface, and
use it only indoors. Never place this machine on a hot
surface, near other appliances which become very hot
when in use (e.g. stove, deep fryer), or near open flames.
The machine must not be used in cupboards or other
closed pieces of furniture.
The mains supply voltage must always match the
working voltage of the machine. Please refer to the
type plate on the machine.
The machine must not be used at altitudes over
2000 m above sea level.
Do not operate the machine if the mains supply cable
or the casing is damaged. Never let the mains supply
cable touch hot parts.
If the mains supply cable of the machine is damaged,
it must be replaced by the manufacturer, its customer
service representative, or a similarly qualified techni-
cian to avoid hazards.
Never immerse the machine in water.
Always keep the mains supply plug dry and keep it
away from moisture.
Do not pull on the mains supply cable to disconnect
the plug from the mains socket.
CAUTION
Repairs to electrical appliances must be carried out
only by specialised technicians! Improper repairs
can expose the user to considerable dangers! If the
machine is used other than for its intended purpose
or is operated or maintained improperly, we cannot
accept liability for any resulting damage!
CAUTION
Actuating the on/off switch during the brewing pro-
cess can damage the machine! Switch the machine
off only when it is idle!
CAUTION
Danger of burns! Hot water might spray out of the
outlet at first when steam or hot water is drawn. Touch
the outlet only when cold.

5Safety instructions
DE
GB
FR
NL
PL
RU
If a fault occurs, disconnect the mains plug immedi-
ately (never by pulling on the mains supply cable or
the machine itself).
Before carrying out maintenance or cleaning, check
that the machine is switched off and that the mains
plug is disconnected.
No liability for damage is accepted in case of incor-
rect operation, improper use, or incorrect repairs. The
warranty is void in these cases.
Always follow the instructions for cleaning and desca-
ling! Failure to comply voids the warranty.
Never clean the machine or individual parts in the
dishwasher. Failure to comply voids the warranty.
Do not leave the machine switched on unnecessarily.
If you will be away for several days, always unplug the
mains supply cable.
Please use the integrated coffee grinder only to grind
roasted and untreated coffee beans, not for other food
items! Always make sure that there are no foreign
objects mixed in with the coffee beans, which voids
the warranty.
If repair of the machine is required (including replace-
ment of the mains cable!), please first contact the
NIVONA service telephone or the dealer from which
the machine was purchased, and, after consultation
with us and observing the section “How to make
your machine ready for shipment” in Chapter 11 of this
document, send it to NIVONA Central Customer
Service, Südwestpark 49, D-90449 Nurember,
Germany.
1.3. Limits to the rane of users
This machine can be used by children 8 and older and
by persons with physical, sensory, or mental impair-
ments or who are lacking in experience and know-
ledge, provided they are acting under supervision or
have been instructed on how to use the machine safely
and are aware of the possible dangers. Children must
not play with the machine. Cleaning and maintenance
of this machine must not be carried out by children
unless they are age 8 or over and are acting under
supervision. The machine and its connection line must
be kept away from children younger than 8.

Control elements6 2.
2 CLARIS fresh water filters
Operating instructions
Warranty terms
Measuring spoon
2 cleaning tablets
Test strips (for measuring
water hardness)
2 connection tubes for milk:
WELCOME PACK
(included with machine)
With the sinle milk tube
only manual rinsin of the
frother is possible.
With the double milk tube
automatic rinsin of the frother
is carried out after a pre-set
time (easyclean+).
2. CONTROL ELEMENTS
Rotary dial
Frother
Display /
touchscreen
Height-adjustable
outlet with
cover plate
(frother behind)
Cup storage area /
cup heating
Ground coffee shaft
Service door with handle
(brewing unit behind)
Connection for milk tube
(in the height-adjustable outlet)
Type plate
(Remove drip tray)
Coffee grounds
container (inside)
Connection for milk tube
(in the drip tray)
Drip tray
Cover for coffee bean holder
Water tank with cover
On/off switch
Coffee bean holder
Rear rollers (in back)
Cable compartment (in back)
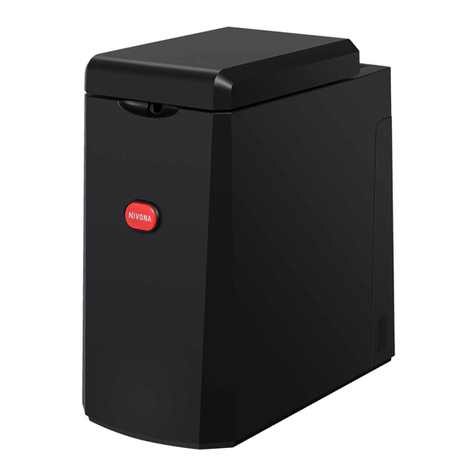
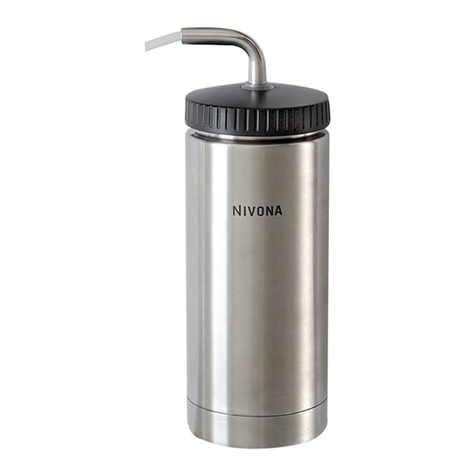
Milk container

3. Operation of the machine 7
DE
GB
FR
NL
PL
RU
3. OPERATION OF THE MACHINE
3.1. Function switches
The NIVONA machine can be operated with the following switches:
3.2. Operation with the rotary dial
Turning the rotary dial
To change between the three main menus SPECIALTY COFFEES, SETTINGS and MAIN
TENANCE, to select / navigate within the main menus and to change the setting options in
the submenus and Recipe menu.
Pressing the rotary dial
To start / confirm the currently marked function or the changed setting option.
In the submenus and in the Recipe menu, the first press selects the setting parameters and
the next press confirms the change.
Pressing the rotary dial once when the beverage is drawn cancels the procedure. If the draw
is cancelled while the parameters are still flashing, the rotary dial must be pressed 2x.
Rotary dial
navigate / select / change /
confirm by turning and pressing
Touchscreen
navigate / select / change /
confirm by touching
* The Recipe menu only appears before each
draw of a specialty coffee if DIRECT
DISPENSING is disabled
(SETTINGS - COMFORT SETTINGS menu).

8 Operation of the machine
3.3. Operation with the touchscreen
Using the touchscreen, the menu and function selection can be made directly by touching the
symbols and buttons.
3.4. Functions of the buttons
The buttons can be selected either by touching (directly) or with the rotary dial (by turn-
ing and pressing). To change a setting option in the SPECIALTY COFFEES and SETTINGS
menus, turn the rotary dial. The arrow symbols can only be operated by touching.
START start EXIT back | leave menu
OK confirm | save CHOOSE select option | enable
NEXT confirm | to next step navigate | select by touching
CANCEL cancel confirm a message /
instruction
Instruction for a manual
action on the machine
The currently selected symbol / function is
highlighted; the symbol description is dis-
played in the SPECIALTY COFFEES menu.

9Initial startup
4.
DE
GB
FR
NL
PL
RU
4. INITIAL STARTUP
4.1. Preparation
Remove the machine and other supplied parts from the packaging
Place the machine on a level, dry work surface (ventilation slots must not be covered)
Connect the mains supply cable to a power socket which has been correctly installed
(any unnecessary length of cable remains inside the cable compartment)
Switch on the machine
If the machine is switched on after the initial startup, it first heats up. If the automatic switch-
on rinse is enabled, the display shows RINSING SYSTEM and the rinse procedure starts
automatically. If the automatic switch-on rinse is disabled, the display shows PLEASE RINSE
and the rinse procedure must be started.
4.2. Initial Start menu
The instructions on the display lead you through the Initial Start menu conveniently and
step-by-step.
Set language
Select the language and confirm
Set filter
Select the filter setting
NOTE
Details on Operation of the machine are
contained in Chapter 3, starting at page 7.
Filter YES Filter NO

10 Initial startup
Test strips Deree of
hardness
Water hard-
ness display
≤
1 red point
1 - 7° DEGREE 1
2 red points 8 - 14° DEGREE 2
3 red points 15 -21° DEGREE 3
(factory setting)
≥4 red points > 21° DEGREE 4
Example: Water hardness
display DEGREE 3
FILL WATER
TANK
Operation without filter
(factory setting)
Set the menu to INSERT FILTER?
Set NO and confirm with NEXT
When using the machine without a
filter, the water hardness must be
entered in the next step.
Operation with filter
Set the menu to INSERT FILTER? Set
YES and confirm with NEXT
NOTE
If used with a filter, the machine does not need
to be descaled as often.
Set water hardness*
Immerse supplied test strip briefly in water, shake it off and read the test result after
about 1 minute
In the menu, select the water hardness read from the test strip and confirm with NEXT.
Fill water tank (> 0.7l)
Remove the water tank and fill it with fresh, cold water without carbonation (no mineral
water), reinsert the tank.
Do not fill any carbonated liquids or any other liquids, or the warranty is void!
Fill coffee bean holder
Fill the coffee bean holder with untreated, roasted coffee beans without foreign objects
or dirt and without sugar, then close the flavour protection cover well
* For operation without filter
FILL COFFEE BEANS

11
X. 11
5. Menu navigation
FR
NL
PL
RU
GB
DE
DE
FR
NL
PL
RU
FILLING
SYSTEM
RINSING
FILTER
RINSING
SYSTEM
SPECIALTY
COFFEES
SETTINGS MAINTE-
NANCE
CAUTION
Insert the filter straiht
and do not overturn!
Insert
the
filter
Insert filter*
Using the mounting aid at the end of the measuring spoon, screw the filter into the
water tank
Place a large container (> 0.5 l) under the outlet and confirm with NEXT
Rinse filter*, fill / rinse system
A message / instruction is shown on the display when the system hast to be filled
Place a large container (> 0.5 l) under the outlet
Wait until no more water comes out of the outlet, then empty the container
Confirm the message / instruction
All settings that were determined during initial startup can be changed at any time in the
SETTINGS menu.
5. MENU NAVIGATION
In the NIVONA machine, you can select the main menus SETTINGS, SPECIALTY COFFEES,
and MAINTENANCE. All available functions of the machine can be carried out within these
main menus.
Detailed information on navigation within and between the main menus is found in Chapter
3 starting at page 7.
* For operation with filter

12 Prepare specialty coffees
NOTE
At first preparation, the grinding chamber is
still empty. After the first grinding, it is pos-
sible that FILL BEANS is displayed and the
machine does not make coffee.
Follow the instructions o n the dis-
play and press the rotary dial again
for an additional draw; the process is
then repeated
6.
RINSE VALVE
UNDER COLD
WATER
6. PREPARE SPECIALTY COFFEES
6.1. Draw specialty coffee
Select the desired specialty coffee in the SPECIALTY COFFEES menu
For specialty coffees with milk, connect the milk-filled container (milk container, milk
cooler, Tetra Pack, etc.) to one end of the milk tube (in case of a double milk tube to the
valve). Connect the other end to the height-adjustable outlet
When direct dispensing is enabled (see Chapter 7.1. on page 17), short pressing / touch-
ing the desired specialty coffee starts dispensing immediately
When direct dispensing is disabled (see Chapter 7.1. on page 17), short pressing / touch-
ing the desired specialty coffee takes you to the recipe menu for the stored beverage,
with the option of changing some of the stored parameters for the next dispensing
Confirmation in the recipe menu of the specialty coffee starts the beverage dispensing
After completing the preparation of a specialty coffee with milk, the display shows the
message / instruction to rinse the frother.
If the sinle milk tube is used, the frother should be rinsed as soon as possible, but at the
latest before switching off the machine.
Reconnect the tube to the drip tray, select and confirm the message / instruction on the
display with the rotary dial / by touching and follow the instructions on the display until
the end of the program
CAUTION
Before switching off the machine, the
frother must be rinsed also when usin
the double milk tube (if a message / in-
struction appears on the display) and the
connection (valve) of the double milk tube
must be rinsed under cold, clean water
(see Chapter 8.7. on page 26).
With the rotary dial / by touching
select and confirm the message /
instruction on the display
Double milk tube Single milk tube
– connected to the milk container –

13Prepare specialty coffees
DE
GB
FR
NL
PL
RU
Single milk tube –
connected to drip tray
* Not for CAFFÈ AMERICANO, HOT WATER
If the double milk tube is used, the frother does not need to be rinsed immediately, because
the easyclean+rinsing program rinses it automatically after the set time (see Chapter 7.1. on
page 17). It is not necessary to remove the tube end from the connected milk source.
Even durin a started coffee dispensing, the parameters coffee strength, quantity, aroma and
2-cup function can still be changed by selecting and turning the rotary dial as lon as they
are flashin.
Beverage dispensing can be cancelled either with CANCEL or by pressing the rotary dial. If
dispensing is cancelled with the rotary dial while the parameters are still flashing, the rotary
dial must be pressed several times.
6.2. 2-cup function*
To dispense two cups of the same beverage directly one after the other at the press of a
button / by touching, the cup symbol must be changed during dispensing and a second
cup must be placed under the outlet
6.3. COFFEE quantity function (can symbol)
To dispense up to 8 cups (max. 1.9l) of the specialty coffee COFFEE one after the other,
place a suitably large container under the outlet and change the cup symbol to the
desired quantity. When direct dispensin is enabled (see Chapter 7.1. on page 17), the
cup symbol must be changed durin dispensin. If direct dispensin is disabled, the cup
symbol is changed in the recipe menu before dispensin.
If the quantity of coffee beans or water falls below the minimum quantity during
dispensing, dispensing can either be continued or cancelled after refilling.
CAUTION
Before removing the double milk tube,
the frother must be rinsed (if a message /
instruction appears on the display).
Confirm the message / instruction
on the display.
Can
1 cup 2 cups

14 Prepare specialty coffees
MY COFFEE
6.4. Cappuccino Connaisseur
By changing the PREPARATION, CAPPUCCINO or CAFFÈ LATTE lovers can determine
in BEVERAGE RECIPES whether milk (milk ---> coffee), coffee (coffee ---> milk) or both at
the same time (coffee + milk) is added to the cup first
6.5. Flavour profiles
Changing the flavour profile (DYNAMIC | CONSTANT | INTENSE) changes the brewing
process and extraction from the beans and thus the taste of the coffee (see also
Chapter 7.3 Aroma Balance System on page 19).
The QUICK flavour profile makes it possible to dispense a specialty coffee more quickly
than the other three flavour profiles
6.6. My Coffee (for individual specialty coffees)
Up to 20 different beverages can be individually set, named, and stored with the NIVONA
machine.
To do this, in the SETTINGS menu select the menu option BEVERAGE RECIPES and
edit, add or delete beverages under MY COFFEE
Add a beverae:
Select basic recipe, assign name, go one step further, select symbol, set individual recipe,
save and exit the menu
DYNAMIC
CONSTANT INTENSE
QUICK

15Prepare specialty coffees
DE
GB
FR
NL
PL
RU
NOTE
Detailed information for setting a perma-
nent TEMPERATURE and for the general
setting of an FLAVOUR PROFILE is given
in chapter 7.1. General settings on page 17
6.7. Permanent recipe settins
The following parameters for the individual specialty coffees can be permanently set in the
SETTINGS menu under the item BEVERAGE RECIPES:
STRENGTH FLAVOUR*
(DYNAMIC, CONSTANT,
INTENSE)
PREPARATION**
(Cappuccino Connaisseur)
QUANTITY
(coffee / milk foam / water
/ milk, depending on the
specialty coffee)
TEMPERATURE***
(NORMAL, HIGH, HOT,
MAXIMUM)
Pressing the rotary dial / touching OK saves the changed parameters
Press EXIT to exit the menu level
* Only if the INDIVIDUAL option is selected in the AROMA menu option of the SETTINGS menu
** Only for CAPPUCCINO or CAFFÈ LATTE
*** Only if the INDIVIDUAL option is selected under TEMPERATURE in the SETTINGS menu; the available tempera-
ture options depend on the beverage

16 Prepare specialty coffees
FILL GROUND
COFFEE
CLOSE THE
GROUND COFFEE
SHAFT LID
CAUTION
The ground coffee shaft is not a storage
container. Therefore, never add more than
one portion to the shaft and use only fresh
or vacuum-packed ground coffee from
coffee beans.
Water-soluble instant coffee must not be
used!
6.8. Prepare round coffee
Open the lid of the ground coffee shaft (top centre on the right-hand side of the
machine)
The display alternately shows FILL COFFEE POWDER and CLOSE GROUND COFFEE
SHAFT
Add a level measuring spoon of ground coffee
Close the cover and flap
The display shows when the ground coffee is ready
Place a cup in the middle below the coffee outlet
Select the beverage in the SPECIALTY COFFEES menu
Start preparation
NOTE
If you accidentally open the ground coffee shaft – or have not started a beverage draw after adding
ground coffee – the machine is automatically rinsed about one minute after the cover is closed again
and is then ready for use again.

17Basic settings
7.
DE
GB
FR
NL
PL
RU
7. BASIC SETTINGS
7.1. General settins
All parameters displayed in the SETTINGS menu can be changed using the rotary dial / by touching.
BEVERAGE RECIPES
– Permanent recipe setting of the individual
specialty coffee
– LIVE PROGRAMMING within the individual
beverages, i.e. changing and saving the recipe
setting during dispensing
(Select LIVE PROGRAMMING within the beverage recipe
and follow the instructions on the display)
FILTER
Set operation with / without filter
WATER HARDNESS
– Set the water hardness
(only displayed during operation
without filter)
FLAVOUR
– Setting the aroma profile for all beverages in
the SPECIALTY COFFEE menu
(CONSTANT, DYNAMIC, INTENSE, QUICK, INDIVIDUAL)
With the setting INDIVIDUAL, different aroma
profiles can be defined for the different spe-
cialty coffees
TEMPERATURE
– Setting the temperatures for COFFEE,
MILK, MILK FOAM and HOT WATER for all
beverages in the Specialty Coffee menu
(NORMAL, HIGH, HOT, MAXIMUM, INDIVIDUAL)*
With the setting INDIVIDUAL, different
temperatures can be defined for the
different specialty coffees
LANGUAGE
– Set the language
SETTINGS
* The available temperature options depend on the beverage

18 Basic settings
* After disconnection from the power network, the time of day must be reset.
** If the rotary dial has not been actuated for a longer period of time, the machine switches automatically into the ECO mode.
A screen saver appears on the display. Actuate the rotary dial to leave the ECO mode.
*** For the easyclean+automatic rinsing program when using the machine with double tube.
TIMES
– Activate / deactivate automatic switch-off time
– Activate / deactivate automatic switch-on time
(setting of the current time and the switch-on time)
- Set time of day*
(only appears when the switch-on time is activated)
COMFORT SETTINGS
– Activate / deactivate cup heating
– Activate / deactivate display lock /
energy saving (ECO) mode**
– Activate / deactivate milk products
(specialty coffee with milk)
– Activate / deactivate automatic
switch-on rinse
– Set frother rinsing***
– Activate / deactivate automatic
switch-on rinse
– Activate / deactivate direct dispensing
(immediate beverage dispensing with a single press /
by touching the SPECIALTY COFFEE menu, without
the possibility of making changes in the recipe menu)
FACTORY SETTING
– Recipes, settings and Bluetooth
can be reset to the factory
setting
STATISTICS
– Displays the draws per specialist coffee
and the performed maintenance functions
since initial startup
BLUETOOTH
– Connection to smartphone / tablet
and control of the machine with the
NIVONA app.

19Cleaning & maintenance
DE
GB
FR
NL
PL
RU
CAUTION
The rind fineness may only be set when
the rinder is runnin!
The grinder can be adjusted to adapt to
the roast of the coffee beans. We rec-
ommend always leaving the grinder at a
medium setting.
NOTE
When changing the grind fineness, we
recommend:
– a finer setting for light roasts
(regulator further to the left),
– a coarser setting for dark roasts
(regulator further to the right).
Set grind finenessOpen / close the
service door
7.2. Set rind fineness
To change the grind fineness, please:
Open the service door on the right side of the housing (gently pull the unlocking device
inside the handle upward, then carefully remove the service door from the housing)
Place cup under the height-adjustable outlet
Select and start ESPRESSO in the SPECIALTY COFFEE menu
While the grinder grinds, change the grind fineness by moving the regulator (above
right) (left = finer, right = coarser)
Close the service door again (guide pins on the rear of the service door into the recesses,
then press the service door until it locks in place)
7.3. Aroma Balance System
The NIVONA machine is equipped with the Aroma Balance System, which brings out the best
of the bean for every taste. The three flavour profiles DYNAMIC, CONSTANT and INTENSE
create a different taste with the same bean, same coffee strength, and same water amount.
The fourth flavour profile, QUICK, enables a specialty coffee to be dispensed more quickly
than with the other three flavour profiles while maintaining a balanced aroma.
DYNAMIC CONSTANT INTENSEQUICK

20 Basic settings 8.
MAINTE-
NANCE
NOTE
The NIVONA machine supports only one
active Bluetooth connection with a mobile
device.
7.4. NIVONA app
The NIVONA machine can be controlled and operated through the NIVONA app, as it is
equipped with a Bluetooth interface.
Download the NIVONA app from the Google Play Store (Android) or from the Apple
App Store (iOS) onto your mobile device
In the SETTINGS menu, select the BLUETOOTH menu option and activate Bluetooth
with CONNECT on the NIVONA machine
Activate Bluetooth on your mobile device and from there connect to the NIVONA
machine through the NIVONA app
Now the NIVONA machine can be operated / controlled through the app.
8. CLEANING & MAINTENANCE
All cleaning and maintenance programs can generally be selected and started in the
MAINTENANCE menu.
Select MAINTENANCE menu
Select the cleaning or maintenance program and start it with the rotary dial / by touching
The machine starts the corresponding cleaning or maintenance process and displays
instructions for additional actions if required.
Follow the instructions on the display up to the end of the program and confirm each
time with the rotary dial / by touching
Other manuals for Cafe Romatica
2
Table of contents
Other Nivona Kitchen Appliance manuals
