Instructions for use
Before attaching any parts, ensure the mixer is unplugged from the mains
power supply.
Using the stand mixer
•Push the head tilt release button inwards and at the same time, tilt the
motor head back.
•To attach the bowl, place it on the base of the mixer and gently turn
anticlockwise until it locks into place.
•Push the clear splash guard into its position under the mixer head with
the opening at the front.
•Attach the plastic splatter guard onto the chosen tool.
•To attach the flat beater, whisk or dough hook, insert your chosen
attachment into the centre hole of the plastic splatter guard, fix the
two raised notches of either the beater, whisk or dough hook into the
two recessed areas on the splash guard and then push up against the
spring into the beater shaft. Turn clockwise until it is locked into place.
The splash and splatter guards will help to prevent any splatters and
spillages from the food in the bowl.
7
Speed control guide
The speed control dial (10) should be set to the lowest speed for starting and
then gradually moved to the desired higher speed to avoid ingredients
splashing out of the bowl.
Note: Using the pulse settings allows for greater control over the texture of the
food produced. It is only intended to be used for short bursts of mixing.
•0 –Off.
•P –(Pulse). Combining mixes, batters and dough. Mincing meat and
blending.
•1 –Slow stirring, combining, mashing and starting all mixing.
•2 –Slow mixing batters and dough, mashing and faster stirring.
•3 –Mixing batters and dough. Mincing meat.
•4 –Medium - fast beating or whipping. Mincing meat and blending.
•5 –Whipping cream and egg whites. Blending.
•6 to 10 –Whipping small amounts of cream or egg whites. Blending.
Note: Do not exceed speed 3 when preparing dough. This may damage the
mixer.
Using the mixer accessories
•Flat beater –Use for normal to heavy mixtures: cakes, biscuits,
creamed icing, quick breads, mashed potato and pie pastry.
•Whisk –Use for mixtures that need air incorporated: eggs, egg
whites, heavy cream, sponge cake, mayonnaise.
•Dough hook –Use for mixing and kneading yeast dough: breads,
rolls and buns.
Tips for using as a stand mixer
•Most recipes provide the required time and speed needed for
correct mixing.
•Do not add ingredients directly into the moving beater.
•Always start by using speed setting 1, if you start on a higher speed
the ingredients will spill out of the mixing bowl. As the ingredients
become combined you can then increase the speed of the mixer.
You can then use a plastic or wooden spatula (not included) to
scrape the sides of the mixing bowl.
•To prevent splattering, keep the beaters in the mixture and always
switch the mixer off before lifting the beaters from the mixture.
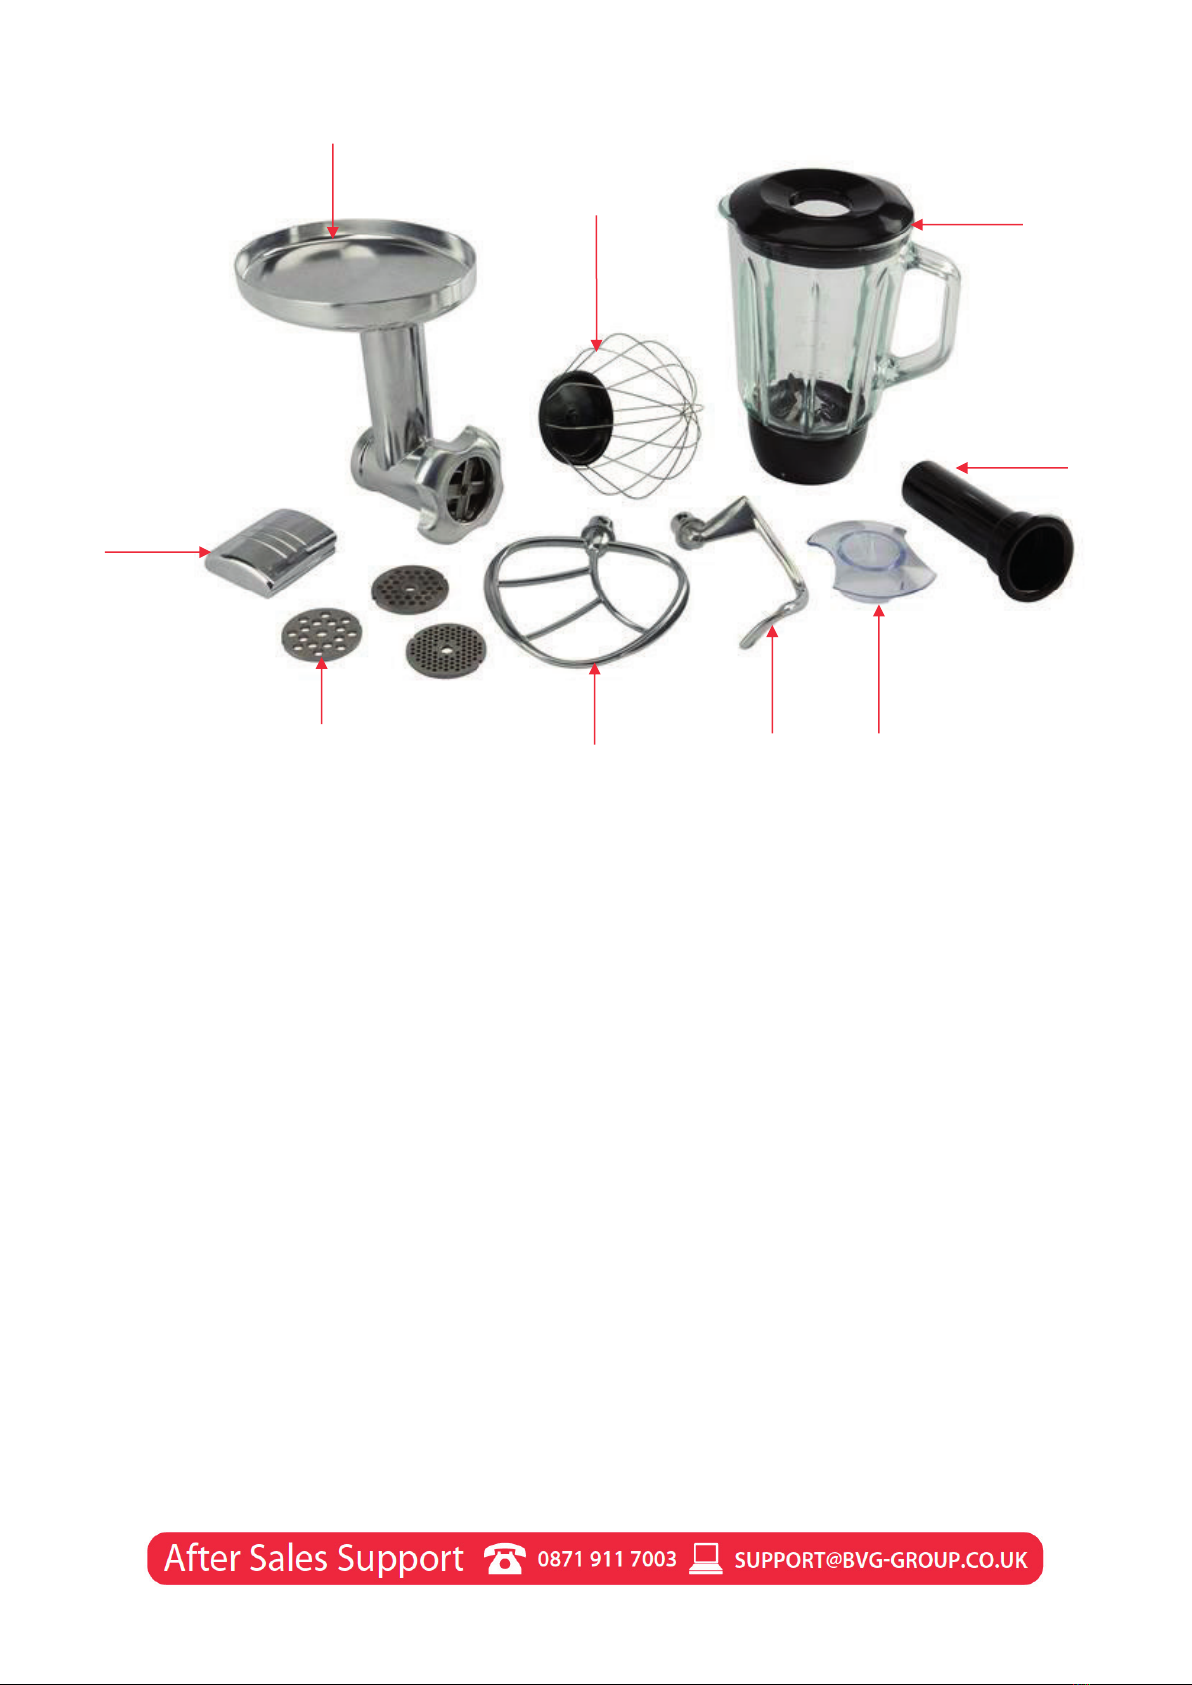
Description of parts
1. Main motor body
2. Mincer attachment
3. Mincer attachment location
4. Clear splash guard
5. Stainless-steel bowl
6. Blender jug
7. Display screen
8. Time setting & pulse control
9. Head tilt release button
10. Speed control dial
11. Mincer location cover
12. 3 mincer plates
13. Flat beater
14. Dough hook
15. Access lid for blender jug
16. Pusher for mincer
17. Whisk
76