NoFli Standard 26 Installation and operating instructions

Instruction Manual
P
ACKAGE CONTENTS
V
erpackungsinhalt / Contenu de la boîte / Contenido del paquete / Zawartośc Paczki
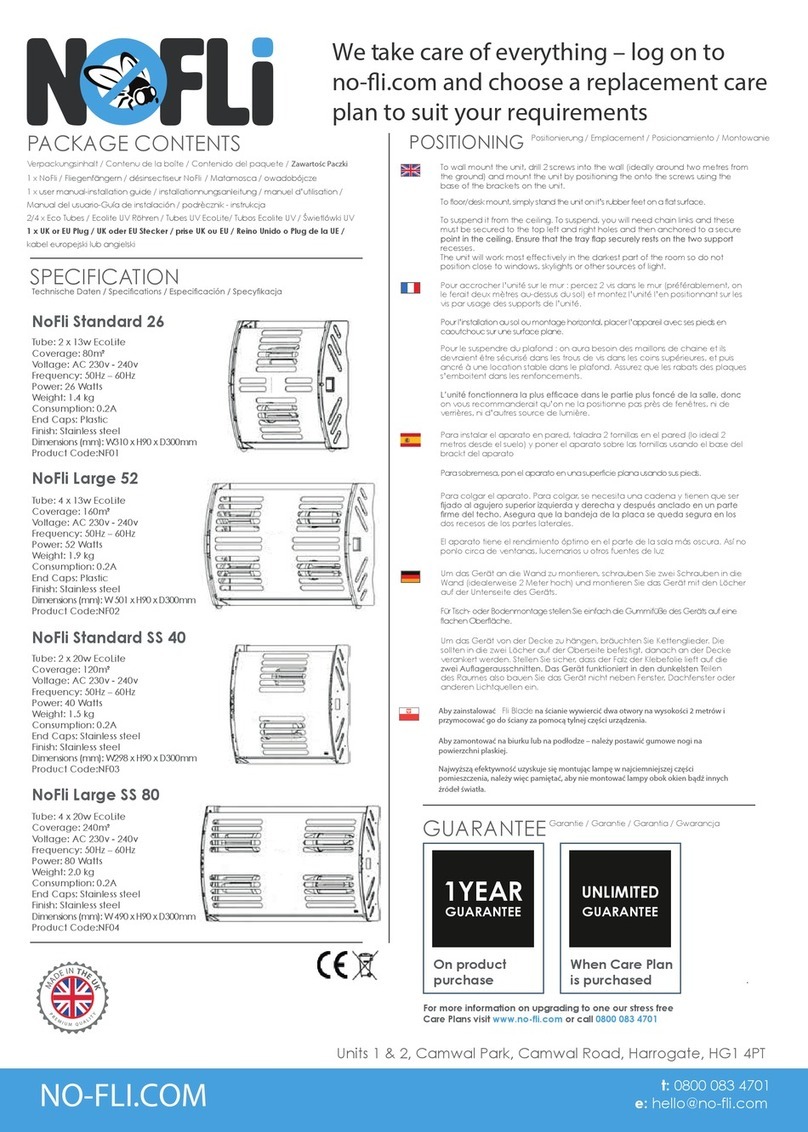
Tube: 2 x 13w EcoLite
Coverage: 80m²
Voltage: AC 230v - 240v
Frequency: 50Hz – 60Hz
Power: 26 Watts
Weight: 1.4 kg
Consumption: 0.2A
End Caps: Plastic
Finish: Stainless steel
Dimensions (mm): W310 x H90 x D300mm
Product Code:FB01
NoFli Standard 26
SPECIFICATION
Fli Blade 26,40,52,80
Tube: 4 x 13w EcoLite
Coverage: 160m²
Voltage: AC 230v - 240v
Frequency: 50Hz – 60Hz
Power: 52 Watts
Weight: 1.9 kg
Consumption: 0.2A
End Caps: Plastic
Finish: Stainless steel
Dimensions (mm): W 501 x H90 x D300mm
Product Code:FB02
NoFli Large 52
product please contact us within 12 months
of the purchase date with details of the fault
and any images / proof. We will attempt
is not possible for whatever reason we will
endeavour to replace with a like for like unit
or similar. If no alternative is available we will
credit accordingly.
Any product sent back after 12 months after
the purchase date will be at the cost of the
customer including any repairs authorised.
GUARANTEE Garantie / Garantie / Garantia / Gwarancja
3YEAR
GUARANTEE
NoFli Standard
NoFli Large
POSITIONING Positionierung / Emplacement /Posicionamiento /Montowanie
1
x NoFli /Fliegenfängern / désinsectiseur NoFli /Matamosca / owadobójcze
1
x user manual-installation guide / installationnungsanleitung /manuel d’utilisation /
M
anual del usuario-Guía de instalación / podrècznik - instrukcja
2/4
x Eco Tubes / Ecolite UVRöhren / Tubes UV EcoLite/ Tubos Ecolite UV / �wietlówki UV
1
x UK or EU Plug /UK oder EU Stecker / prise UK ou EU /Reino Unido o Plug de la UE /
k
abel europejski lub angielski
To wall mount the unit, drill 2 screws into the wall (ideally around two metres from
the ground) and mount the unit by positioning the onto the screws using the
base of the brackets on the unit.
To floor/desk mount, simply stand the unit on it’s rubber feet on a flat surface.
Para sobremesa, pon el aparato en una superficie plana usando sus pieds.
Für Tisch- oder Bodenmontage stellen Sie einfach die Gummifüße des Geräts auf eine
flachen Oberfläche.
Pour l’installation au sol ou montage horizontal, placer l’appareil avec ses pieds en
caoutchouc sur une surface plane.
To suspend it from the ceiling. To suspend, you will need chain links and these
must be secured to the top left and right holes and then anchored to a secure
recesses.
The unit will work most effectively in the darkest part of the room so do not
position close to windows, skylights or other sources of light.
Pour accrocher l’unité sur le mur : percez 2 vis dans le mur (préférablement, on
le ferait deux mètres au-dessus du sol) et montez l’unité l’en positionnant sur les
vis par usage des supports de l’unité.
Pour le suspendre du plafond : on aura besoin des maillons de chaine et ils
devraient être sécurisé dans les trous de vis dans les coins supérieures, et puis
ancré à une location stable dans le plafond. Assurez que les rabats des plaques
s’emboitent dans les renfoncements.
on vous recommanderait qu’on ne la positionne pas près de fenêtres, ni de
verrières, ni d’autres source de lumière.
Para instalar el aparato en pared, taladra 2 tornillas en el pared (lo ideal 2
metros desde el suelo) y poner el aparato sobre las tornillas usando el base del
brackt del aparato
Para colgar el aparato. Para colgar, se necesita una cadena y tienen que ser
dos recesos de los partes laterales.
El aparato tiene el rendimiento óptimo en el parte de la sala más oscura. Así no
ponlo circa de ventanas, lucernarios u otros fuentes de luz
Aby zainstalować Fli Blade na ścianie wywiercić dwa otwory na wysokości 2 metrów i
przymocować go do ściany za pomocą tylnej części urządzenia.
Najwyższą efektywność uzyskuje się montując lampę w najciemniejszej części
pomieszczenia, należy więc pamiętać, aby nie montować lampy obok okien bądź innych
źródeł światła.
Aby zamontować na biurku lub na podłodze – należy postawić gumowe nogi na
powierzchni plaskiej.
Um das Gerät an die Wand zu montieren, schrauben Sie zwei Schrauben in die
Wand (idealerweise 2 Meter hoch) und montieren Sie das Gerät mit den Löcher
auf der Untenseite des Geräts.
Um das Gerät von der Decke zu hängen, bräuchten Sie Kettenglieder. Die
sollten in die zwei Löcher auf der Oberseite befestigt, danach an der Decke
verankert werden. Stellen Sie sicher, dass der Falz der Klebefolie lieft auf die
eilen
des Raumes also bauen Sie das Gerät nicht neben Fenster, Dachfenster oder
anderen Lichtquellen ein.
Instruction Manual
PACKAGE CONTENTS
Verpackungsinhalt / Contenu de la boîte / Contenido del paquete / Zawartośc Paczki
Tube: 2 x 13w EcoLite
Coverage: 80m²
Voltage: AC 230v - 240v
Frequency: 50Hz – 60Hz
Power: 26 Watts
Weight: 1.4 kg
Consumption: 0.2A
End Caps: Plastic
Finish: Stainless steel
Dimensions (mm): W310 x H90 x D300mm
Product Code:FB01
Fli Blade 26
SPECIFICATION
Fli Blade 26,40,52,80
Tube: 4 x 13w EcoLite
Coverage: 160m²
Voltage: AC 230v - 240v
Frequency: 50Hz – 60Hz
Power: 52 Watts
Weight: 1.9 kg
Consumption: 0.2A
End Caps: Plastic
Finish: Stainless steel
Dimensions (mm): W 501 x H90 x D300mm
Product Code:FB02
Fli Blade 52
Tube: 2 x 20w EcoLite
Coverage: 120m²
Voltage: AC 230v - 240v
Frequency: 50Hz – 60Hz
Power: 40 Watts
Weight: 1.5 kg
Consumption: 0.2A
End Caps: Stainless steel
Finish: Stainless steel
Dimensions (mm): W298 x H90 x D300mm
Product Code:FB03
Fli Blade 40
Tube: 4 x 20w EcoLite
Coverage: 240m²
Voltage: AC 230v - 240v
Frequency: 50Hz – 60Hz
Power: 80 Watts
Weight: 2.0 kg
Consumption: 0.2A
End Caps: Stainless steel
Finish: Stainless steel
Dimensions (mm): W 490 x H90 x D300mm
Product Code:FB04
Fli Blade 80
product please contact us within 12 months
of the purchase date with details of the fault
and any images / proof. We will attempt
is not possible for whatever reason we will
endeavour to replace with a like for like unit
or similar. If no alternative is available we will
credit accordingly.
Any product sent back after 12 months after
the purchase date will be at the cost of the
customer including any repairs authorised.
GUARANTEE Garantie / Garantie / Garantia / Gwarancja
3YEAR
GUARANTEE
Fli Blade 26,52
Fli Blade 40,80
POSITIONING Positionierung / Emplacement /Posicionamiento /Montowanie
Fli-Blade
Building C
Knaresborough Technology Park
Manse Lane
Knaresborough
HG5 8LF
Tel: +44 (0)1423 855600
Fax: +44 (0)1423 855601
Web: www.fliblade.com
1x FliBlade /Fliegenfängern / désinsectiseur FliBlade /Matamosca / owadobójcze
1x user manual-installation guide / installationnungsanleitung /manuel d’utilisation /
Manual del usuario-Guía de instalación / podrècznik - instrukcja
2/4 x Eco Tubes / Ecolite UVRöhren / Tubes UV EcoLite/ Tubos Ecolite UV / Świetlówki UV
1x UK or EU Plug /UK oder EU Stecker / prise UK ou EU /Reino Unido o Plug de la UE /
kabel europejski lub angielski
fly control systems
To wall mount the unit, drill 2 screws into the wall (ideally around two metres from
the ground) and mount the unit by positioning the onto the screws using the
base of the brackets on the unit.
To floor/desk mount, simply stand the unit on it’s rubber feet on a flat surface.
Para sobremesa, pon el aparato en una superficie plana usando sus pieds.
Für Tisch- oder Bodenmontage stellen Sie einfach die Gummifüße des Geräts auf eine
flachen Oberfläche.
Pour l’installation au sol ou montage horizontal, placer l’appareil avec ses pieds en
caoutchouc sur une surface plane.
To suspend it from the ceiling. To suspend, you will need chain links and these
must be secured to the top left and right holes and then anchored to a secure
recesses.
The unit will work most effectively in the darkest part of the room so do not
position close to windows, skylights or other sources of light.
Pour accrocher l’unité sur le mur : percez 2 vis dans le mur (préférablement, on
le ferait deux mètres au-dessus du sol) et montez l’unité l’en positionnant sur les
vis par usage des supports de l’unité.
Pour le suspendre du plafond : on aura besoin des maillons de chaine et ils
devraient être sécurisé dans les trous de vis dans les coins supérieures, et puis
ancré à une location stable dans le plafond. Assurez que les rabats des plaques
s’emboitent dans les renfoncements.
on vous recommanderait qu’on ne la positionne pas près de fenêtres, ni de
verrières, ni d’autres source de lumière.
Para instalar el aparato en pared, taladra 2 tornillas en el pared (lo ideal 2
metros desde el suelo) y poner el aparato sobre las tornillas usando el base del
brackt del aparato
Para colgar el aparato. Para colgar, se necesita una cadena y tienen que ser
dos recesos de los partes laterales.
El aparato tiene el rendimiento óptimo en el parte de la sala más oscura. Así no
ponlo circa de ventanas, lucernarios u otros fuentes de luz
Aby zainstalować Fli Blade na ścianie wywiercić dwa otwory na wysokości 2 metrów i
przymocować go do ściany za pomocą tylnej części urządzenia.
Najwyższą efektywność uzyskuje się montując lampę w najciemniejszej części
pomieszczenia, należy więc pamiętać, aby nie montować lampy obok okien bądź innych
źródeł światła.
Aby zamontować na biurku lub na podłodze – należy postawić gumowe nogi na
powierzchni plaskiej.
Um das Gerät an die Wand zu montieren, schrauben Sie zwei Schrauben in die
Wand (idealerweise 2 Meter hoch) und montieren Sie das Gerät mit den Löcher
auf der Untenseite des Geräts.
Um das Gerät von der Decke zu hängen, bräuchten Sie Kettenglieder. Die
sollten in die zwei Löcher auf der Oberseite befestigt, danach an der Decke
verankert werden. Stellen Sie sicher, dass der Falz der Klebefolie lieft auf die
eilen
des Raumes also bauen Sie das Gerät nicht neben Fenster, Dachfenster oder
anderen Lichtquellen ein.
Instruction Manual
PACKAGE CONTENTS
V
erpackungsinhalt / Contenu de la boîte / Contenido del paquete / Zawartośc Paczki
Tube: 2 x 13w EcoLite
Coverage: 80m²
Voltage: AC 230v - 240v
Frequency: 50Hz – 60Hz
Power: 26 Watts
Weight: 1.4 kg
Consumption: 0.2A
End Caps: Plastic
Finish: Stainless steel
Dimensions (mm): W310 x H90 x D300mm
Product Code:FB01
Fli Blade 26
SPECIFICATION
Fli Blade 26,40,52,80
Tube: 4 x 13w EcoLite
Coverage: 160m²
Voltage: AC 230v - 240v
Frequency: 50Hz – 60Hz
Power: 52 Watts
Weight: 1.9 kg
Consumption: 0.2A
End Caps: Plastic
Finish: Stainless steel
Dimensions (mm): W 501 x H90 x D300mm
Product Code:FB02
Fli Blade 52
Tube: 2 x 20w EcoLite
Coverage: 120m²
Voltage: AC 230v - 240v
Frequency: 50Hz – 60Hz
Power: 40 Watts
Weight: 1.5 kg
Consumption: 0.2A
End Caps: Stainless steel
Finish: Stainless steel
Dimensions (mm): W298 x H90 x D300mm
Product Code:FB03
Fli Blade 40
Tube: 4 x 20w EcoLite
Coverage: 240m²
Voltage: AC 230v - 240v
Frequency: 50Hz – 60Hz
Power: 80 Watts
Weight: 2.0 kg
Consumption: 0.2A
End Caps: Stainless steel
Finish: Stainless steel
Dimensions (mm): W 490 x H90 x D300mm
Product Code:FB04
Fli Blade 80
product please contact us within 12 months
of the purchase date with details of the fault
and any images / proof. We will attempt
is not possible for whatever reason we will
endeavour to replace with a like for like unit
or similar. If no alternative is available we will
credit accordingly.
Any product sent back after 12 months after
the purchase date will be at the cost of the
customer including any repairs authorised.
GUARANTEE Garantie / Garantie / Garantia / Gwarancja
3YEAR
GUARANTEE
Fli Blade 26,52
Fli Blade 40,80
POSITIONING Positionierung / Emplacement /Posicionamiento /Montowanie
Fli-Blade
Building C
Knaresborough Technology Park
Manse Lane
Knaresborough
HG5 8LF
Tel: +44 (0)1423 855600
Fax: +44 (0)1423 855601
Web: www.fliblade.com
1
x FliBlade /Fliegenfängern / désinsectiseur FliBlade /Matamosca / owadobójcze
1
x user manual-installation guide / installationnungsanleitung /manuel d’utilisation /
M
anual del usuario-Guía de instalación / podrècznik - instrukcja
2/4
x Eco Tubes / Ecolite UVRöhren / Tubes UV EcoLite/ Tubos Ecolite UV / Świetlówki UV
1
x UK or EU Plug /UK oder EU Stecker / prise UK ou EU /Reino Unido o Plug de la UE /
k
abel europejski lub angielski
fly control systems
To wall mount the unit, drill 2 screws into the wall (ideally around two metres from
the ground) and mount the unit by positioning the onto the screws using the
base of the brackets on the unit.
To floor/desk mount, simply stand the unit on it’s rubber feet on a flat surface.
Para sobremesa, pon el aparato en una superficie plana usando sus pieds.
Für Tisch- oder Bodenmontage stellen Sie einfach die Gummifüße des Geräts auf eine
flachen Oberfläche.
Pour l’installation au sol ou montage horizontal, placer l’appareil avec ses pieds en
caoutchouc sur une surface plane.
To suspend it from the ceiling. To suspend, you will need chain links and these
must be secured to the top left and right holes and then anchored to a secure
recesses.
The unit will work most effectively in the darkest part of the room so do not
position close to windows, skylights or other sources of light.
Pour accrocher l’unité sur le mur : percez 2 vis dans le mur (préférablement, on
le ferait deux mètres au-dessus du sol) et montez l’unité l’en positionnant sur les
vis par usage des supports de l’unité.
Pour le suspendre du plafond : on aura besoin des maillons de chaine et ils
devraient être sécurisé dans les trous de vis dans les coins supérieures, et puis
ancré à une location stable dans le plafond. Assurez que les rabats des plaques
s’emboitent dans les renfoncements.
on vous recommanderait qu’on ne la positionne pas près de fenêtres, ni de
verrières, ni d’autres source de lumière.
Para instalar el aparato en pared, taladra 2 tornillas en el pared (lo ideal 2
metros desde el suelo) y poner el aparato sobre las tornillas usando el base del
brackt del aparato
Para colgar el aparato. Para colgar, se necesita una cadena y tienen que ser
dos recesos de los partes laterales.
El aparato tiene el rendimiento óptimo en el parte de la sala más oscura. Así no
ponlo circa de ventanas, lucernarios u otros fuentes de luz
Aby zainstalować Fli Blade na ścianie wywiercić dwa otwory na wysokości 2 metrów i
przymocować go do ściany za pomocą tylnej części urządzenia.
Najwyższą efektywność uzyskuje się montując lampę w najciemniejszej części
pomieszczenia, należy więc pamiętać, aby nie montować lampy obok okien bądź innych
źródeł światła.
Aby zamontować na biurku lub na podłodze – należy postawić gumowe nogi na
powierzchni plaskiej.
Um das Gerät an die Wand zu montieren, schrauben Sie zwei Schrauben in die
Wand (idealerweise 2 Meter hoch) und montieren Sie das Gerät mit den Löcher
auf der Untenseite des Geräts.
Um das Gerät von der Decke zu hängen, bräuchten Sie Kettenglieder. Die
sollten in die zwei Löcher auf der Oberseite befestigt, danach an der Decke
verankert werden. Stellen Sie sicher, dass der Falz der Klebefolie lieft auf die
eilen
des Raumes also bauen Sie das Gerät nicht neben Fenster, Dachfenster oder
anderen Lichtquellen ein.
1 x NoFli / Fliegenfängern / désinsectiseur NoFli / Matamosca / owadobójcze
no-fli.com
Building C, Knaresborough Technology Park,
Manse Lane, Knaresborough, HG5 8LF
we take care of everything – log on to
no-fli.com and choose a replacement
care plan to suit your requirements
t: 0800 0834701
e: hello@no-i.com

NoFli doit être uniquement utilisé dans des lieux non poussiéreux ou à l’écart de produits
e de
prévention incendie.
explosifs. Il doit être installé à une hauteur d’au moins 2 mètres du sol, hors de portée des enfants. Ne
tout danger. Débranchez l’appareil de toute source électrique avant toute manipulation. Ne
Ne nettoyez pas l’appareil
sous l’eau et ne l’installez pas sous la pluie. Toute réparation doit être opérée par le fabricant ou un
Assurez-vous que le voltage et la fréquence électrique correspondent à l’appareil.
Une prise de terre est nécessaire.
NoFli sólo debe utilizarse en zonas que están libres de polvo y de cualquier posible mezcla explosiva.
Si usted tiene alguna duda póngase en contacto con su autoridad local de bomberos para obtener
asesoramiento antes de la instalación.
pueden llegar. (<2.0m).
la lámpara o cualquier otra parte del aparato está dañado, el fabricante, su agente de servicio o por
Desconecte el aparato antes de
limpiarlo. Asegúrese de cortar la electricidad antes de limpiarlo y de reparar el aparato. No lo use en
No lavar con agua, ni colocar en la lluvia. Cualquier
reparación deberá ser llevada a cabo por el fabricante o por un electricista. Asegúrese que voltaje
local y la frecuencia son adecuados para la máquina. Asegure la conexión a tierra.
WARNING! Warnung / Avertissement / Advertencia / Ostrzeżenie
Warning
NoFli products must only be used in areas which are free of dust and any possible explosive vapour
mixture. Should you have any queries contact your The
or mount the appliance in a position where children can’t reach (at least 2.0m).
part of the appliance. If the supply cord, the lamp or any other part of the appliance is damaged, the
Unplug the appliance before cleaning. Be sure to cut off electricity when cleaning and repairing the
machine. No washing by water, no placing in the
rain. Repair should be carried out by Make sure local voltage
and frequency are suitable for the machine. Ensure earthling connection to prevent damage or danger
Der NoFli darf nur in Bereichen verwendet werden, die frei von Staub und jedem möglichen
explosivem Dampfgemisch sind. Bei jeglichen Unsicherheiten kontaktieren Sie bitte vor der Installation die
lokale Feuerwehr.
vorkommen. Hängen oder montieren Sie das Gerät in einer kindersichere Höhe (>2.0m). Entfernen Sie
niemals ein angebrachtes Teil des Gerätes. Falls das Kabel, die Lampe oder irgendein anderes Teil des
ersetzen, um Risiken zu vermeiden. Ziehen Sie den Stecker des Gerätes vor dem Reinigen heraus. Stellen
Sie sicher, dass die Elektrizität ausgeschaltet ist beim Reinigen oder Reparieren des Gerätes. Nicht in
brennbaren und/oder explosiven Bereichen verwenden. Nicht mit Wasser reinigen, nicht in den Regen
stellen. Reparaturen sollten vom Hersteller oder Elektriker durchgeführt werden. Stellen Sie sicher,
dass elektrische Spannung und Frequenz für das Gerät vorhanden sind. Stellen Sie sicher, dass das Gerät
geerdet ist.
Lampy NoFli powinny być używane w miejscach mało zakurzonych i wolnych od łatwopalnych gazów. W
tej sprawie zachęcamy do kontaktu z odpowiednimi slużbami. Urządzenie nie powinno być montowane tam,
gdzie istnieje ryzyko zapalenia obecnych w powietrzu łatwopalnych substancji. Montować w miejscu niedostępnym
dla dzieci (powyżej 2 metrów). Nie wymieniaj uszkodzonych elementów lampy samemu. W razie uszkodzenia
naprawy specjalistą. Odłącz urządzenie z prądu przed czyszczeniem. Upewnij się, że urządzenie jest odłączenie
podczas czyszczenia. Nie używać w miejscach, w których istnieje ryzyko eksplozji lub zapalenia. Nie
przemywać wodą, nie wystawiać na działanie deszczu. Naprawę powinien przeprowadzać wyłącznie producent
lub uprawniony elektyk. Upewnij się, że napięcie, z którego korzystasz i inne parametry prądu są odpowiednie dla
urządzenia. Upewnij się o uziemieniu.
Röhrenaustausch / Remplacement des tubes /
Tubo de repuesto / Wymiana żarówek UV
Replacer les UV Tubes
1. Eteignez l’appareil de l’alimentation
électrique en débranchant la prise
de courant
2. Attendez 5 minutes pour que la
lampe se refroidir
3. Ouvrir la grille avant
4. Relâchez les vieux tubes du châssis
5. Retirez les vieilles tubes dans une
façon écologique
6. Visser les nouvelles tubes EcoLite
dans le support
7. Fermer la grille et rebranchez la prise
de courant
Remplacer les tubes chaque 9 mois pour
To replace the UV tubes
1. Turn off the unit from the mains by
unplugging the unit
2. Leave for 5 minutes to let the lamps
cool down
3. Open the front grill
4. Release the old tubes from the chassis
5. Dispose of the old tubes in an
environmentally friendly way
6. Insert the new EcoLite tubes
7. Close the front grid and reconnect the
power to the unit
Replace the tubes every 9 months to keep
the unit effective.
Para sustituir los tubos UV
1. Apague la unidad de la red eléctrica
desconectando el enchufe
2. Espere 5 minutos para dejar que las
lámparas se enfríen
3. Abra la rejilla frontal
4. Suelte los viejos tubos del chasis
5. Elimine las viejas tubos de un modo
ecológico
6. Enrosque las nuevas tubos EcoLite en
el portalámparas
7. Cierre la rejilla y conecte de nuevo
el enchufe
Sustituya las tubos cada 9 meses para
TUBE REPLACEMENT
Wymiana żarówek UV
1. Wyłącz lampę i odłącz z prądu
2. Pozwól lampie wystygnąć przez ok. 5 min.
3. Otwórz przednia pokrywę
4. Zwolnić stare rury z obudowy
5. Zadbaj o to, by żarowki zostały
zutylizowane we właściwy sposób
6. Wkręć nowe żarówki EcoLite
7. Zamknij ruszt rażący i ponownie podłącz
lampę
Aby utrzymać efektywność lampy należy
wymieniać żarówki co 9 miesięcy.
Um die UV-Röhren ersetzen
1. Schalten Sie das Gerät vom Stromnetz,
indem Sie das Gerät
2. Lassen Sie für 5 Minuten, damit die
Lampen abkühlen
3. Öffnen Sie den Frontgrill
4. Lassen Sie die alten Rohre aus dem
Gehäuse
5. Entsorgen Sie die alten Rohre in einer
umweltfreundlichen Art und Weise
6. Schrauben Sie die neue EcoLite Rohre
in die Lampenfassung
7. Schließen Sie die vordere Gitter und
schließen Sie die Stromversorgung des
Geräts
Tauschen Sie die Rohre alle 9 Monate, sodass
das Gerät effektiv.
Changing the Tubes
Removing Glue Boards
1 2
1 2
3
no-fli.com t: 0800 0834701
e: hello@no-i.com
This manual suits for next models
1
Other NoFli Lawn And Garden Equipment manuals
Popular Lawn And Garden Equipment manuals by other brands

Simplicity
Simplicity 4567 Illustrated parts list
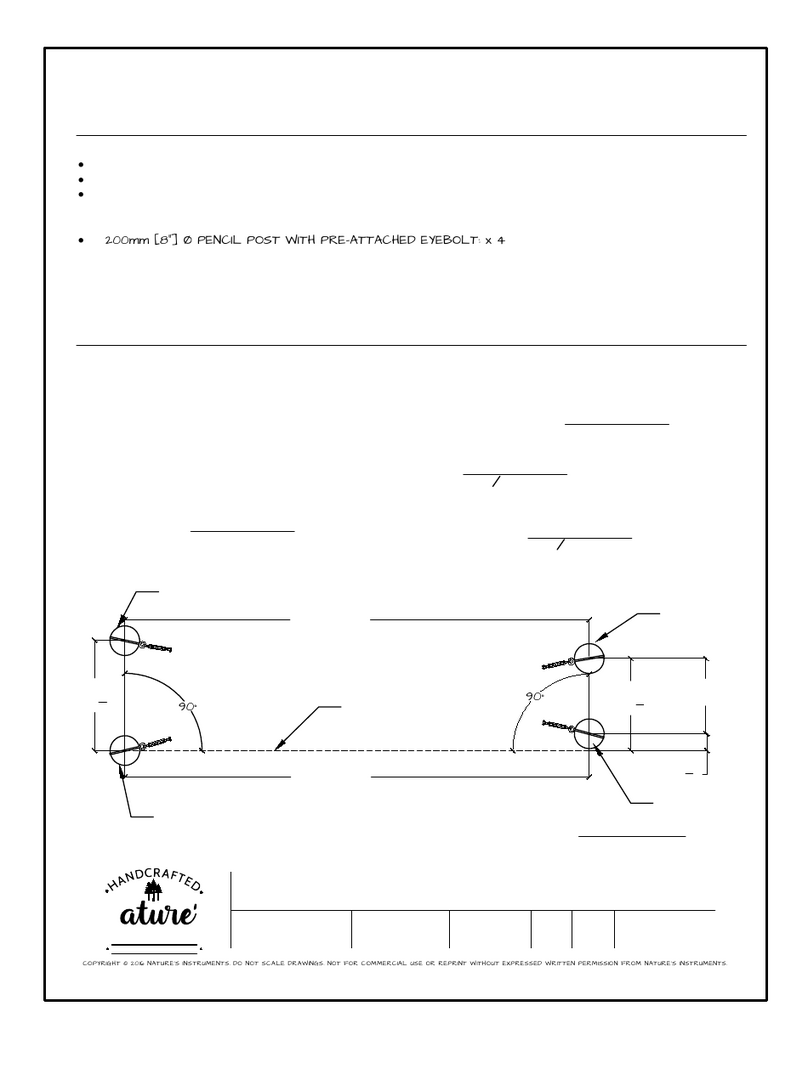
NATURE'S INSTRUMENTS
NATURE'S INSTRUMENTS NI-PG-403-06 quick start guide

Plow & Hearth
Plow & Hearth 53563 Use and care instructions

Bermuda
Bermuda BER050 user guide

Hyundai power products
Hyundai power products FWGE1200-H-1 Original instructions

HSS Hire
HSS Hire 62316 Operating & safety guide
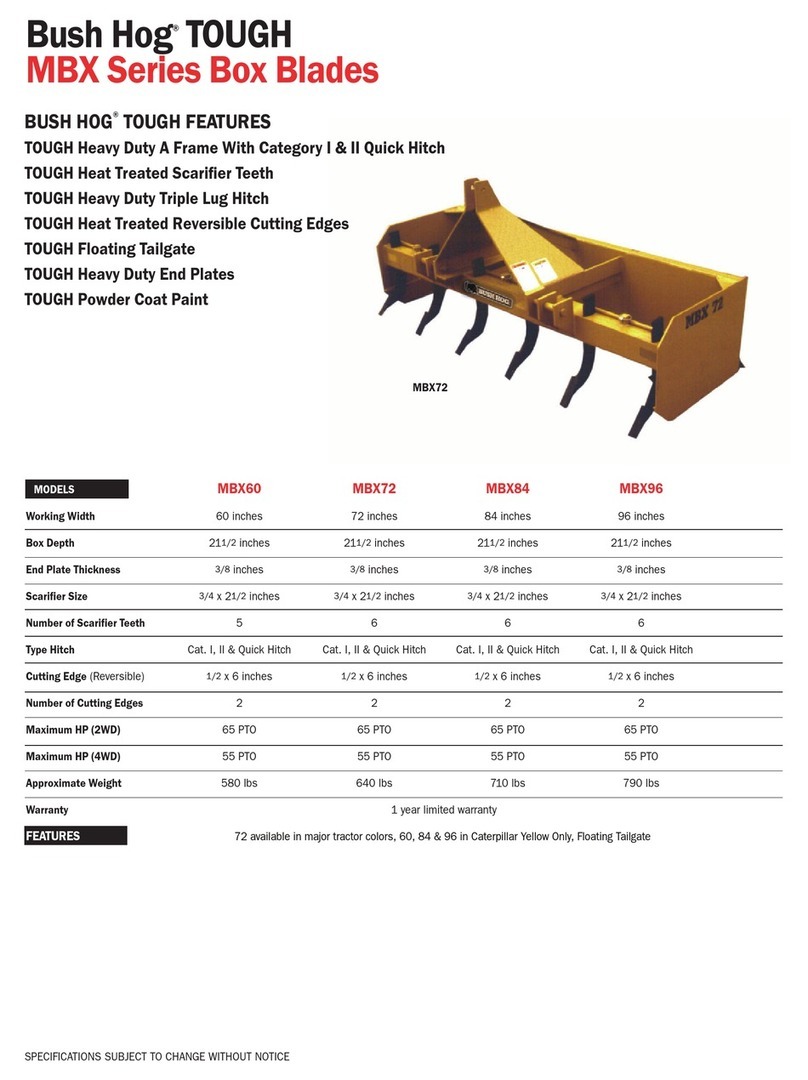
Bush Hog
Bush Hog TOUGH MBX60 Specifications

Easylife
Easylife EL6200-25ft instruction manual
Jaclyn Smith
Jaclyn Smith JACLYN SMITH Dutch Harbor 9' Umbrella owner's manual
AeroGarden
AeroGarden Sprout Titan TAL
Stinger
Stinger FP15 SERIES owner's manual

SNOWJOE
SNOWJOE sunjoe SBJ606E-GA-RED-RM Operator's manual
