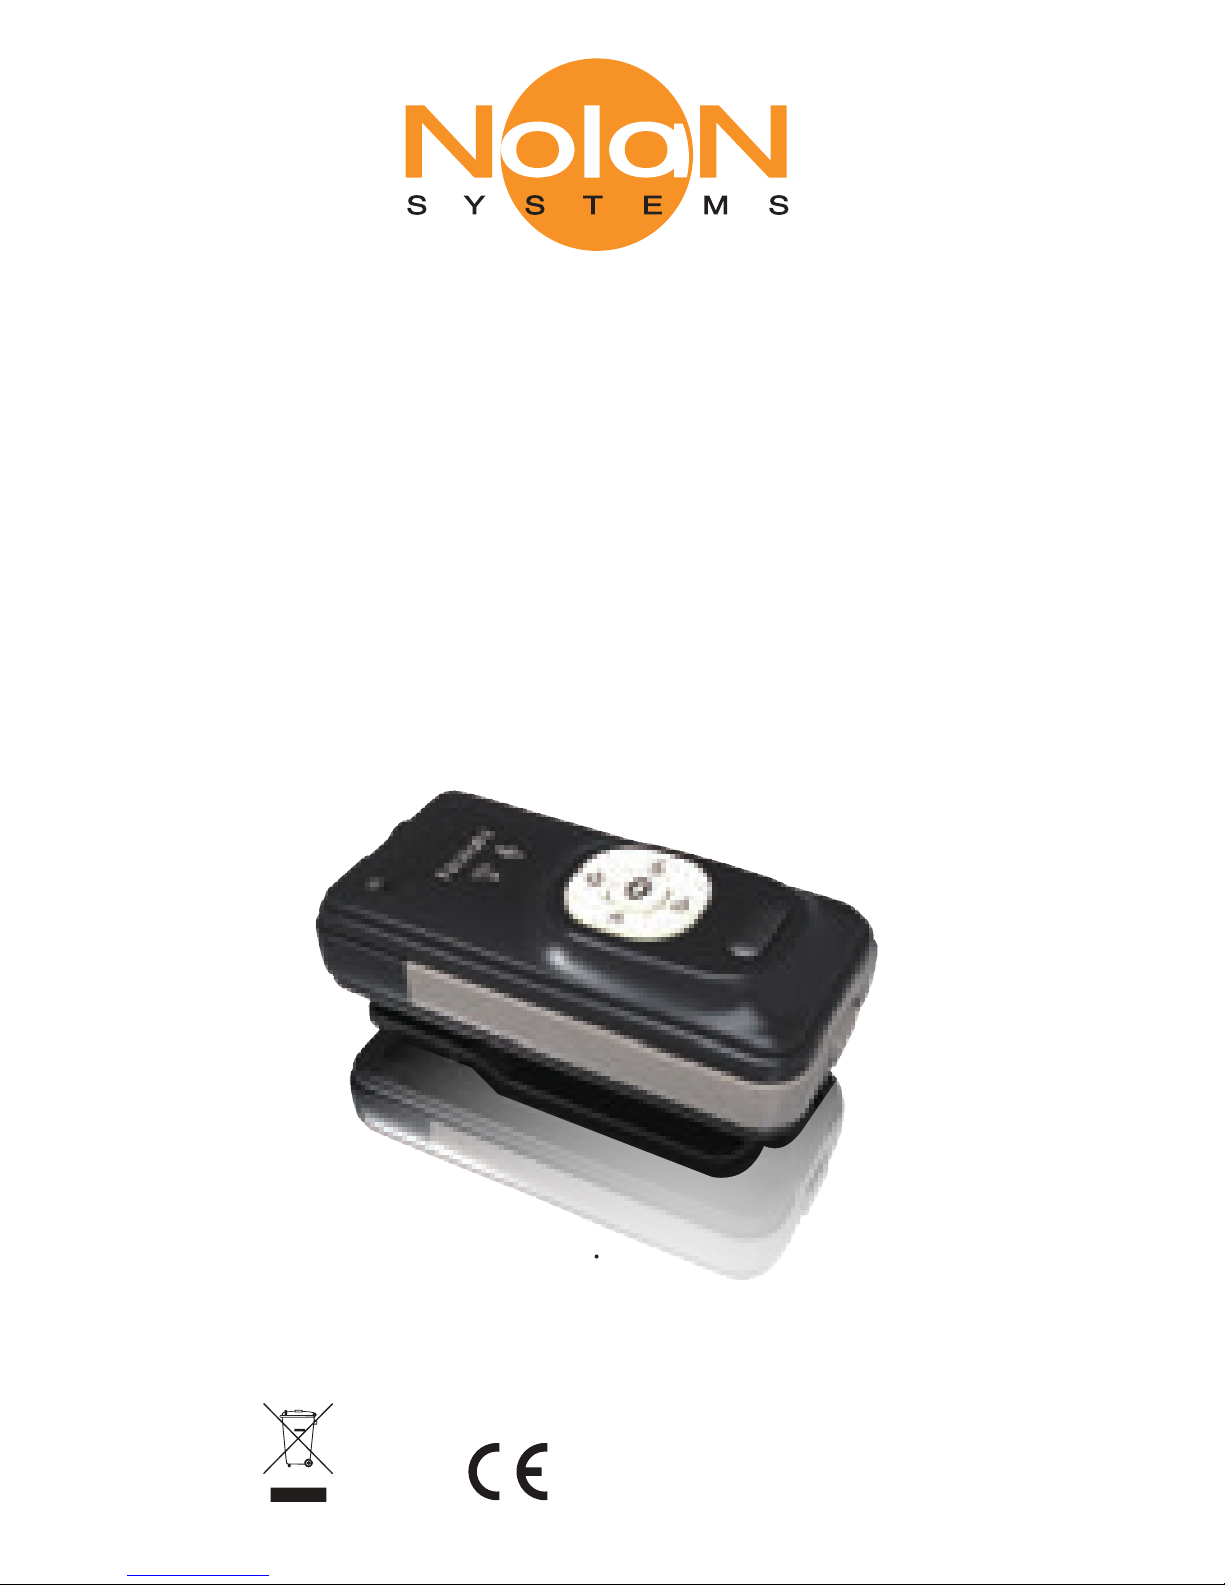
Nolan RemHearLinks NSRXRM3C2RHL User manual
Bluetooth Wireless
Remote Audio Voice Links
P/N NSRXRM3C2RHL
USER GUIDE
RemHearLinks
.
FCC ID:TNZNSRXRM3C2XXX
0678
Declaration of Conformity. We declare that product
NSRXRM3C2MSX conforms to the R&TTE Directive 1999/5/RC.
INTRODUCTION
Nolan RemHearLinks Bluetooth Wireless Remote
Voice Audio Links with microphone, audio streamer
to help and improve hearing impairments to under-
stand more speech over a distance .
Compatible stereo Bluetooth devices must
support the Bluetooth profile known as A2DP
profiles.
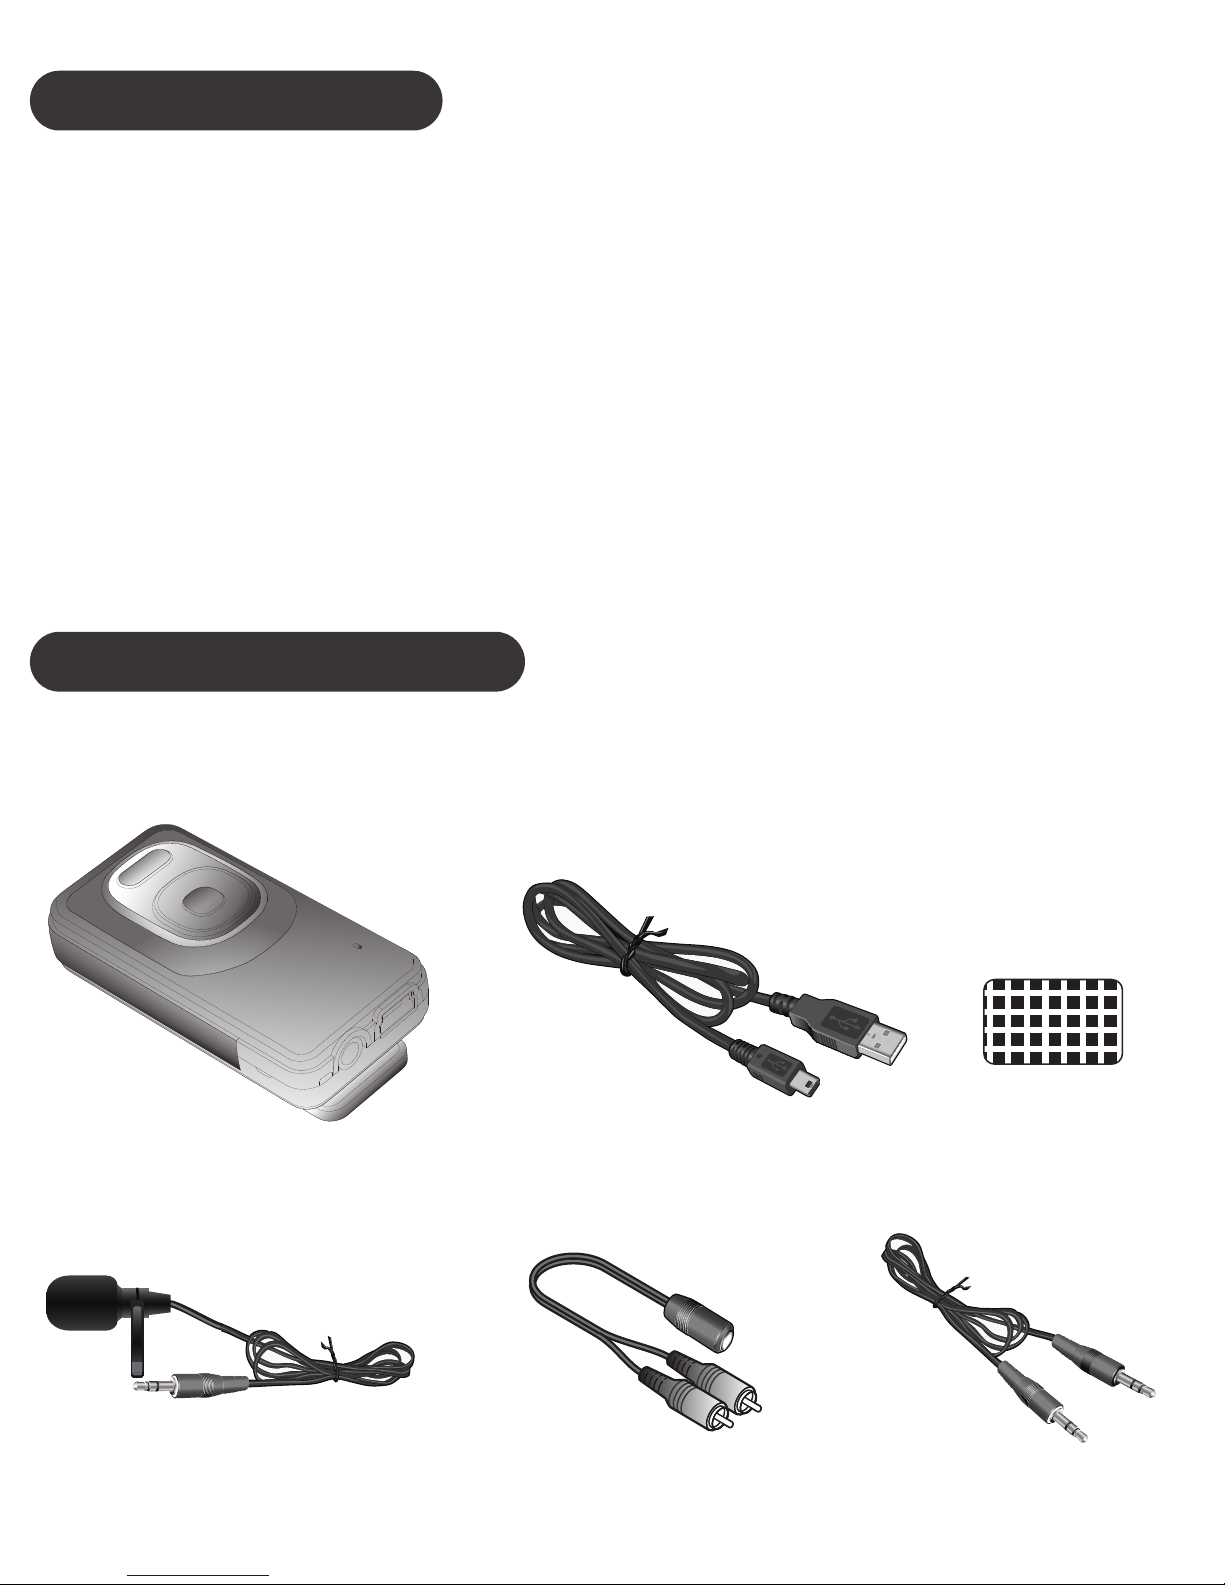
GETTING STARTED
Unpack the package carefully and confirm that you
have all of parts as shown below.
※
USB charging cable Sticker
External microphone
RemHearlinks
3.5mm stereo cable
Analog stereo
audio cable
Please check the contents carefully and contact
your local dealer immediately if anything is missing
or damaged.
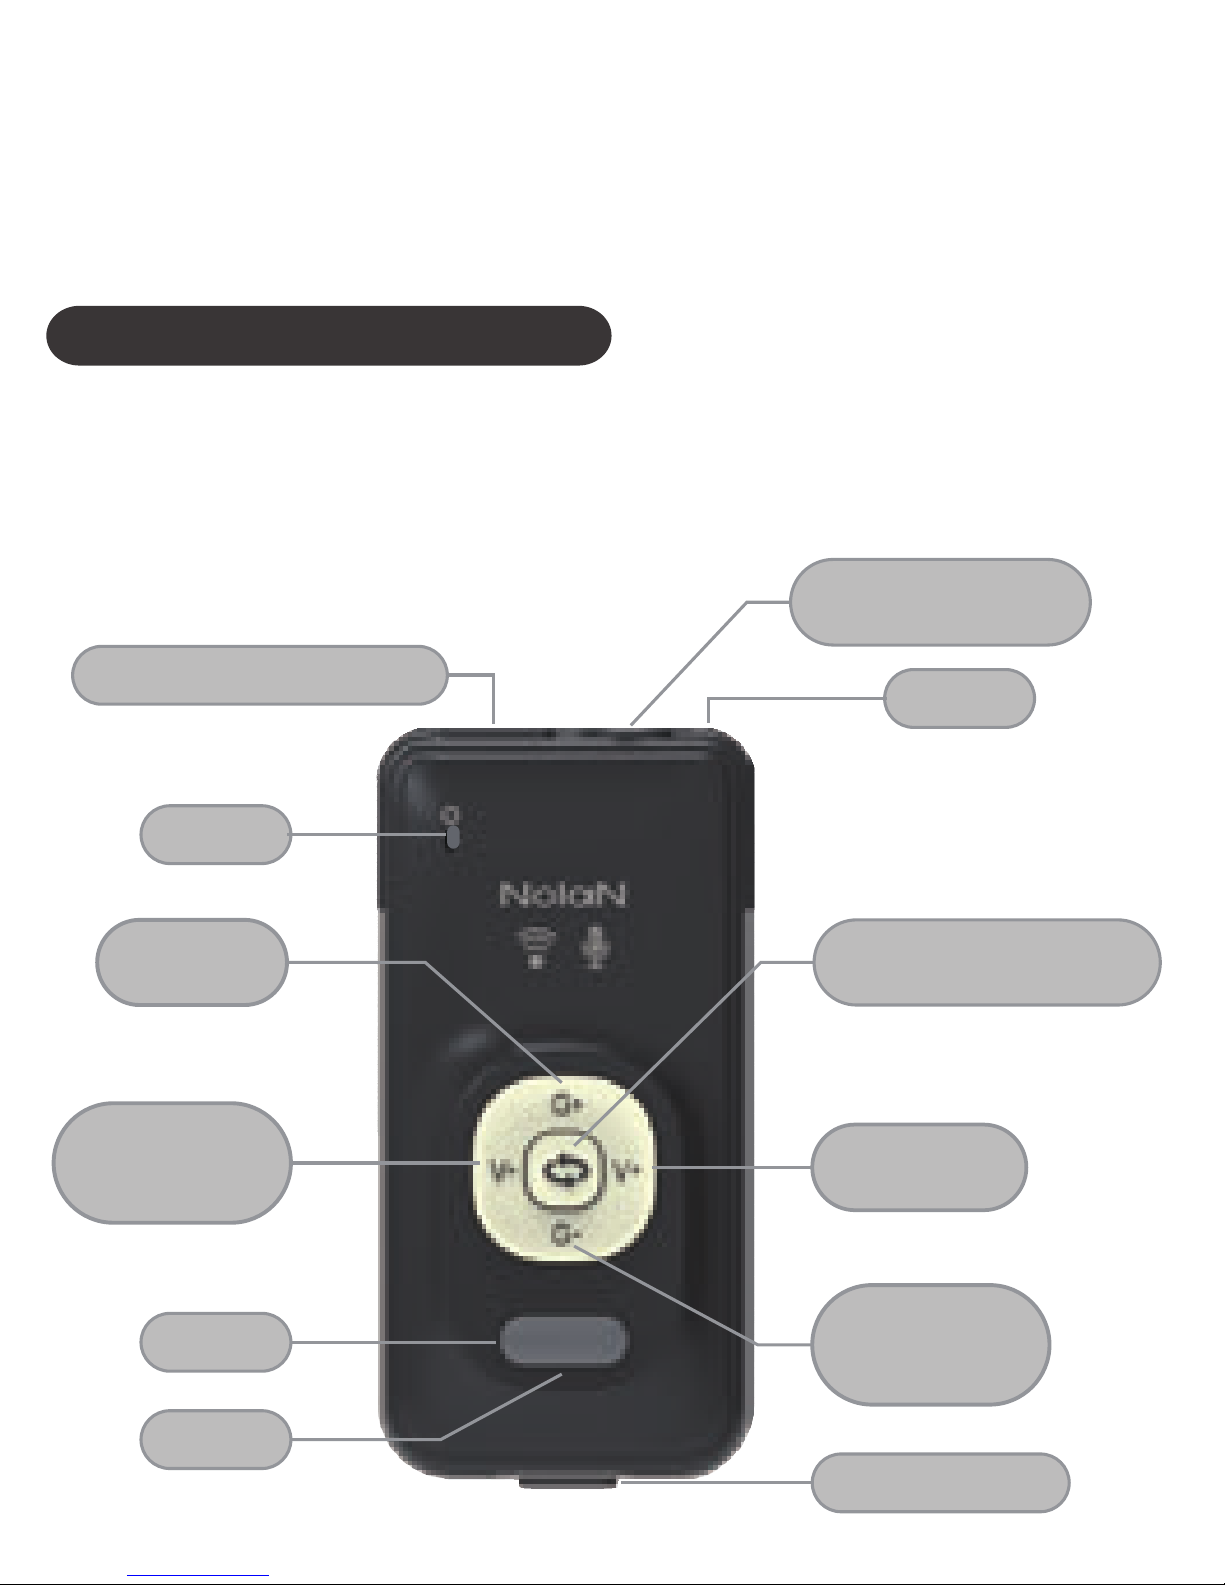
PRODUCT OVERVIEW
See image below. Please note some models of
RemHearLinks will differ slightly in style, colour and
the functionality may vary according to their specifi-
cations.
Omni Mic
Internal Mic
Gain Up
USB Charging Connector
LED
On/Off
Omni /Uni Switch
Uni Mic
Line in and
External Mic Jack
Internal Mic Line in/
External Mic Selection
Line in
Volume Up
Line in
Volume Down
/Mute
Internal Mic
Gain Down
/Mute
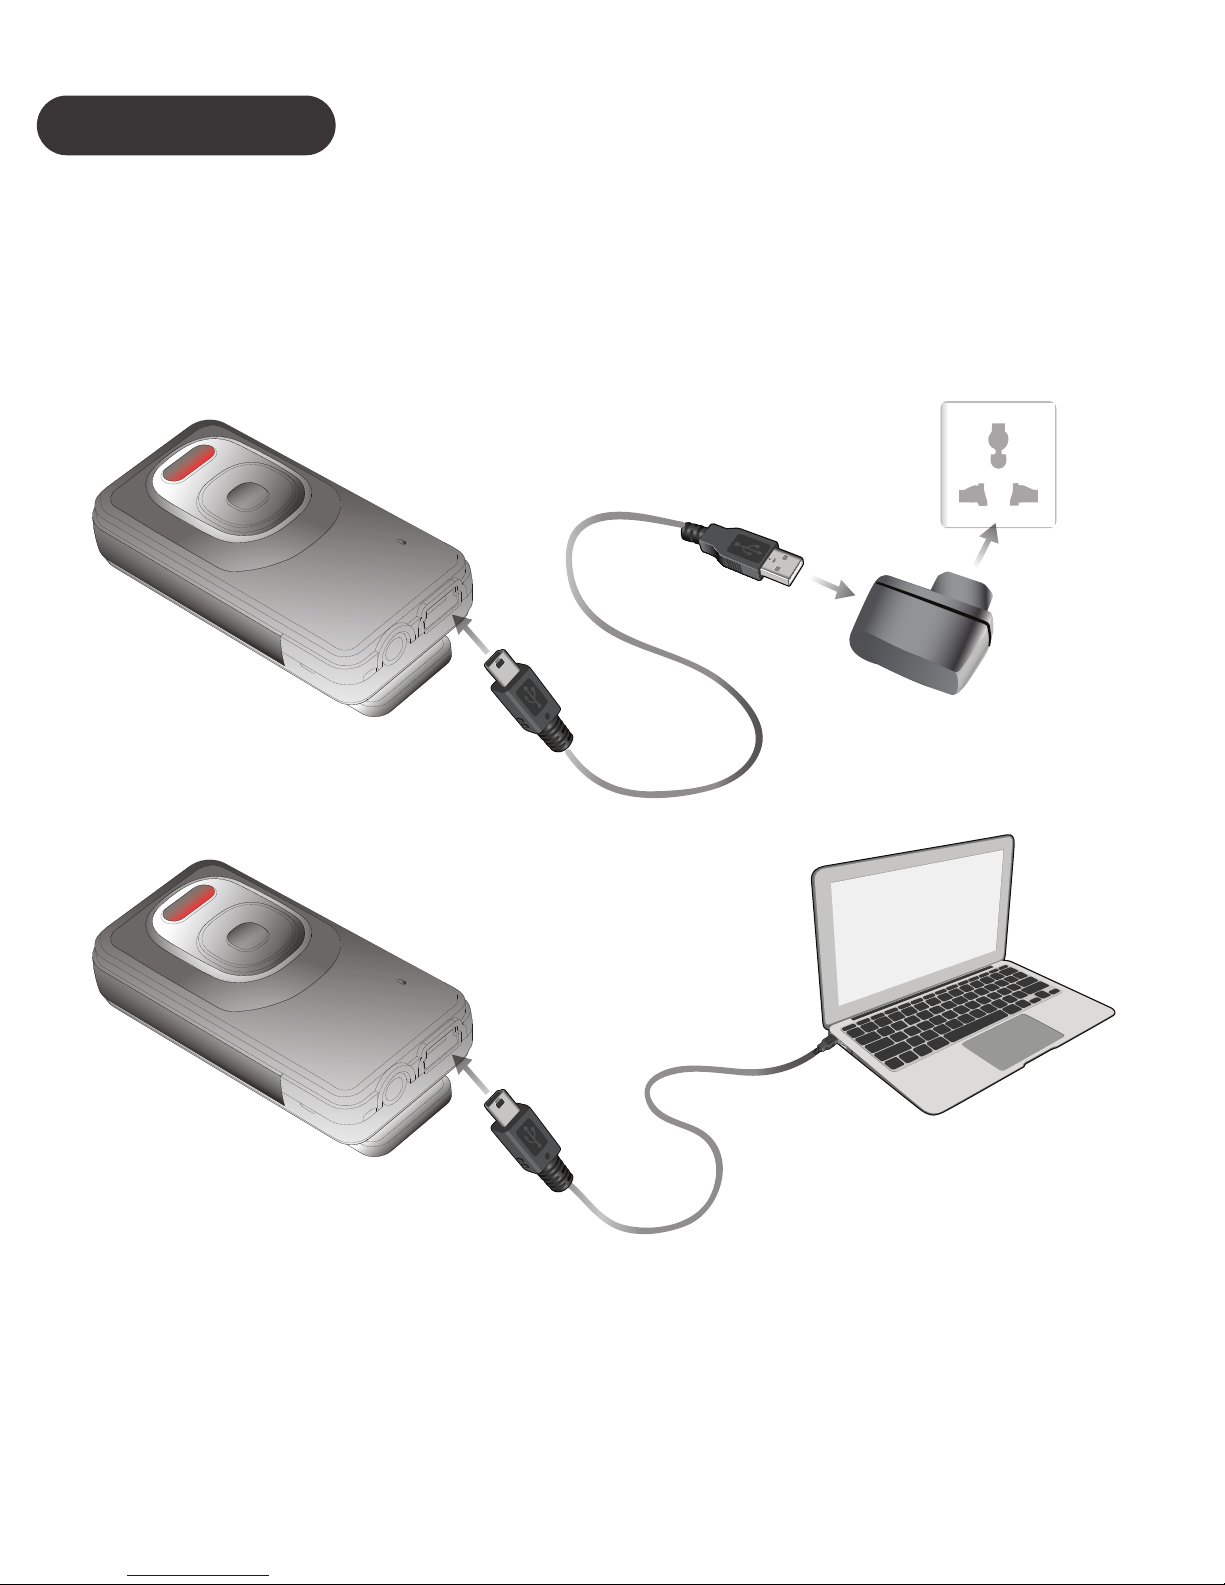
CHARGING
Plug the USB charging cable into RemHearLinks
mini USB connector. Plug the other side of the USB
charging cable into a powered USB connector.
When charging, the amber LED will be lighted.
When charging is completed, the amber LED will be
turn off.
or
Important Note: RemHearLinks supports four sets
of pin code: 0000, 1111, 1234, and 8888. It covers
the popular Bluetooth speakers, receivers.
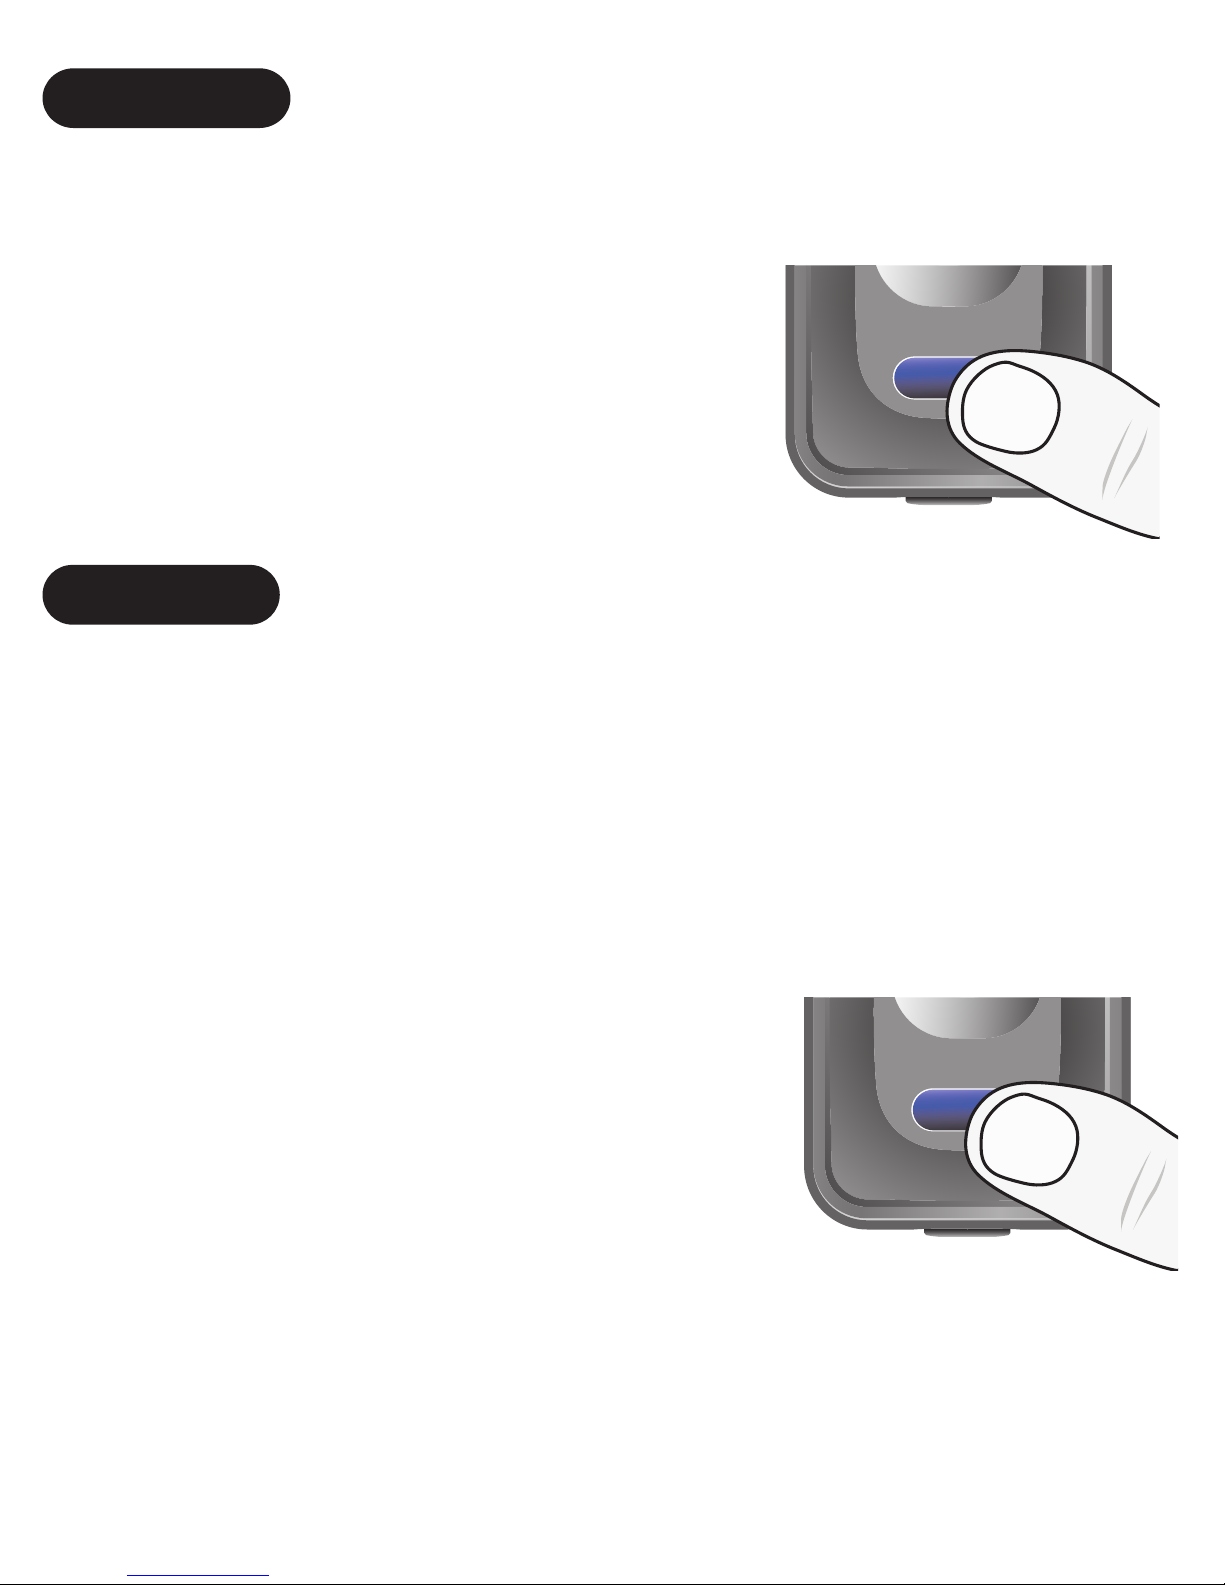
TURN ON
Press and hold the ON/OFF button for about 3
seconds, the blue LED will flashing. Release the
ON/OFF button. If your device 1
has paired with RemHearLinks 1
before, they will reconnect 1
each others automatically.
PAIRING
Press and hold the ON/OFF button for about 3
seconds, RemHearLinks will be turned on and into
pairing mode automatically with blue LED fast
flashes.After the RemHearLinks is in pairing mode,
put your Bluetooth receiver into pairing mode, refer
to your audio receiver’s User Guide.
The audio receiver should find
the RemHearLinks and pair with
it. When pairing is completed, the
blue LED on RemHearLinks will
begin to flash slowly.
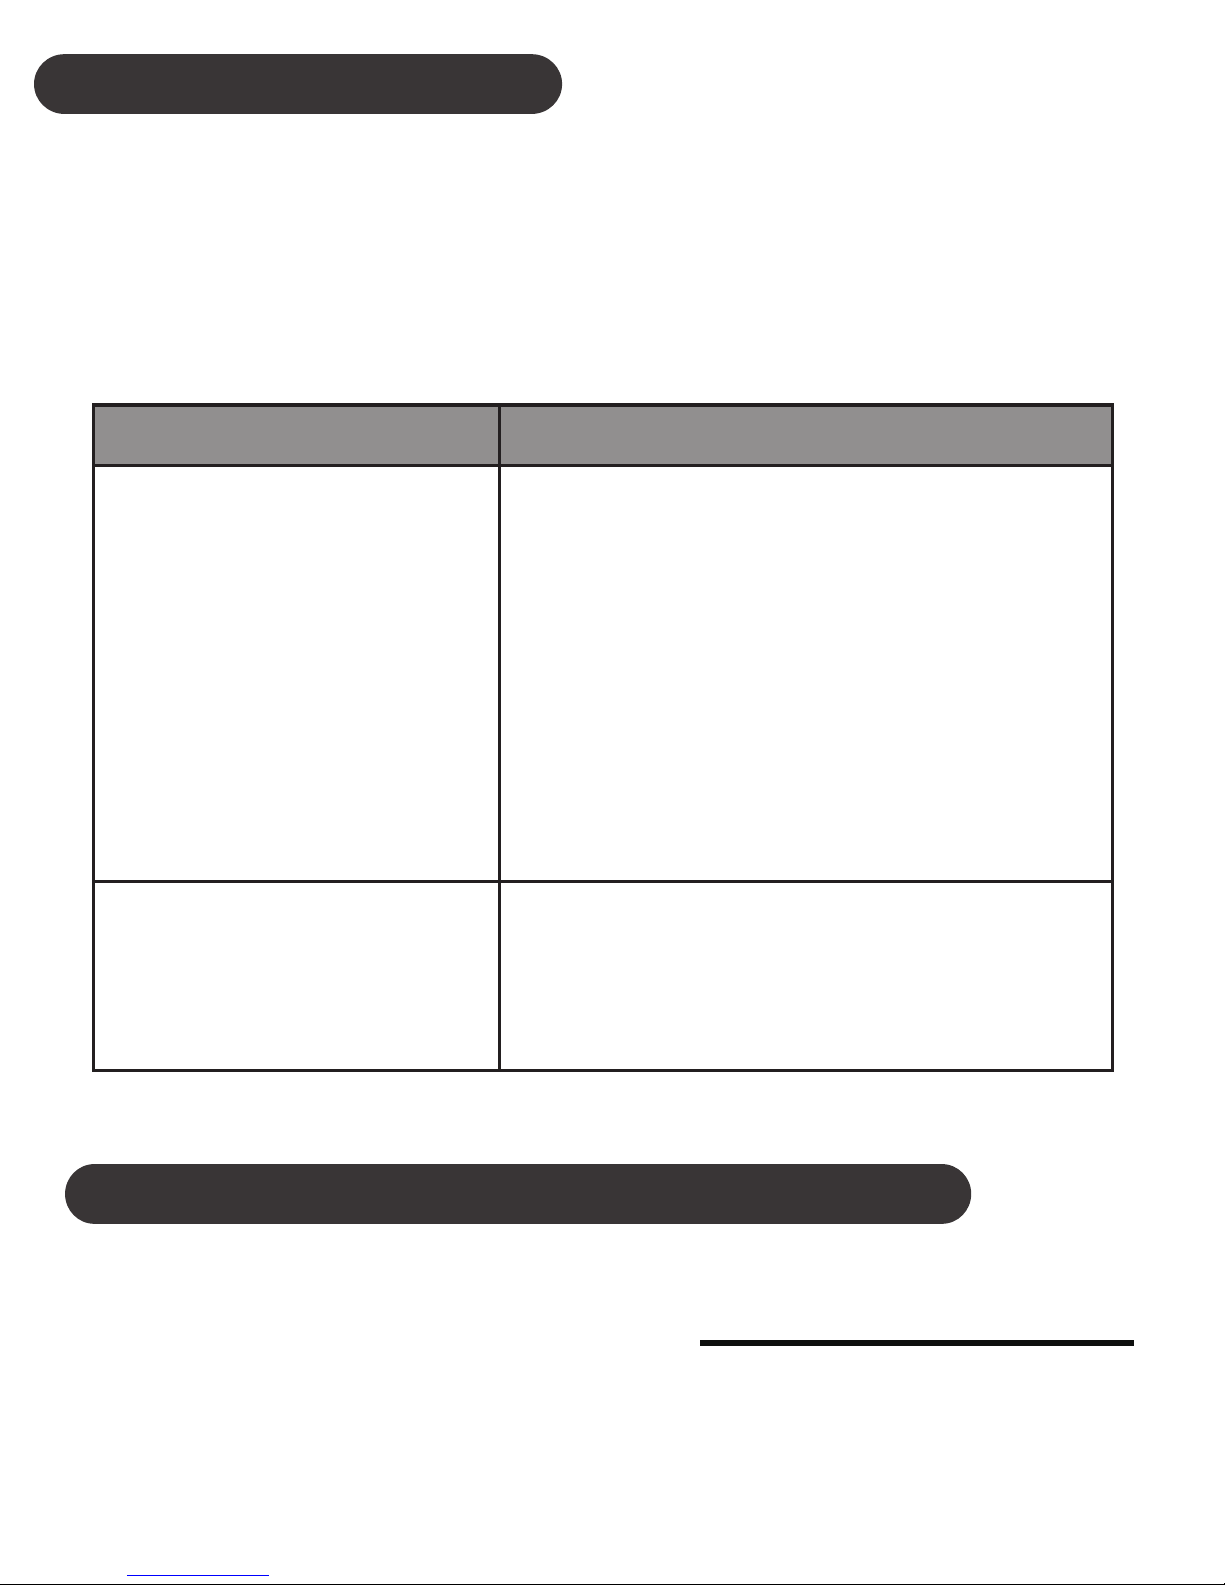
Using internal Uni and Omni directional micro-
phone
Put RemHearLinks’ microphone close to the sound
source around 8 inches to captured the best sound
quality.
USING MICROPHONE
The RemHearLinks support internal and
external microphone
max. 20cm
8 inches
Too far away
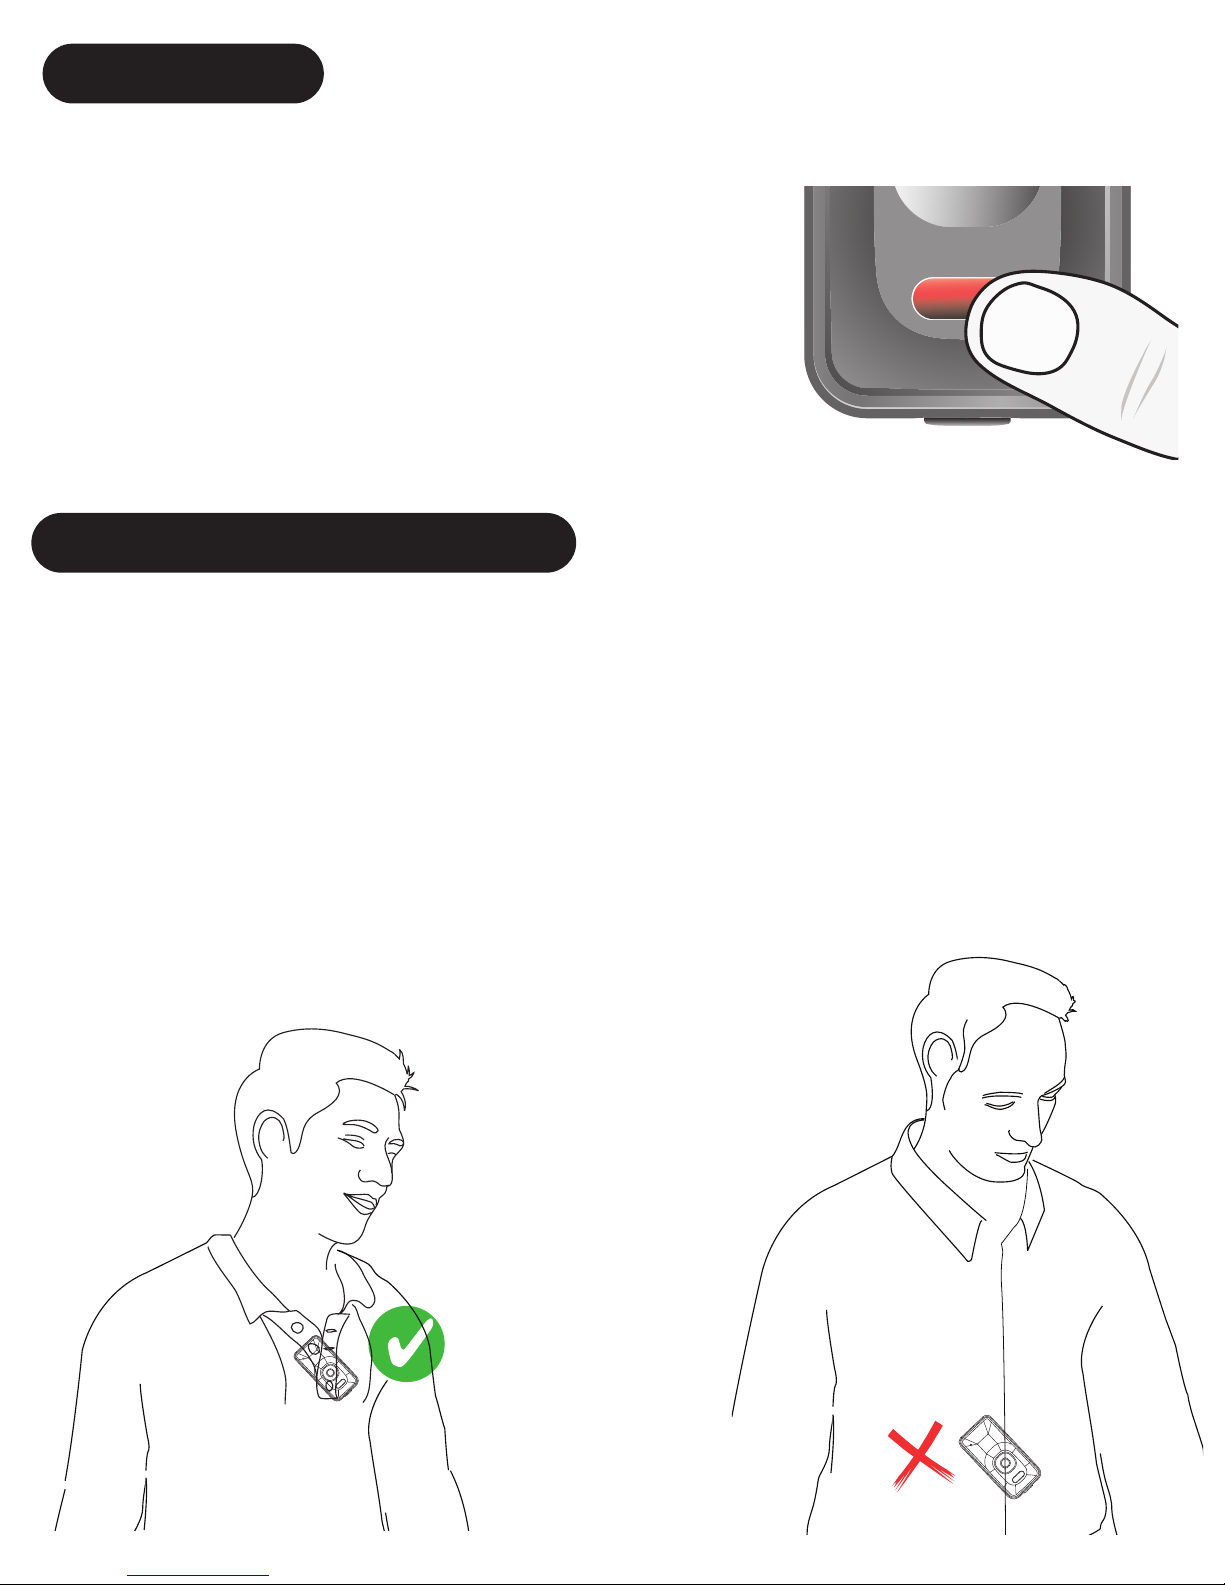
TURN OFF
Press and hold the ON/OFF button for about 2
seconds, the amber LED
1
will stay on for about 1 1
second and then the
1
RemHearLinks will be turn off . 1
Release the ON/OFF button.

Slide the microphone
selection switch to choose
the corresponding internal
microphone.
Unidirectional
(Cardioid) microphone
is used that the target
sound source pick up
directly in front of the
microphone, and all
other sounds from sides
are largely rejected.
Omnidirec-
tional microphones will
pick up sound from all
directions or sides
around the microphone.
Users can speak into
any side of the
microphone.

Both unidirectional and omnidirectional
microphones have their advantages and disadvan-
tages. The important thing is to know the applica-
tion of the microphone in use to know which would
be better for the given situation around.
Using external audio source input: external
microphone, TV or external audio devices
Short press the
input selection
button, RemHear-
Links will toggle the
audio input source
between internal
microphone and
externalllla
microphone/audio
device.
When you using internal microphone, the blue LED
will flash up.
When you using external microphone/audio device,
the green LED will flash up instead of blue LED.

Plug the external microphone
into the RemHearLinks audio
jack, and then select the
external microphone/audio
device.
RemHearLinks external microphone
TV or other audio devices audio input
Connect the TV or other audio devices 3.5mm to
RemHearLinks via audio cable, and then select the
external microphone/audio device.
Using 3.5mm audio cable or RCA audio cable
converter to connect AUX or RCA audio output for
TV sound output.
3.5’
TV
or
AUX
AUDIO
OUTPUT
L R

Adjust microphone gain, input audio volume or
mute
The four volume buttons, Mic Gain Up/Down and
external audio Volume Up/Down, provide the
flexible volume tuning functions.
G+ and G- : Single press to increase and
decrease the internal microphone gain.
G-: Press and hold about a second to mute
the internal microphone, the amber LED will flash
slowly. Then press G+ to un-mute
V+ and V- : Single press to increase and
decrease the external microphone or audio sound
volume.
V-: Press and hold about a second to mute
the microphone, the amber LED will flash slowly.
Then press V+ un-mute.
Internal Mic
Gain Up
Internal Mic Line in/
External Mic Selection
Line in
Volume Up
Line in
Volume Down
/Mute
Internal Mic
Gain Down
/Mute

VISUAL INDICATION
The POWER/MODE/AUDIO LED can also indicate
the status of RemHearLinks working statues.
Statues Indication
Charging Amber LED is On
Not Connected
Blue/Green LED very
slow flashes, approx.
every 5 seconds
Connected
Power On
Power Off
Blue/Green LED
slow flashes approx.
every 2 seconds
Pairing mode with
Bluetooth receiver
External audio
source selected
Blue/Green LED
fast flashes
Green LED flashing
Blue LED flash once
Amber LED flash once
Amber LED slow flash,
approx. every 5 seconds
Mute
TROUBLESHOOTING
Please note that you should also be familiar with the
operation of your audio receiver, or other connect-
ing Bluetooth device. Please read the User Guide
for your device carefully.
Problem Likely Cause / Solution
RemHearLinks
does not
reconnect.
Lost Connection.
Blue LED flashes
at 5 second
intervals.
Distance between
RemHearLinks and
audio receiver’ out of
range.
Put them closer and turn
on to reconnect again.
RemHearLinks
will not pair with
audio receiver
Ensure that PIN code is
one of these codes:
0000, 1111, 1234, 8888
CUSTOMER SERVICE INFORMATION
For other Nolan Bluetooth products or support,
please view our website – www.nolan-sys.com or
representative.

ENVIRONMENT
Do not throw this electrical device away with the
normal household waste at the end of its life, but
hand it in at an official collection point for recycling.
By doing this you will help to preserve the environ-
ment.
DISCLAIMER
Whilst every effort has been made to ensure that
the information in this manual is accurate and
complete, no liability will be accepted for any errors
and/or omissions made. The manufacturer
reserves the right to make changes and improve-
ments to the specifications and features of the
hardware and firmware of the products described in
this document without prior notice. Reproduction,
transfer, distribution or storage of part or all of the
contents in this document in any form is prohibited
without prior permission of the manufacturer. All
trademarks acknowledged.
Table of contents


