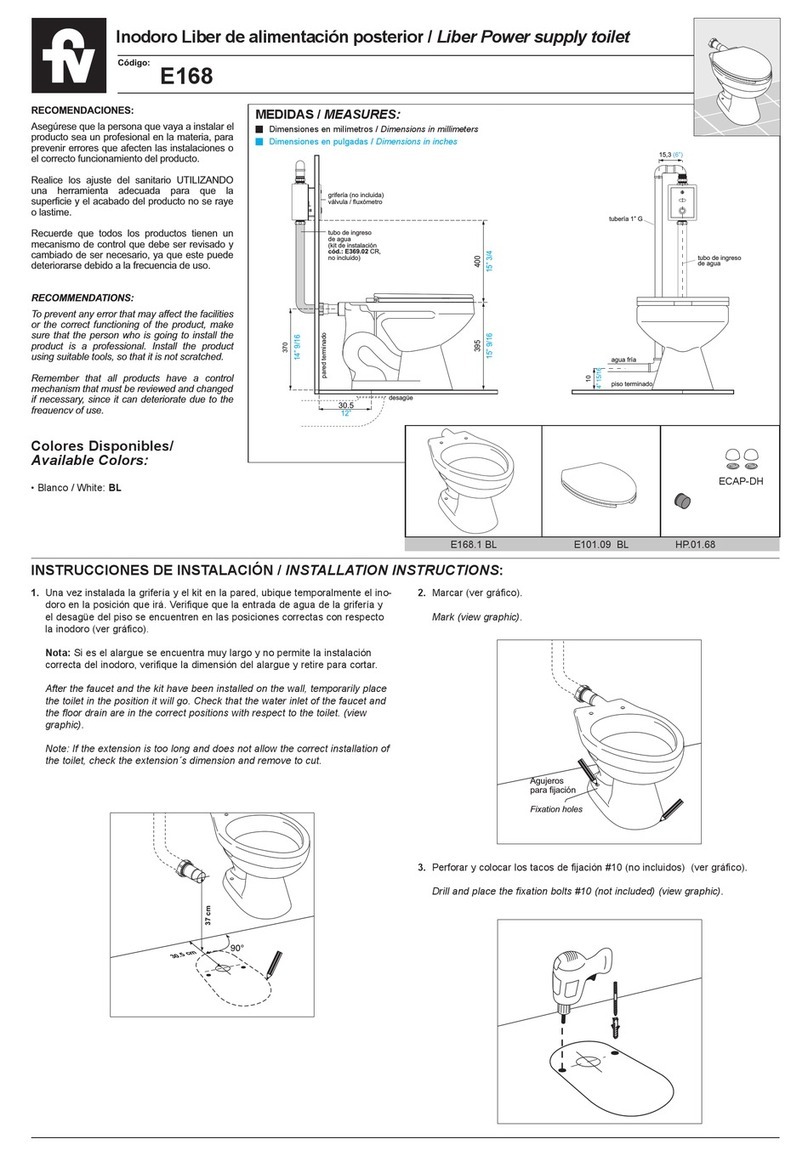
Figure-5:
Measure the distance between two marks on water inlet pipe (y)
and cut this length from the end of the pipe as shown in the
picture. Therefore prepare the pipe for installation
Figure-6:
Measure the distance between the marked lines of the outlet
pipe (X). Use this measurement to cut the pipe from the end of
it as shown in the picture so that it will be the exact size needed
for the installation
Abbildung 5:
Bereiten Sie das Rohr für die Installation vor. Messen Sie den
Abstand zwischen zwei Markierungen am Wasserzulaufrohr (y)
und schneiden Sie diese Länge wie im Bild gezeigt vom Rohr-
ende ab.
Abbildung 6:
Messen Sie den Abstand zwischen den markierten Linien des
Abflußrohrs (X). Verwenden Sie dieses Maß, um das Rohr wie
in der Abbildung gezeigt vom Ende des Rohrs abzuschneiden.
Das Abflußrohr hat jetzt die für die Installation
erforderliche Größe.
Figure-7:
Measure the distance on the WC pan which is marked as (X)
in the picture. Adjust the mounting screw so that the center of
the head piece is 5 mm. less than the measured distance (X-5).
WARNING : IN ORDER TO ACHIEVE A LEAK-PROOF CON-
NECTION NO SILICON SHOULD BE APPLIED TO THE SEA-
LING GASKETS.
Abbildung 7:
Messen Sie den Abstand auf dem WC-Becken, der im Bild mit
(X) markiert ist. Stellen Sie die Befestigungsschraube so ein,
dass die Mitte des Kopfstücks 5 mm beträgt.
WARNUNG: UM EINEN LECKSICHENEN ANSCHLUSS ZU
ERREICHEN, SOLLTE KEIN SILIKON AUF DIE DICHTUNGEN
GELANGEN. Figure-8:
Put the toilet in its place as shown above. Place the allen
wrench at the hole. Finalize the installation by tightening the
screws on the pivot bolt.
Abbildung 8:
Setzen Sie die Toilette wie oben gezeigt ein. Schließen Sie die
Installation ab, indem Sie die Schrauben am Drehbolzen fest-
ziehen.

