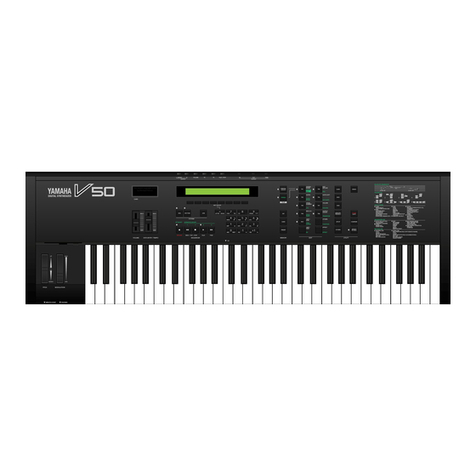
Nordic Ware 50303 User manual

Part No. 50303 Copyright Clavia DMI AB 2007
Print Edition 1.00
USER MANUAL
Software Version 1.0X

The lightning ash with the arrowhead symbol within an
equilateral triangle is intended to alert the user to the
presence of uninsulated voltage within the products
enclosure that may be of sufcient magnitude to constitute
a risk of electric shock to persons.
Le symbole éclair avec le point de èche à l´intérieur d´un triangle
équilatéral est utilisé pour alerter l´utilisateur de la presence à
l´intérieur du coffret de ”voltage dangereux” non isolé d´ampleur
sufsante pour constituer un risque d`éléctrocution.
The exclamation mark within an equilateral triangle is
intended to alert the user to the presence of important
operating and maintenance (servicing) instructions in the
literature accompanying the product.
Le point d´exclamation à l´intérieur d´un triangle équilatéral est
employé pour alerter l´utilisateur de la présence d´instructions
importantes pour le fonctionnement et l´entretien (service) dans le
livret d´instructions accompagnant l´appareil.
Instructions pertaining to a risk of re, electric shock or injury to persons.
IMPORTANT SAFETY INSTRUCTIONS
SAVE THESE INSTRUCTIONS
CAUTION AVIS
RISK OF ELECTRIC SHOCK
DO NOT OPE
N
RISQUE DE SHOCK ELECTRIQUE
NE PAS OUVRIR
CAUTION: TO REDUCE THE RISK OF ELECTRIC
SHOCK DO NOT REMOVE COVER (OR BACK).
NO USER SERVICEABLE PARTS INSIDE.
REFER SERVICING TO QUALIFIED PERSONNEL.
ATTENTION :POUR EVITER LES RISQUES DE CHOC
ELECTRIQUE, NE PAS ENLEVER LE COUVERCLE.
AUCUN ENTRETIEN DE PIECES INTERIEURES PAR L´USAGER.
CONFIER L´ENTRETIEN AU PERSONNEL QUALIFE.
AVIS : POUR EVITER LES RISQUES D´INCIDENTE OU
D´ELECTROCUTION, N´EXPOSEZ PAS CET ARTICLE A LA PLUIE
OU L´HUMIDITET.
Warning - When using electric products, basic
precautions should always be followed, including
the following:
1. Read all the instructions and observe the graphic
symbols above before using the product.
2. Do not use this product near water - for example
near a bathtub, washbowl, kitchen sink, in a wet
basement, near or in a swimming pool, a swamp or
the like.
3. This product should be used only with a cart or a
stand that is recommended by the manufacturer.
4. This product, either alone or in combination with an
amplier and headphones or speakers may be
perfectly capable of producing sound levels that
could cause permanent hearing loss. Do not
operate for a long period of time at a high volume
level or at a level that is uncomfortable. If you
experience any hearing loss or ringing in the ears,
you should consult an audiologist.
5. The product should be located so that its location
or position does not interfere with or obstruct its
normal ow of ventilation.
6. The product should be located away from heat
sources such as radiators, heat registers or other
products that produce heat.
7. The product should be connected to a power
supply only of the type described in these opera-
tion instructions or as marked on the product.
8. The power supply cord of the product should be unplugged
from the outlet when the product is left unused for a long
period of time.
9. Care should be taken so that objects do not fall, or liquids
are not spilled into the enclosure through openings.
10. The product should be serviced by qualied service person-
nel when:
A. The power supply cord has been damaged; or
B. Objects have fallen or liquids have been spilled onto the
product; or
C. The product has been exposed to rain; or
D. The product does not appear to operate normally or
exhibits a marked change in performance; or
E. The product has been dropped or the enclosure has
been damaged.
11. Do not attempt to service the product beyond those means
described in this operating manual. All other servicing
should be referred to qualied service personnel.
12. To completely disconnect the apparatus from the mains,
remove the mains plug.
13. Ensure possible protective earting connections of other
equipment when the apparatus is connected to multimedia
systems.
13. Where the Mains plug is used as the disconnect device, the
disconnect device shall remain readily operable.
Trademarks: The Nord logo is registred trademark of Clavia DMI AB. All other trade-
marks mentioned in this publication are the properties of their respective holders.
Specications and appearances are subject to change without notice.
Copyright by Clavia DMI AB, 2007

| 3
Contents
1. Introduction 4
Thank you! . . . . . . . . . . 4
Development story . . . . . . . 4
Features. . . . . . . . . . . . 4
Synthesizer . . . . . . . . . . 4
Eects . . . . . . . . . . . . . 5
Programs . . . . . . . . . . . 5
Samples . . . . . . . . . . . . 5
Control & connections . . . . . . 5
More samples . . . . . . . . . 5
About this manual . . . . . . . 5
2. Overview 6
The Front panel . . . . . . . . 6
Program Section . . . . . . . . 6
Synth Section . . . . . . . . . 6
Eect Section . . . . . . . . . 6
Keyboard Section . . . . . . . . 7
LCD Window . . . . . . . . . . 7
System Menu. . . . . . . . . . 7
MIDI Menu . . . . . . . . . . . 7
About knobs . . . . . . . . . . 7
MASTER LEVEL knob . . . . 7
LCD-dial . . . . . . . . . . . . 7
LED-dials . . . . . . . . . . . 7
Potentiometer knobs . . . . . . 7
About buttons . . . . . . . . . 8
On/o buttons . . . . . . . . . 8
SHIFT button . . . . . . . . . 8
PANIC button . . . . . . . . 8
Slot buttons . . . . . . . . . . 8
OCTAVE SHIFT buttons . . . 8
CHORD button . . . . . . . 8
STORE button . . . . . . . . 8
PROGRAM buttons . . . . . 8
3. Connections 9
Audio Connections . . . . . . . 9
LEFT OUT and RIGHT OUT9
Headphones . . . . . . . . . . 9
MIDI connections. . . . . . . . 9
MIDI OUT . . . . . . . . 9
MIDI IN . . . . . . . . . 9
USB Connection . . . . . . . . 9
Pedal Connections . . . . . . . 9
SUSTAIN pedal . . . . . . . 9
CONTROL pedal . . . . . . 9
4. The Keyboard Section10
Panel & Keyboard Focus SLOT A
& SLOT B buttons) . . . . . 10
OCTAVE SHIFT buttons . . 10
CHORD button . . . . . . 11
Modulation wheel . . . . . . 11
Pitch stick . . . . . . . . . . 11
5. The Eect Section 12
Delay . . . . . . . . . . . . .12
TEMPO LED . . . . . . . . 12
AMOUNT knob . . . . . . 12
TEMPO knob. . . . . . . . 12
FEEDBACK button. . . . . 12
STEREO button . . . . . . 13
TAP TEMPO button . . . . 13
Tube amp . . . . . . . . . . .13
DRIVE knob . . . . . . . . 13
Reverb . . . . . . . . . . . .13
REVERB button. . . . . . . 13
DRY/WET knob . . . . . . 13
6. The Program section 14
What is a Program?. . . . . . .14
Sorting Programs. . . . . . . 14
Loading a Program . . . . . . 15
Editing a Program. . . . . . . 15
Storing a Program . . . . . . 15
7. The Synth Section 16
MONO MODE . . . . . 16
Selector button. . . . . . . . 16
GLIDE knob . . . . . . . . 16
VIBRATO . . . . . . . . 16
LFO (LFO1 & LFO2) . . . . .16
RATE knob . . . . . . . . . 16
Waveform selector . . . . . . 17
LFO Destination selector. . . . 17
AMOUNT knob . . . . . . 17
POLY mode. . . . . . . . . 17
SINGLE mode . . . . . . . 17
Modulation Envelope (MOD
ENV). . . . . . . . . . . . .17
AT TACK knob . . . . . . . 17
DEC/REL knob. . . . . . . 17
AR button (SHIFT + Dest Sel) 17
AMOUNT knob . . . . . . 17
Destination selector button . . 19
Oscillator (OSC1 & OSC2) . .19
Oscillator Waveform selector . . 19
Shape (SHAPE1 & SHAPE2/
DEC knob) . . . . . . . . . 19
SEMI TONES knob . . . . 19
FINE TUNE knob . . . . . 19
Oscillator Modulation (OSC
MOD). . . . . . . . . . . .19
AMOUNT knob . . . . . . 22
TYPE button . . . . . . . . 22
Oscillator mix (OSC MIX) . . .22
MIX knob . . . . . . . . . . 22
Oscillator Sync (SYNC) . . . .22
Amp. Envelope (AMP ENV) . .23
AT TACK knob . . . . . . . 23
DECAY knob . . . . . . . . 23
SUSTAIN knob . . . . . . . 23
RELEASE knob . . . . . . . 23
Filter . . . . . . . . . . . . .23
TYPE button . . . . . . . . 23
Filter Frequency FREQ knob) 23
Filter Resonance (RES knob) 23
KB Tracking (KB TRACK) . . 23
Filter Slope (SLOPE button) 25
VELOCITY button . . . . . 25
Filter Envelope . . . . . . . . .25
Env. Amount ENV AMT) . . 25
AT TACK knob . . . . . . . 25
DECAY knob . . . . . . . . 25
SUSTAIN knob . . . . . . . 26
RELEASE knob . . . . . . . 26
OUTPUT . . . . . . . . 26
LEVEL knob . . . . . . . . 26
Equalizer (EQ) . . . . . . . .26
TREBLE knob. . . . . . . . 26
BASS knob . . . . . . . . . 26
CHORUS . . . . . . . . 26
CHORUS button . . . . . . 26
8. The Morph function 27
About Morphing . . . . . . . .27
Morph Sources. . . . . . . . .27
Morph Destinations . . . . . .28
Setting up a morph. . . . . . .28
Clearing Morphs . . . . . . . .28
Morph Mode. . . . . . . . . .28
Morph Examples . . . . . . . .28
Use the MODULATION
WHEEL to cross-fade between
two sounds . . . . . . . . . 28
9. MIDI 29
Basic MIDI operation . . . . . .29
MIDI Menu . . . . . . . . . .29
MIDI implementation. . . . . .30
MIDI implementation chart . . 30
10. System settings 31
System Menu . . . . . . . . .31
11. NW Manager 32
What is the Nord Wave Manager?32
Non-destructive editing . . . . 32
System Requirements . . . . . 32
Getting Started . . . . . . . .33
Project, sample memory . . . 33
WYDIWUH . . . . . . . . . . 33
Working oine. . . . . . . . 33
Sample, Zone . . . . . . . . 33
Sample Instruments, Program 33
Sample editing, loop markers,
crossfade . . . . . . . . . . 33
Generate, upload, download . . 33
Librarian . . . . . . . . . . 33
Installation . . . . . . . . . .34
Installation of the USB driver. . 34
Installation of the NordWave
Manager, Windows PC. . . . . 34
Installation of the NordWave
Manager, Mac OSX . . . . . . 34
The Quick Tours . . . . . . . .34
First Light . . . . . . . . . . 34
Download to the NordWave . . 34
Upload from the NordWave . . 35
Create a new Sample Instrument 35
Audio les with ind. samples. . 36
Single Sample Assign . . . . . 36
Editing . . . . . . . . . . . 37
Looping . . . . . . . . . . . 37
Generate a Sample Instrument 38
Program management . . . . 38
Backup the original samples . . 39
NW Manager File Reference . . .40
File Menu . . . . . . . . . . 40
Instrument Menu . . . . . . . 40
Settings Menu . . . . . . . . 41
Backup Menu. . . . . . . . . 41
Help Menu . . . . . . . . . . 41
NW Manager Tab Reference . . .41
Common area . . . . . . . . 41
Audio File/Assign Tab . . . . . 42
Sample Loop/Stop Tab. . . . . 44
Sample Start Tab . . . . . . . 46
InstrumentTab . . . . . . . . 46
NordWave tab . . . . . . . . 48
12. Appendix 51

4| Nord Wave User Manual OS V1.00
Thank you!
First we would like to thank you for purchasing the
Nord Wave. We hope you will nd it to be everything you
have wished for and that you will have many hours of great
fun with your new instrument.
Development story
The Nord Wave is built on a legacy of making virtual analog
synthesizers for more than 15 years. Virtual means “not
physically existing as such but made by software to appear
to do so”, so the nord synthesizers are very digital, but
behaves, feels and sounds like an analog synthesizer.
Surely today, you can nd a lot of digital instruments in
both hardware and software that attempts to sound like an
analog synthesizer. But for the spot-on feel, response and
sound most of them end up quite far from the spot.
To us, details are everything - and an intuative and fast to
use user-interface is just as important as the sound. We are
musicians ourselves, and know by experience how frustrat-
ing it can be to have to wade through menus and page-
plus buttons to change a setting. That is why we have a
physical button our knob for every sound related param-
eter on the front panel. Also, we know the importance of
building our instruments as light weighted as possible -
some times it is a long walk to that gig.
Our vision in designing and combining our own hardware
and software is to have professional sound quality and
playability in every single component; from the stroke of
the key all the way to the audio output.
Our patented pitch stick is a perfect example on how dedi-
cated hardware and software extends playability. Once you
get familiar with it you are likely to dismiss all other pitch
sticks as a toys.
Since we are working in a digital domain, we can do a lot
of interesting stu with our virtual analog synthesizer that
would not be possible if it was analog-for-real. For instance
we can store a sound setting, and recall it any time we
want. This might not blow your mind, but remember that
this simple task was not available to the all-analog synthe-
sizers.
The oscillator is where the sound is generated, and by
routing it through a lter and a amplier envelope we
have a basic synthesizer. An analog oscillator is limited
to generating a few basic waveforms, and though we can
add stu (like numerous LFO’s and EG’s and dierent lter
types) to make our synthesizer more complex, the founda-
tion of the sound is set to what the oscillator can do. Think
of a highway - you do not get more lanes by adding a lot of
access ramps.
With the Nord Wave we have not only added a fast lane,
but rebuilt the entire highway into a roller coaster; the
magic is in the oscillators and we can have them produce
many other things than the standard analog waveforms.
This is a concept we have been working on since the rst
Nord Lead synthesizer introduced in 1995, and currently
includes:
Traditional analog waveforms (Pule, Triangle, Saw and•
Sine)
FM-synthesis (Frequency Modulation); generating very•
complex and metalic style waveforms.
Wavetables - single cycle waveforms with large varia-•
tions in tonal character.
Sampled waves - acoustic samples turned into waveta-•
bles with the attack partion of the sample intact.
User replaceable samples - using any standard .wav-le•
as a oscillator source in a virtual ananlog environment.
Filters are great for shaping your sound. We have included
not only the basic lter types, but some really interesting
multimode lters as well.
Also, morphing; if there is one chapter in this manual you
must read - it is the one on morphing. It is very intuative
yet extremely powerfull (just the way we like it), and will
change not only your playing but also your approach to
sound design.
Featuring the ability to use any type of sampled wave-
forms, the nord wave is a sample player and an analog
synthesizer in one - and anything in-between.
Like a fabulous bouquet you do not know brilliant re-
sponse and sound until you have experienced it - we hope
you will nd your nord wave experience as astonishing as
we have developing it.
Features
The Nord Wave is a virtual analog synthesizer with an
extensive set of oscillators capable of producing various
waveforms including classical analog, FM and wavetable
as well as playback of sampled waveforms.
Synthesizer
In an classical analog synthesizer environment, each of the
Nord Wave’s two Synthesizer Sections consist of 2 Oscilla-
tors, 2 LFOs, 1 Modulation Envelope, 1 Amplier Envelope
and a Multi-type Filter section:
Oscillator 1 can produce wavetable, FM, analog and•
noise waveforms, as well as operate in Sync mode.
Oscillator 2 can produce sampled waves, FM, analog and•
sampled waveforms, as well as function as a modulation
source for Oscillator 1.
The LFOs have a wide array of modulation destinations•
as well as random waveforms and the ability to run in
Poly and Single mode.
The Modulation Envelope also has a wide array of•
modulation destinations and can funciton as either at-
tack/decay or attack/release envelope.
The Filter section has envelope and velocity control, and•
is selectable between resonant high pass, band pass
1. Introduction

1. INTRODUCTION | 5
and low pass modes as well as Comb, Multi and Vocal
modes.
Virtually any parameter can be seamlessly altered via a
Morph Source such as the MODULATION WHEEL & CON
TROL PEDAL input, note number or note velocity.
Each Synthesizer Section also features a 2-band EQ, chorus,
output level, mono/legato, glide and vibrato settings.
The Nord Wave is dual timbral; two sounds can be played
in layer or be switched between seamlessly using the SLOT
A& Bbuttons.
Both SLOTS A & B are stored within a program.
Effects
The Program section features an tube style overdrive, ste-
reo delay and reverb.
Programs
Programs can be stored in 1024 locations, organized in 8
banks and can be categorized for quick access.
Samples
User recorded and mapped key-zoned samples can be
downloaded via USB and stored in 99 memory locations or
up to 185Mb of compressed lossless data.
The memory is of Flash type which means that the data
remains in memory when power is cut, and there is no use
for hard drives or other type of loading media; once loaded
into the memory the data will be there till you remove it
yourself!
Clavia’s custom developed non-destructive compression
algorithm allows sample data sizes equivalent of up to 3
times the size of the physical memory.
Control & connections
The Nord Wave has a 49-key keyboard with velocity and af-
tertouch, modulation wheel and wooden pitch stick, 2 line
level outputs, 1 headphone output, MIDI IN & OUT, sustain
pedal and control pedal inputs.
More samples
More high quality samples can be downloaded free of
charge from the clavia web site: www.clavia.se
About this manual
Text displayed LIKE THIS refers to a knob, button, connec-
tor or area on the instruments panel.
Text displayed
like this
refers to what is displayed in
the instrument’s LCD WINDOW.
Text displayed like this refers to what is displayed in the
corresponding oscillator LED window.
You can download the latest version of this manual on the
clavia web site: www.clavia.se
Table of contents
