Norditalia MEMPHIS User manual

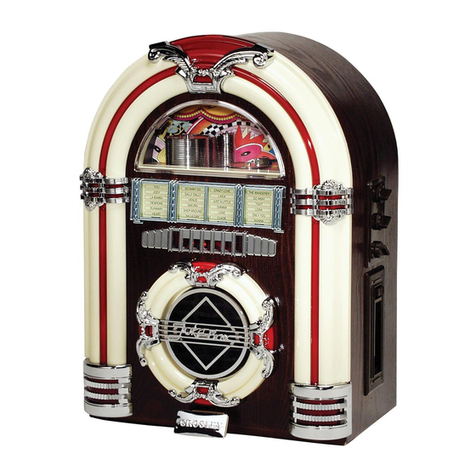
OPERATING INSTRUCTIONS JUKE BOX MEMPHIS, KANSAS
AND NEW ORLEANS

IMPORTANT SAFETY INSTRUCTIONS
Please read his owner’s guide
Please take the time to follow the instructions in this owner’s guide carefully. It will help you set up and
operate your system properly and enjoy all of its advanced features. Please save this owner’s guide for
future reference.
WARNING:
To reduce the risk of fire or electrical shock, do not expose the product to rain or moisture. Li uids can cause
a failure and/or a fire hazard. DO NOT OPEN THE BACK PANEL FOR RISK OF ELECTRICAL SHOCK
This symbol indicates that there are important operating instructions in the literature accompanying this
unit. This symbol indicates that dangerous voltage constituting a risk of electric shock is present within this
unit. To reduce the risk of fire or electrical shock, do not expose this product to rain or moisture.
This product is intended to be used only with the power supply provided.
This product must be used indoors. It is NOT designed for outdoors use.
WARNING:
Keep the remote control battery away from children. It may cause a fire or chemical burn if mishandled.
Dispose of used batteries promptly.
Please dispose of used ba ers properly, following any local local regula ions.

FRONT PANEL FUNCTIONS + REMOTE CONTROL FUNCTIONS FOR MODEL MEMPHIS WITH I-POD:

FRONT PANEL FUNCTIONS + REMOTE CONTROL FUNCTIONS FOR MODEL MEMPHIS WITH
USB/SD CARD:

FRONT PANEL FUNCTIONS + REMOTE CONTROL FUNCTIONS FOR MODEL NEW ORLEANS WITH
USB-SD CARD:

lTO PLAY A CD
1. Press the ON/OFF switch and select MODE SELECTOR to CD.
2. Flip open the semi circle “CD DOOR”
3. Turn the “RESET” pointer to “OFF” position and insert a disc onto the disc tray.
**(Make sure the “RESET” pointer in “ON” position after disc loaded.)
4. Press the PLAY/PAUSE button to play the CD, press once again to temporarily stop disc play.
5. Press STOP to stop playing the CD.
6. Adjust listening level and sound effect with Volume knob and Loudness button.
7. Press SKIP FORWARD to skip ahead to next track. Press SKIP BACKWARD to skip back to
previous track. The track number will be displayed in readout.
NOTE:
If the disc is seriously scratched, or too dirty, disc play may not start.
If an improperly centered disc is played, noise can be heard in the mechanism. The use of such discs
should be avoided.
NOTES ON CD-R/RW DISCS
•Because of non-s andardized forma defini ion/ produc ion of CD-R/RW, playback quali y
and performance are no guaran eed.
•Manufac urer is no responsible for he playabili y of CD-R/RW due o recording condi ions,
such as PC performance, wri ing sof ware, media abili y, e c.
•Do no a ach a seal or label o ei her side of he CD-R/RW disc. I may cause a malfunc ion.
PROGRAMMED DISC PLAY
It is not possible to enter programs during disc play. Press the STOP button first, then enter a program.
1. Press the STOP button.
2. Press the PROGRAM button. Select a track number using SKIP FORWARD or SKIP BACKWARD
button, press PROGRAM button again
3. Repeat step 2 until all the desired tracks are programmed in memory
4.
NOTE:
- To modify the program, press the STOP button and restart from step 2.
-To clear the program, press the STOP or power is switched off
REPEAT DISC PLAY
1. Press REPEAT button once to repeat disc play of one track.
2. Press REPEAT button twice to repeat all the track on the disc.
3. Select the desired track for disc play using SKIP FORWARD or SKIP BACKWARD button.
4. Press the PLAY/PAUSE button to play
5. Press STOP button to cancel repeat mode.
6.
RANDOM DISC PLAY
1. Press the RANDOM button to play CD in random order.
2. To cancel RANDOM, press STOP button
MUTE DISC PLAY
1. Press MUTE button to muting the sound while playing disc. *The MUTE indicator on the CD control
panel will be lighted up.
2. To resume press MUTE again and the MUTE indicator will goes off
USING THE IP DOCK (for hose models wi h Ipod connec ion)
1. Connect the Mains Lead and Plug to a suitable AC Mains wall outlet.
2. Open the iP dock drawer at the lower part of unit.
3. Insert your iPod into the iP Docking station before switching it on and ensure the iPod is firmly
seated.
4. Set the MODE SELECTOR to IP. (The iP Dock indicator light should light up).
5. Rotate the VOLUME/POWER knob clockwise to turn on the unit.
6. Press the PLAY/PAUSE button (on both the remote handset or ipod) to start playing the music.
Note: Whilst in the dock, the internal battery of the iPod will be charged.
7. Press PLAY/PAUSE once again to pause the music.

8. Press (on both the remote handset or ipod) to enter the iPod menu.
9. (on both the remote handset or ipod) for selection
10. (on both the remote handset or ipod) to operate selection.
11. on the remote handset (iP only section) or rotate /POWER knob on the front panel adjust the Volume
sound level.
12. Press STOP on the remote handset to stop playing.
13. To switch off the iPod, press and hold the PLAY/PAUSE button for a few seconds until the iPod
display has turned dark. Note: The iPod will keep charging when docked until fully charged.
14. To play the music again, simply press the PLAY button.
15. To safely remove the iPod, first press and hold the PLAY/PAUSE button for few seconds until the
iPod display has turned dark, then switch off the unit by the VOLUME/POWER knob.
*IMPORTANT NOTE:
To avoid malfunction on both your iPod and the iP Dock, make sure your iPod, as well as the
POWER of the Jukebox, is switched off before inserting your iPod into the iP Dock!
NOTE:
1. The main rotary VOLUME knobs on the front panel of the jukebox control the volume
loudness of CD & iP Dock.
2. When using the remote control handset to adjust the volume of the iP Dock, the main Volume
knob should be set at your maximum desired sound level.
3. When using the iP dock with your iPod, it is recommended to set the iPod Backlight Timer to
“ALWAYS ON” for easy reference.
MUTE DISC PLAY
1. Press MUTE button to muting the sound while playing disc. *The MUTE indicator on the CD control
panel will be lighted up.
2. To resume press MUTE again and the MUTE indicator will goes off
LIGHT OPERATION
1. LIGHT MODE (MEMPHIS model ONLY)
The colors of the lights change overtime gradually, press COLOR FLASH to remain static toyour
favourite color. Press it again to resume.
2. LIGHT MODE (KANSAS, NEW ORLEANS models only)
The colours of the lights are continually changing. Move the PLAY/HOLD switch to the “HOLD”
position for the lights to remain static at your favourite colour.
Note: The colour changing system will not work while in AM (MW)/FM radio mode -- the LED lighting
Will automatically change to the “BLUE” light only
IMPORTANT NOTES
The colour changing se uences of the lights are controlled by IC (Integrated Circuit).
•The lights may turn off when the light mode is in the HOLD position, this is normal and
not a malfunction.
•Press the small RESET button to clear all light mode pre-sets and start again.
•When the colour changing se uences are not in the right order, press the RESET button or
•press the LIGHT button on the front panel to switch off all the lights for few seconds.
RADIO OPERATION
1. Uncoil the Wire Antenna and extend fully for better reception.
2. Set the MODE selector to your desired band.
3. Tune to the desired radio station by using the TUNING knob.
4. To turn the radio off, press the POWER button.
AUXILIARY CONNECTION AUX IN (IF EQUIPPED)
1. Connect your own device (i.e. MP3 Player or iPod) to the AUX IN connection located on
the back of the cabinet, together with stereo plug and detachable rack (packed separately).

2. Adjust the ON / OFF switch next to the jack to the ON position.
3. Rotate the MODE SELECTOR on the front panel to CD-AUX.
4. Adjust the sound level with the VOLUME knob on the Jukebox or via the volume control of the
external device.
5. When changing to another mode, the external device will continue playing without sound until the
ON/OFF switch on the Jukebox is moved to OFF and the external device is switched off.
TROUBLESHOOTING GUIDE
Symptom Possible Causes (and Remedies)
RADIO RECEPTION
No radio
The MODE selector has not been set to the correct position.
Adjust the VOLUME knob.
Rotate the TUNING knob to find a radio station.
Switch the AUX IN jack to “OFF”
CD PLAYER OPERATION
Disc does not play
Reload the disc with the label side up
Clean the disc.
Sound skips Change the installation location.
Press the Reset button.
Unit is not working. Press the STOP button and then program the tracks.
GENERAL
Programmed disc play will not function
The AC power cord is not connected to an AC wall outlet.
Check that the power cord is connected firmly.
Push the power button from the “OFF” position to the “ON”
position.
No sound output. Turn VOLUME knob clockwise. Press the Reset button.
Switch the AUX IN jack to “OFF” and remove the RCA cord.
Switch the external speaker jack on the back cover.
Severe hum or noise. The TV or VCR is too close to the stereo system.
Separate from the TV or VCR.
THE OPERATING INSTRUCTIONS REFLECT THE CURRENT TECHNICAL SPECIFICATION OF THIS
PRODUCT AT TIME OF PRINT.
WE RESERVE THE RIGHT TO CHANGE SPECIFICATIONS FOR TECHNICAL REASONS WITHOUT
PRIOR NOTICE.


IMPORTED BY NORDITALIA RICAMBI SRL.
VIA SPAINO 2, 22066 MARIANO COMENSE (CO), ITALY
This manual suits for next models
2
Table of contents
