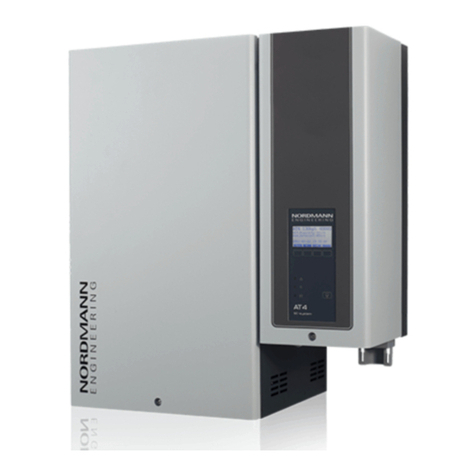
Nordmann Engineering AT4 User manual

SERVICE MANUAL
NORDMANN
ENGINEERING
NORDMANN
ENGINEERING
Dampfluftbefeuchter econoVap
Steam humidier
Nordmann AT4
2559457 EN 1202


3
Contents
1 Introduction 4
2 Settings in the engineering level 5
2.1 Launching the Engineering level 5
2.2 Setting the replacement interval time for the steam cylinder 5
2.3 Activating/deactivating the drain cooling 5
2.4 Setting GFCI operation 6
2.5 Set Multimode operation for double units 7
2.6 Set cylinder rotation for sequential operation 7
2.7 Setting the interval time for the cylinder rotation in sequential operation 8
2.8 Disabling a cylinder in parallel operating mode 8
2.9 Setting the heating current monitoring 8
2.10 Setting the On/Off hysteresis 9
2.11 Activate/deactivate error message for open safety chain 10
2.12 Resetting the control to factory settings 10
2.13 Activate/deactivate the test screens 11
3 Malfunctions 12
3.1 Operating malfunctions 12
4 Humidity control systems 22
4.1 Humidity control system without limitation of the supply air humidity 22
4.1.1 System 1: Room humidity control 22
4.2 Humidity control system with limitation of the supply air humidity 23
4.2.1 System 2: Room humidity control with continuous limitation of the supply air humidity 23
4.2.2 System 3: Supply air humidity control with continuous output limitation 24
4.3 Notes on humidity control systems with limitation of the supply air humidity 25
5 Water management 26
5.2 The SC system of the Nordmann AT4 26
5.3 The use of softenend water for the operation of the Nordmann AT4 27
6 Block diagrams 29
6.1 Block diagram CPU 29
6.2 Block diagram power board 30

4
1 Introduction
The present service manual is meant for the Nordmann service technician
and assumes a profound knowledge on the Nordmann AT4. It is also as-
sumed that the Service technician has notice of the mounting instructions
as well as of the operating instructions of the Nordmann AT4 and that he is
familiar with the dangers when working on the unit.
The present service manual includes the following information:
– Description of the settings in the engineering level of the Nordmann AT4
control.
– Information on operational malfunctions
– Information on the humidity control systems
– Information on the water management
– Block diagrams of the control electronics

5
2 Settings in the engineering level
2.1 Launching the Engineering level
Select the engineering settings menu:
Path: Main menu > User > Password entry: 1055 > Engineering
Press the <> and < > keys in order to select the individual settings in the engineering level. Detailed
information on the different settings are found in the following chapters.
2.2 Setting the replacement interval time for the steam cylinder
Select “Max.op.hr SC” in the engineering menu, then press the <Set> key.
In the upcoming modication dialogue set the desired interval time for the replacement of the steam
cylinder in hours (max. operating hours). The interval time to be set depends on the water quality on site.
Note: First priority for the determination of the maximum operating hours of the steam cylinder has
always the maximum level counts via the level sensor.
Factory setting: 5000 h
Setting range: 100...8000h
2.3 Activating/deactivating the drain cooling
Select “Drain Cool” in the engineering menu, then press the <Set> key.
In the upcoming modication dialogue activate (On) or deactivate (Off) the drain cooling function. With
activated drain cooling the inlet valve opens during the drain cycle, thus reducing the drain water tem-
perature.
Factory setting: On
Options: On (Inlet valve opens during drain cycle)
Off (Inlet valve remains closed during drain cycle)
Engineering Code
1055
Enter Number
Conrm with Set
Esc Set
Main Menu
Engineering :Set
Diagnostic :Set
Benutzer :Set
Esc Set
Test Screens:O
Rem.SafChain:O
Default :Set
Min.Request :25/20%
Overcurrent :Float
Seq.Interval:100h
Engineering
Drain Cool :On
GFCI :Set
Multi-Mode :Sequenz
Max.op.hr SC:5000h
Seq.Rotation:On
Esc Set
Menu
AT4 130kg/h 400V3
Standby
2011-02-15 12.00.00
Max.op.hr SC
5000
5000
Esc Set
Engineering
Drain Cool :On
GFCI :Set
Multi-Mode :Sequenz
Max.op.hr SC:5000h
Seq.Rotation:On
Esc Set
Engineering
Drain Cool :On
GFCI :Set
Multi-Mode :Sequenz
Max.op.hr SC:5000h
Seq.Rotation:On
Esc Set
Drain Cool
O
On
On
Esc Set

6
2.4 Setting GFCI operation
Select “GFCI” in the engineering menu, then press the <Set> key.
In the upcoming modication dialogue select whether or not the Nordmann AT4 is connected to a fault
current relay protected mains supply or whether the Nordmann AT4 is operated on a vessel with special
requirements concerning fault current measurement.
Factory setting: On
Options: On (mains supply with fault current relay protection, main contactor is switched
off during drain cycle)
Off (mains supply without fault current relay protection, main contactor remains
activated during drain cycle)
Ship (mains supply with special requirements concerning fault current measure-
ment, main contactor is switched off during lling and draining cycle)
Notes on the function “Ship”
The “Ship” function is used if the Nordmann AT4 is installed on a vessel. On vessels fault currents are
monitored much more exactly than elsewhere, since these lead to an increased corrosion of the ship trunk.
Due to the fact that small fault currents can ow via the inlet line to earth/mass also during lling, the
main contactor is switched off also during lling cycle with the “Ship” function.
Since no current measurement is possible during lling with deactivated main contactor, the lling time
is controlled via the inlet factor.
Select “Ship” in the GFCI menu, then press the <Set> key.
In the upcoming modication dialogue set the desired inlet factor.
Factory setting: 1 (Filling cycle 30 seconds)
Setting range: 0.5 (Filling cycle 10 seconds) up to 2.0 (Filling cycle 60 seconds)
Note: With inlet factor 1 the lling cycle takes 30 seconds then, the inlet valve is closed and the main
contactor is activated, in order to check the current rise. If the desired current value is not yet achieved
(110% of the nominal current), the main contactor is deactivated again, and another lling cycle of
30 seconds starts.
Engineering
Drain Cool :On
GFCI :Set
Multi-Mode :Sequenz
Max.op.hr SC:5000h
Seq.Rotation:On
Esc Set
Engineering
Drain Cool :On
GFCI :Set
Multi-Mode :Sequenz
Max.op.hr SC:5000h
Seq.Rotation:On
Esc Set
GFCI
GFCI :Set
GFCI-Mode :On
Esc Set
GFCI
GFCI :Set
GFCI-Mode :On
Esc Set
GFCI
InletFactor :1.0
GFCI :Set
GFCI-Mode :On
Esc Set
GFCI-Mode
O
On
Ship
On
Esc Set
GFCI-Mode
O
On
Ship
Ship
Esc Set
GFCI
InletFactor :1.0
GFCI-Mode :On
Esc Set
InletFactor
1.0
1.0
Esc Set

7
If the current is always too high after a lling cycle of 30 seconds (InletFactor 1), the lling time can be
reduced up to 15 seconds (=> inlet factor 0.5).
Or vice versa if it always takes 2 – 3 lling cycles to reach the desired current value, the lling time can
be increased up to 60 seconds (=> inlet factor 2).
2.5 Set Multimode operation for double units
Select "Multi-Mode" in the engineering menu, then press the <Set> key.
In the upcoming modication dialogue you determine, how the humidity demand is to be distributed on
the two cylinders.
Factory setting: Sequence
Options: Sequence (sequential distribution)
Parallel (balanced distribution)
Notes on settings
– Sequence: the demand is distributed as follows: the rst cylinder (Module A) takes 0 – 50% of the
demand and the second cylinder (Module B) 51 – 100%. In the operating mode “Sequence” the
additional parameters “Seq. Rotation” (see chapter 2.6) and “Seq. Interval” (see chapter 2.7) are
available, in order to ensure balanced cylinder operating hours.
– Parallel: The demand is distributed evenly on both cylinders, i.e. with a demand of 50 % both cylin-
ders working with 50% demand. In the operating mode “Parallel” the additional parameter “Disable”
(see chapter 2.8) is available, in order to disable one of the two cylinders (module A or B).
2.6 Set cylinder rotation for sequential operation
Note: this setting appears only if Multimode operation is set to “Sequence”.
Select “Seq. Rotation” in the engineering menu, then press the <Set> key.
In the upcoming modication dialogue activate (On) or deactivate (Off) the cylinder rotation for sequential
operation.
Factory setting: On
Options: On (Cylinder rotation activated)
Off (Cylinder rotation deactivated)
Notes on settings
– On: the cylinders alternate in processing the system demand, in order to ensure an even cylinder
wear.
– Off: the partitioning of the system demand remains unchanged, cylinder A 0 – 50% and cylinder B
51 - 100%
Engineering
GFCI :Set
Multi-Mode :Sequence
Seq.Rotation:On
Drain Cool :On
Seq.Interval:100h
Esc Set
Engineering
Multi-Mode :Sequenz
Seq.Rotation:On
Seq.Interval:100h
GFCI :Set
Overcurrent :Float
Esc Set
Multi-Mode
Parallel
Sequence
Sequenz
Esc Set
Seq.Rotation
O
On
On
Esc Set

8
2.7 Setting the interval time for the cylinder rotation in sequential operation
Note: this setting appears only if Multimode operation is set to “Sequence” and cylinder rotation is
activated (On).
Select “Seq.Interval” in the engineering menu, then press the <Set> key.
In the upcoming modication dialogue set the desired interval time for the cylinder rotation in sequential
operating mode.
Factory setting: 100
Setting range: 100 ... 1000 h
2.8 Disabling a cylinder in parallel operating mode
Note: this setting appears only if Multimode operation is set to “Parallel”.
Select “Disable” in the engineering menu, then press the <Set> key. Now, select the cylinder to be
disabled (Module A or Module B), and press the <Set> key.
In the upcoming modication dialogue activate or deactivate the selected cylinder.
Factory setting: Enable
Setting range: Enable (activated) or Disable (deactivated)
2.9 Setting the heating current monitoring
Select “Overcurrent” in the engineering menu, then press the <Set> key.
In the upcoming modication dialogue you determine whether the current monitoring shall take place
with a xed (Fixed) or a floating overcurrent threshold (Float).
Factory setting: Float
Setting range: Float (floating overcurrent threshold) or Fixed (fixed overcurrent threshold)
Engineering
Multi-Mode :Sequenz
Seq.Rotation:On
Seq.Interval:100h
GFCI :Set
Overcurrent :Float
Esc Set
Seq.Rotation
O
On
On
Esc Set
Disable
Modul A :Enable
GFCI :Set
Modul A :Enable
Esc Set
Modul A
Disable
Enable
Enable
Esc Set
Overcurrent
Fixed
Float
Float
Esc Set
Engineering
Multi-Mode :Parallel
Disable :Set
Overcurrent :Float
GFCI :Set
Overcurrent :Float
Esc Set
Engineering
Seq.Interval:100h
Overcurrent :Float
Min.Request :20/25%
Seq.Rotation:On
Rem.SafChain:O
Esc Set

9
Notes on settings
For the heating current monitoring, there are two overcurrent thresholds:
– The threshold for the excess current is set to 135% of the maximum nominal current (dash-dotted
line in the following diagram). This threshold value is xed and leads always to a draining of the
cylinder and to an emergency shut-down (Error E25) when exceeded.
– The threshold for the overcurrent is set to 125% of the maximum nominal current (W24/E24). If this
threshold value is exceeded the unit tries to reduce the current under 125 % by repetitive drainings.
If after 5 repetitive drainings the current value is still above the threshold value of 125 % the unit
goes on error (Error 24).
This threshold is xed based on the maximum nominal current if Fixed is selected (dashed line in
the following diagram).
With the function Float the overcurrent threshold (dashed line in the following diagram) can be
attened. The solid line in the following diagram represents the oat threshold. The function Float
allows a faster reaction to changes of the control signal.
2.10 Setting the On/Off hysteresis
Select “Min.Request” in the engineering menu, then press the <Set> key.
In the upcoming modication dialogue you determine the minimum demand for switching the unit on
(rst value) and off (second value) (On/Off hysteresis).
Factory setting: 25/20%
Options: 25/20%
17/12%
Notes on settings
To ensure an optimal current measuring/regulation with electrode based humidiers the hysteresis is
set to 25 % (switch on) and 20 % (switch off).
However you can reduce the hysteresis to 17% (switch on) and 12% (switch off).
Min.Request
25/20%
17/12%
25/20%
Esc Set
Engineering
Overcurrent :Float
Min.Request :20/25%
Rem.SafChain:O
Seq.Interval:100h
Default :Set
Esc Set
Floating Over Current Level
Module Request [%]
Over/Excess Current Level [%]
20 25 30 35 40 45 50 55 60 65 70 75 80 85 90 95 100
100
150
200
250
300
350
400
450
500
550
600
650
700
Excess current 135% of the maximum nominal current
Fixed overcurrent threshold 125% of the maximum nominal current
Overcurrent threshold with Float (Factor 1.5)

10
2.11 Activate/deactivate error message for open safety chain
Select “Rem.SafChain” in the engineering menu, then press the <Set> key.
In the upcoming modication dialogue you determine whether a warning message (Off) or error mes-
sage (On) appears when the safety chain is open.
Factory setting: Off
Options: Off (warning message with open safety chain)
On (error message with open safety chain)
2.12 Resetting the control to factory settings
Caution! When resetting the control to factory settings, any modied settings in the user level are lost.
Select “Default” in the engineering menu, then press the <Set> key.
The reset dialogue shows up in the display. Press the <Yes> key to reset the control to factory set-
tings. The control is reset to factory settings and restarted.
Note: By pressing the <No> key the reset procedure can be aborted. The control returns to the engi-
neering menu.
Rem.SafChain
O
On
O
Esc Set
Engineering
Min.Request :20/25%
Rem.SafChain:O
Default :Set
Overcurrent :Float
Test Screens:O
Esc Set
Engineering
Min.Request :20/25%
Rem.SafChain:O
Default :Set
Overcurrent :Float
Test Screens:O
Esc Set
Default
Are you sure?
No Yes
Menu
AT4 130kg/h 400V3
Standby
2011-02-15 12.00.00
AT4
STARTUP:
INIT MODULE

11
2.13 Activate/deactivate the test screens
With this function you can activate the test screens to carry out different function tests. The test screens
are not discussed in the service manual.
Select “Test Screens” in the engineering menu, then press the <Set> key.
In the upcoming modication dialogue switch the test screens on or off.
Factory setting: Off
Options: Off
On
Test Screens
O
On
O
Esc Set
Engineering
Min.Request :20/25%
Rem.SafChain:O
Default :Set
Overcurrent :Float
Test Screens:O
Esc Set

12
3 Malfunctions
3.1 Operating malfunctions
W20, E20 Safety chain open
Function: indicates that the safety chain is open.
Procedure: if the safety chain is open the system is blocked and the warn-
ing message W20A is shown. By setting the option “Rem.SafChain” in the
engineering level to On an open safety chain triggers the Error E20 and the
error relay is activated.
Behaviour on activation:
Warning (with Rem.SafChain: Off) Error (with Rem.SafChain: On)
Display W20A: Safety Loop Open E20A: Safety Loop Open
LED display: red & green ash Red lights
Fault-Remote: -Error Relay
Error-History: - -
System: Unit blocked Unit blocked
Time delay: - -
Reset: automatic reset automatic reset
W21, E21 Max. level and no current
Function: indicates that the maximum level sensor has triggered.
Procedure: if the water level reaches the maximum level sensor the warning
message W21 is triggered. The maximum level sensor features a software
related switch-off delay of 10 seconds.
If during steam production the warning message W21 is active for more than
30 minutes and simultaneously the current is below 1.5 % the corresponding
module goes on Error E21.
Behaviour on activation:
Warning Error
Display W21A(B): Cyl.Max.Level E21A(B): Cyl.Max & NoCurr
LED display: -Red lights
Fault-Remote: -Error Relay
Error-History: -E21A(B)
System: No relling on the corresponding module Corresponding module blocked
Time delay: -30 minutes
Reset: automatic reset Unit Off/On

13
W22, E22 Maximum lling time and W23, E23 No electrode current
Function: monitoring of the lling cycle
Procedure: if the lling cycle ist not nished within 20 minutes (maximum
lling level or reference current not reached) a warning is triggered. If the
current is below 1.5 % warning W23 is triggered otherwise warning W22.
The procedure is as follows:
• 20 minutes lling -> W22 or W23 active
• 20 minutes lling
• 60 minutes waiting
• 20 minutes lling
• 20 minutes lling
• 60 minutes waiting
• 20 minutes lling -> E22 or E23 active
At the end of a lling cycle of 20 minutes the warning message can change
from W22 to W23 or vice versa.
If a module with activated warning W22 or W23 goes on standby the warn-
ing message remains existing (advantage: you can see at any time that a
module has problems with the water supply).
In addition to the normal monitoring of the maximum lling time the lling
cycle is interrupted after 300 seconds for 5 seconds (except with the oper-
ating mode Ship).
When the steam production is restarted (main contactor activated) the lling
valve is blocked for 60 seconds (awaiting current rise due to the heating
up of the water).
Behaviour on activation:
Warning Error
Display W22A(B): Max.Fill Time
W23A(B): No Current
E22A(B): Max.Fill Time
E23A(B): No Current
LED display: - Red
Fault-Remote: -Error Relay
Error-History: -E22A(B) bzw. E23A(B)
System: corresponding module is lling or wai-
ting
Corresponding module blocked
Time delay: -220 minutes (3 hours 40 minutes)
Reset: automatic reset Unit Off/On

14
W24, E24 Electrode current too high
Function: monitoring of the heating current (Phase L1)
Procedure: if a overcurrent is detected the main contactor is switched off
immediately, a draining is carried out and the Warning W24 is triggered.
Subsequently, the main contactor is activated again. If overcurrent occurs
again, the process is repeated. After 15 drainings the error E24 is triggered
if the current could not be reduced.
The overcurrent monitoring serves for the recognition of slow rising over-
currents. The threshold of 125 % refers to the actual demand. If the steam
demand drops quickly, so called correction drainings are carried out with this
function, in order to achieve the new working point faster. The overcurrent
is analysed only if the current value determined by the current measure-
ment is valid, i.e. the software related RC element is loaded. It takes up to
8.25 seconds until the overcurrent monitoring can be released.
Behaviour on activation:
Warning Error
Display W24A(B): Over Current E24A(B): Over Current
LED display: -Red lights
Fault-Remote: -Error Relay
Error-History: -E24A(B)
System: Corresponding module is draining Corresponding module blocked
Time delay: -15 drainings
(Time see table)
Reset: automatic reset Unit Off/On
Cylinder type Draining time
5xx/8xxx 4 seconds
15xx 6 seconds
23xx 8 seconds
32xx/45xx/65xx 12 seconds

15
W25, E25 Maximum admissible electrode current exceeded
Function: monitoring of the heating current (Phase L1)
Procedure: if a overcurrent is detected the main contactor is switched off
immediately, a draining is carried out and the Warning W25 is triggered.
Subsequently, the main contactor is activated again. If overcurrent occurs
again, the process is repeated. After 3 drainings the error E25 is triggered
if the current could not be reduced.
The excess current monitoring serves for the recognition of fast rising over-
currents. The threshold of 135 % refers always to the nominal current of
the humidier and therefore it does not depend on the steam demand. The
current value is analysed even if the software related RC element is not yet
loaded. Thus it can be ensured that a fast rising current can be switched
off, before the fuse is triggered.
Behaviour on activation:
Warning Error
Display W25A(B): Excess Current E25A(B): Excess Current
LED display: -Red lights
Fault-Remote: -Error Relay
Error-History: -E25A(B)
System: Corresponding module is draining Corresponding module blocked
Time delay: -3 drainings
(Time see table)
Reset: automatic reset Unit Off/On
Cylinder type Draining time
5xx/8xxx 30 seconds
15xx 40 seconds
23xx 40 seconds
32xx/45xx/65xx 60 seconds

16
E26 Heating voltage contactor jammed
Function: current monitoring while the contactor is switched off.
Procedure: if during operation with deactivated main contactor a current
higher than 1.5 % is registered the error E26 is triggered and the unit is
blocked. Error E26 is triggered and the system is blocked too, if during the
calibration of the unit (after switching the unit on) a certain current value is
exceeded.
Behaviour on activation:
No Warning Error
Display -E26A(B): Req. Off Current
LED display: - Red
Fault-Remote: -Error Relay
Error-History: -E26A(B)
System: -Corresponding module blocked and cyl-
inder is draining
Time delay: -30 seconds
Reset: -Unit Off/On
W27, E27 Foam detection
Function: monitoring of foam formation in the steam cylinder.
Procedure: to detect the formation of foam the current value when the water
gets in contact with maximum level sensor (lling end) and the current value
when the water looses the contact with the maximum level sensor are set
in relation to each other.
This relation is called CurrentDrop:
CurrentDrop = ISensor-Off / ISensor-On
If the CurrentDrop value is less than 0.8, a counter is increased by 1. If the
counter has counted up from 0 to 1, a waiting period of 30 minutes starts.
During the waiting time the CurrentDrop is not analysed. If the counter counts
up to 2, the warning W27 is triggered. If the counter has reached the value
of 6 the cylinder is drained and the counter is reset to 0. If within 24 hours
4 drainings occurred the error E27 is triggered.
– CurrentDrop < 0.8:
––> Counter + 1
– CurrentDrop ≥ 0.8 or lling end with 110% current:
––> Counter - 1 (not < 0)
– Counter ≥ 2:
––> W27A(B)
– Counter = 6
––> cylinder draining
– 4 drainings within 24h
––> E27A(B)
Reset of Warning W27
If after a draining the CurrentDrop is ≥ 0.8, the warning is reset automatically.
The warning message is reset too, if the counter has counted back to 0.

17
Behaviour on activation:
Warning Error
Display W27A(B): Foam E27A(B): Foam
LED display: -Red lights
Fault-Remote: -Error Relay
Error-History: W27A(B) E27A(B)
System: Corresponding module is draining Corresponding module blocked and cyl-
inder draining
Time delay: 30 minutes 24 hours
Reset: automatic reset Unit Off/On
W28, E28 Steam cylinder used
Function: monitoring of the steam cylinder on lime deposits at the electrodes.
Procedure: if a lling cycle ends due to a contact with the max. level sen-
sor a counter is increased by 1. If the lling cycle ends with 110 % current
the counter is decreased by 1 (not < 0). Sensor contacts beyond the lling
cycles are not counted. If the sensor counter reaches a value of 2400 (4800
with conductivity: <125uS), the warning W28 is triggered. Further 72 hours
of operation are possible after the warning message before the error E28
is triggered.
Behaviour on activation:
Service Error
Display W28A(B): Cyl. Maintenance E28A(B): Cyl. Maintenance
LED display: Yellow lights Yellow & Red light
Fault-Remote: Service Relay Service & Error Relay
Error-History: -E28A(B)
System: 72 h Timer is started Corresponding module blocked
Time delay: 2400 (4800) Sensor contacts 72 hours warning time
Reset: User -> Maintenance -> Cyl. Reset User -> Maintenance -> Cyl. Reset

18
W29, E29 Max. operating hours of steam cylinder reached
Function: monitoring the steam cylinder on max. operation hours.
Procedure: if the operating hours of the steam cylinder has reached the set
maximum value the Warning W29 is triggered. Further 72 hours of operation
are possible after the warning message before the error E29 is triggered.
Behaviour on activation:
Service Error
Display W29A(B): Cyl. Maintenance E29A(B): Cyl. Maintenance
LED display: Yellow lights Yellow & Red light
Fault-Remote: Service Relay Service & Error Relay
Error-History: -E29A(B)
System: 72 h Timer is started Corresponding module blocked
Time delay: 2500/5000 operating hours 72 hours warning time
Reset: User -> Maintenance -> Cyl. Reset User -> Maintenance -> Cyl. Reset
W32, E32 Humidity sensor defective
Function: monitoring of the humidity signal at the control input (sensor
interruption).
Procedure: the monitoring is active only, if the internal controller (“Int.P” or
“Int.PI”) is activated. If the humidity signal drops below the threshold of 3 %
steam production is stopped and the warning W32 triggered. If the signal
is still below 3 % after 60 seconds error E32 is triggered.
Behaviour on activation:
Warning Error
Display W32A(B): HumSensor broken E32A(B): HumSensor broken
LED display: -Red lights
Fault-Remote: -Error Relay
Error-History: -E32A(B)
System: Steam production = 0% Steam production = 0%
Time delay: -60 seconds
Reset: automatic reset automatic reset

19
W33, E33 Limit humidity sensor defective
Function: Monitoring of the humidity signal at the limiter input (sensor
interruption).
Procedure: the monitoring is active only, if the internal controller (“Int.P”
or “Int.PI”) is activated and the Function “Limiter” activated. If the humidity
signal drops below the threshold of 3 % steam production is stopped and
the warning W33 triggered. If the signal is still below 3 % after 60 seconds
error E33 is triggered.
Behaviour on activation:
Warning Error
Display W33A(B): Lim Sens broken E33A(B): Lim Sens broken
LED display: -Red lights
Fault-Remote: -Error Relay
Error-History: -E33A(B)
System: Steam production = 0% Steam production = 0%
Time delay: -60 seconds
Reset: automatic reset automatic reset
W34 Module inactive
Function: indicates that a module is blocked.
Procedure: the modules a and B can be blocked by the user. If a module
is set to “Inactive” the corresponding module is blocked and the warning
W34 is triggered.
Behaviour on activation:
Warning No Error
Display W34A(B): Module disable -
LED display: - -
Fault-Remote: - -
Error-History: - -
System: corresponding module blocked -
Time delay: - -
Reset: Engineering -> Module A(B) -> Active -

20
E35 Modbus Timeout
Function: monitoring for continuous transmission of the control/limiter signal
(demand/humidity) via Modbus.
Procedure: If the demand or humidity signal is transmitted to the unit via
Modbus (SignalSource: Modbus) the signal must be updated in regular inter-
vals. If within 5 seconds no new value is transmitted error E35 is triggered.
Behaviour on activation:
No Warning Error
Display -E35A(B): Modbus Timeout
LED display: -Red lights
Fault-Remote: -Error Relay
Error-History: - -
System: -Steam production = 0%
Time delay: -5 seconds
Reset: -automatic reset
W36, E36 Standby Modus active
Function: Indicates that a standby operation is active (Draining, AntiFreeze
or KeepWarm).
Procedure:
– Standby-Operation “Draining”
If a module has no demand for 72 hours standby draining is triggered on
the corresponding module. During draining the information W36 is shown
in the display. In standby mode the draining function is triggered only
once (no repetition after 72 additional operating hours without demand).
– Full Draining
With full draining the cylinder is completely drained (3 minutes) after
72 hours in standby operation.
– Partial draining
With partial draining only a short draining cycle is performed. Subse-
quently, it is checked whether or not there is a current ow between
the electrodes. If still current ows (the electrodes are still in the
water), the draining is repeated (max. 20 times). If no current ows,
partial draining is terminated. If the safety chain is interrupted no
partial draining can be performed (contactor cannot be activated).
In this case a full draining is performed automatically.
– Standby operation “KeepWarm” and “AntiFreeze”
If a module has no demand the keep warm or anti freeze function is ac-
tivated. With keep warm function the water in the cylinder is heated with
150 W for a maximum of 72 hours as standard. With anti freeze function
the water in the cylinder is heated with 50 W without time limitation.
Other manuals for AT4
2
Table of contents
Other Nordmann Engineering Humidifier manuals

Nordmann Engineering
Nordmann Engineering Omega Pro User manual

Nordmann Engineering
Nordmann Engineering Omega Pro Series User manual

Nordmann Engineering
Nordmann Engineering AT4 User manual

Nordmann Engineering
Nordmann Engineering MinAir User manual

Nordmann Engineering
Nordmann Engineering AT4 Quick setup guide

Nordmann Engineering
Nordmann Engineering Omega Pro User manual

Nordmann Engineering
Nordmann Engineering ES4 How to use