Northern Diver SRE SEA HAWK User manual

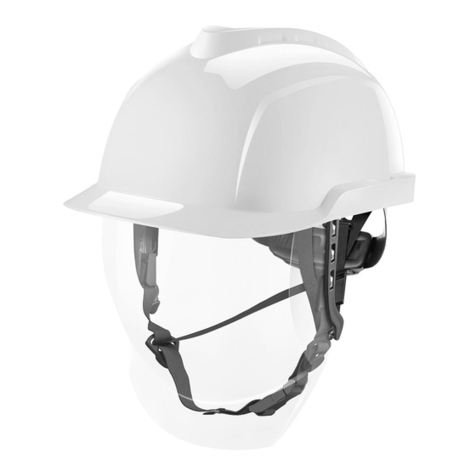
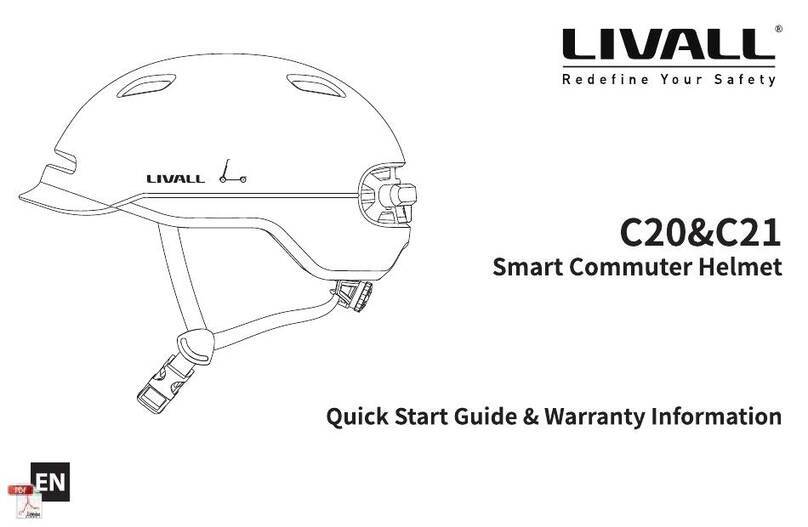
SEA HAWK HELMET
USER MANUAL
LIMITED IMPACT PROTECTION. Helmets cannot always protect against injury. Even a very low speed accident can
result in serious injury or death. Any helmet subjected to a severe impact should be discarded and destroyed, even though
damage may not be outwardly visible.
HELMETS CANNOT PREVENT ALL HEAD INJURIES. Some head injuries are not caused by impacts at all, but by other
forces. You can scramble an egg just by shaking it. You don’t have to break the shell to destroy the contents.
HELMETS CANNOT PREVENT THIS TYPE OF INJURY. Helmets cannot protect what they do not cover. This helmet will
not protect the neck or any areas of the head that it does not cover. It cannot guard against spinal or other bodily injuries
that may result from an accident.
SAFETY. This helmet has a limited life span in use and should be replaced when it shows obvious signs of wear. Do not
modify or remove any original component parts of the helmet, other than as recommended by Northern Diver. Do not adapt
the helmet for the purpose of attaching accessories, other than as recommended by Northern Diver. Please exercise care
and good judgment whenever you use your helmet.
YOU SHOULD ALWAYS:
1. Wear your helmet low in the front to protect the forehead.
2. Fasten your buckle and tighten your chin strap.
3. Check your adjustments every time you wear your helmet.
4. Replace your helmet after an accident, even if no damage
is visible.
5. Store your helmet in a cool dry place.
6. Wear a helmet designed for what you’re doing.
YOU SHOULD NEVER:
1. Wear a helmet that’s been in an accident, even if no
damage is visible.
2. Wear someone else’s helmet.
3. Wear your helmet with the buckle unfastened.
4. Wear your helmet tipped back to expose your forehead.
5. Wear anything under your helmet that has not been
recommended
6. Clean your helmet with chemical cleaners.
CONTACTING NORTHERN DIVER
Ofce: Unit 5, East Quarry, Appley Lane North, Appley
Bridge, Wigan, Lancashire, WN6 9AE, UK
Telephone: +44 (0) 1257 25 44 44
Email: info@ndiver.com
Visit our website: www.ndiver-rescue.com
Thank you for purchasing this Northern Diver Helmet. To help ensure your future safety, do not use this product before
reading this manual. It is important to fully understand its proper handling for safe usage.
Copyright notice: This owners manual is copyrighted, all rights reserved. It may not, in whole or in part, be copied,
photocopied, reproduced, translated, or reduced to any electronic medium or machine-readable form without prior consent
in writing from Northern Diver (International) Ltd.
For the latest information about all Northern Diver Specialist Rescue Equipment please visit www.ndiver-rescue.com
CARING FOR YOUR HELMET
Cleaning: Helmets can be damaged by many available
cleaners, especially Petroleum based solvents. Clean
the helmet using a soft cloth or sponge, warm water and
mild soap.
Storage: Excessive heat can damage the helmet. In
direct sunlight, dark gear bags and automobile trunks
can get hot enough to cause heat damage. Damaged
helmets will appear to have uneven or bubbly surfaces.
WARNING: DO NOT use heat damaged helmets.
WARRANTIES: Northern Diver warrants to the original
purchaser of this product that the product is free of
defects in material and workmanship for a period of one
year from the original date of purchase.
This warranty does not apply to defects of physical
damage resulting from abuse, neglect, improper repair,
improper t, alterations, or use unintended by the
manufacturer. If your helmet is found to be defective in
materials or workmanship within one year from the date
of purchase, Northern Diver can either repair or replace
the helmet free of charge. Northern Diver does not
warranty any helmet damaged due to heat or contact
with solvents.

THIS IS IMPORTANT. If you can roll it off the head
completely in either direction, by rolling it forward so
far that its blocks your vision, or backward far enough
to expose the forehead, it doesn’t t correctly. Repeat
Steps 2 and 3 until the helmet movement is minimal.
WARNING! If you cannot adjust the helmet to t properly
according to Step 5, DO NOT USE THIS HELMET.
Replace it with a different size or model. Return it to your
dealer or contact Northern Diver for assistance. Once
you are satised that the helmet ts correctly and that all
straps are properly adjusted and tightened, take a short
test ride. Pay attention to overall comfort and helmet
stability while riding. Make any minor adjustments to the
t pads and straps to improve comfort or stability.
FITTING THE HELMET TO YOUR HEAD
In order for your Northern Diver helmet to work correctly, it
must t and be worn correctly. Follow these simple steps to
learn how to properly t and wear your helmet. Please note
these instructions are a guide for your general use. Helmet
components mentioned may not be exact to the helmet you
have purchased but will be very similar. Illustrations are for
reference and do not depict any particular helmet.
STEP 1: WEAR HELMET IN ITS PROPER POSITION
Always wear the helmet low in the front to protect the
forehead (Fig. 1A). Never wear the helmet tipped back to
expose your forehead (Fig. 1B).
IMPORTANT: All tting adjustments MUST be made with
the helmet in the proper position. Failure to do so will
result in a poor t. This will allow the helmet to move out of
position or come off in an accident.
STEP 2: ADJUST THE STRAPS
To adjust the position of the straps:
A. Open the Cam-Lock adjusters (Figure 2). Put the helmet
on and slide the straps through the adjusters until they are
located in the correct position as indicated in (Figure 3).
B. Make sure there is no slack in any of the straps when the
adjusters are positioned correctly.
C. Close and lock the Cam-Lock adjusters. The front and
rear straps should join at the point slightly below and in front
of (but not covering) the ears (Figure 3).
STEP 3: ADJUST THE CHIN STRAP
Always wear the helmet with the chin strap buckle fastened
and the strap pulled tight. Figures 4 and 5 show how to
fasten and release the buckle. Make sure the strap is well
back against the throat, NOT on the point of the chin. Straps
worn on the point of the chin increase the chance of the
helmet coming off in an accident. Figure 6 shows the proper
position of the chin strap.
WARNING!
Make sure the loose end of the strap passes through the
rubber “O” ring (Figure 7). If it does not, the strap may slide
loose and the helmet can come off accidentally.
STEP 4: GETTING THE CORRECT FIT
The helmet ts correctly when it is held rmly but
comfortably in place by the interior t pads and the t
system. This helmet has the TwistFit system. Simply twist
the dial located at the back of the head, clockwise to tighten
and anti-clockwise to loosen. The t system should be snug,
but not uncomfortably tight.
STEP 5: CHECKING THE FIT AND ADJUSTMENTS
Before using the helmet, make sure it ts correctly, the
straps are correctly adjusted, and the chin strap is tight
enough. Put the helmet on in the correct position. Fasten the
chin strap and pull it tight.
A. Check the t. Grab the helmet with both hands and twist
it to the left and to the right. If the helmet ts right, the skin
on the forehead will move as the helmet moves. If it does
not, the helmet is too loose. Return to Step 4.
B. Check the straps. Grab the helmet with both hands and
try to remove it by rolling the helmet forward and backward
as far as you can. Make a serious effort.
