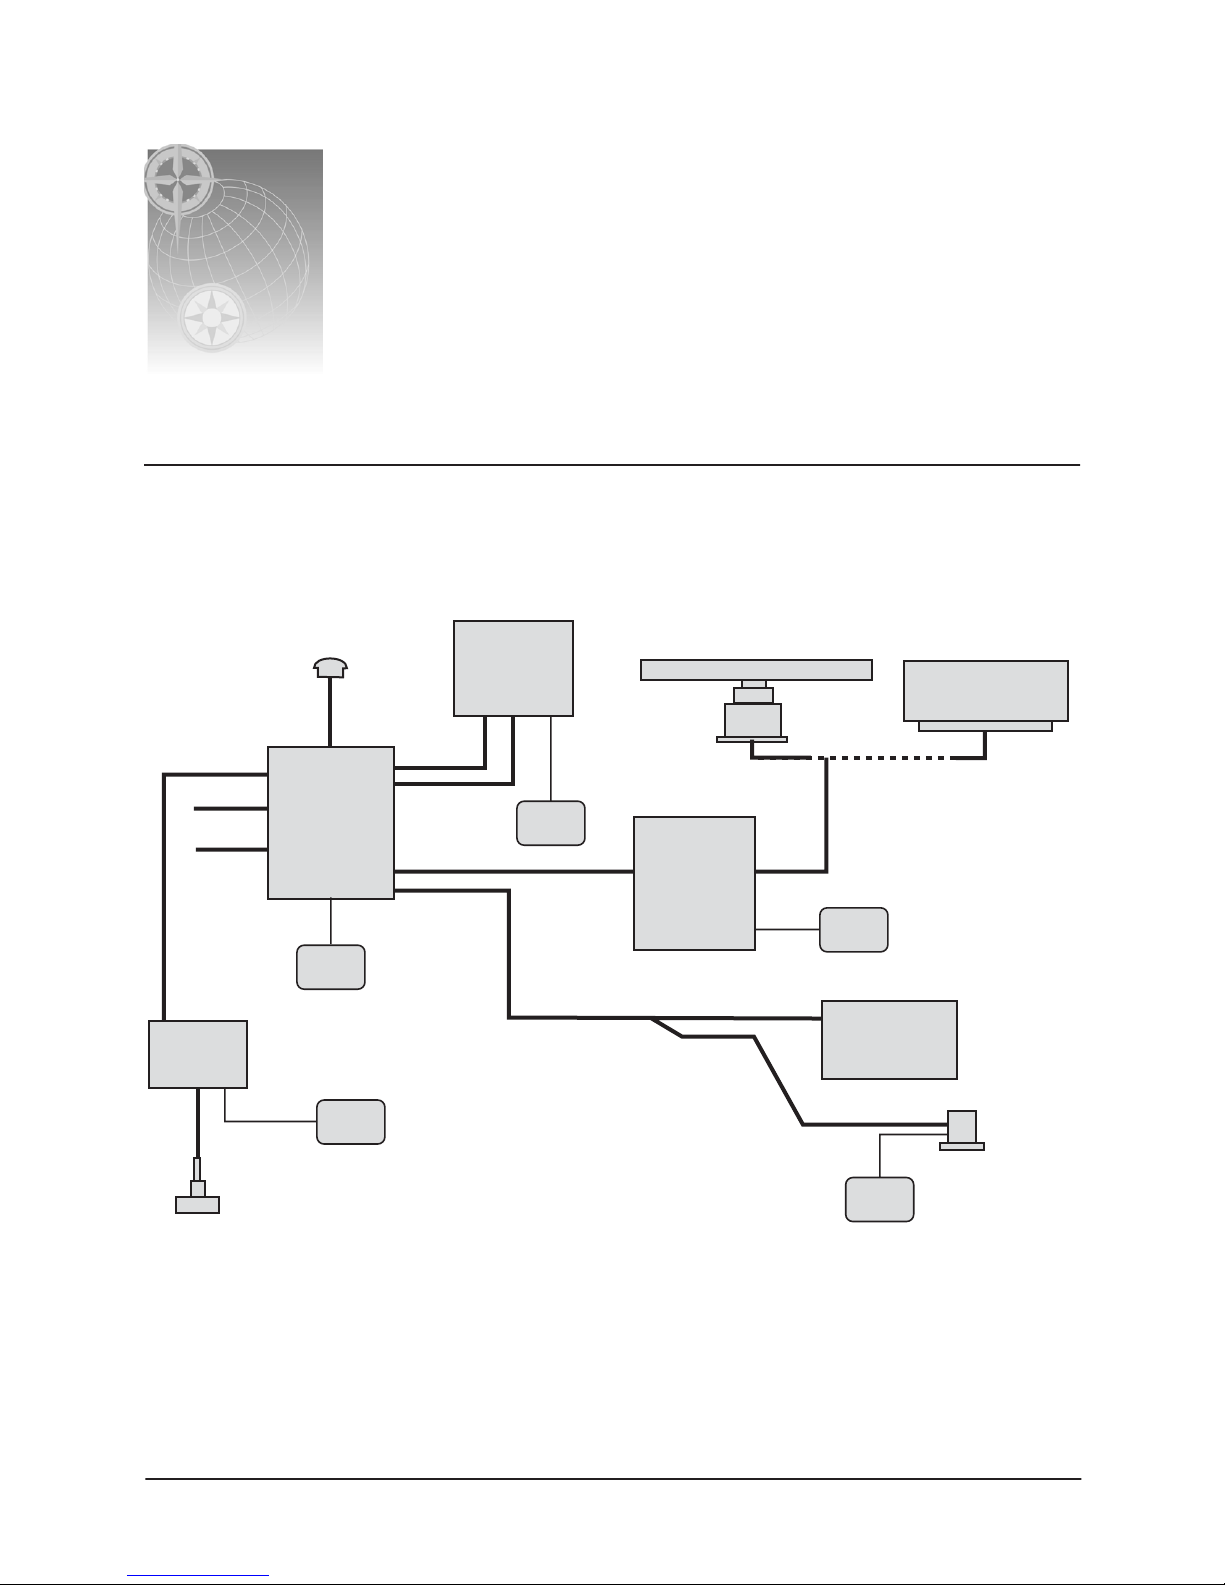
SECTION TWO: Installing and wiring the radar
Page 4 Ethernet Radar Installation Manual, Rev. A
Installing the radar antenna
Choosing the antenna location
The radar’s ability to detect targets depends greatly on the position of its antenna. The ideal antenna
location is high above the ship's keel line where there aren’t any obstacles. This ideal location is
limited by various factors; therefore, consider the following when choosing the antenna location:
•
Do
install the antenna as high as possible (after considering the structure of the vessel’s
hull, the weight of the antenna, and how easy it will be to maintain the antenna). The
higher the installation position, the longer the radar ranging distance.
•
Do
install the antenna away from masts or other obstructions. If the antenna isn’t higher
than obstructions, radar waves may be blocked, creating shadow zones or generating false
echoes.
•
Do
install the antenna closer to the vessel’s bow, for a clear view to the front. When
installing the antenna on a mast, place it in front of the mast. If obstacles can’t be avoided
for vessel structural reasons, see “Shifting the antenna away from the keel line,” described
below.
•
Do
install the antenna as far away as possible from the antennas of other equipment, such
as direction finders, GPS equipment, radio receivers, etc. Radar scanners may cause
interference with radio receivers.
•
Do
keep the connecting cable as short as possible. Whenever possible, keep the distance
from the antenna to the control box within the standard cable length of 10 meters. If you
must use longer cable, do not exceed 30 meters.
•
Don’t
install the antenna where it may be subjected to smoke or hot air from smokestacks
or heat from lamps.
Shifting the antenna away from the keel line
By shifting the antenna position from the keel line to starboard, it’s possible to move shadow zones
to the port side. This makes it possible to keep a clear view to the bow. You can calculate the distance
to be shifted, depending on the distance from the antenna to any obstacles, by using the following
equation (Ls = distance to be shifted from keel line; D = diameter of obstacle on keel line; and R =
distance from antenna to obstacle):
Ls=0.4R+D/2 (when R<15m)
Ls=0.025R+D/2 (when R>=15m)
CAUTION!
To eliminate interference, install the antenna away from GPS and radio
receiver antennas, including SatNav and satellite TV antennas.