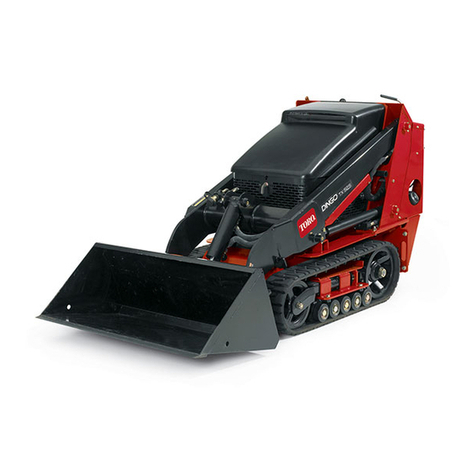
Nortrac 20 HP Mini-Track Gas Loader User manual

READ & SAVE THESE INSTRUCTIONS
20 HP Mini-Track Gas Loader
Owner’s Manual
WARNING: Read carefully and understand all OPERATING INSTRUCTIONS before
operating. Failure to follow the safety rules and other basic safety precautions may result in serious
personal injury.
Item #2232003

Page 2 of 35
Thank you very much for choosing a NorTrac™product!
For future reference, please complete the owner’s record below:
Serial Number/Lot Date Code: ________________________________
Purchase Date: ____________________________________________
Save the receipt, warranty, and this manual. It is important that you read
the entire manual to become familiar with this product before you begin
using it.
This 20 HP Mini Track Gas Loader is designed for certain applications
only. Northern Tool and Equipment is not responsible for issues arising
from modification or improper use of this product such as an application
for which it was not designed. We strongly recommend that this product
not be modified and/or used for any application other than that for which
it was designed.
For product assistance, service, and warranty questions, please contact
NorTrac Technical Support 1-800-521-0438.

Page 3 of 35
Table of Contents
Intended Use..........................................................................................................................................4
Technical Specifications......................................................................................................................4
Important Safety Information...............................................................................................................4
Safety and Product Labels...................................................................................................................9
Before Each Use..................................................................................................................................10
Operating Instructions........................................................................................................................13
After Each Use.....................................................................................................................................20
Maintenance ........................................................................................................................................21
Troubleshooting..................................................................................................................................30
Parts Diagram......................................................................................................................................32
Parts List..............................................................................................................................................33
Replacement Parts..............................................................................................................................33
Limited Warranty.................................................................................................................................34

Page 4 of 35
Intended Use
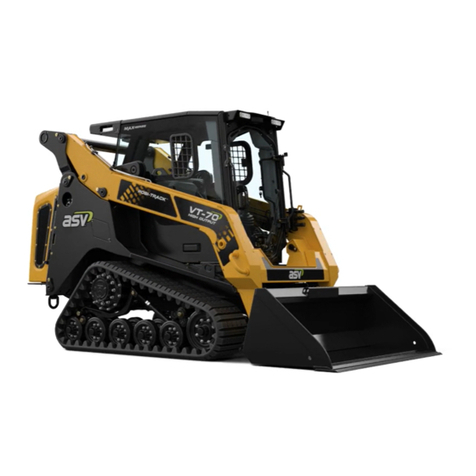
The NorTrac 20 HP Mini-Track Gas Loader is used for digging, carrying materials, grading,
landscaping, ground maintenance, site preparation, and snow removal. With optional attachments
(sold separately), the 20MTL is capable of sweeping, trenching, and more. The steer loader is
designed for operation in small and limited-access spaces. Its standard mini-SSL interface and
hydraulic connections make it compatible with many attachments to perform a wide variety of light and
medium duty tasks.
Technical Specifications
Property
Specification
Overall Width (with bucket)
43.7 in. / 1110 mm.
Overall Length
99.2 in. / 2520 mm.
Overall Height
55.3 in. / 1405 mm.
Maximum Operating Height (with standard bucket)
80.2 in. / 2037 mm.
Operating Weight
3351 lb.
Rated Load Capacity –Bucket (with 198 lb. operator)
750 lb.
Travel Speed
0-4.5 km/h (0-2.8 mph)
Angle of Departure
22º
Engine
14.9 KW
Ground Clearance
4.1 in. / 104 mm.
Hydraulics Flow (auxiliary)
6.5 gal/min
System Relief Pressure (hydraulic)
18 MPa
Hydraulic Oil Tank Capacity
33 liters
Standard Bucket Capacity
0.17m3
Standard Bucket Dump Height
51.7 in. / 1313 mm.
Height to Hinge Pin
73.5 in. / 1867 mm.
Specifications and design subject to change without notice.
Important Safety Information
⚠WARNING
•Read and understand all instructions. Failure to follow all instructions may result in serious injury
or property damage.
•The warnings, cautions, and instructions in this manual cannot cover all possible conditions or
situations that could occur. Exercise common sense and caution when using this tool. Always be
aware of the environment and ensure that the tool is used in a safe and responsible manner.
•Do not allow persons to operate the machine 20MTL they have read this manual and have
developed a thorough understanding of how it works.
•Do not modify this machine in any way. Unauthorized modification may impair the function and/or
safety and could affect the life of the product and void the warranty. There are specific applications
for which the product was designed.
•Use the right tool for the job. DO NOT attempt to force small equipment to do the work of larger
industrial equipment. There are certain applications for which this equipment was designed. This
product will be safer and do a better job at the capacity for which it was intended. DO NOT use
this equipment for a purpose for which it was not intended.
•Industrial or commercial applications must follow OSHA requirements.

Page 5 of 35
⚠WARNING
WORK AREA SAFETY
•Inspect the work area before each use. Keep work area clean, dry, free of clutter, and well-lit.
Cluttered, wet, or dark work areas can result in injury. Using the product in confined work areas
may put you dangerously close to cutting tools and rotating parts.
•Do not use the product where there is a risk of causing a fire or an explosion; e.g., in the presence
of flammable liquids, gases, or dust. The product can create sparks, which may ignite the
flammable liquids, gases, or dust.
•Keep children and bystanders away from the work area while operating the tool. Do not allow
children to handle the product.
•Be aware of all power lines, electrical circuits, water pipes, and other mechanical hazards in your
work area. Some of these hazards may be hidden from your view and may cause personal injury
and/or property damage if contacted.
⚠WARNING
PERSONAL SAFETY
•Stay alert, watch what you are doing, and use common sense when operating the tool. Do not use
the tool while you are tired or under the influence of drugs, alcohol, or medication. A moment of
inattention while operating the tool may result in serious personal injury or death.
•Dress properly. Do not wear loose clothing, dangling objects, or jewelry. Keep your hair, clothing
and gloves away from moving parts. Loose clothes, jewelry, or long hair can be caught in moving
parts. Air vents on the tool often cover moving parts and should be avoided.
•Wear the proper personal protective equipment when necessary. Use ANSI Z87.1 compliant safety
goggles (not safety glasses) with side shields, or when needed, a face shield. Use a dust mask in
dusty work conditions. Also use non-skid safety shoes, hardhat, gloves, dust collection systems,
and hearing protection when appropriate. This applies to all persons in the work area.
•Do not overreach. Keep proper footing and balance at all times.
•Secure the work with clamps or a vise instead of your hand when practical. This safety precaution
allows for proper tool operation using both hands.
•Engine exhaust contains carbon monoxide, an odorless, deadly poison that can kill you. Do not
run the engine indoors or in an enclosed area.
⚠CAUTION
MINI-TRACK LOADER USE AND CARE
•Do not force the product. Products are safer and do a better job when used in the manner for
which they are designed. Plan your work and use the correct product for the job.
•Check for damaged parts before each use. Carefully check that the product will operate properly
and perform its intended function. Replace damaged or worn parts immediately. Never operate the
product with a damaged part.
•Do not use a product with a malfunctioning switch. Any power tool that cannot be controlled with

Page 6 of 35
the power switch is dangerous and must be repaired by an authorized service representative
before using.
•Disconnect the power/air supply from the product and place the switch in the locked or off position
before making any adjustments, changing accessories, or storing the tool. Such preventive safety
measures reduce the risk of starting the tool accidentally.
•Store the product when it is not in use. Store it in a dry, secure place out of the reach of children.
Inspect the tool for good working condition prior to storage and before re-use.
•Use only accessories that are recommended by the manufacturer for use with your product.
Accessories that may be suitable for one product may create a risk of injury when used with
another tool. Never use an accessory that has a lower operating speed or operating pressure than
the tool itself.
•Keep guards in place and in working order. Never operate the product without the guards in place.
•Do not leave the tool running unattended.
⚠WARNING
TRAINING
•Read the Owner’s Manual and other training material. If the operator(s) or mechanic(s) cannot
read English, it is the owner's responsibility to explain this material to them.
•Become familiar with the safe operation of the equipment, operator controls, and safety signs.
•All operators and mechanics should be trained. The owner is responsible for training the users.
•Never let children or untrained people operate or service the equipment. Local regulations may
restrict the age of the operator.
•The owner/user can prevent and is responsible for accidents or injuries occurring to himself or
herself, other people or property.
⚠WARNING
PREPARATION
•Evaluate the terrain to determine what accessories and attachments are needed to properly and
safely perform the job. Only use accessories and attachments approved by the manufacturer.
•Wear appropriate clothing including gloves, safety glasses, long pants, substantial slip-resistant
footwear, and hearing protection. Tie back long hair and do not wear jewelry.
•Inspect the area where the equipment is to be used and remove all objects such as rocks, toys,
and wire which can be thrown by the machine.
•Use extra care when handling fuels. They are flammable, and vapors are explosive.
Use only an approved fuel container
Never remove the fuel cap or add fuel with the engine running. Allow the engine to cool before
refueling. Do not smoke.
Never refuel or drain the machine indoors.
•Check that the operator's presence controls, safety switches, and shields are attached and
functioning properly. Do not operate unless they are functioning properly.

Page 7 of 35
⚠WARNING
OPERATION
•Only operate in good light, keeping away from holes and hidden hazards.
•Be sure all drives are in neutral before starting the engine. Only start the engine from the
operator's position.
•Do not operate any of the control levers (including auxiliary lever) unless you are standing with
both feet on the platform and firmly holding the grip handles.
•Slow down and use extra care on hillsides. Be sure to travel in the recommended direction on
hillsides. Turf conditions can affect the machine's stability.
•Slow down and use caution when making turns, crossing roads and sidewalks, and changing
directions on slopes.
•Never operate without the guards securely in place. Be sure all interlocks are attached, adjusted,
and functioning properly.
•Do not change the engine governor setting or overspeed the engine.
•Stop on level ground, lower implements, disengage the auxiliary hydraulics and shut off the engine
before leaving the operator's position for any reason.
•Keep hands and feet away from moving attachments.
•Look behind and down before backing up to be sure of a clear path.
•Never carry passengers and keep pets and bystanders away.
•Slow down and use caution when making turns and crossing roads and sidewalks.
•Do not operate the machine when you are tired, ill, or under the influence of alcohol or drugs.
•Use care when loading or unloading the machine into a trailer or truck.
•Use care when approaching blind corners, shrubs, trees, or other objects that may obscure vision.
•Read all attachment manuals.
•Ensure that the area is clear of other people before operating the loader unit. Stop the loader unit
if anyone enters the area.
•Never leave a running loader unit unattended. Always lower the loader arms, stop the engine, set
the parking brake, and remove the key before leaving.
•Do not exceed the rated operating capacity, as the loader unit may become unstable which may
result in loss of control.
•Do not carry a load with the arms raised. Always carry loads close to the ground.
•Do not overload the attachment and always keep the load level when raising the loader arms.
Logs, boards, and other items could roll down the loader arms, injuring you.
•Never jerk the controls; use a steady motion.
•Watch for traffic when operating near or crossing roadways.
•Do not touch parts which may be hot from operation. Allow them to cool before attempting to
maintain, adjust, or service.
•Check for overhead clearances (i.e., branches, doorways, electrical wires) before driving under

Page 8 of 35
any objects and do not contact them.
•Ensure that you operate the loader unit in areas where there are no obstacles in close proximity to
the operator. Failure to maintain adequate distance from trees, walls, and other barriers may result
in injury. Only operate the unit in areas where there is sufficient clearance for the operator to safely
maneuver the product.
•Before digging, have the area marked for underground utilities, and do not dig in marked areas.
Also, be aware of the location of objects and structures that may not be marked, such as
underground storage tanks, wells, and septic systems.
•Locate the pinch point areas marked on the loader unit and attachments and keep hands and feet
away from these areas.
•Before operating the loader unit with an attachment, ensure that the attachment is properly
installed and a genuine NorTrac-approved attachment.
•Lightning can cause severe injury or death. If lightning is seen or thunder is heard in the area, do
not operate the machine; seek shelter.
⚠WARNING
SLOPE OPERATION
•Do not operate on slopes exceeding 15°. If the slope is greater than 5°, only go up and down (not
across).
•Operate up and down slopes with the heavy end of the loader unit uphill. Weight distribution
changes. An empty bucket will make the rear of the loader unit the heavy end, and a full bucket
will make the front of the loader unit the heavy end. Most other attachments will make the front of
loader unit the heavy end.
•Raising the loader arms on a slope will affect the stability of the machine. Whenever possible,
keep the loader arms in the lowered position when on slopes. Remove obstacles such as rocks,
tree limbs, etc. from the work area. Watch for holes, ruts, or bumps, as uneven terrain could
overturn the loader unit. Tall grass can hide obstacles.
•Use only NorTrac-approved attachments. Attachments can change the stability and the operating
characteristics of the loader unit. Warranty may be voided if used with unapproved attachments.
•Keep all movements on slopes slow and gradual. Do not make sudden changes in speed or
direction.
•Avoid starting or stopping on a slope. If the loader unit loses traction, proceed slowly, straight
down the slope.
•Avoid turning on slopes. If you must turn, turn slowly and keep the heavy end of the loader unit
uphill.
•Do not operate near drop-offs, ditches, or embankments. The loader unit could suddenly turn over
if a track goes over the edge of a cliff or ditch, or if an edge caves in.
•Use caution when operating on wet grass. Reduced traction could cause sliding.
•Do not park the loader unit on a hillside or slope without lowering the attachment to the ground
and chocking the tracks.

Page 9 of 35
Safety and Product Labels
Reference
Number
Description
Quantity
1
Burn Hazard Warning Decal
1
2
Crush Hazard (Hand) Warning Decal
2
3
Crush Hazard (Body) Warning Decal
2
4
High-Pressure Fluid Hazard Warning Decal
3
5
Crush Hazard (Hand, Track) Warning Decal
2
6
Fire Hazard Danger Decal
1
7
Rotating Parts Warning Decal
1
8
Crush Hazard (Body, Access Panel) Warning Decal
1
9
Operational Warnings Decal (Impact, Rollover, Electrocution, Fall,
General)
1
10
Start-up/Shut-down Instructions Decal
1
11
Nameplate
1
12
NorTrac Decal
1
13
Lifting Hook Decal
1
14
EPA Evap Compliance Decal
1
1.
2.
3.
4.
5.
6.
7.
8.

Page 10 of 35
9.
10.
11.
12.
13.
14.
Before Each Use
⚠WARNING
•Evaluate the terrain to determine what accessories and attachments are needed to properly and
safely perform the job. Only use accessories and attachments approved by the manufacturer.
•Before digging, have the area marked for underground utilities, and do not dig in marked areas.
Also, be aware of the location of objects and structures that may not be marked, such as
underground storage tanks, wells, and septic systems.
Read this manual and the engine’s manual before operating. Always check the following before
operation:
•Remove all debris from the machine.
•Check the fuel level to be sure there is enough fuel for operation.
•Check the engine oil level (refer to engine operating manual). Add oil as-needed to bring to
proper operating level.
•Check hydraulic fluid level.
•Conduct pre-start inspection of entire machine.
•Be sure that the work area is free of obstacles and people.

Page 11 of 35
•Clear debris in your work area.
•Know and mark the location of any utility lines.
Checking for Debris
Note: The engine will overheat if it is operated with a blocked grass screen, a dirty or plugged cooling
fin, and/or a cooling shroud removed.
1. Park the machine on a flat surface, lower the loader arms, and turn off the engine (turn ignition
key to off). Remove the key.
2. Check the air filter pre-cleaner for debris. If required, wipe away debris before and during each
use.
3. Debris can build up in the engine area. Clean any debris build-up with a brush or blower before
each use.
Important: It is preferable to blow out dirt than to wash it out. If water is used, keep it away from
electrical appliances.
Important: Do not high-pressure wash. High-pressure washing can damage the electrical system.
Adding Fuel
⚠WARNING
•Use extra care when handling fuels. They are flammable, and vapors are explosive.
Use only an approved container.
Never remove the fuel cap or add fuel when the engine is running. Allow the engine to
cool before refueling. Do not smoke.
Never refuel the loader unit indoors.
Never store the loader unit or fuel container inside where there is an open flame, such as
near a water heater or furnace.
Never fill a container while it is inside a vehicle, trunk, pick-up bed, or any surface other
than the ground.
Keep container nozzle in contact with the tank during filling.
The label on the fuel tank indicates the correct fuel type; gasoline, or diesel fuel. For fuel types and
information on suitable additives, refer to the engine’s operating manual.

Page 12 of 35
Filling the Fuel Tank
1. Position the unit on a level surface, lower the loader arms, and turn off the engine by turning the
ignition key to OFF. Remove the key.
2. Clean around the fuel tank cap and remove the cap. Use a funnel to add fuel (as specified above)
to the fuel tank, filling until the fuel reaches 2-3 inches (60-70mm) below the top of the tank. This
space is needed to allow the fuel to expand. Do not fill the fuel tank completely full.
3. Replace the fuel cap securely. Clean up any spilled fuel.
Checking the Oil Level
1. Refer to the engine operating manual for oil specifications.
2. Remove any debris from the machine and clean around the dipstick and oil fill location.
3. With the engine cold and the machine parked on a level surface, remove the dipstick and check.
Checking the Hydraulic Fluid
⚠WARNING
•Inspect hydraulic system regularly for leaks.
•Hydraulic fluid escaping through even a pin-size hole opening can puncture skin and cause blood
poisoning.
•Wear proper hand and eye protection when searching for leaks. Never check for leaks with your
hand while system is pressurized. Use wood or cardboard instead of hands
•Relieve pressure on hydraulic system before servicing or disconnecting hoses.
•Seek medical attention immediately if injured by escaping fluid.

Page 13 of 35
1. Check the hydraulic fluid level before the engine is started and after every 25 hours of operation.
The fluid type is H68 or equivalent. The hydraulic tank capacity is 33 liters.
2. Position machine on level surface. Lower the loader arms and stop the engine.
3. Clean the area around filler neck of the hydraulic tank.
4. Remove the cap from the filler neck and check the fluid level. The fluid level should be
approximately 75-100mm below the top of the tank.
5. If the level is low, add fluid.
6. Return cap to the filler neck.
Pre-Start Inspection
It is very important to do a visual inspection of the machine before beginning operation. This
inspection should include:
•Check all decals and warning signs for damage.
•Check all fuel, oil and hydraulic lines, hoses fittings and connections for signs of damage or
leaks.
•Inspect the machine for any signs of damage or loose fasteners.
•Check for any signs of leaking fluids.
•Check the machine controls to make sure that they move freely and have automatically returned
to the neutral position.
Operating Instructions
⚠WARNING
•Only operate in good light, keeping away from holes and hidden hazards.
•Slow down and use extra care on hillsides. Be sure to travel in the recommended direction on
hillsides. Turf conditions can affect the machine's stability.
•Slow down and use caution when making turns, crossing roads and sidewalks, and changing
directions on slopes.

Page 14 of 35
•Never operate without the guards securely in place. Be sure all interlocks are attached, adjusted,
and functioning properly.
•Do not change the engine governor setting or overspeed the engine.
•Stop on level ground, lower implements, disengage the auxiliary hydraulics and shut off the engine
before leaving the operator's position for any reason.
•Keep hands and feet away from moving attachments.
•Look behind and down before backing up to be sure of a clear path.
•Never carry passengers and keep pets and bystanders away.
•Slow down and use caution when making turns and crossing roads and sidewalks.
•Do not operate the machine when you are tired, ill, or under the influence of alcohol or drugs.
•Use care when loading or unloading the machine into a trailer or truck.
•Use care when approaching blind corners, shrubs, trees, or other objects that may obscure vision.
•Read all attachment manuals.
•Ensure that the area is clear of other people before operating the loader unit. Stop the loader unit
if anyone enters the area.
•Never leave a running loader unit unattended. Always lower the loader arms, stop the engine, and
remove the key before leaving.
•Do not exceed the rated operating capacity, as the loader unit may become unstable which may
result in loss of control.
•Do not overload the attachment and always keep the load level when raising the loader arms.
Logs, boards, and other items could roll down the loader arms, injuring you.
•Never jerk the controls; use a steady motion.
•Watch for traffic when operating near or crossing roadways.
•Do not touch parts which may be hot from operation. Allow them to cool before attempting to
maintain, adjust, or service.
•Check for overhead clearances (i.e., branches, doorways, electrical wires) before driving under
any objects and do not contact them.
•Ensure that you operate the loader unit in areas where there are no obstacles in close proximity to
the operator. Failure to maintain adequate distance from trees, walls, and other barriers may result
in injury. Only operate the unit in areas where there is sufficient clearance for the operator to safely
maneuver the product.
•Locate the pinch point areas marked on the loader unit and attachments and keep hands and feet
away from these areas.
•Before operating the loader unit with an attachment, ensure that the attachment is properly
installed and a genuine NorTrac-approved attachment.
•Lightning can cause severe injury or death. If lightning is seen or thunder is heard in the area, do
not operate the machine; seek shelter.
Read all the safety instructions in this manual. Pay special attention to the pre-start up section. Also,
be sure to read the engine operating manual before operating the equipment.

Page 15 of 35
Important: Ensure the auxiliary hydraulic levers #3 and #4 are in the center position before
attempting to start the engine. The most common cause for an engine not starting, not turning over
fast enough, or the battery not having enough power, is that the auxiliary lever has been left on or
knocked into gear and the engine is trying to start under load.
Operating the 20MTL
Starting and Stopping the Engine
Starting
1. Stand on the platform.
2. Move the auxiliary hydraulics lever to the neutral position.
Note: Ensure the auxiliary hydraulic lever is in the neutral position before starting the engine. Aside
from starting difficulties, the attachment may move during starting.
3. Key Switch -The key switch, used to start the engine, varies on gas and diesel models. Check
the engine manufacturer’s manual for starting instructions.
Gas Engine:
•Pull the choke lever completely out if you are starting a cold engine.
•Move the throttle lever to the slow position.
•Turn the ignition key to the start position. When the engine starts,
release the key.
•After the engine starts, gradually move the choke inward. If the
engine stalls or hesitates, pull the choke out again until the engine
warms up.
•When starting the engine in cold conditions, allow the engine to run in the middle throttle
position for 2 to 5 minutes before moving the throttle to fast.
Diesel Engine:
•Insert the key - position 0 = no operating voltage.
•Turn the key left against the spring pressure - position 3 =
preheating.
•When the preheating controller illuminates, turn the key right -
position 2 = starting.
•Release the key as soon as the engine starts. The key returns to
position 1 and the control lights extinguish.
•In cold weather (32º F [0º C]) after about 5 minutes of the engine idling, operate all of
the main hydraulic controls to cycle warmed hydraulic oil through the hydraulic lines into
the cylinders and hydraulic motors. Allow the engine to idle for another 5 minutes before
beginning any machine operations.
Stopping
1. Move the throttle lever to SLOW position .
2. Lower the loader arms to the ground.
3. Turn the ignition key to OFF.
Note: If the engine has been working hard or is hot, let it idle for a minute before turning the ignition
key OFF. This helps cool the engine before it is stopped. In an emergency, turning the ignition key to
OFF will stop the engine.

Page 16 of 35
Operator Controls
⚠WARNING
•Be sure all drives are in neutral before starting the engine. Only start the engine from the
operator's position.
•Do not operate any of the control levers (including auxiliary lever) unless you are standing with
both feet on the platform and firmly holding the grip handles.
•Do not carry a load with the arms raised. Always carry loads close to the ground.
Loader Control Lever (Lift Arm and Bucket) (Lever 1)
Forward......................Lower the loader arm
Back...........................Raise the loader arm
Right..........................Dump bucket / Tilt attachment forward
Left.............................Curl bucket / Tilt attachment backward
Throttle Lever (Lever 2)
Push forward to increase engine RPM and pull backward to reduce the engine’s RPM.
Auxiliary Hydraulics Lever (Levers 3 and 4)
The auxiliary hydraulic levers allow you to control the speed and direction of hydraulic functions on
attachments and to stop their operation.
If there is not a motor or only one motor on the attachment, you can choose Lever 3 or Lever 4 to
operate.
If there are two motors on the attachment, use Lever 3 and Lever 4 together at the same time to
change the direction of the attachments.

Page 17 of 35
Travel Speed Select Lever (Lever 5)
Push forward to select high speed and push backward to select low speed. Operating hydraulic
functions while traveling in high-speed mode will reduce machine travel speed.
Drive Control Levers (Levers 6 and 7)
•To move forward in a straight line, push the drive control levers (6 and 7) forward equally. To
move backward in a straight line, pull the same drive control levers backward equally.
•The farther you move the drive control levers in either direction, the faster the machine will move
in that direction.
•To turn, decrease the pressure on the drive control lever closest to the direction you want to turn.
To slow or stop, move or release the drive control levers (6 and 7) into neutral. If released, the
control levers will automatically return to neutral.
Spin Turn
⚠WARNING
•When spinning the machine on its axis, always hold on with one hand to avoid falling off the unit.
Move the control levers in opposite directions to spin the machine on its axis. To spin turn left, move
the right control lever forward while pulling the left control lever backward. To spin turn to the right,
push the left control lever forward while pulling the right control lever backward.

Page 18 of 35
Instrumentation Panel
Hydraulic Oil Pressure Indicator
When the indicator is in the green range, it is normal. When the indicator is in the red range, stop the
loader and replace the oil return filter.
Fuel Gauge
When the pointer is in the red range, the fuel is low. Stop the engine and refuel.
Charging Indicator
When the indicator is on the right of “0”, it is charging. When the indicator is on the left of “0”, check
the battery.
Engine Oil Pressure Light
When the light turns on, the engine oil pressure is low. Stop the loader and check the engine oil.
Working Light Switch
Press the switch and the working light will turn on.
Attachments
To use optional attachments, the bucket must first be removed.
Disconnecting the Bucket or Optional Attachments
1. Lower the bucket onto a firm, level surface.
2. Shut off the machine engine.
3. Disengage the lock pins. It may be necessary to slightly raise the bucket to allow the lock pins to
move freely.
4. Stand on the operator platform and restart the engine.
5. Using the loader control lever, slowly move to the dump position by moving the lever to the left to
tilt the adapter plate downward. Simultaneously, lower the loader arms by moving the loader
control lever forward to disengage the bucket from the adaptor plate.
6. Slowly back away from the bucket, using the drive control levers.

Page 19 of 35
Connecting the Bucket or Optional Attachments
IMPORTANT: Use only manufacturer approved attachments. Attachments could change the stability
and operating characteristics of the machine. The warranty of the machine may by void if used with
unapproved attachments.
IMPORTANT: Before connecting any attachments to the machine, make sure mount plates are free of
dirt and debris.
1. Move the speed control lever to the SLOW (turtle) position.
2. Slowly push the loader control lever to the right (dump) to tilt the attachment mount plate forward.
3. Slowly move the machine forward until the mount plate engages the attachment’s receiver plate.
4. Slowly raise the loader arms by pulling back on the loader control lever while curling (tilting back)
the mount plate by moving the loader control lever to the left at the same time to engage the
attachment plate into the upper lip of the attachment’s receiver plate.
IMPORTANT: The attachment needs to be raised high enough to clear the ground and the mount
plate needs to be tilted all the way back.
5. Turn the ignition key to OFF to stop the engine.
6. Engage the attachment lock pins.
Note: Lock pins are located on the operator side of the mount plate and should be turned toward the
inside to engage.
Note: Proceed to the next step if the auxiliary hydraulics are required with attachment, otherwise, the
machine is ready to operate.
IMPORTANT: Make sure all foreign matter is cleaned from the hydraulic couplers before making
connections.

Page 20 of 35
7. Move the auxiliary hydraulics lever forward, backward, and back to the neutral position to relieve
hydraulic pressure at the hydraulic couplers.
8. Remove protective covers from the hydraulic couplers on the machine. Connect covers together
to prevent contamination during operation.
9. Insert hydraulic connectors from attachment into the machine’s couplers. Note – female
connector is connected onto male adaptor and male connector is inserted into female coupler.
10. Confirm that the connections are secure by pulling on the hoses.
Disconnecting
1. Lower the attachment onto a firm, level surface.
2. Shut off the machine engine.
3. Move the auxiliary hydraulics lever forward, backward, and back to the NEUTRAL position to
relieve hydraulic pressure at the hydraulic couplers. This step can be disregarded if the bucket or
attachment does not utilize the hydraulic connectors.
4. Slide the collar back on the hydraulic coupler to release the connection and pull back on the
attachment’s couplers to disconnect the attachment couplers from the machine couplers. Note: If
collars are difficult to move, repeat step 3.
IMPORTANT: Connect the attachment hoses together to prevent contamination during storage.
5. Re-Install protective covers onto the machine’s hydraulic couplers.
6. Disengage the attachment lock pins by turning them to the outside.
7. Start the engine, tilt the mount plate forward, and back the machine away from the attachment.
After Each Use
Transporting and Securing
IMPORTANT: When transporting the machine on a trailer, always use the following procedure.
1. Lower the loader arms.
2. Reduce engine speed to idle and Turn the ignition key to OFF to stop the engine.
3. Secure the machine to the trailer with chains or straps. Secure the rear side of equipment through
the secure hole on both sides of the support, as shown in Fig 1. Secure the front side of
equipment through hook, as shown in Fig 2.
Fig 1 Fig 2
Table of contents
