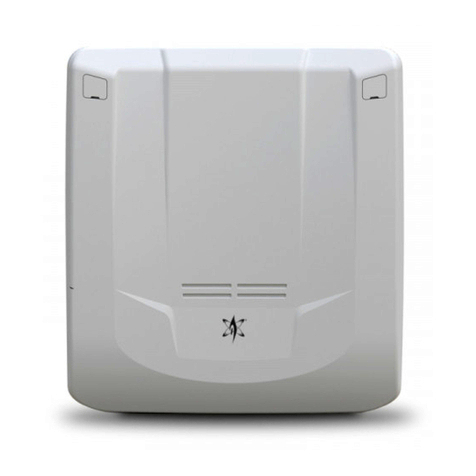
Nothnagel Haustechnik LRX 2200 User manual

1 Rev. 1.2 03/07
LRX 2200
ELECTRONIC CONTROL UNIT
An electronic control unit with incorporated radio receiver, for the
remote operation of rolling window hutter , un blind and Venetian
blind . It may be u ed together with one or more radio control for
individual or centrali ed control (for the imultaneou manoeuvring of
more than one piece of equipment).
- Mod. ( LR 2200 ) : 306 Mhz
- Mod. ( LRS 2200 / 330 ) : 330 Mhz
- Mod. ( LRS 2200 / 418 ) : 418 Mhz
- Mod. LRS 2200 : 433.92 Mhz
- Mod. LRS 2200 SET : 433.92 Mhz narrow band
( ) Product intended for tho e countrie where it u e i permitted
T
ECHNICAL
DATA
- Power upply: 230V~ 50/-60Hz 1.5W
- Motor output: 230V~ 500W Max.
- Operating temperature: -10 to 70°C
- Radio receiver: ee model
- Type of radio control: 12-18 Bit, BeFree Sx or Rolling Code
- Stored code capacity: 75 (with different code )
- Container ize: 102 x 27 x 23 mm
- Container: ABS+PC V0 pla tic
- Protection degree: IP 65
CN1:
C
ONTROL
U
NIT
P
OWER
S
UPPLY
C
ONNECT ION
N - Blue - 230V line input ~ (Neutral)
F - Brown - 230V line input ~ (Pha e)
T - Yellow/Green - Earth
CN2:
M
OTOR
C
ONNECT ION
1 - Yellow/Green - Earth
2 - Black - 230V motor output~ UPWARD MOVEMENT
3 - Blue - 230V motor output ~ SHARED
4 - Brown - 230V motor output~ DOWNWARD MOVEMENT
I
NITIAL
O
PERATING
CONDIT ION
The device can only operate in conjunction with one or more radio
control ; the central control unit contain no tored radio control code
when it i fir t u ed.
O
PERATION
USING
DIFFERENT
M
ODELS
OF
R
ADIO
C
ONTROL
Different model of remote control may be programmed. By toring a
code ( one button ) a cyclic tep by tep operation (Up-Stop-Down)
may be achieved, and by toring two different code ( two button )
different command are produced (one for Up and one for Down).
Storing three different code ( three button ) produce three different
command : the fir t for Up, the econd for Stop and the third for Down;
it i al o po ible to programme the Venetian blind movement.
Operation using a 1 button radio control:
The following type of operation i obtained u ing a radio control with a
ingle button: The fir t pre control the upward movement until the
motor top (the motor ha a running time of around 3 minute ). The
econd pre control the downward movement of the hutter. If the
button i pre ed before the motor top running, the control unit will
top the hutter moving and the button will need to be pre ed again to
reactivate the motor in the oppo ite direction.
Operation using a 2 button radio control:
By u ing a radio control with 2 button , the following proce e may be
carried out: the fir t button, “Up”, control the upward movement for
about 3 minute , until the motor ha topped running, and the econd
button (“Down”) control the downward movement of the hutter. If the
upward movement i interrupted with another “Up” command, the
motor will continue to run in the upward movement direction. If,
however, the movement i interrupted with a “Down” command, the
control unit will top the motor.
The procedure remain the ame for the downward movement pha e.
Operation using a 3 button radio control ( BeFree Series ):
When u ing a radio control with 3 button , the following proce e may
be carried out: the Up button control the upward movement until the
motor top running (3 minute ), the Stop button make the hutter
top and the Down button control the downward movement. If a top
command i ent during the upward or downward movement, the
control unit cau e the hutter to top. If, during upward or downward
movement, a command i ent for the ame direction, the control unit
will keep the motor running.
If a command which i in the oppo ite direction to the current
movement i ent during the upward or downward movement, the
control unit will cau e the hutter to change direction.
O
THER
O
PERATING
MODES
Venetian Blind Operation:
In thi operating mode, when the Up or Down button of a tored radio
control i pre ed for le than 2 econd , the unit function in the
“u er pre ent” operating mode. It i po ible, in thi manner, to rotate
the lat of the Venetian blind in one direction or the other in order to
modulate the amount of light filtering through a de ired. If the button
on the radio control i pre ed for longer than 2 econd , the blind
move upward or downward depending on which button wa
pre ed, until the motor top running (the timer i et to approximately
3 minute ); if a Stop command i ent during upward or downward
movement the control unit will top the hutter movement completely.
If, during upward or downward movement, a command i ent for the
ame direction, the control unit will keep the motor running.
If a command which i in the oppo ite direction to the current
movement i ent during the upward or downward movement, the
control unit will cau e the hutter to change direction.
“User Present” Operation:
In thi operating mode, the command u ed to control the motor of the
blind (where the direction of movement depend on the button
pre ed) i con tantly enabled. The movement top when the control
i relea ed.
Operation with Indefinite Motor Running Time:
In thi operating mode, the control unit i activated for an indefinite
period of time when a button on the radio control i pre ed, unle a
further command i ent which lead to it deactivation.
G
ROUP
OR
G
ENERAL
C
ENTRALISAT ION
It i al o po ible to enter two identical code ( button ) from one radio
control onto all the control unit or a group of them which are ituated
at a maximum di tance of 20 metre from the point of command, in
order to obtain general or partial motion of more than one automation.
R
ADIO
CONT ROL
P
ROGRAMMING
WIT H
“P
OWER
ON”
The transmission codes may be programmed within the first 15
seconds of connection to the electricity mains in the following way:
Programming using a 1 or 2 button radio control:
Connect the control unit to the electricity main and you will hear three
beep confirming the tart of programming. Pre the radio control
button you wi h to u e for upward movement and hold it for 5 econd ,
until the control unit emit a beep to confirm the operation ha been
carried out ucce fully. Next, pre the econd radio control button
which will be u ed for downward movement and hold it for 5 econd ,
until the control unit beep twice to confirm the operation ha been
carried out ucce fully. After one econd the control unit will beep
another four time to ignal the programming proce i complete.
If the econd code i not et immediately after the fir t, the control unit
will exit the programming mode and then emit four beep to ignal the
programming proce i complete. It will operate u ing only one code.
Programming using a 3 button radio control (BeFree Series):
Connect the control unit to the electricity main and you will hear three
beep confirming the tart of programming. Pre the Up button on the
BeFree erie radio control, which will control the upward movement,
and hold it for 5 econd until the control unit beep to confirm thi
function ha been et. After one econd, the control unit will beep four
GB

1 Rev. 1.2 03/07
time to ignal that the programming proce ha been completed.
R
ADIO
C
ONTROL
P
ROGRAMMING WITH THE
“SEL”
BUTTON
The control unit may al o be programmed by pre ing the “SEL” button
(u ing, for example, the nib of a pen) which i ituated in ide the hole
on the box cover.
Once the SEL button ha been pre ed, the control unit will follow the
ame procedure a de cribed above in the paragraph “Radio Control
Programming with POWER ON”.
P
ROGRAMMING WITH OTHER
R
ADIO
C
ONTROLS
The above programming operation can be repeated to enter further
radio control code - up to a maximum of 75 - in the control unit
memory.
If the memory already contain 75 tored code when you attempt the
programming procedure, the control unit will beep ix time to inform
you that the memory i full.
I
NVERSION OF THE ROTATION MOTOR
If you notice that when pre ing the ( Up ) key on the radio-control the
control unit cau e the hutter to move downward in tead of upward ,
imply repeat the programming procedure pre ing the ( Down ) key
in tead of the ( Up ) key, or invert the Upward movement wire and the
Downward movement wire of the motor.
P
ROGRAMMING
V
ENETIAN
B
LIND
O
PERATION
To activate thi operating mode, move the jumper J1 (located on the
board, in ide the pla tic container) from po ition 2-3 to po ition 1-2.
Perform thi procedure with the control unit di connected from the 230
V electricity upply.
P
ROGRAMMING
“U
SER
P
RESENT
” B
LIND
O
PERATION
To activate thi operating mode, remove the jumper J1 (located on the
board, in ide the pla tic container). Perform thi procedure with the
control unit di connected from the 230 V electricity upply.
P
ROGRAMMING
I
NDEFINITE
M
OTOR
T
IME
To et unlimited motor time proceed a follow : pre and hold the
SEL button while the control unit i connected to the electricity upply,
until the control unit emit even confirmation beep . To re tore the
three-minute motor running time, repeat the operation de cribed above
or perform the Re et procedure.
R
ESET WITH THE
“SEL”
BUTTON
To re tore the control unit to it default configuration, proceed a
follow . pre and hold the SEL button for 5 econd , until the control
unit beep five time to confirm that the operation i complete.
R
ESET WITH
“P
OWER
ON
AND
R
ADIO
C
ONTROL
”
Another way of re toring the control unit to it default configuration i
a follow : within the 15 econd following connection to the electricity
upply, pre and hold a button on a Radio control which ha already
been tored, until the control unit emit five confirmation beep to
ignal that the operation ha been completed ucce fully.
B
EEP
S
IGNALS
1 BEEP = Fir t radio control code tored.
2 BEEPS = Second radio control code tored.
3 BEEPS = Start of programming pha e.
4 BEEPS = End of programming pha e.
5 BEEPS = Re toration of default configuration.
6 BEEPS = No more memory available for new code .
7 BEEPS = Motor running time programming.
the product below:
LRS 2200 - LRS 2200SET Electronic Control Unit
Comply with the requirements of Directives R&TT 99/5/ C,
MC 2004/108/ C and LVD 2006/95/ C
F
OR THE
I
NSTALLER
I
MPORTANT
The control unit was designed to enable the installer to automate
closure while adhering to the provisions set out by current legislation.
Compliance with these obligations and the implementation of the
minimum safety requirements is the responsibility of the installer. Once
installation has been completed in full compliance with N 60335-2-97
(“Household and similar electrical appliances - Safety”, part 2 “Particular
requirements for drives for rolling shutters, awnings, blinds and similar
equipment”), make sure that:
There are no accidental movements.
There are no movements which were not requested caused
by variations in the voltage and electricity supply.
The force of impact at the main closure edge does not
exceed:
- 25 N for more than 5 s
- 150 N for more than 0.5 s.
If the latter provision is not satisfied, the “User Present”
function can be used as an alternative, to obtain non selfholding
release command operation. In this case the radio
control must only be used while
the user is in full view of the rolling device (perhaps
fixing it to the wall would ensure this).
We also advise that you take note of the following recommendations:
- For the radio receiver to operate correctly when two or more control
units are used, we recommend that you install the devices at least 3
metres away from each other.
−
The control unit is not equipped with a sectioning device. The
installer is therefore responsible for the installation of a
SECTIONING DEVICE IN THE SYSTEM
.
This manual suits for next models
5
Popular Control Unit manuals by other brands
SMC Networks
SMC Networks EX600-DX Series Operation manual
MICROENER
MICROENER MX14-5 Operation manual
Honeywell
Honeywell V5421C installation instructions
4EVAC
4EVAC LOOPDRIVE FIM-RC quick start guide
SP Controls
SP Controls PixiePlus PXE-DCM PLUS installation guide
Yamaha
Yamaha disklavier DKC-850 Operation manual
HealTech Electronics
HealTech Electronics ThunderBox user manual
PVA
PVA FCM200 Operation manual
Brizo
Brizo Virage T75P530-GL manual

Power Elite
Power Elite PC 7600 installation instructions
Red Valve
Red Valve Tideflex Series Installation, operation and maintenance manual
Lucent Technologies
Lucent Technologies PacketStar PSAX 45N74 user guide

