10
NL
Voordat u verdergaat, vragen wij graag uw
aandacht voor de volgende punten:
- Draai de temperatuurknop altijd naar de
positie ‘min' voordat u de netstekker in het
stopcontact plaatst of de netstekker uit het
stopcontact verwijdert.
Draai de temperatuurknop (4) rechtsom•
om de temperatuur te verhogen.
Draai de temperatuurknop (4) linksom om•
de temperatuur te verlagen.
De temperatuurindicator (5) blijft aan tijdens
het proces. De temperatuurindicator (5) gaat
uit wanneer de strijkzool (17) de gewenste
temperatuur heeft bereikt. De temperatuur-
display (6) geeft de geselecteerde
temperatuur aan.
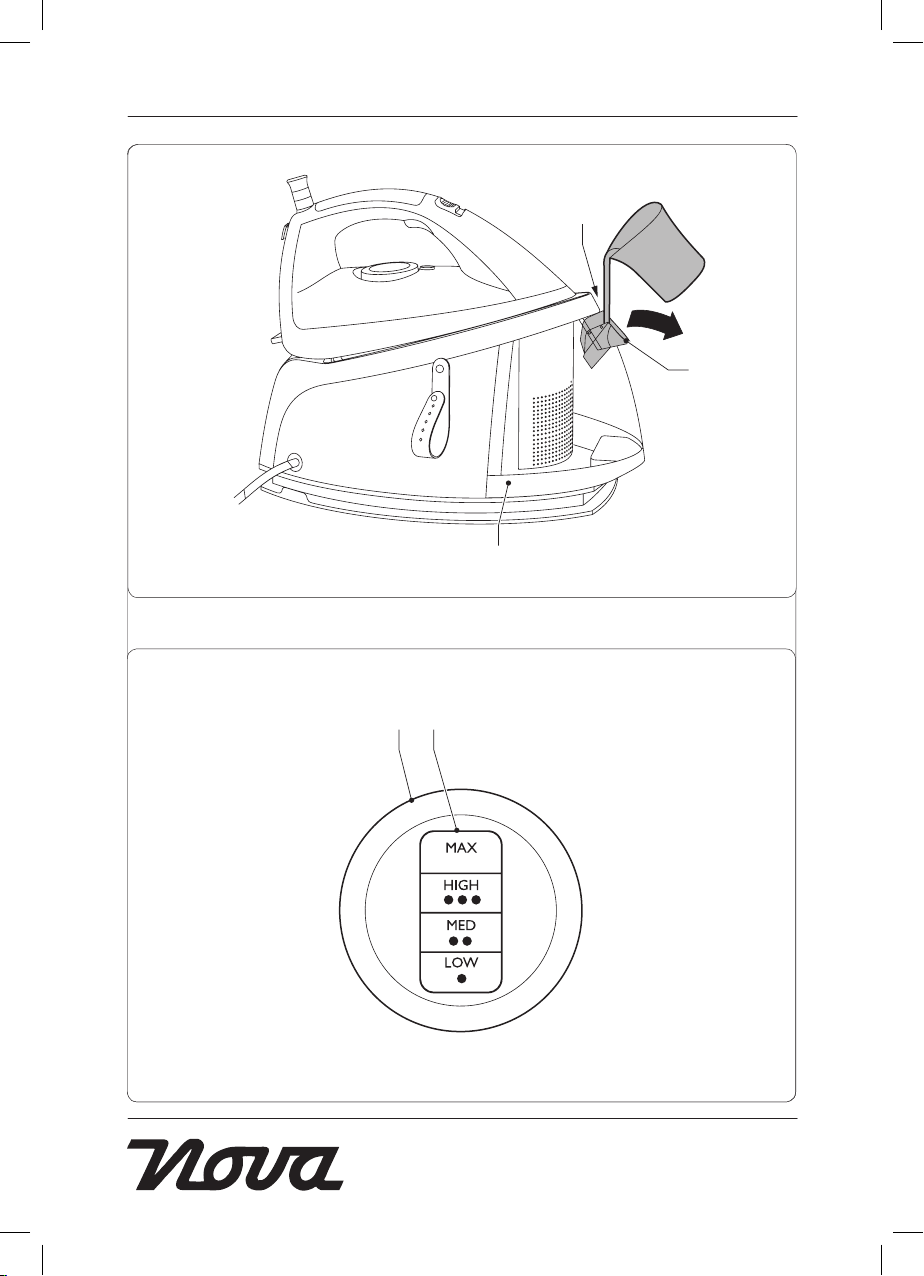
Label Textielsoort Temperatuur
(fig. D) (fig. C)
A Het textiel mag niet
worden gestreken.
B Synthetisch (acryl, modacryl,
polypropyleen, polyurethaan) A
C Synthetisch (acetaat, triacetaat) B
C Synthetisch (metaal, nylon,
polyester, viscose) B
C Zijde B
C Wol C (droogstrijken /
stoomstrijken)
D Katoen C (droogstrijken /
stoomstrijken)
D Linnen C (droogstrijken /
stoomstrijken)
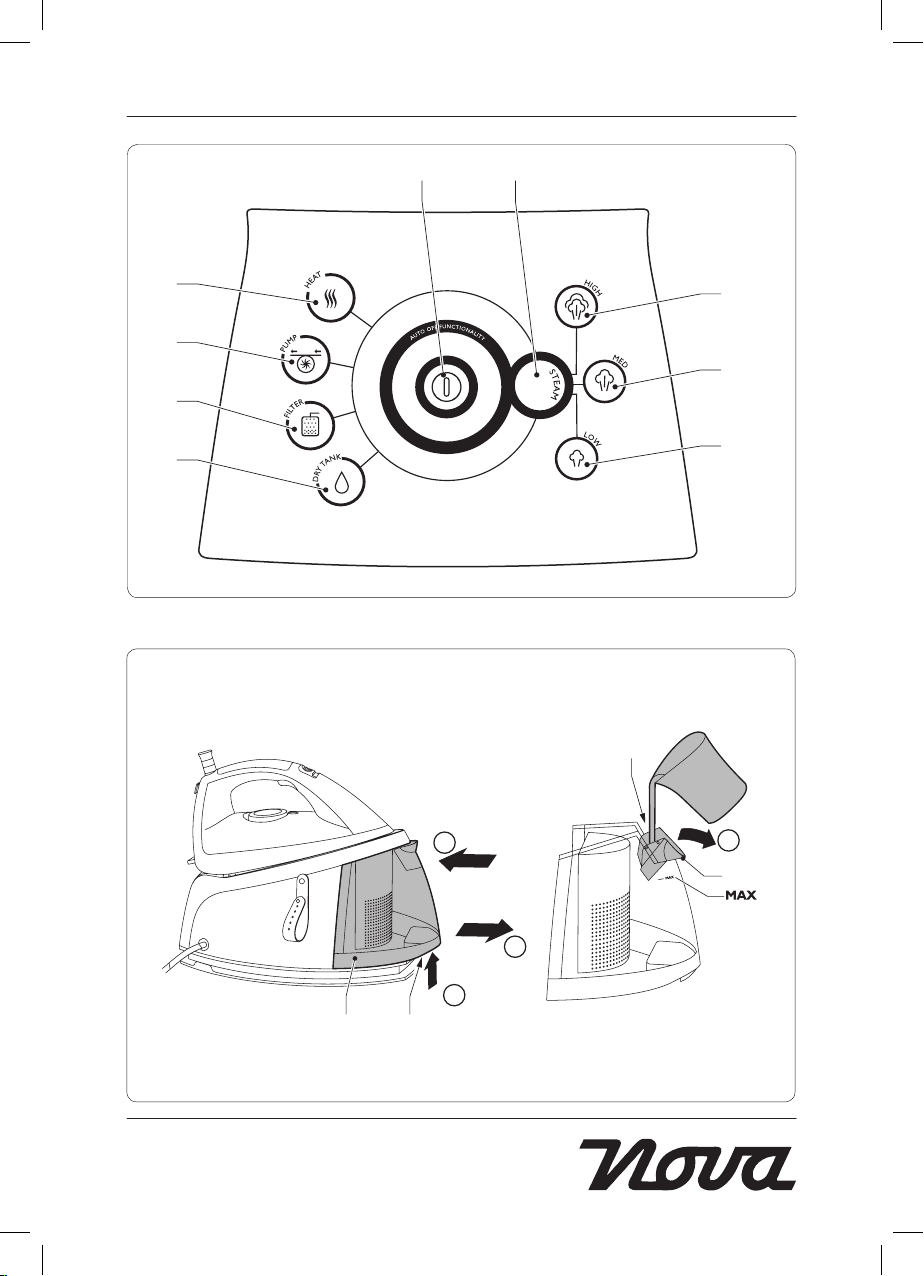
Instellen van het stoomvolume
(fig. A)
Druk op de stoomvolumeknop (7) om het•
stoomvolume in te stellen. De relevante
stoomvolume-indicator (8a/8b/8c) gaat
branden.
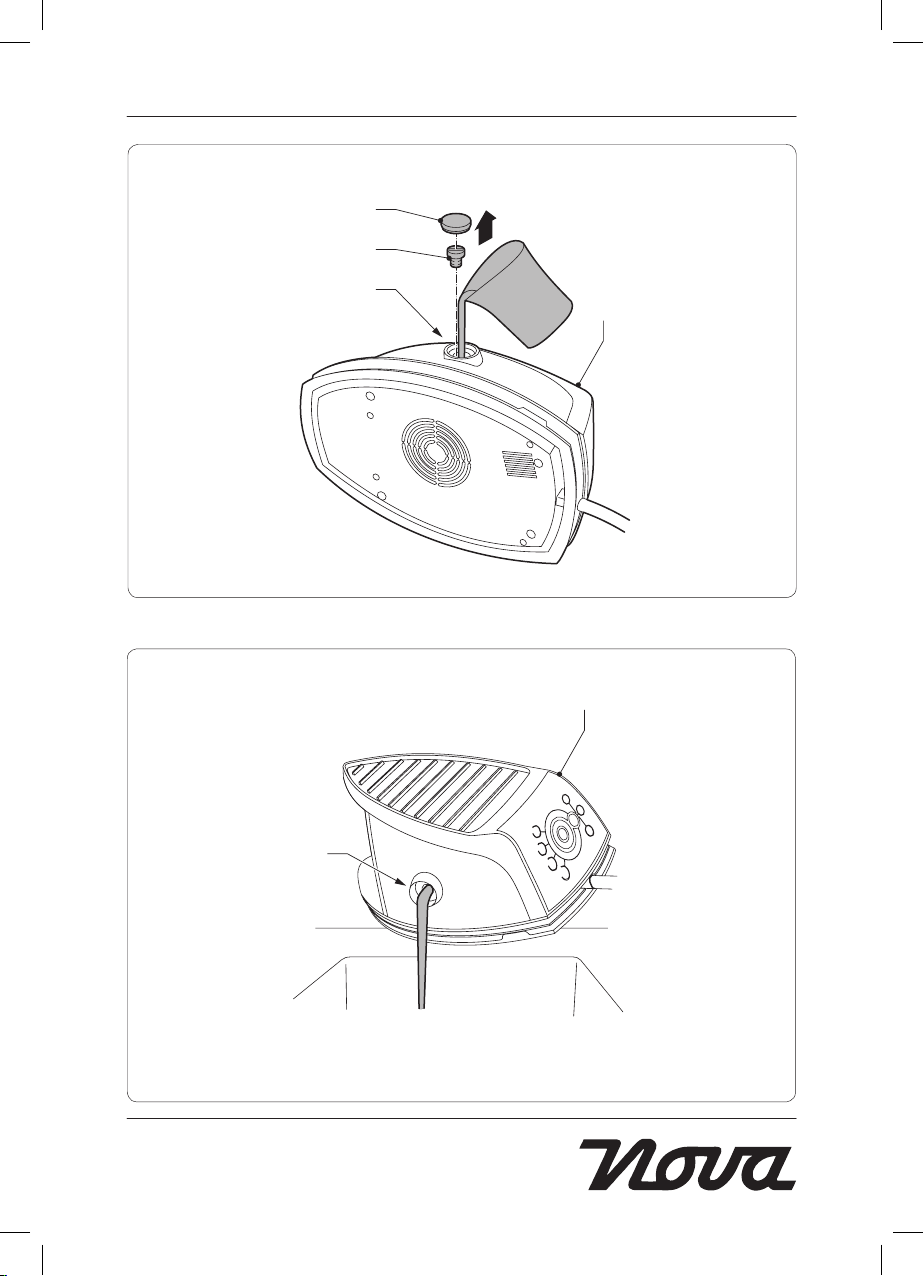
"Waterreservoir leeg"-indicator
(fig. A & B)
Indien het waterniveau in het waterreservoir
(19) te laag is, gaat de "waterreservoir leeg"-
indicator (12) branden om aan te geven dat
het waterreservoir moet worden bijgevuld.
Aanwijzingen voor gebruik
(fig. A - D)
Droogstrijken
Voordat u verdergaat, willen wij graag dat u
uw aandacht vestigt op de volgende punten:
- Gebruik de stoomstootfunctie niet voor
droogstrijken.
Plaats het strijkijzer (1) op de•
strijkijzerhouder (18).
Plaats de netstekker in het stopcontact.•
De aan/uit-indicator (3) knippert.
Druk op de aan/uit-knop (3) om het•
apparaat in te schakelen. De aan/uit-
indicator (3) gaat branden.
Stel de temperatuur in met behulp van de•
temperatuurknop (4). De
temperatuurdisplay (6) geeft de
geselecteerde temperatuur aan.
De temperatuurindicator (5) knippert•
terwijl het apparaat het water verhit. Het
apparaat is klaar voor gebruik wanneer de
temperatuurindicator (5) gaat branden.
De temperatuurindicator (5) gaat aan en•
uit wanneer het apparaat in- en uitschakelt
om de gewenste temperatuur te behouden.
Let op: Een zoemer zal klinken wanneer de
pomp in de stoomgenerator werkt. De "pomp
actief"-indicator (10) blijft aan tijdens het
proces.
Indien u het proces onderbreekt, plaats•
dan het strijkijzer (1) op de
strijkijzerhouder (18).
Plaats na gebruik het strijkijzer (1) op de•
strijkijzerhouder (18).
Druk op de aan/uit-knop (3) om het•
apparaat uit te schakelen. De aan/uit-
indicator (3) knippert.
Verwijder de netstekker uit het•
stopcontact. De aan/uit-indicator (3) gaat
uit.
Laat het apparaat volledig afkoelen.•
Stoomstrijken
Voordat u verdergaat, willen wij graag dat u
uw aandacht vestigt op de volgende punten:
- Zorg er bij stoomstrijken voor dat het
waterreservoir (19) is gevuld met water.