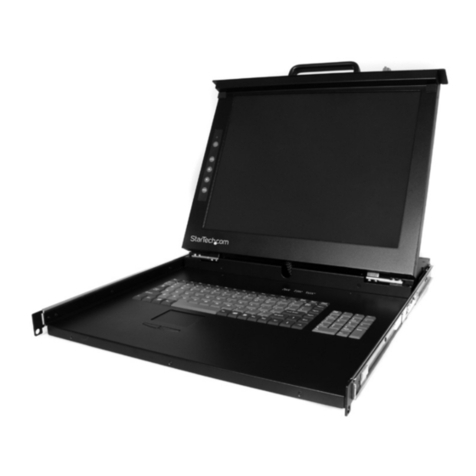
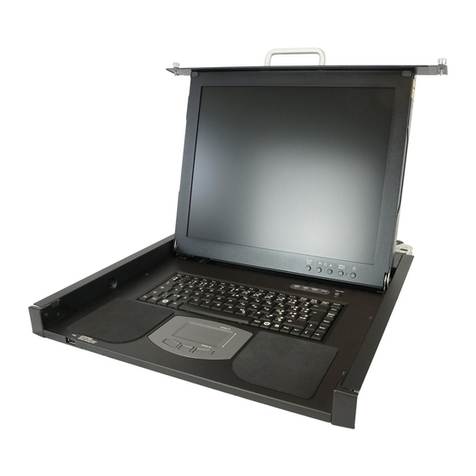
Nova LCD1U15-06 User manual

User
Manual
LCD1U15-06 / LCD1U17-02
1ULCDKeyboardDrawer
withPS/2KVMSwitch
-8KVM / 16KVM

UserManual
Rev. : 1.0 P.1
1.TableofContent P.1
2.Introduction P.2
3.Features P.2
4.PackageContents P.3
5. Optional Accessories P.4
6.PeripheralProducts P.4
7.ImportantSafeguards P.5
8.StructureDiagram P.6
9.DimensionDiagram
LCD1U15-06-8KVM/16KVM P.7
LCD1U17-02-8KVM/16KVM P.8
10.LCD Session
LCD MembraneDiagramP.10
LCD OSDControl
MainMenu P.10
Sub Menu P.11-12
ResolutionSettings
ForWindows P.13
ForSUN Servers P.14
11.KVMSession
Front ViewP.16
RearViewP.17
Installation StepsP.18
Cascading P.19
12.StartUp P.20
HotKeyCommand P.20
HotKeyCommand Operation P.21-22
KVMOnScreenDisplayControl
OSDStructureDiagram P.23
OSDMenu Operation P.24
13.FAQ P.25
14.TechnicalSpecification P.26-27
1.TableOfContent

Rev. : 1.0 P.2
RKP Seriesisacombination ofkeyboard,mouseand monitorintoadrawer,
withfeaturessuchasflip-updesign, adjustablebrackets,builtinLCD OSDto
provide effectiveassistant foran administratortocontrolPCsystem.
RKP Seriesprovidescosteffectiveforyourlimited ITbudgetoverusingCRT
and rack mounting. Also, it willbe spacesavingforyourcompact environment
rack and effectiveassistant foran administratortocontrolPCsystem.
2.Introduction
3.Features
Adjustablemounting bracketsfrom390 to790mm (front torear19
mount)
Lightweight aluminiumconstruction—withblackanodisefinish
SlimSizekeyboardwithGlidePoint
TM touchpad mouse
StandardD-Sub15-pinVGAinput connector
Suppliedwith12V5Aremotepoweradapter(singlepowerresource)
BuiltinOnScreen Displaycontrolledbyintegralmembrane switches.
Uniquemechanicaldesigntomaximizerack mountablespace
Uniquemonitorflip-up design allowsviewing through closed glass door
of cabinet.
Built-inKVMswitchfunction foreasy controllingand monitoring up to16
residing servers/ platforms
SupporteightcharacterspasswordprotectionandsearchPCserver
name
Autoscan mode formonitoring PCsand flexiblescantimefrom5~99
seconds
HotPluggable—Addorremovecomputerswithoutpoweringdownthe
switch
EasilyswitchindividualbuttontoselectthePCchannelusing the push-
buttonchannelselectorswitches,Hotkeys,orviatheOn-Screen
Display(OSD)Menu
Disclaimer
Thisinformation issubjecttochange withoutnotice.Theproducerofthismanual acceptsno
responsibilityfordamage orclaims,resulting frommisuseormisinterpretation.
UserManual

Rev. : 1.0 P.3
4.PackageContents
Before Unpacking
It isvery importanttolocatetheLCD KeyboardDrawerinasuitableenvironment.
The surfaceforplacingand fixing the LCDKeyboardDrawershouldbe stableandlevel
ormounted intoasuitablecabinet.
Makesurethe placehasgood ventilation,isout ofdirect sunlight, awayfromsourcesof
excessivedust, dirt,heat, water,moistureand vibration.
Convenienceforconnecting the LCD KeyboardDrawertothe related facilitiesshouldbe
well considerstoo.
Unpacking
The LCD KeyboardDrawercomeswiththe standardpartsshownasabove. Checkand make
suretheyareincluded and ingood condition.Ifanything ismissing,ordamage,contactthe
supplierimmediately.
LCDMonitorDrawerwithPS/2KVMSwitch1Piece
UserManual1Piece
DCPowerAdapter1Piece
PowerCord1Piece
Mounting Bracket1Pair
Fasteners4Pieces
LCD-A1004 3-in-1KVMcable8Pieces
UserManual

Rev. : 1.0 P.4
UserManual
5.OptionalAccessories
6.PeripheralProducts
LCD-A1004 / 05 / 06 6ft/ 10ft/ 15ftPS/23-in-1cable
LCD-A1018 / 21 / 22 6ft/ 10ft/15ftPS/23-to-3cable
LCD-A1001 SUN /iMACUSBtoPS/2adapter
Others Video Input
12V/24V/ 48VDC Power
KVMCable
CascadeCable
Conversion Adapter
ModelDescription
LCDK1009 4-PortPS/2KVMswitch
LCDK1010 8-PortPS/2KVMswitch
LCDK1011
16-PortPS/2KVMswitch
LCDK1019 CAT.5PS/2KVMextender

Rev. : 1.0 P.5
Pleaseread allof theseinstructionscarefullybeforeyou usethe device.
Savethismanualforfuturereference.
UnplugtheLCD KeyboardDrawerfromthepoweroutletbeforecleaning.
Donotsprayliquidcleanersoraerosoldirectlyonthe device. Wetaclothwitha
neutraldetergent(e.g.cleanwater) andsqueezeittight,thencleanthescreen
slightlywithit.
DonotexposetheLCDKeyboardDrawerdirectlytorain,water,moistureor
sunlight.
Avoidpressureonthe LCD screentopreventpermanentdamagetothedisplay.
Donotattempttoservicethe deviceyourself. Improperoperationmayvoidyour
warranty. Referall servicingtoqualifiedservicepersonnel.
Safestorageenvironment oftheLCD KeyboardDrawerisrangingbetween –20oC
and60oC.Permanent damagecouldoccuriftheLCD KeyboardDrawerisstored
outside thesaferange.
UnplugtheLCD KeyboardDrawerimmediatelyand call qualified serviceperson-
nelunderthefollowingconditions:
1. Ifthe monitorhasbeenexposedtorain,liquidorwater.
2. Ifthe monitorhasbeendroppedorthecasinghasbeendamaged.
Whatthewarrantydoes notcover
1.Anyproduct,onwhichtheserialnumberhasbeendefaced,modifiedor
removed.
2.Damage,deteriorationormalfunction resulting from:
a)Accident,misuse,neglect,fire,water,lightning,orotheractsofnature,
unauthorized productmodification,orfailuretofollowinstructionssupplied
withthe product.
b)Repairorattemptedrepairbyanyonenotauthorized byus.
c)Anydamageof theproductduetoshipment.
d)Removalorinstallationof the product.
e)Causesexternaltotheproduct, suchaselectricpowerfluctuation orfailure.
f)Useof suppliesorpartsnot meetingourspecifications.
g)Normalwearand tear.
h)Anyothercauseswhichdoesnotrelatetoaproduct defect.
3. Removal, installation, andset-upservicecharges.
7.Important Safeguards
UserManual

Rev. : 1.0 P.6
8.StructureDiagram
1.PS/2keyboard
2.Aluminiumfrontpanel
3.Class AactivematrixTFT LCD panel
4.Rearmetalcase
5.Analogtodigitalsignalconverter board
6.LCD inverter
7.LCD membrane
8.Ball bearing telescopicslideswithstopper
9.Adjustablemountingbracket
10.KVMmembrane&KVMswitchboard
UserManual
•‚ƒ„…
Š ‡ˆ
†
‰
Š

Rev. : 1.0 P.7
LCD1Y15-06-8KVM / 16KVM
9.Dimension Diagram
UserManual
15 LCD

LCD1U17-02-8VKM / 16KVM
9.Dimension Diagram
UserManual
17 LCD
Rev. : 1.0 P.8

Rev. : 1.0 P.9
LCD
Session
UserManual

Rev. : 1.0 P.10
LCD MembraneDiagram
Left Right Exit
Menu/SelectionPower
MAINMENU
BRIGHT/CONTRAST
AUTOADJUST
PHASE/CLOCK
H/VPOSITION
MISC
RESET
MainMenu
Bright/ Contrast
Toenterintothe Bright, Blacklevel&Contrast sub-menu
AutoAdjust
Toperformautomaticoptimisationsof allfunctions
An “Adjusting message isdisplayed duringthe process
Phase / Clock
Toenterintothe phase&clock sub menu
H/VPosition
Toenterintothe Position sub-menu
MISC
Toenterintothe MISCsub-menu
Reset
Reset tothedefaultfactorysettings
10.LCD Session
UserManual

Rev. : 1.0 P.11
Bright/ Contrast
1.Brightness
Toperformbrightness adjustment of the inputRGBsignal
UsetheLeft&Rightbuttontoadjust andbuttonto “Brightness
2.Contrast
Toadjust the contrastlevelof theinput signal
Usethe Left&Right button toadjust and button to “Contrast
Phase/ Clock
1. Phase
Toadjust input videosampling clock’sphase
Usethe Left&Right button toadjust and button to “Phase
2. Clock
Toadjust input videosampling clock
Usethe Left&Right button toadjust and button to “Clock
H/VPosition
1. H.Position
Toadjust the horizontalsizeof theframe
Usethe Left &Right button toadjustand buttonto “H.position .
2.V.Position
Toadjust the verticalpositionof theframe
Usethe Left&Right button toadjust and button to “V.position .
10.LCD Session
UserManual

Rev. : 1.0 P.12
MISC
1.Information
The firstheaderrowshowsthe current resolution setup
The second headerrowshowsthe horizontalfrequency ofthecurrent
input signal
The thirdheaderrowshowsthe verticalfrequency ofthecurrentinput
signal
2.OSDTimer
Tomodifythe durationof theOSDtime-out
3.Color
a) 5500K
Select ColourTempat 5500K
b)6500K
Select ColourTempat 6500K
c) 9500K
Select ColourTempat 9500K
d)User
Change ColourTempbymanual
4.Language
Toselectthelanguageof OSDmenu 7Languages:
(1)English
(2)Japanese(日本語)
(3)Chinese(中文)
(4)German
(5)Francais
(6)Espanol
(7)Italiano
10.LCD Session
UserManual

Rev. : 1.0 P.13
ResolutionSettings
ForMicrosoftWindows
Step1 –Pressrightclickon the desktop
Step2 –Choose “Properties
Step3 –Change the “Screen Resolution
Step4 –Change the “Screen refreshrate
10.LCD Session
UserManual

Rev. : 1.0 P.14
10.LCD Session
ResolutionSettings
ForSUN Servers
ResolutionconfigurationproceduresshouldberunbyqualifiedSUN
serveradministrator
Sun Serversareusing resolution at 1152 x900x76Hz.
Supported resolutionmode for15 LCD:
1024 x768 x70/75Hz
Supported resolutionmode for17 LCD:
1280 x1024 x75Hz
You needtochange the SunServerresolution beforeyouconnectto
LCD Display.
Pleasedothe following procedurestochangethe resolution settings:
1.Asroot:
You mayfind the followingcomment “/user/sbin/m64config .
2.Toviewcurrentresolution:
Type “/user/sbin/m64config –prconf .
3. Tochange to1024x768 @70MHz:
Type “/user/sbin/m64config –res1024x768x70 now .
4.The screen willbe rubbish.
5. Then type “pkillXsun .
And Type “pkillXsession torestart theXsession.
UnderCommon Desktop Environment (CDE).
TochangetheOpenBootresolution,youcantypethefollowing
command inOKprompt.
1.InOKprompt, type “setenvoutput-devicescreen:r1024x768x70 .
2.Type “printenv toconfirmthe resolutionhasbeen changed
to1024x768x70Hz.
3. Then type, “reset torestartthe system.
Note:RemembertoRESTARTthe serveraftertheseprocesses.
Note: RemembertoRESTARTthe serveraftertheseprocesses
UserManual

Rev. : 1.0 P.15
KVM
Session
UserManual

Rev. : 1.0 P.16
11.KVMSession
FrontView
ChannelSelect Button
Selected Channel BankButton
BankNo.
Shift ButtonOnlineChannel
LEDIndication
Selected Channel-Displayedchannelonmonitor &redin
LED.
Channelselect button-Press toselect channelfrom1 –8.
Shiftbutton-Press &Holdfollowwithachannel
buttontoselect channelfrom9 –16.
OnlineChannel-GreenLEDstatethePChasconnected
andpoweron.
Bankno.-Displaythe Bankno. from1 –8.
Bankbutton -Select the bankfrom1 –8(for cascade
only).
UserManual

Rev. : 1.0 P.17
Rear View
11.KVMSession
Cascade
Port Channel
Port
DC
Power
8KVM
16KVM
DC Power-connect toexternal12VDC poweradapter.
CascadePort-connecttoadditionalKVMswitchforchannel
expansion.
Channel Port -connect toPCcomputerwithLCD-A1004 3-in-1KVMcable.
UserManual

Rev. : 1.0 P.18
11.KVMSession
Installation Steps
Beforeinstallation,pleasemakesureall ofperipheralsandcomputershave
been turned off.
1.Connectthe3-in-1cablewith2mini-din6-pinconnectorsanda
HDDB15-pinconnectortothe computerports.
2.Connect anotherend ofthe cabletoKVMswitch.
3.Plug thepoweradapterincluded tothe LCD KeyboardDrawer.
4. Afterpoweringon computersandfinishing theboot-upprocess, you
can startLCD keyboarddrawerwithPS/2KVMswitch.
Note: Pleasedon’tswitchthe PCport(i.e.Don’tpressthe pushbutton of
KVMswitchorrunhotkey)duringthecomputersareunder
boot-up.
PC
LCD-A1004 3-in-1cable
UserManual
DC
Adapter

Rev. : 1.0 P.19
11.KVMSession
Cascading
Using CA-6PS/2KVMcabletoconnect fromBank1’s “Cascadeport to
Bank2’s “Consoleport . Afterconnectedpleasepress “Bank & “Channel
button onthe frontof the PS/2KVMswitchtoreset thePS/2KVMswitch.
LCD-A1018 PS/2KVMcable
Bank1
Bank2
Bank8
(Max.)
Cascadelevel Max. :8level
Max.PCconnectionis128 orwithadditional122 PCs.
AllPS/2KVMswitchiscompatible&can cascade witheachother.
Using PS/2KVMcabletocascade.
Normaldistancefromone PS/2KVMtoanotheris15 feet.
UserManual
LCD-A1018
This manual suits for next models
1
Table of contents
Other Nova LCD Drawer manuals
Popular LCD Drawer manuals by other brands

fantastic furniture
fantastic furniture JUNO UTILITY 3 DRAWER manual

NTI
NTI RACKMUX Series Single-Person Installation Manual

Synergy Global Technology
Synergy Global Technology LCD2U17-3K-02 user manual

GE
GE GFP1528 installation instructions

Howdens
Howdens HYH13PF Assembly

NTI
NTI RACKMUX-V15-4UNV Installation and operation manual