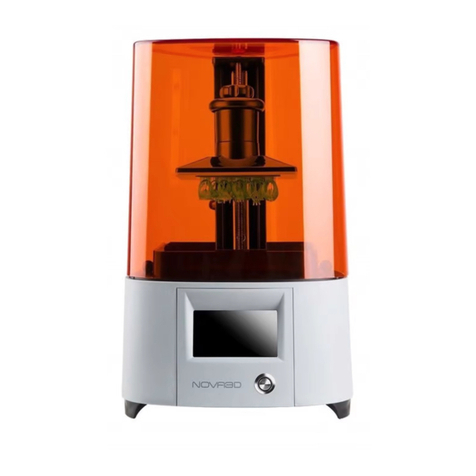
NOVA3D Bene3 User manual

1
Bene3
User Manual

2

3
Introduction
Please read this manual carefully before use. It is highly recommended reading
everything from beginning to end unless anything negligible is explicitly stated.
For more information, please visit: http://www.nova3dprinter.com.
In order to ensure the quality and efficiency of after-sales services, it is important to
follow the following steps in case of any problems:
1) Please Read this manual in detail, most of the questions can be found answers in
this manual.
2) Any questions can be sent to email:
service@nova3dp.com
3) You can get the guidance video at http://www.nova3dprinter.com.

4
Introduction ................................................................................. Error! Bookmark not defined.
1. Know the machine................................................................. Error! Bookmark not defined.
1.1 Package contents............................................................. Error! Bookmark not defined.
1.2 Machine structure............................................................ Error! Bookmark not defined.
1.3 Technical parameters....................................................... Error! Bookmark not defined.
1.4 Introduction of the touch screen....................................... Error! Bookmark not defined.
2. Machine checking .................................................................... Error! Bookmark not defined.
3. Quick print............................................................................................................................. 13
3.1 Platform leveling checking ............................................................................................ 13
3.2 Print preparation.............................................................. Error! Bookmark not defined.
3.3 Test print ......................................................................... Error! Bookmark not defined.
4. Post-print processing................................................................ Error! Bookmark not defined.
4.1 Remove the printed model.............................................................................................15
4.2 Resin tank cleaning ......................................................... Error! Bookmark not defined.
4.3 Next printing preparation................................................. Error! Bookmark not defined.
5. Customize printing................................................................... Error! Bookmark not defined.
5.1 NovaMaker software installation................................................................................... 16
5.2 NovaMaker software introduction ................................... Error! Bookmark not defined.
5.3 NovaMaker import models .............................................. Error! Bookmark not defined.

5
5.4 NovaMaker adding support ............................................. Error! Bookmark not defined.
5.5 NovaMaker slicing .......................................................... Error! Bookmark not defined.
5.6 Connection to the printer ................................................. Error! Bookmark not defined.
5.7 Printing ........................................................................... Error! Bookmark not defined.
6. Routine maintenance and FAQ................................................. Error! Bookmark not defined.
6.1 The printing platform..................................................................................................... 30
6.2 The trough....................................................................... Error! Bookmark not defined.
6.3 The display screen........................................................... Error! Bookmark not defined.
6.4 The release liner ............................................................................................................31

6
1. Know the Machine
1.1Package list

7
1.2Machine structure
Platform fixed knob
Z-axis rod
Printing arm
Leveling screw
Working panel
Resin tank
Printing screen
Printing panel
Touch
screen
Touch switch button

8
1.3Technical parameters
Model
NOVA3D-L3130
Curing rate
15mm/h
X Y Exactitude
0.05mm
Z-axis Exactitude
0.01mm
Dimensions
210mm*210mm*386mm
Build volume
130mm*70mm*150mm
Forming technology
Surface forming technology of LCD
stereolithography
Net weight
8KG
Control software
NovaMaker (NOVA3D.CN)

9
1.4Introduction of the touch screen
There are four buttons when powering the printer on, which can access to the four
pages: the printing, the system setting, the files, and the print settings.
The main page, as shown the Figure1.
The printing page: As shown the figure1, it records and shows the printing
information: the printing file thickness, layers, panel raising speed, printing status, the
File format
STL CWS 3MF
Printed material
The photosensitive resin (405nm)
Connectivity
Wired Ethernet, wireless WIFI, Mobile APP
Resolution
2K(1440*2560)
Screen
3.5 -inch capacitive touch screen
Power
60W
Package
Pearl cotton lining + special cardboard box
Storage
8G

10
ongoing printing image, and speeds etc.
System settings: As shown the Figures 3 and 4. There are two pages, one is the
network setting, which you can connect to the current LAN network so that the
machine can be connected wirelessly. The other is machine information which
indicates the machine information, such as module, serial number, and version
information.
The file page: As shown the figure5. It storage the whole files in the machine,
you can print, delete files here. It is the same page when using a U-disk.
The print setting: As shown the Figure6 &7. Two settings on this page, the panel
setting, and the SLC parameter setting.
The power off page: As shown the figure8. Press and hold the switch button for 3
seconds, then there will be a power off confirm page, at that time, press and hold the
switch for another 10 seconds will shut off the machine.
Figure1 Figure2
Figure3 Figure4

11
Figure5 Figure 6
Figure 7
2. Machine Checking
As shown the Figure9, connect the power cable to the adapter first, then
connect the adapter to the machine, and finally connect the power cable
to the power supplier. The machine will start working automatically when
electric is connected, and the screen page will jump from Figure 10 to 11.
Figure 9 Figure 10

12
Figure 11 Figure 12
For a better observing the screen status, remove the printing panel before
the printing test. To remove the panel, you have to unscrew the fixed
knob first then remove the panel from the machine as shown the Figure
13. After that, press the “File” button on the screen, find and select the
file “TEST_MOTOR_SCREEN” as shown the figure12, then press the
“Print” button on the top left of the screen. If the panel is rested to the
horizon and moves up and down, and there is an image “NovaTest” found
as shown the figure14, it indicates the panel and the screen works
properly. (Notice: Be careful and not to stare at the screen)
Figure 13 Figure 14 Figure 15

13
Figure 16 Figure 17
Figure 18 Figure 19
3. Quick Print
3.1 Pannel leveling checking
The printing panel should be mounted on the printing arm when the
machine arrived. For better leveling the panel, it is best to set the printing

14
settings. Enter the “Print setting” page and press the “up
50mm” button (Figure16), then place the folded A4 paper that included in
the toolkit on the screen (Figure15).
Press the “Home” button (Figure17), when the panel is down to the
screen horizon point(figure18), remove the A4 paper (Figure19). At this
time, there should be some resistance when extracting the A4 paper by
hand. (The machine is already leveled when it arrived, feel the resistance
force of the paper at this time for it is the same force the next time
leveling. If the gap between the screen and the panel is too large, please
seeking supports from the customer service.)
3.2 Printing preparation
The printing panel should be close to the screen after being level, at
that time, press the “Raise 50mm” button (Figure16) to lift the panel up.
Then take out the resin tank (pour the resin into the tank first or after
placed on the machine are both acceptable), then match the holes at the
button of the tank with the holes around the screen.
Then place the tank as Figure20 shown (handle with care), and in the
end, insert the panel back into the printing arm (Figure21), screw and
tighten the fixing knob to complete the printing preparation.
Figure 20 Figure 21

15
3.3 Test print
Return to the “File” page, find and select file
“TEST_NOVA_8040.cws” (Figure22), then press the “Print” button on
the top left. After about 10 minutes, a small sheet containing "NOVA
TEST" as shown in Fig. 23 is printed.
Figure 22 Figure 23
4. Post-print processing
4.1 Remove the printed model
After printing, the printing platform will rise automatically, yet there are
still resins remain on the printing panel. Placed the tank for about half a
minute to let it flows naturally.
Then remove the printing panel as shown Figure24 (the printing platform
and the printing arm are fixed with magnets, pulled it out slowly with
little effort). And scrape the model off carefully with a utility knife as it is
fragile (Figure25).
At last, use some medical alcohol to flush the printing panel, or clean it
with paper towels or cotton swabs. (Notice: Never drop the alcohol in the
tank as it is made of plastic.)

16
Figure 24 Figure 25
4.2 Resin tank cleaning
After printing, there is theoretically only residual resin in the tank, but
there may actually be some solidified resins. Therefore, it is a must to
check and ensure the tank is no solid residue in the remaining resins. If
there is, be sure to clean it, otherwise it may result in a broken screen in
the next printing task.
When cleaning the tank, it is recommended to let the resin flow as
naturally as possible instead of washing it. It is no need to clean the tank
with water due to the use of special release materials. You can place the
resin tank vertically for a few minutes to the resin flow out (Figure24),
and then clean the rest with a piece of clean paper towel.
4.3 Next printing preparation
After clean the resin tank and the printing panel, do as the steps 3.1 and
3.2 to prepare the next printing task.
5. Customize printing

17
5.1 NovaMaker software installation
Download the NovaMaker software from our official website
www.nova3d.cn,click “Service Support”then “Software Download”as
shown in the Figures below. Choose the corresponding installation
version download and install it step by step.
5.2 NovaMaker software introduction
5.2.1 There are two parts in the NovaMaker: the 3D slice and the
printer control.
3D slice: For model moving, zooming, clones, slice etc.
Printer control: Connection to the printer and print the task etc.
5.2.2 Printing task in the printer control
1) Layer thickness (The default is 0.05mm)
2) Slice status (Currently completed layer / total slice levels)
3) Printing speed (mm/min)
4) Printing status
5) Pause

18
6) Stop button
7) Print status bar
8) Currently printing file name
9) Currently printing status
5.2.3 Printable files in the printer control
1) Print button: Print the CWS file selected
2) Delete button: Delete the printable CWS files stored
3) Import button: Open and import the file
4) Files stored in the printer

19
Details for import and print the file:
Press the 3)Import button, and find the sliced CWS file in file
management. Click to cinfirm and the “Refresh” button, find the file and
click the “Print” button to start printing the imported file.
5.2.4 Printer in the printer control

20
5.2.4.1 Printer control: Control the printing panel up, down and reset.
The printing can be moved on the screw rod at a distance of 0.05, 1, 10,
50mm, and the user can adjust the position of the printing platform
according to the actual situation.
5.2.4.2 SLC files defaulted parameter: When printing with CWS files, the
following parameters are generally default and no need to be changed.
Exposure time (ms): set the exposure time of each layer
Number of bottom layers: set the number of bottom layers
Bottom exposure: set the first layer exposure time
Z-axis rising distance (cm): Controls the lifting distance of the printing
platform after each layer is printed.
Z-axis moving speed (mm/min): Controls the lifting speed of the printing
platform
Table of contents
Other NOVA3D 3D Printer manuals
