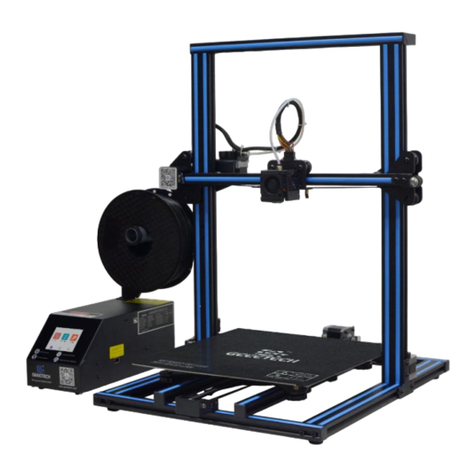
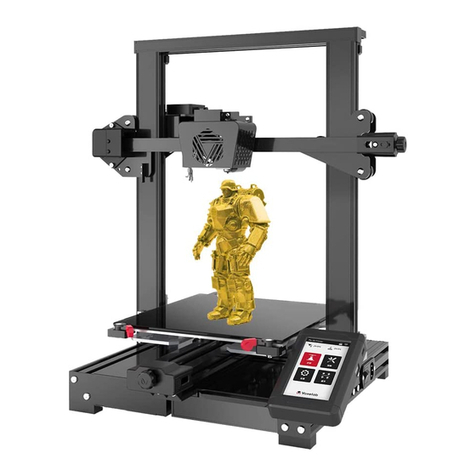
Creativity ELF PRO User manual

ShenZhen Creativity Technology Co.,Ltd
ELF PRO
3D Printer
User Manual
The User Manual is for the ELF PRO 3D printer.
Detailed instructions for using are available on the TF card.

Do not place the Printer near flammables, explosives or heat sources. It is best to place it in a well-
ventilated, low-dust environment.
Do not expose the Printer to violent vibration or any unstable environment.
This will cause poor print quality.
The filaments recommended by the manufacturer are preferred as to avoid clogging in the hot end
and/or Printer damage.
Do not use any other power cable than the one supplied. Use a grounded three-prong power outlet.
Do not touch the nozzle or hot bed during printing. Keep hands away from machine while in use to
avoid burns or personal injury.
Do not wear gloves or loose clothing when operating the Printer. These loose articles can become
caught in moving parts and cause personal injury or Printer damage.
Clean off filament from the nozzle tip with the provided pliers before the nozzle cools. Do not touch
the nozzle directly. This can cause personal injury.
Clean the Printer frequently. With the machine powered off, clean the printer body with a dry cloth to
remove dust, adhered printing materials and foreign objects on guide rails.
Use glass cleaner or isopropyl Alcohol to clean the print surface before every print for consistent
results.
Children under 12 years of age should not use the Printer without supervision.
Attention

Safet y Instructions-------------------------- ------------------- 1
Technical Speciflcation-----------------------------------------------------------------------2
Packing List----------------------------------------------------------------------------------3
Product Overview---------------------------------------------------------------------------------4
Installation---------------------------------------------------------------------------------------5
Install Frame---------------------------------------------------------------------------------6
Wire Connection--------------------------------------------------------------------------7
Warm Reminder------------------------------------------------------------------------------------8
Leveling------------------------------------------------------------------------------------9
Printing Test-----------------------------------------------------------------------------10
Test Print------------------------------------------------------------------------11
Cura Installation---------------------------------------------------------------------------12
Introduction to slicing software---------------------------------------------------13
Manipulate 3D modle in cura--------------------------------------------------------14
Cura Settings------------------------------------------------------------15
Start Srinting------------------------------------------------------------------16
FAQ---------------------------------------------------------------17

When printer is working, please beware of the high temperature of hot
bed, extruderhead,and other hot parts, Pleasedon't touch any hot part
during printing in case of scald.Pleasenote hot parts need time to cool
down after working.
Pleasenote hot parts need time to cool down after working.
The printer has 220V AC/110V AC voltage and other high voltage power
connector, Pleasedon't touch conductive part in case of electric shock
The power of some key parts of the printer(such as hot bed, extruder
head) is stronger,Duringinstallation and usage, please ensure all
terminals connected tightly to avoid anysparking may be caused by
loose wiring.To ensure safety, printer should be mannedduring
working.
The printer belongs to mechanical equipment. When it is working,
please don't touchmoving parts in case of mechanical wounding.

Printing Size(mm) 300*300*360 Molding Tech FDM
Slice Software
CURA /Simplify3D/
Repetier-Host ect Power Supply AC :110-120 V /
200-240V
DC:24V 15A
Nozzle Number 1Total Power MW-LRS-350W
Machine Size(mm) 460*480*560 Language
EN/RU/ES/FR/KR/ZH
-
CN
Machine Weight 16Kg
Printing Method
TF Card/Online Printing
Package Weight 23Kg Display 3.5 inch color touch
screen
Slice Thickness 0.1-0.4mm Bed Temp ≤ 110℃
Precision 0.1mm Nozzle Temp ≤ 260℃
Supported file
formats STL/G-Code Operating
System Windows/Lunix/Mac
Nozzle Diameter 0.4mm.Support
0.2/0.3/0.6/0.8mm Printing
Speed
≤180mm/s,
Normal 30-60mm/s
Working
Environment 10-30℃
humidity
20-50% After sales
service
One year warranty and free
consultation for life.Free software
upgrade,technical support

M3*5 screw 8PCS M4*16 screw 30PCS M5*25 screw 8PCS
ELF PRO Supplies holder limit switch+Material
break detection Coupling
Data cable TF Card+Card reader Shovel+VGA Support Plier
Filament 200g T-screw fixings Tool kit Power Cord

Extrusion Kit
Frame
Display screen
Print platform
Z motor+Coupling
Power switch
Material break
detection
Nozzle
Base
Z limit switch
VGA cable
T-screw
Switch button

Fig.2
1.lnstall frame
1 Fig.1, Fix
the Z-axis hotbed
tray on the linear
guide with M3*5
cup head screws.
2 Fig.2, Insert 4
pieces of 2040
profiles and the
components in step
1 into the
corresponding
holes of the base.
M3*5-4PCS
Fig.1
M4*16
20PCS

3 Fig.3, Fix two
2020 profiles on
the Z-axis profile
with M5*25 cup
head screws
(6PCS)
4 Fig.4, Rotate
the T-screw into the
brass nut (note: be
sure to compress the
spring) and connect it
to the motor through
the coupling
M5*25
6PCS
Fig.3
Fig.4
T8*8 Screw
2PCS
D8-d5 Coupling
2PCS

5 Fig.5, Fix the
hotbed plate on the Z-
axis tray with M4*30
flat head screws, blue
die springs and black
hand-torque nuts (note:
the hand-torque nuts
can be tightened a
little) M4*30-P
4PCS
Fig.5
6 Fig.6, Put the
top cover assembly
on the profile frame
and fix it with M4*16
screws (the top cover
assembly needs to
be kept flat) Fig.6
M4*16
8PCS M3*5-4PCS

7 Fig.7, install
the Z-axis limit
switch and the Z-
axis T-screw fixing
piece in the
position shown in
the figure Fig.7
Y-axis motor & Z-axis
limit wiring diagram X-axis motor & Y-axis
limit & Z-axis limit wiring
diagram
Wiring diagram of
hotbed aviation
connector VGA wiring diagram

Dear customers:
1. In order to ensure the quality of products, we will carry out printing test for each
printer in the factory. If you find that the nozzle has slight traces of use, this is left
by the printing test. We try to clean it up as much as possible, but please don't mind.
2. The factory test voltage is 220V. When installing, please select 110V or 220V
according to your local power supply to ensure the printer can work normally.
Please find the following power supply identification, and use a screwdriver or
tweezers to move the regulator on the power supply.

1. Auto Home All Disable xy
If you want the
printer to shut
down
automatically
after printing,
Automatic
shutdown
2. Test with A4 paper, adjust the nuts under the platform up and down, to make the nozzle just presses the
A4 paper, and ensure that the four corners are the same distance. Repeat steps 1-2 times if necessary

There might be 3 kinds of results
for the first layer of the test prints.
A:Nozzle too close,lack of
extrusion,the nozzle rub against
the platform.Slowly tighten the
corresponding nuts underneath by
half circle or level again.
B:Proper nozzle height,good
extrusion and adhesion
C:Nozzle too high,Large
gap,filaments are not even adhere
to the platform.Slowly loosen the
corresponding nuts underneath the
platform by half circle or level again.

(1).ELF PRO 3D printer
reads Gcode file and prints. It
is necessary to convert
3Dfiles (such as stl file) into
Gcode files for machine to
recognize. Software that
convert 3D files into Gcode
files is called slicing software.
Cura_15.04.6 is used for
example here.Location of
cura: SD card---
>"Files_Engish_ELF PRO"---
>"cura"--->"Windows".
Double click"cura_15.04.6" ,
and follow the procedures as
shown in Fig.8:
Fig.8

(2)Next, before start Cura for
the first time, there will be more
settingsabout the language and
machine types, as show in
Fig.9.
Fig.9

Upon finish, open Cura for the first time, there might be a default robotmodel appears,
customers may click File --->"Clear platform todelete it.
Load 3D model into Cura
(1) Clear the platform by clicking“File”--->“Clear platform”
(2) Load 3D files onto the platform by“File”--->“Load model file...”.Files with extension
such as "STL","OBJ","DAE"and"AMF" can be loaded.Model in grey means it is outside
of the printable area and needs to bemoved or scaled to fit in.
Manipulate 3D model in Cura
(1)Zoom in/out: scroll the mouse wheel
(2) Change viewing angle: right click the model, hold on and move themouse
(3) Position change: left click on the model, hold on and drag the modelto move.
(4)Rotate: single left click on the model and several icons will appear atthe bottom left
of the window (Fig. 21).Click the rotate button, 3 circles will surround the model.Rotate
the model by moving the circle lines.
➢Lay flat: it is very important to ensure the flat portion of the model iswell attached to
the platform. So, please use Lay Flat option everytimeafter rotating the model, as it
will minimize the adhesion issues during printing.(Fig. 10)
➢Reset: click it to return the model to the original orientation.

(5) Scale: to uniformly scale the
modelalong X/Y/Z
dimensions.Todisable uniform
scaling, click the lock in the
lower section of the scaling
window. (Fig. 11)
Fig.10
Fig.11

Fig.12
(6) View mode (Fig. 12): to view the model in different ways and helpsto spotting
issues before print starts. Such as Layers mode: to viewthe toolpath of the print
head to check if there are skipped layers or gaps.
Scroll at
layers mode

Manipulate 3D model in Cura
(1)Machine settings
Refer to Fig. 13, click "Machine"--->"Machine settings" to input thosesuggested parameters
into the corresponding column.
Fig.13
Table of contents
Other Creativity 3D Printer manuals
