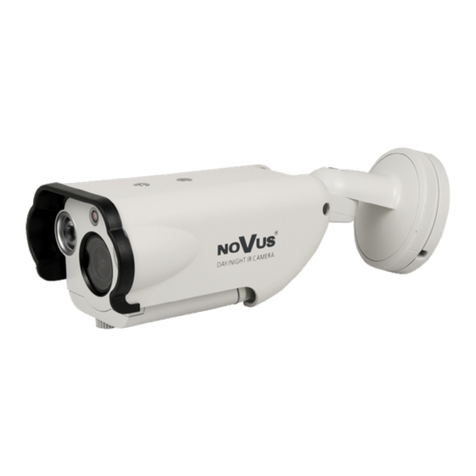
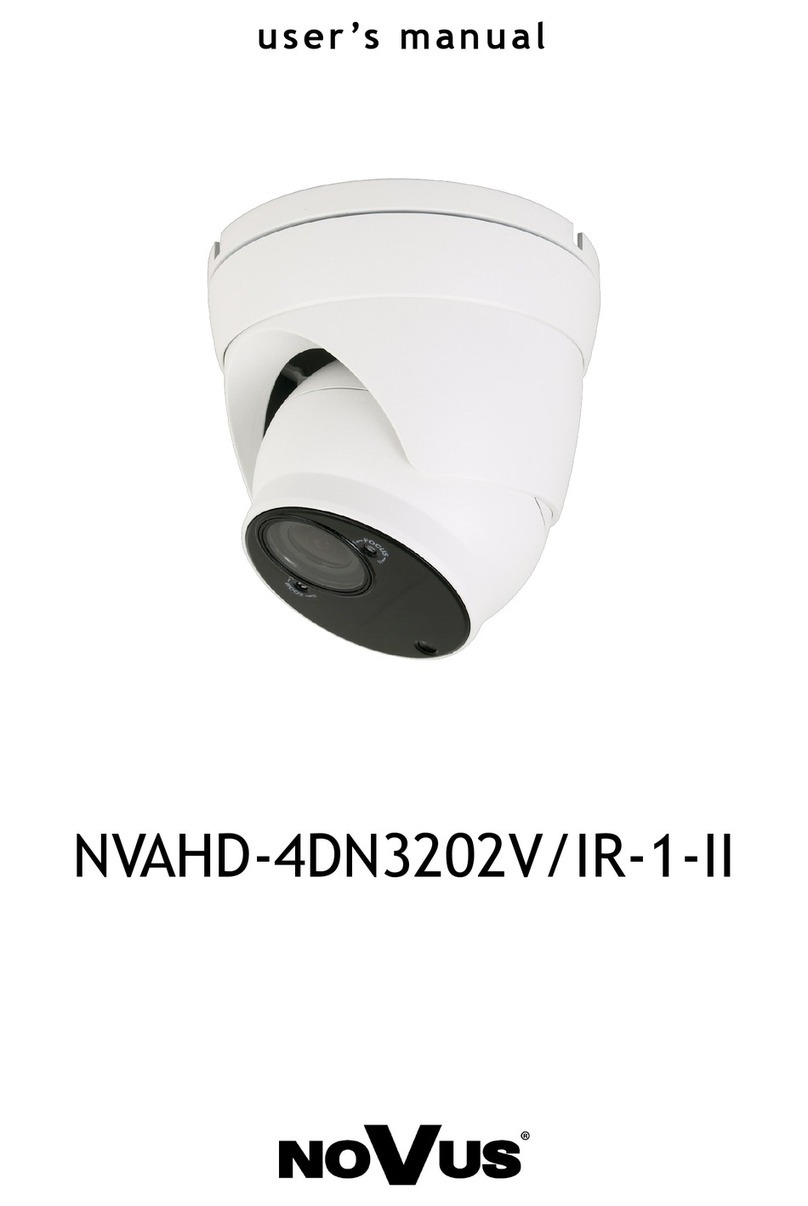
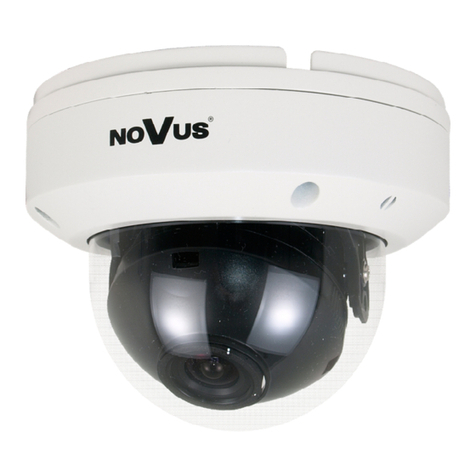
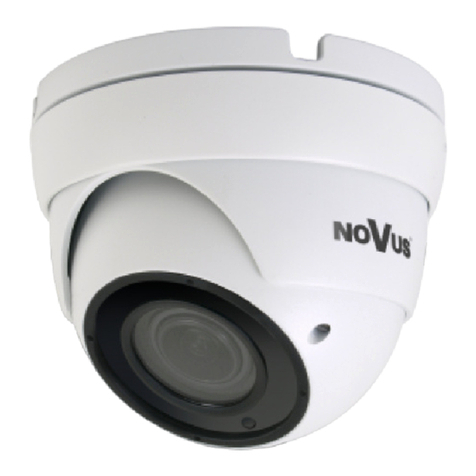
Novus NVAHD-2DN3201MV/IR-1-PIR User manual

NVAHD-2DN3201MV/IR-1-PIR
u s e r ’s m a n u a l

NVAHD-2DN3201MV/IR-1-PIR - User’s manual ver. 1.0
All rights reserved © AAT Holding S.A.
2
INFORMATION
EMC (2014/30/EC) and LVD (2014/35/EC ) Directives
CE Marking
Our products are manufactured to comply with the requirements of the following directives
and national regulations implementing the directives:
• Electromagnetic compatibility EMC 2014/30/EC.
• Low voltage LVD 2014/35/EC with further amendment. The Directive applies to electrical
equipment designed for use with a voltage rating of between 50VAC and 1000VAC as well
as 75VDC and 1500VDC.
WEEE Directive 2012/19/UE
Information on Disposal for Users of Waste Electrical and Electronic Equipment
This appliance is marked according to the European Directive on Waste Electrical and
Electronic Equipment (2012/19/UE) and further amendments. By ensuring this product is disposed of
correctly, you will help to prevent potential negative consequences for the environment and human
health, which could otherwise be caused by inappropriate waste handling of this product.
The symbol on the product, or the documents accompanying the product, indicates that this appliance
may not be treated as household waste. It shall be handed over to the applicable collection point for
used up electrical and electronic equipment for recycling purpose. For more information about
recycling of this product, please contact your local authorities, your household waste disposal service
or the shop where you purchased the product.
RoHS Directive 2011/65/EC
Out of concern for human health protection and friendly environment, we assure that our
products falling under RoHS Directive regulations, regarding the restriction of the use of
hazardous substances in electrical and electronic equipment, have been designed and manufactured in
compliance with the above mentioned regulations. Simultaneously, we claim that our products have
been tested and do not contain hazardous substances whose exceeding limits could have negative
impact on human health or natural environment.
Information
The device, as a part of professional CCTV system used for surveillance and control, is not designed
for self installation in households by individuals without technical knowledge.
The manufacturer is not responsible for defects and damages that result from improper or inconsistent
with user’s manual installation of the device in the system.

NVAHD-2DN3201MV/IR-1-PIR - User’s manual ver. 1.0
All rights reserved © AAT Holding S.A.
3
WARNING!
THE KNOWLEDGE OF THIS MANUAL IS AN INDESPENSIBLE CONDITION OF A PROPER DEVICE
OPERATION. YOU ARE KINDLY REQUSTED TO FAMILIRIZE YOURSELF WITH THE MANUAL
PRIOR TO INSTALLATION AND FURTHER DEVICE OPERATION.
WARNING!
USER IS NOT ALLOWED TO DISASSEMBLE THE CASING AS THERE ARE NO USER-
SERVICEABLE PARTS INSIDE THIS UNIT. ONLY AUTHORIZED SERVICE PERSONNEL MAY OPEN
THE UNIT
INSTALLATION AND SERVICING SHOULD ONLY BE DONE BY QUALIFIED SERVICE PERSONNEL
AND SHOULD CONFORM TO ALL LOCAL REGULATIONS
WARNING!
PRIOR TO UNDERTAKING ANY ACTION THAT IS NOT DESCRIBED FOR THE GIVEN PRODUCT IN
USER’S MANUAL AND OTHER DOCUMENTS DELIVERED WITH THE PRODUCT, OR IF IT DOES
NOT ARISE FROM THE USUAL APPLICATION OF THE PRODUCT, MANUFACTURER MUST BE
CONTACTED UNDER THE RIGOR OF EXCLUDING THE MANUFACTURER’S RESPONSIBILITY
FOR THE RESULTS OF SUCH AN ACTION.
IMPORTANT SAFEGUARDS AND WARNINGS
1. Prior to undertaking any action please consult the following manual and read all the safety and operating
instructions before starting the device.
2. Please keep this manual for the lifespan of the device in case referring to the contents of this manual is
necessary;
3. All the safety precautions referred to in this manual should be strictly followed, as they have a direct
influence on user’s safety and durability and reliability of the device;
4. All actions conducted by the servicemen and users must be accomplished in accordance with the user’s
manual;
5. The device should be disconnected from power sources during maintenance procedures;
6. Usage of additional devices and components neither provided nor recommended by the producer is
forbidden;
7. Mounting the device in places where proper ventilation cannot be provided (e. g. closed lockers etc.) is not
recommended since it may lead to heat build-up and damaging the device itself as a consequence;
8. Mounting the camera on unstable surface or using not recommended mounts is forbidden. Improperly
mounted camera may cause a fatal accident or may be seriously damaged itself. The camera must be
mounted by qualified personnel with proper authorization, in accordance with this user’s manual.
9. Device should be supplied only from a power sources whose parameters are in accordance with those
specified by the producer in the camera technical datasheet. Therefore, it is forbidden to supply the camera
from a power sources with unknown parameters, unstable or not meeting producer’s requirements;
10.Signal cables (conducting TV or / and telemetric signal) should be placed in a way excluding the possibility
of damaging them by accident. Special attention must be paid to cables getting from the camera and
connecting the power supply;
11.To avoid equipment damage, whole TV circuit should be equipped with properly made discharge-, overload-
and lightning protection devices. Usage of separating transformers is advised;
12.Electric installation supplying the device should be designed to meet the specifications given by the producer
in such a way that overloading is impossible;
13.User cannot repair or upgrade the equipment himself. All maintenance actions and repairs should be
conducted only by qualified service personnel;
SAFETY REQUIREMENTS
NVAHD-2DN3201MV/IR-1-PIR - User’s manual ver. 1.0
All rights reserved © AAT Holding S.A.
4
MAIN CHARACTERISTIC
14. Unplug the camera from the power source immediately and contact the proper maintenance
department when the following occurs:
• Damages to the power cord or to the plug itself;
• Liquids getting inside the device or exposure to strong mechanical shock;
• Device behaves in a way not described in the manual and all adjustments approved by the
manufacturer and possible to apply by user himself, seem not to have any effect;
• Camera is damaged;
• Atypical behaviour of the camera components may be seen (heard).
15. In necessity of repairs attention to using only original replacement parts (with their parameters
in accordance with those specified by the producer) should be paid. Non-licensed service and
non-genuine replacement parts may cause fire or electrocution;
16. After maintenance activities tests should be run to ensure proper operation of all the functional
components of the device.
Novus AHD cameras are dedicated to work with Novus AHD DVRs. Using only Novus products
guarantees the highest image quality. Connecting Novus AHD cameras to DVRs from other
manufacturers may decrease video quality.
1. MAIN CHARACTERISTIC
• Mechanical IR cut filter
• IR operation capability
• Horizontal resolution: 2MPX,
• Min. illumination: from 0.01 lx/F=2.0 (0lx with IR on)
• Lens type: standard, f=2.8 mm/F2.0
• Built-in IR illuminator: 16 IR LED
• Light sensor
• 2DNR digital noise reduction
• PIR sensor - reducing the number of false alarms
• WDR - Wide Dynamic Range
• The ability to work in AHD 1080p, TVI 1080p, CVI 1080p, analog 960H
• Other functions:
–mirror effect
–defective pixels correction
–adjusting the brightness
–working in PAL and NTSC video mode
• Menu available by DVRs OSD
• Degree of protection IP66
• Power supply: 12VDC
Attention!
Technical changes reserved without prior notice and printing errors possible.

NVAHD-2DN3201MV/IR-1-PIR - User’s manual ver. 1.0
All rights reserved © AAT Holding S.A.
5
2. SPECIFICATION
SPECIFICATION
Image
Image Sensor CMOS sensor 1/2.7” SMARTSENS
Operang mode AHD 1080p, TVI 1080p, CVI 1080p, analog 960H
Number of Eecve Pixels 1936 (H) x 1096 (V)
Resoluon 1080p
Min. Illuminaon 0.01 lx/F2.0 - color mode,
0 lx (IR on) - B/W mode
S/N Rao > 40 dB (AGC o)
Electronic Shuer auto/manual: 1/25 s ~ 1/50000 s
Wide Dynamic Range (WDR) yes
Digital Noise Reducon (DNR) 2D
Lens
Lens Type standard, f=2.8 mm/F2.0
Day/Night
Switching Type mechanical IR cut lter
Switching Mode auto, manual
Switching Delay 0 ~ 60 s
Visible Light Sensor yes
Other funcons
System PAL, NTSC
OSD languages: Polish, English, Russian, others
PIR sensor range up to 8 m
Image Processing Defecve Pixel Correcon (DPC), 180˚ image rotaon, mirror eect, vercal
ip, horizontal ip
Remote control Yes (COAX protocol)
IR LED
LED Number 16
Range 20 m
Angle 60°
Interfaces
Video Output BNC, 1.0 Vp-p, 75 Ohm
Installaon parameters
Dimensions (mm) 100 (Ф) x 90 (H)
Weight 0.4 kg
Degree of Protecon IP 66 (details in the user’s manual on page 7)
Enclosure vandal proof, aluminium, white
Power Supply 12 VDC
Power Consumpon 1 W, 5 W (IR on)
Operang Temperature -30°C ~ 55°C

NVAHD-2DN3201MV/IR-1-PIR - User’s manual ver. 1.0
All rights reserved © AAT Holding S.A.
6
2.1. Dimensions (given in millimetres):
2.2. Package contents
• NVAHD-2DN3201MV/IR-1-PIR camera
• User’s manual
• Accessories bag
If any of the listed equipment has been damaged during transport or if the package is incomplete,
the contents of package should be packed back in to the original box. Please contact your local
NOVUS distributor for further assistance.
3. INSTALLATION
3.1. Power supply connection
WARNING: Device should be supplied only from a power sources whose parameters are in
accordance with those specified by producer in the camera’s technical datasheet. Therefore, it
is forbidden to supply the camera from power sources whose parameters are unknown,
unstable or not meeting the producer’s requirements.
INSTALLATION
video
12V DC +/- 10% power supply
video
(GND)
+
- (GND)

NVAHD-2DN3201MV/IR-1-PIR - User’s manual ver. 1.0
All rights reserved © AAT Holding S.A.
7
INSTALLATION
3.2. Camera mounting
To mount a camera please follow the instructions below:
• Unscrew the retaining ring (A) and remove the camera (B) from the base
• Put the bracket to the wall in a desired mounting place (with cable hole). Taking the bracket’s
base screw holes as a pattern, mark future drilling holes for screws.
• Drill holes in accordance with previously done markings and base hole placement.
• Mount the camera base using the supplied plugs and screws.
• Connect the camera cables, put camera on the base, and pre-tighten the retaining ring
• Adjust camera position.
• Tighten the retaining ring to the stop.
WARNING!
Please note that the wall or ceiling must have enough strength to support the camera.
WARNING!
In order to obtain declared degree of protection please seal the camera bracket to prevent water
getting inside. Furthermore, when installing the bracket on rough/uneven surfaces, please
additionally seal the junction with appropriate sealing mass. Please pay special attention to any
mounting holes and if they are a loop-through ones, seal them too.
WARNING!
The declared degree of protection of the camera relates to its housing and does not take into
account the possibility of moisture infiltration into the interior of the camera by connecting
cables. Connection cables protection through i.e. sealing up is the responsibility of the camera
installer. The manufacturer is not liable for any damages to the camera caused as a result of
failing in performing that activity by installer, which also means that camera damaged in that
way is not subject to warranty repairs.
B
A

NVAHD-2DN3201MV/IR-1-PIR - User’s manual ver. 1.0
All rights reserved © AAT Holding S.A.
8
PIR FUNCTION
4. PIR FUNCTION
4.1 PIR detector - introduction
Passive infrared detectors (PIR) are widely used, in the alarm systems for motion detection. Operation
of the sensor is based on precise measurement of the temperature of objects in a specific area, and
each change of this temperature is interpreted as motion by integrated electronics - and generates an
alarm.
4.2 PIR detector in the AHD camera
The task of the PIR detector in the AHD camera is to limit the number of false motion detection
alarms. The PIR detector, working in conjunction with the motion detection function, detects moving
objects with a temperature higher than the ambient temperature. It is only the simultaneous detection
of motion by the PIR detector and the motion detection function that generates an alarm event. In this
way, the PIR sensor significantly reduces the number of false motion detection alarms related to light
flashes, snowfall or day/night switching.
4.3 Configuration of the PIR function
WARNING:
Configuration of the PIR function in the camera and receiving events is possible only through
the menu of the Novus brand recorder, supporting the PIR functionality.
After connecting the camera with the PIR detector to the recorder, it is automatically recognized and
the recorder activates the "PIR" option for the channel in the "Alarm" section. Configuration is
performed similarly as for motion detection: specify the detection zone, sensitivity, time post-alarm
recording and enable recording.
Recordings of events from PIR detection are marked in purple in the schedule and on the recording
graph.
Enabling in the recorder the PIR event receiving, disables the ability to control the camera
functions via the COAX protocol. In order to display the menu and control the functions of the
camera, it is necessary to disable receiving PIR events in the option Alarm -> PIR (option Enable
-> Disable)

NVAHD-2DN3201MV/IR-1-PIR - User’s manual ver. 1.0
All rights reserved © AAT Holding S.A.
9
SETTINGS
5. SETTINGS
WARNING:
Camera configuration is presented with Novus DVR.
The camera has an OSD menu displayed in the foreground of image. During normal operation
status information can be displayed on the image. To navigate menu and make changes please use
PTZ option in DVR menu. The protocol used to control camera functions is COAX. To navigate in
camera menu click in Devices section in DVR menu in PTZ options, select channel of camera, select
COAX protocol for this channel and save changes.
To enter the camera menu, select the appropriate channel in DVR and turn on PTZ option (by
clicking button), than in PTZ window click “Menu” , or IRIS+, or FOCUS- buttons,.
To navigate menu please use PTZ console:
/ - up/down - moving in menu
/- right/left - change options
- IRIS+
- FOCUS- - ENTER command
- MENU
Pressing IRIS+, or FOCUS-, or “Menu” buttons mean ENTER command for device. To choose
submenu, select the UP, DOWN keys. If the sub-menu contains the symbol that indicates the
opportunity to enter to the settings by giving the ENTER command. To change the parameters of
selected items, press LEFT, RIGHT buttons. To exit the menu and saves changes, select SAVE&EXIT.

NVAHD-2DN3201MV/IR-1-PIR - User’s manual ver. 1.0
All rights reserved © AAT Holding S.A.
10
SETTINGS
5.1. Main menu
After pressing “Menu” button (ENTER command), camera main menu is displayed as on the screen
below:
5.1.1 EXPOSURE submenu
This submenu contains exposure and shutter speed settings.
SHUTTER - shutter mode control. Allows you to choose the automatic mode (AUTO), the manual
mode with adjustable shutter speed in the range of 1/25 ~ 1/50000s and flicker reduction (FLK).
AGC - Sets AGC gain. Higher gain make a scene brighter, but noise increases. It allows to adjust
the gain in the range from 0 to 15.
BRIGHTNESS - sets brightness level in the range from 1 to 100.
D-WDR - this function allows to enable/disable wide dynamic range function that enables to
observe the scene with different illumination levels. After selecting this function, there is
a submenu to adjust the level in the range from 0 to 15.

NVAHD-2DN3201MV/IR-1-PIR - User’s manual ver. 1.0
All rights reserved © AAT Holding S.A.
11
SETTINGS
5.1.2 BACKLIGHT submenu
These compensation functions allow to enhance visibility of the objects located in the foreground,
surrounded by strongly illuminated background (BLC) or for enhancing visibility of the objects
located near the strong light source (HSBLC).
BLC - function allows to enhance visibility of the objects located in the foreground, surrounded by
strongly illuminated background. By giving the ENTER command in this mode displays the
following menu:
Submenu presented allows to set the size and location of the area where the BLC function is active,
furthermore it allows to set the sensitivity of the function.
HSBLC - high light compensation function. It allows to enhance visibility of the objects located
near the strong, point light source. If a strong, point light source appears on the screen , function
will mask it for effective observation of the scene itself (this function is recommended e.g. to
observe car licence plates). Selecting HSBLC displays following menu:
SELECT - allows to select one of the four areas of HSBLC function
DISPLAY - enables or disables previously selected zone.
BLACK MASK - enables or disables masking area
LEVEL - adjusts intensity function between 0-100
MODE - (ALL DAY/NIGHT) determines whether the function is running all the time or only at night
(recommended).
DEFAULT - restores default HSBLC settings

NVAHD-2DN3201MV/IR-1-PIR - User’s manual ver. 1.0
All rights reserved © AAT Holding S.A.
12
SETTINGS
5.1.3 WHITE BAL submenu
This feature allows to set appropriate color settings using following options:
ATW - auto tracking white balance based on color temperature.
AWC→SET - this mode enables adaptive setting of white balance. In order to obtain the optimum
state under the current illumination, direct the camera at a sheet of white paper and give the
ENTER command. When lighting parameters change (e.g. light bulbs changed to halogen lamps,
daylight to artificial light etc. ), procedure mentioned above should be repeated;
INDOOR - this mode enables adaptive setting of white balance, set this option when camera is
looking at the inside
OUTDOOR - this mode enables adaptive setting of white balance, set this option when camera is
looking at the outside
MANUAL - manual mode settings. In case of inappropriate color settings for ATW, AWC modes it
is possible to set RED and BLUE values manually. Color values range from 0 to 100 and are
represented by sliders. Any change in the color components are instantly applied to the image.
5.1.4 D&N submenu
Allows to adjust day/night settings. Available settings are: AUTO, EXT, COLOR, B/W.
AUTO - camera switches between night (b/w) and day (color) mode automatically, depending on
current illumination conditions. Settings are available at following sub-menu:
D--N (CDS) and N--D (CDS) - sets the illumination threshold that switches the camera from day
to night mode and from night to day mode (respectively 6~255 and 0~249)
D--N (DELAY) and N--D (DELAY) - sets the delay between color and b/w mode switching and
between b/w and color mode (0~60s)
B/W - forces continuous black & white mode. Selecting displays option - IR SMART - function
ensuring balanced brightness level of the picture during operation with an IR illuminator (which
prevents overexposure of the objects located close to the camera and its illuminator).
COLOR - forces continuous day (color) mode.
EXT - camera switches between night (b/w) and day (color) mode automatically, depending on
current illumination conditions, based on signals from the light sensor. Similar to the AUTO
function, after entering the option submenu:

NVAHD-2DN3201MV/IR-1-PIR - User’s manual ver. 1.0
All rights reserved © AAT Holding S.A.
13
SETTINGS
it is possible to set the speed of the camera switching between the color and black and white color
modes and between black and white and color (0 ~ 60s)
5.1.5 NR submenu
Allows to make settings for digital noise reduction function. Giving the ENTER command in this
mode camera displays the submenu which allows to set the level of noise reduction for static parts of
the image - 2DNR. Available settings: OFF, LOW, MIDDLE, HIGH.
5.1.6 SPECIAL submenu
Allows to set additional camera features. Giving the ENTER command in this mode displays the
following menu:
MIRROR - submenu allows to set additional digital functions:
MIRROR - allows to change viewpoint as mirror reflection
V-FLIP - turns the image flip over vertically
ROTATE - turns the image 180° rotation
DPC - allows to adjust parameters used in Dead Pixel Correction function:
LIVE DPC - sets parameters of the defective pixel correction function in real time. Selecting ON
and giving ENTER command opens a submenu for setting the gain level and the level of
correction.
WHITE DPC - allows to a correct "hot pixels". Selecting ON and giving ENTER command opens
a submenu:

NVAHD-2DN3201MV/IR-1-PIR - User’s manual ver. 1.0
All rights reserved © AAT Holding S.A.
14
SETTINGS
Here you can specify the size and location of the zone in which the correction will be made
(position POS/SIZE), then define the level of correction and amplification (LEVEL and AGC
positions) and set SENS-UP option (if camera uses SENS-UP position). Then select START
position and give ENTER command, cover the lens tightly and give ENTER command again.
After correcting process the camera returns to the DPC WHITE menu. In the DPC VIEW you can
check the correction effect and, if needed repeat the operation with different settings.
BLACK DPC - allows to correct (mask) dead pixels. Selecting ON and giving ENTER command
opens a submenu which define the size and location of the zone in which the correction is made
(position POS/SIZE), then define the compensation level (position LEVEL). Then select
START position and give ENTER command and wait for the end of the operation. In the DPC
VIEW check the correction effect and, if needed repeat the operation with different settings.
LANGUAGE - switches between OSD languages: Polish, English, Russian and others
5.1.7 ADJUST submenu
It allows to perform additional image adjustment. Giving the ENTER command in this mode displays
the following menu:
SHARPNESS - allows to disable (OFF) and enable (AUTO) sharpness correction function. After
selecting AUTO and giving the ENTER command , next submenu is displayed, where it is possible
to set the degree of correction and gain ranges for compensation
MONITOR - corrects the image parameters depending on chosen monitor (LCD monitor or CRT
monitor). After giving the ENTER command, the submenu is displayed where fine adjustments can
be made.
LSC - enables and disables the vignetting correction function.
OUTPUT MODE - switches the system and camera mode. After issuing the ENTER command, the
next submenu will appear:

NVAHD-2DN3201MV/IR-1-PIR - User’s manual ver. 1.0
All rights reserved © AAT Holding S.A.
15
SETTINGS
FORMAT - allows to change the camera's operating mode. Available options are: AHD,
CHD, THD, CVBS
FRAMERATE - allows you to switch the frame rate (25 or 30 for AHD, CHD, THD) or
between PAL and NTSC (for CVBS mode)
5.2 HIDDEN additional camera menu
Camera has another additional menu to which you enter by hovering over the EXPOSURE menu three
times clicking RIGHT, and then giving ENTER command:
This menu allows to display additional information about the camera:
ADC TEST - option that displays raw data from ADC converter for testing purposes.
AE TEST - option that displays raw data from Auto Exposure for testing purposes.
VERSION - the current version of the camera firmware.
RETURN - return to the previous menu.

AAT Holding S.A.
431 Pulawska St., 02-801 Warsaw, Poland
tel.: +4822 546 07 00, fax: +4822 546 07 59
www.novuscctv.com
19.02.2018 TF, MK v1.0

NVAHD-2DN3201MV/IR-1-PIR
i n s t r uk c j a o b s łu g i

NVAHD-2DN3201MV/IR-1-PIR - instrukcja obsługi wersja 1.0
Wszelkie prawa zastrzeżone © AAT Holding S.A.
2
INFORMACJE
Dyrektywy EMC (2014/30/UE) i LVD (2014/35/UE)
Oznakowanie CE
Nasze produkty spełniają wymagania zawarte w dyrektywach oraz przepisach krajowych
wprowadzających dyrektywy:
- Kompatybilność elektromagnetyczna EMC 2014/30/UE.
- Niskonapięciowa LVD 2014/35/UE. Dyrektywa ma zastosowanie do sprzętu
elektrycznego przeznaczonego do użytkowania przy napięciu nominalnym od 50VAC do 1000VAC
oraz od 75VDC do 1500VDC.
Dyrektywa WEEE 2012/19/UE
Informacja dla użytkowników o pozbywaniu się urządzeń elektrycznych i
elektronicznych
Niniejszy produkt został oznakowany zgodnie z Dyrektywą WEEE (2012/65/UE) oraz
późniejszymi zmianami, dotyczącą zużytego sprzętu elektrycznego i elektronicznego.
Zapewniając prawidłowe złomowanie przyczyniają się Państwo do ograniczenia ryzyka wystąpienia
negatywnego wpływu produktu na środowisko i zdrowie ludzi, które mogłoby zaistnieć w przypadku
niewłaściwej utylizacji urządzenia.
Symbol umieszczony na produkcie lub dołączonych do niego dokumentach oznacza,
że nasz produkt nie jest klasyfikowany jako odpad z gospodarstwa domowego. Urządzenie należy
oddać do odpowiedniego punktu utylizacji odpadów w celu recyklingu. Aby uzyskać dodatkowe
informacje dotyczące recyklingu niniejszego produktu należy skontaktować się z przedstawicielem
władz lokalnych, dostawcą usług utylizacji odpadów lub sklepem, gdzie nabyto produkt.
Dyrektywa RoHS 2011/65/UE
Informacja dla użytkowników dotycząca ograniczenia użycia substancji
niebezpiecznych w sprzęcie elektrycznym i elektronicznym.
W trosce o ochronę zdrowia ludzi oraz przyjazne środowisko zapewniamy, że nasze
produkty podlegające przepisom dyrektywy RoHS, dotyczącej użycia substancji
niebezpiecznych w sprzęcie elektrycznym i elektronicznym, zostały zaprojektowane i wyprodukowane
zgodnie z wymaganiami tej dyrektywy. Jednocześnie zapewniamy, że nasze produkty zostały
przetestowane i nie zawierają substancji niebezpiecznych w ilościach mogących niekorzystnie
wpływać na zdrowie człowieka lub środowisko naturalne.
Informacja
Urządzenie, jako element profesjonalnego systemu telewizji dozorowej służącego do nadzoru i
kontroli, nie jest przeznaczone do samodzielnego montażu w gospodarstwach domowych przez osoby
nie posiadające specjalistycznej wiedzy.
Obowiązek konsultowania się z Producentem przed wykonaniem czynności nieprzewidzianej
instrukcją obsługi albo innymi dokumentami:
Przed wykonaniem czynności, która nie jest przewidziana dla danego Produktu w instrukcji obsługi,
innych dokumentach dołączonych do Produktu lub nie wynika ze zwykłego przeznaczenia Produktu,
należy, pod rygorem wyłączenia odpowiedzialności Producenta za następstwa takiej czynności,
skontaktować się z Producentem.

NVAHD-2DN3201MV/IR-1-PIR - instrukcja obsługi wersja 1.0
Wszelkie prawa zastrzeżone © AAT Holding S.A.
3
UWAGA!
ZNAJOMOŚĆ NINIEJSZEJ INSTRUKCJI JEST NIEZBĘDNYM WARUNKIEM PRAWIDŁOWEJ
EKSPLOATACJI URZĄDZENIA. PROSIMY O ZAPOZNANIE SIĘ Z NIĄ PRZED
PRZYSTĄPIENIEM DO INSTALACJI I OBSŁUGI KAMERY.
UWAGA !
NIE WOLNO DOKONYWAĆ ŻADNYCH SAMODZIELNYCH NAPRAW. WSZYSTKIE
NAPRAWY MOGĄ BYĆ REALIZOWANE JEDYNIE PRZEZ WYKWALIFIKOWANYCH
PRACOWNIKÓW SERWISU.
WARUNKI BEZPIECZEŃSTWA
1. Przed zainstalowaniem i rozpoczęciem eksploatacji należy dokładnie zapoznać się z niniejszą
instrukcją obsługi i zawartymi w niej wymogami bezpieczeństwa;
2. Uprasza się o zachowanie instrukcji na czas eksploatacji kamery na wypadek konieczności
odniesienia się do zawartych w niej treści;
3. Należy skrupulatnie przestrzegać wymogów bezpieczeństwa opisanych w instrukcji, gdyż mają one
bezpośredni wpływ na bezpieczeństwo użytkowników i trwałość oraz niezawodność urządzenia;
4. Wszystkie czynności wykonywane przez instalatorów i użytkowników muszą być realizowane
zgodnie z opisem zawartym w instrukcji;
5. W czasie czynności konserwatorskich urządzenie musi być odłączone od zasilania;
6. Nie wolno stosować żadnych dodatkowych urządzeń lub podzespołów nie przewidzianych
i nie zalecanych przez producenta;
7. Nie należy instalować tego urządzenia w miejscu, gdzie nie można zapewnić właściwej wentylacji
(np. zamknięte szafki, itp.), co powoduje zatrzymanie się ciepła i w konsekwencji może
doprowadzić do uszkodzenia urządzenia;
8. Nie wolno umieszczać kamery na niestabilnych powierzchniach lub niezalecanych przez
producenta uchwytach. Źle zamocowana kamera może być przyczyną groźnego dla ludzi wypadku
lub sama ulec poważnemu uszkodzeniu. Kamera musi być instalowana przez wykwalifikowany
personel o odpowiednich uprawnieniach według zaleceń podanych w niniejszej instrukcji;
9. Urządzenie może być zasilane jedynie ze źródeł o parametrach zgodnych ze wskazanymi przez
producenta w danych technicznych kamery. Dlatego też, zabrania się zasilania kamery ze źródeł
o nieznanych, niestabilnych lub niezgodnych z wymaganiami określonymi przez producenta
parametrach;
10. Przewody sygnałowe i zasilające powinny być prowadzone w sposób wykluczający możliwość ich
przypadkowego uszkodzenia. Szczególną uwagę należy zwrócić na miejsce wyprowadzenia
przewodów z kamery oraz na miejsce przyłączenia do źródła zasilania.
11. W celu uniknięcia uszkodzenia urządzenia, cały tor wizyjny powinien być wyposażony
w prawidłowo wykonane układy ochrony przed zakłóceniami, przepięciami i wyładowaniami
atmosferycznymi. Zalecane jest również stosowanie transformatorów separujących.
12. Użytkownik nie może dokonywać żadnych napraw lub modernizacji urządzenia. Wszystkie
naprawy mogą być wykonywane jedynie przez wykwalifikowanych pracowników
autoryzowanego serwisu;
13. Instalacja elektryczna zasilająca kamerę powinna być zaprojektowana z uwzględnieniem wymagań
podanych przez producenta tak, aby nie doprowadzić do jej przeciążenia;
UWAGI I OSTRZEŻENIA

NVAHD-2DN3201MV/IR-1-PIR - instrukcja obsługi wersja 1.0
Wszelkie prawa zastrzeżone © AAT Holding S.A.
4
CHARAKTERYSTYKA OGÓLNA
14. Należy niezwłocznie odłączyć kamerę od źródła zasilania i przewodów sygnałowych oraz
skontaktować się z właściwym serwisem w następujących przypadkach:
• Uszkodzenia przewodu zasilającego lub wtyczki tego przewodu;
• Przedostania się cieczy do środka urządzenia lub gdy zostało ono narażone na silny uraz
mechaniczny;
• Urządzenie działa w sposób odbiegający od opisanego w instrukcji, a regulacje dopuszczone
przez producenta i możliwe do samodzielnego przeprowadzenia przez użytkownika nie
przynoszą spodziewanych rezultatów;
• Obudowa została uszkodzona;
• Można zaobserwować nietypowe zachowanie kamery.
15. W przypadku konieczności naprawy urządzenia należy upewnić się, czy pracownicy serwisu użyli
oryginalnych części zamiennych o charakterystykach elektrycznych zgodnych z wymaganiami
producenta. Nieautoryzowany serwis i nieoryginalne części mogą być przyczyną powstania pożaru
lub porażenia prądem elektrycznym;
16. Po wykonaniu czynności serwisowych należy przeprowadzić testy urządzenia i upewnić
się co do poprawności działania wszystkich podzespołów funkcjonalnych kamery.
Kamery AHD marki Novus dedykowane są do współpracy z rejestratorami AHD marki Novus.
Tylko w połączeniu z nimi gwarantowany jest najwyższy poziom jakości obrazu. Podłączenie
kamer AHD marki Novus do rejestratorów AHD innych producentów może skutkować
obniżeniem jakości wideo.
1. CHARAKTERYSTYKA OGÓLNA
• Mechaniczny filtr podczerwieni
• Możliwość pracy w podczerwieni
• Rozdzielczość 2MPX
• Czułość: od 0.01lx/F=2.0 (0lx z wł. oświetlaczem IR)
• Typ obiektywu: standardowy f=2.8 mm/F2.0
• Wbudowany oświetlacz podczerwieni, 16 diod LED IR
• Czujnik światła widzialnego
• 2DNR - cyfrowa redukcja szumu
• Detektor PIR - redukcja ilości fałszywych alarmów
• WDR - szeroki zakres dynamiki
• Możliwość pracy w trybie AHD 1080p, TVI 1080p, CVI 1080p, analog 960H
• Dodatkowe funkcje:
–odbicie lustrzane
–maskowanie uszkodzonych pikseli
–regulacja jasności obrazu
–praca w systemach PAL i NTSC
• Menu ekranowe dostępne z poziomu rejestratora
• Zasilanie 12VDC
• Klasa szczelności IP 66
Uwaga!
Producent zastrzega sobie możliwość wystąpienia błędów w druku oraz zmian parametrów
technicznych bez uprzedniego powiadomienia.
Table of contents
Languages:
Other Novus Digital Camera manuals

Novus
Novus NVB-4010VB User manual

Novus
Novus NVAHD-1DN5106H/IR-1 User manual

Novus
Novus NVAHD-4DN3202V/IR-1-II User manual

Novus
Novus NVIP-4DN3514V/IR-1P User manual

Novus
Novus NVAHD-2DN5504MD/IR-1 User manual

Novus
Novus NVAHD-2DN5504MH/IR-1-II User manual

Novus
Novus NVDN-601D/IR-white User manual

Novus
Novus NVAHD-2DN5102H/IR-1 User manual

Novus
Novus NVC-BC2403D-II User manual

Novus
Novus NVIP-2SD-6540/15 User manual