Nowsonic autark id07 User manual

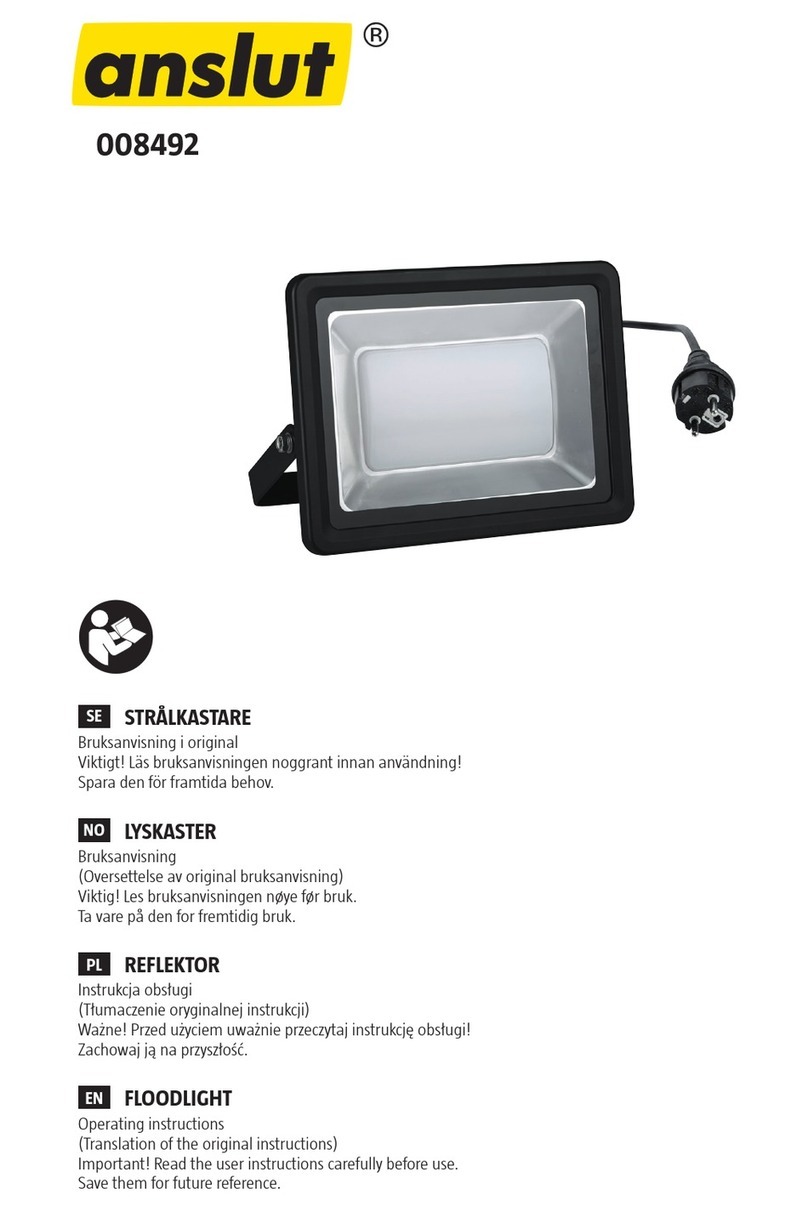
LED stage floodlight with
remote control
User manual
Bedienungsanleitung
Mode d‘emploi
Manual del usuario
Podręcznik użytkownika
AUTARK ID07


User manual 5
Bedienungsanleitung 19
Mode d‘emploi 33
Instrucciones de uso 47
Instrukcja obsługi 61


Nowsonic Autark ID07
User manual
www.nowsonic.com

6
Nowsonic Autark ID07
User manual
GB www.nowsonic.com
IMPORTANT SAFETY INSTRUCTIONS
1) Read these instructions.
2) Keep these instructions.
3) Heed all warnings.
4) Follow all instructions.
5) Do not use this apparatus near water.
6) Clean only with dry cloth.
7) Do not block any of the ventilation openings! Install in
accordance with the manufacturer’s instructions.
8) Do not install near any heat sources such as radiators, heat
registers, stoves, or other apparatus (including amplifiers) that
produce heat.
9) Do not defeat the safety purpose of the polarized or grounding-
type plug. A polarized plug has two blades with one wider than
the other. A grounding type plug has two blades and a third
grounding prong. The wide blade or the third prong is provided
for your safety. If the provided plug does not fit into your outlet,
consult an electrician for replacement of the obsolete outlet.
10) Protect the power cord from being walked on or pinched,
particularly at plugs, convenience receptacles, and the point
where they exit from the apparatus.
11) Only use attachments/accessories specified by the manufacturer.
12) Use only with a cart, stand, tripod, bracket, or table specified by
the manufacturer, or sold with the apparatus. When a cart is used,
use caution when moving the cart/apparatus combination to
avoid injury from tip-over.
13) Unplug this apparatus during lightning storms or when unused
for long periods of time.
14) Refer all servicing to qualified service personnel. Servicing is
required when the apparatus has been damaged in any way,
such as power-supply cord or plug is damaged, liquid has been
spilled or objects have fallen into the apparatus, the apparatus
has been exposed to rain or moisture, does not operate normally,
or has been dropped.

7
Nowsonic Autark ID07
User manual
GB
www.nowsonic.com
The lightning flash with an arrowhead symbol within an equilateral
triangle is intended to alert the user to the presence of uninsulated
“dangerous voltage”within the product’s enclosure that may be of
sufficient magnitude to constitute a risk of electric shock to persons.
The exclamation point within an equilateral triangle is intended
to alert the user to the presence of important operating and
maintenance(servicing) instructions in the literature accompanying
the product.
WARNING
To reduce the risk of fire or electric shock, do not expose this appa-
ratus to rain or moisture.
Do not expose this equipment to dripping or splashing and
ensure that no objects filled with liquids, such as vases, are placed
on the equipment.
This apparatus must be earthed.
Use a three-wire grounding type line cord like the one supplied
with the product.
Be advised that different operating voltages require the use of
different types of line cord and attachment plugs.
Always observe the local safety regulations.
This equipment should be installed near the socket outlet and
disconnection of the device should be easily accessible.
To completely disconnect this equipment from the AC Mains,
disconnect the power supply cord plug from the AC receptacle.
Please follow all instructions of the manufacturer for installation.
Do not install in a confined space.
Do not open the unit – risk of electric shock.
CAUTION!
Please note: Changes or modifications to the device not express-
ly approved in this manual could void your authority to operate the
instrument.
Servicing
There are no user-serviceable parts inside.
All service must be performed by qualified personnel.
CAUTION: TO REDUCE THE RISK OF ELECTRIC SHOCK, DO NOT
REMOVE THE COVER. NO USER SERVICEABLE PARTS INSIDE.
REFER SERVICING TO QUALIFIED PERSONNEL ONLY.

8
Nowsonic Autark ID07
User manual
GB www.nowsonic.com
Introduction
Thank you very much for purchasing the Nowsonic Autark ID07! Now-
sonic Autark ID07 is a powerful stage floodlight featuring advanced
LED technology that can be operated wired or, in favor of a simple ins-
tallation, remotely controlled. In addition, the unit can be powered via
an internal battery pack. Despite of the compact size of the unit, the 7
powerful RGBW LEDs offer a very high light intensity in four colors and
provide excellent color mixtures via 20 internal programs. As an alter-
native to the internal programs, the unit can be controlled externally
via the DMX 512 protocol, in Master/Slave mode or wirelessly via an IR
remote control. In addition, the unit features a LED display and specific
buttons for menu operation for local control.
Thanks to an internal 12 V battery pack and the IR receiver, Autark ID07
can be operated fully wirelessly in case it‘s difficult to set up wiring or
when installation must be done very quickly. With the remote control
and an optional DMX radio transmitter respectively, the Autark ID07
can be controlled wirelessly via the DMX 512 protocol.
For installation on the floor or to suitable brackets or trusses Autark
ID07 features a rugged double mounting clamp.
Features
Powerful 4 color stage flooder with advanced LED technology
Controllable via the DMX 512 protocol (4 modes: 1, 2, 6, 9 chan-
nels), in Master/Slave mode or via an IR remote control
Stand-alone Auto mode with 20 internal programs
Internal receiver for wireless remote control (IR remote supplied)
Internal battery pack for battery-backed operation up to 10 hours
Internal receiver for wireless DMX control
Electronic dimming from 0 to 100% without flickering
Double mounting clamp for installation on the floor or mounting
to suitable trusses
Applications
LED flooder for stage use and small music clubs
Mobile application for DJ sets

9
Nowsonic Autark ID07
User manual
GB
www.nowsonic.com
Outlets and controls on the rear panel
The following outlets and controls are available on the back panel of
Autark ID07:
1. Mains sockets / fuse
Here you connect the supplied IEC power cable. Using the IEC outlet
you can daisy-chain the mains to following devices. In addition, you
can replace the internal fuse here in case it should be blown due to
overload: use in every case a replacement fuse with identical specifi-
cations.
2. Menu and operating buttons
Autark ID07 is locally controlled via the buttons underneath the LED
display. Navigating the uppermost menu level is done via the MENU
button and the and buttons. For navigating the sub menu level,
press the ENTER button and again the and buttons. Press the
ENTER button in order to open a menu item or to confirm your entry.
Press again the ENTER or MENU button, to exit a sub menu.
3. WIRELESS SWITCH
This button activates the internal receiver of Autark ID07. In the I
position, Autark ID07 can be controlled either via the supplied remote
control or via a wireless DMX transmitter: the address for the internal
DMX receiver is entered via the menu.
8888 1
2
345
6
7
8
9

10
Nowsonic Autark ID07
User manual
GB www.nowsonic.com
4. BATTERY SWITCH
This button activates the operation of Autark ID07 via the internal
battery pack. The internal battery pack is automatically charged when
Autark ID07 is connected to the mains. The charging capacity of the
battery pack is displayed on the battery indicator (6).
5. Remote antenna
The antenna is connected to the internal DMX receiver of Autark ID07.
Unfold the antenna to improve the reception quality for remote con-
trolling.
6. Battery indicator
These LEDs show the current charging status of the internal battery
pack: when fully charged (all LEDs are lit), Autark ID07 can be operated
up to 10 hours without mains supply.
7. Signal LED
When the automatic sound control mode is active, this LED lights
depending on the sensitivity set in the S!Ln5 menu (see from page 7
on). The brighter the LED lights up, the higher the sensitivity is.
8. DMX IN / OUT sockets
These sockets allow to feed an external DMX signal to Autark ID07 and
to loop thru the incoming DMX signal to following Autark devices.
In Master/Slave mode, the Master device outputs the control signal
via its DMX OUT socket, while the Slave unit receives the signal via its
DMX IN socket.
NOTE: Please note that the last unit in a daisy chained configura-
tion via DMX or in Master/Slave mode should be terminated by a
termination resistor. Otherwise control problems may arise.
9. Earthing point
This screw allows to connect external devices with the ground of
Autark ID07.
Operation
You can operate Autark ID07 either in Stand-alone or Master/Slave
mode or wired and remotely controlled respectively via DMX. In Stand-
alone mode, the sound sensing is automatically activated and toggles
the internal programs depending on the detected music signal.

11
Nowsonic Autark ID07
User manual
GB
www.nowsonic.com
Wiring for Master/Slave mode
In Master/Slave mode, up to 16 Autark units can be linked whereat the
first unit serves as the master and all following units work as slaves. The
slave units receive their control messages from the master.
Proceed as follows:
1) Connect a XLR cable (not supplied) to the DMX OUT socket on
the rear panel of the master unit.
2) Connect the other (male) plug of the cable to the DMX IN
socket of the first slave device.
3) Connect additional slave units according to this pattern (Slave
DMX Out to Slave DMX In).
Next, you must set the devices to Master/Slave mode via their menus.
The operation in the menu is described from page 7.
Wiring in DMX mode
Using a DMX capable controller, you can control Autark ID07 over 1,
2, 6 or 9 channels in DMX mode. For wired control, proceed as follows:
1) Connect a standard high quality XLR audio cable (not supplied)
to the DMX out socket of the controller.
NOTE: A suitable XLR audio cable connects the two signal leads
to PIN 2 and 3, while ground is soldered to PIN 1. Please make
sure that the wiring doesn‘t change within the cables: a polarity
error or short circuit between the Pins will at least impair or com-
pletely stop the control functionality.
2) Connect the other (male) plug of the cable to the DMX IN
socket of the first Autark unit.
3) Connect additional Autark units according to this pattern (Slave
DMX OUT to Slave DMX IN).
Next, you must enter an individual DMX address for each Autark unit
via its menu. The operation in the menu is described from page 7.
Wireless control via DMX
Autark ID07 incorporates a DMX receiver that can receive and
implement control signals from a suitable DMX transmitter. For remo-
te control via DMX, proceed as follows:
1) Connect a XLR audio cable (not supplied) to the DMX out socket
of the controller.
2) Connect the other (male) plug of the cable to the DMX in socket
of an optional DMX transmitter (e. g. Nowsonic WRX-1).
3) Unfold the antenna of Autark ID07 to improve the reception
quality and activate the WIRELESS SWITCH: The LED display
should now switch from Addr to A001.
4) Now you must enter an individual DMX address for the Autark
unit via the menu. The operation in the menu is described from
page 7.
5) Finally, press the button at the external DMX transmitter for
establishing and setting up the connection.

12
Nowsonic Autark ID07
User manual
GB www.nowsonic.com
Control via the supplied remote control
Autark ID07 is supplied with an IR remote control for direct control of
various menu functions. You can operate the following functions via
the controls of the remote:
Button Function
POWER Here you can switch on the remote.
DMX Here you can activate the menu for entering the DMX address.
SLAVE Here you can activate the menu for toggling between Master and Slave mode.
AUTO 1, AUTO 2 Here you can activate the menu for selecting Auto mode 1 or 2.
SPEED Here you can activate the SPEED menu for entering the speed in Auto mode.
SOUND 1, SOUND 2 Here you can activate the menu SOUND 1 or 2.
UP, DOWN Using these two buttons, you can increase or decrease the current value in the active menu.
STROBE Here you can activate Strobe mode.
0, 1, 2, 3, 4, 6 Using these buttons, you can enter numeric values in Program mode.
5W, 7R, 8G, 9B Using these buttons, you can select the corresponding color (white, red, green, blue).

13
Nowsonic Autark ID07
User manual
GB
www.nowsonic.com
Operation with battery
Autark ID07 integrates a battery pack that is automatically charged
when connected to the mains. The battery pack allows for a battery-
backed operation for up to 10 hours. To operate Autark ID07 with
batteries, just pull the mains plug before powering the unit: after
powering up, the current charging status of the battery pack is shown
via the LEDs of the battery indicator.
In case of a malfunction, you can access and exchange the internal
battery pack via service cover on the back panel. Please contact first
the dealer from whom you have purchased the device.
Operation via the menu
You can operate Autark ID07 either via the menu display on the back
panel or via the supplied remote control.
For menu operation proceed as follows:
Select the desired menu item by repeatedly pressing the MENU
button. Alternatively, press the MENU button once and select the
desired menu item via theandbuttons.
Open the selected menu by pressing the ENTER button: the
current setting flashes in the display and can now be modified.
Finally, the display returns to the previously selected menu item.
In order to adapt the settings, proceed as follows:
Entering the DMX address
Using the and buttons, select the desired DMX
address (A001 to A512).
Confirm your entry by pressing the ENTER button.
Choosing the Auto mode
Using the and buttons, select the internal program
(At01 to At20) or the m1 A5t status (Master).
Confirm your entry by pressing the ENTER button.
Entering the speed for Auto mode
Using the and buttons, enter the desired speed
(SP00 = off, SP01 = maximum, SP31 = minimum).
Confirm your entry by pressing the ENTER button.
Choosing Slave mode
Using the and buttons, select the SLA entry to
operate the Autark ID07 in Slave mode with another
Master device.
Confirm your entry by pressing the ENTER button.
Choosing the DMX channel mode
Using the and , select the desired DMX channel
mode. The (K1, (K2, (K6 and (K9 options are available.
For more information about the DMX channels read from
page 9.
Confirm your entry by pressing the ENTER button.
SPED
SP00
SP31
1
2
6
9
AST

14
Nowsonic Autark ID07
User manual
GB www.nowsonic.com
Setting the music sensitivity
Using the and buttons, select the desired sensitivity
for music control in Auto mode (low = 1, high = 100).
Otherwise you can deactivate the music control feature
(off): The sensitivity is also displayed via the SIGNAL LED
next to the battery indicator.
Confirm your entry by pressing the ENTER button.
LED mode for music control
Using the and buttons, select the desired LED mode
for the Auto mode (Sov1 = steady light, Sov2 = strobe,
Sov3 = fade in, Sov4 = fade out).
Confirm your entry by pressing the ENTER button.
Choosing Master mode
Using the and buttons, select the on entry to
operate the Autark ID07 in Master mode with (one) other
slave devices.
Confirm your entry by pressing the ENTER button.
Setting the LED brightness
Using the and buttons, set the desired overall
brightness for all 7 LEDs (off = 0, maximum = 255).
Confirm your entry by pressing the ENTER button.
Setting the light intensity for the color mode Red
Using the and buttons, set the desired light intensity
for the red color component (off = 0, maximum = 255).
Confirm your entry by pressing the ENTER button.
Setting the light intensity for the color mode Green
Using the and buttons, set the desired light intensity
for the green color component (off = 0, maximum =
255).
Confirm your entry by pressing the ENTER button.
Setting the light intensity for the color mode Blue
Using the and buttons, set the desired light intensity
for the blue color component (off = 0, maximum = 255).
Confirm your entry by pressing the ENTER button.
Setting the light intensity for the color mode White
Using the and buttons, set the desired light intensity
for the white color component (off = 0, maximum =
255).
Confirm your entry by pressing the ENTER button.
Turning the LEDs on/o
Using the and buttons, select the desired status (off
= no, on = YP(S).
Confirm your entry by pressing the ENTER button.
Setting the duration for the LED display
Using the and buttons, set the lighting duration
for the Autark display: when set to on, the display lights
continuously. With the other options (30, 60, 90, 120)
you can set the duration until the display goes off.
Confirm your entry by pressing the ENTER button.
1
100
OFF
SENS
SOV1
SOVD
SOV4
AST
ON
OFF
ALL
0
255
RED
R000
R255
GREE
G000
G255
BLUE
B000
B255
U000
U255
BL D
ON
LED
90
120
30
60
ON

15
Nowsonic Autark ID07
User manual
GB
www.nowsonic.com
Displaying the internal temperature
When you choose this option, the display shows the
internal temperature of Autark ID07.
Exit the display by pressing the ENTER button.
Performing various test routines
Using the and buttons, select the desired test (1to
5) or quit test mode (off).
Confirm your entry by pressing the ENTER button.
Setting the reading direction of the display
Using the and , select the desired status: with the
diSP option, the menu entries are displayed normal,
while the dSiP option turns the display upside down
(180°). This helps to simplify the menu operation regard-
less of mounting orientation.
Confirm your entry by pressing the ENTER button.
Displaying the version number
When you choose this option, the current version num-
ber is immediately displayed.
Exit the display by pressing the ENTER button.
Restoring the default settings
When you choose this option, pressing the ENTER
button restores the default settings.
Choosing the internal color mode
Using the and buttons, you can select one of the 51
internal color schemes (1to 52). Confirm your entry by
pressing the ENTER button.
Resetting the Wireless DMX signal
When you choose this option, pressing the ENTER
button resets the internal radio receiver.
1
5
OFF
DISP
DISP
DISP
U 17
0
OLO
O01
RELE 0
21

16
Nowsonic Autark ID07
User manual
GB www.nowsonic.com
Control messages in the DMX modes
Using the DMX protocol, you can control Autark ID07 either via 1, 2, 6
or 9 channels. The DMX mode as well as the DMX address is set in the
menu (see previous section).
The following table lists the assignment between the DMX channels
and the functionality:
Channel Value Function
Channel 1 0–255 0 = off, 1–255 = various color macros
Channel Value Function
Channel 1 0–255 0 = off, 1–255 = Master dimmer
Channel 2 0–255 0 = off, 1–255 = various color macros
Channel Value Function
Channel 1 0–255 Master dimmer (0% to 100%)
Channel 2 0–255 Dimmer red (0% to 100%)
Channel 3 0–255 Dimmer green (0% to 100%)
Channel 4 0–255 Dimmer blue (0% to 100%)
Channel 5 0–255 Dimmer white (0% to 100%)
Channel 6 0–8
9–255
Full brightness, Strobe off Strobe on, speed
increases
Mode 1: 1 channel
Mode 2: 2 channels
Mode 3: 6 channels

17
Nowsonic Autark ID07
User manual
GB
www.nowsonic.com
Channel Value Function
Channel 1 0–255 Master dimmer (0% to 100%)
Channel 2 0–255 Dimmer red (0% to 100%)
Channel 3 0–255 Dimmer green (0% to 100%)
Channel 4 0–255 Dimmer blue (0% to 100%)
Channel 5 0–255 Dimmer white (0% to 100%)
Channel 6 0–255 Full brightness, Strobe off Strobe on, speed
increases
Channel 7
0–10 Default
11–20 Automatic dimming (upwards)
21–30 Automatic dimming (downwards)
31–40 Automatic dimming (upwards/downwards)
41–50 4 color fade
51–60 4 color strobe
61–70 19 color strobe
71–80 15 color strobe
81–90 5 color fade
91–100 Red, green, and white fade
101–110 Red, blue, and white fade
111–120 Green, blue, and white fade
> 120 Color changes via music control
Channel 8 0–255 Speed for special functions or sound sensitivity;
auto program speed adjust
Channel 9 0–127
128–255
Static color changes
Strobe color changes (Sound mode)
Mode 4: 9 channels Specications
Light source 7 × 4 color LEDs (red, green, blue, white,
8W each)
Light intensity min. 2.200 lux @ 2 m
Operating voltage 100–240VAC ~, 50–60Hz
Rec. amperage 0.5A @ 110V
Fuse T3 15A
Power consumption 50W
Battery capacity 12V, 12.000mAh
Battery recharging time approx. 4 hours
Battery operating time approx. 10 hours (max. 2–3 colors)
Control DMX, wired or via IR
DMX connectors 3-pin XLR
DMX channels up to 9 channels
Electronic dimmer 0 to 100% without flickering
Tilting angle 360°, manually
Weight 3.8 kg (w/o packaging)
4.8 kg (incl. packaging)
Dimensions 240 × 240 × 235 mm (H ×W × D, w/o
clamp)

18
Nowsonic Autark ID07
User manual
GB www.nowsonic.com
Scope of supply
Autark ID07: 1 pc
Power cord: 1 pc
Remote control: 1 pc
User manual: 1 pc
Disclaimer
Nowsonic has taken all possible steps to ensure that the information
given here is both correct and complete.
In no event can Nowsonic accept any liability or responsibility for any
loss or damage to the owner of the equipment, any third party, or any
equipment which may result from use of this manual or the equip-
ment which it describes.
Servicing
If you have any question or encounter technical issues, please first
contact your local dealer from whom you have purchased the device.
In case servicing is required, please contact your local dealer. Other-
wise you may contact us directly. Please find our contact data on our
website under www.nowsonic.com.
NOTE: We take great care in packing the device in a well protec-
ted box at the factory, so any shipping damage is very unlikely.
However, should this happen please contact your supplier imme-
diately to report the damage. We recommend to keep the original
packing materials in case you need to ship or transport the device
at a later date.
Legal information
Copyright for this user manual © 2014: Nowsonic
Product features, specifications and availability are subject to change
without prior notice.
Edition v1.0, 05/2014
Part no. 310920

Nowsonic Autark ID07
Bedienungsanleitung
www.nowsonic.com

20
Nowsonic Autark ID07
Bedienungsanleitung
DE www.nowsonic.com
WICHTIGE SICHERHEITSHINWEISE
1) Lesen Sie diese Anleitung.
2) Bewahren Sie diese Anleitung auf.
3) Beachten Sie alle Warnungen.
4) Befolgen Sie alle Anweisungen.
5) Betreiben Sie dieses Gerät nicht in unmittelbarer Nähe von
Wasser.
6) Verwenden Sie zum Reinigen des Geräts ausschließlich ein
trockenes Tuch.
7) Halten Sie die Lüftungsschlitze frei! Folgen Sie bei der Installation
den Anweisungen des Herstellers.
8) Stellen Sie das Gerät nicht in der Nähe von Heizkörpern, Wärme-
speichern, Öfen oder anderer Wärmequellen auf.
9) Kleben Sie in keinem Fall den Schutzkontakt des Steckers ab. Ein
verpolungssicherer Stecker besitzt zwei Kontakte, von denen ein
Kontakt breiter ist als der andere. Ein Schukostecker besitzt zwei
Kontakte und einen dritten Erdungskontakt. Der breitere Kontakt
des verpolungssicheren Steckers bzw. der Erdungskontakt
des Schukosteckers dient Ihrer Sicherheit. Sollte der Stecker
des mitgelieferten Netzkabels nicht in Ihre Steckdose passen,
besorgen Sie sich im Fachhandel ein passendes Kabel.
10) Treten Sie nicht auf das Kabel, knicken Sie das Kabel nicht und
behandeln Sie Stecker und Buchsen besonders vorsichtig.
11) Verwenden Sie ausschließlich Zubehör, das vom Hersteller für
das Gerät vorgesehen ist.
12) Verwenden Sie nur Ständer, Stative oder Tische, die den Anforde-
rungen des Herstellers entsprechen oder die zum Lieferumfang
des Geräts gehören. Seien Sie beim Transport vorsichtig, um
Verletzungen durch verrutschende oder fallende Gegenstände
zu vermeiden.
13) Ziehen Sie während eines Gewitters den Netzstecker; ziehen
Sie den Netzstecker auch, wenn Sie das Gerät längere Zeit nicht
verwenden.
14) Wenden Sie sich im Service-Fall an qualifiziertes Personal. Lassen
Sie das Gerät von einem Fachmann überprüfen, wenn z.B.
Netzkabel oder -stecker beschädigt sind, wenn Flüssigkeit oder
Gegenstände in das Gehäuse gelangt sind, das Gerät Regen oder
Feuchtigkeit ausgesetzt war, das Gerät fallen gelassen wurde,
nicht ordnungsgemäß funktioniert oder anderweitig beschädigt
wurde.
Table of contents
Languages:
Other Nowsonic Floodlight manuals

