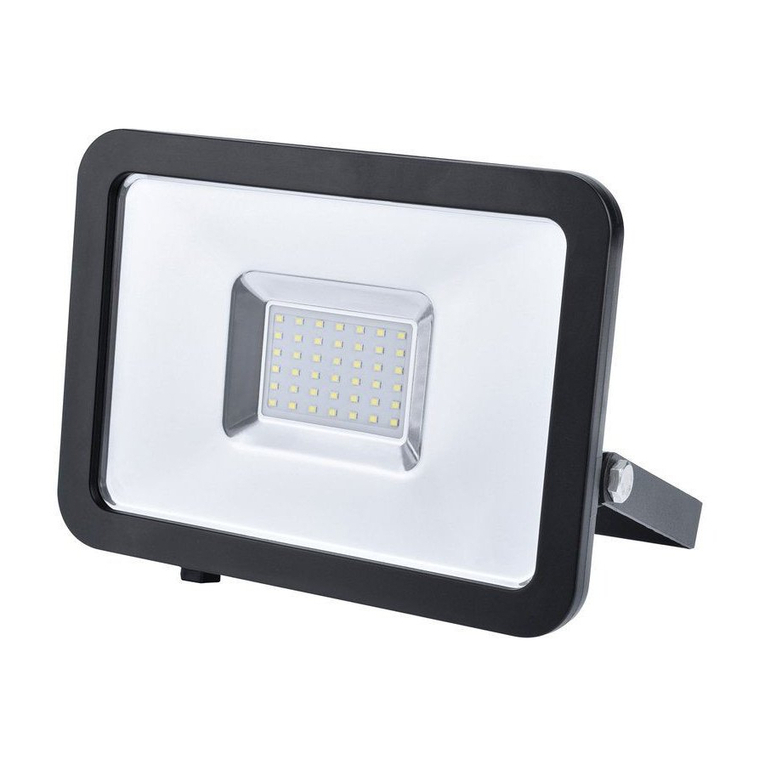
Nowsonic AUTARK OD09 User manual

LED floodlight
User manual
Bedienungsanleitung
Mode d‘emploi
Manual del usuario
Podręcznik użytkownika
AUTARK OD09


User manual 4
Bedienungsanleitung 16
Mode d‘emploi 28
Instrucciones de uso 40
Instrukcja obsługi 52

4
Nowsonic Autark OD09
User manual
GB www.nowsonic.com
IMPORTANT SAFETY INSTRUCTIONS
1) Read these instructions.
2) Keep these instructions.
3) Heed all warnings.
4) Follow all instructions.
5) Do not use this apparatus near water.
6) Clean only with dry cloth.
7) Do not block any of the ventilation openings! Install in
accordance with the manufacturer’s instructions.
8) Do not install near any heat sources such as radiators, heat
registers, stoves, or other apparatus (including amplifiers) that
produce heat.
9) Do not defeat the safety purpose of the polarized or grounding-
type plug. A polarized plug has two blades with one wider than
the other. A grounding type plug has two blades and a third
grounding prong. The wide blade or the third prong is provided
for your safety. If the provided plug does not fit into your outlet,
consult an electrician for replacement of the obsolete outlet.
10) Protect the power cord from being walked on or pinched, parti-
cularly at plugs, convenience receptacles, and the point where
they exit from the apparatus.
11) Only use attachments/accessories specified by the manufacturer.
12) Use only with a cart, stand, tripod, bracket, or table specified by
the manufacturer, or sold with the apparatus. When a cart is used,
use caution when moving the cart/apparatus combination to
avoid injury from tip-over.
13) Unplug this apparatus during lightning storms or when unused
for long periods of time.
14) Refer all servicing to qualified service personnel. Servicing is
required when the apparatus has been damaged in any way,
such as power-supply cord or plug is damaged, liquid has been
spilled or objects have fallen into the apparatus, the apparatus
has been exposed to rain or moisture, does not operate normally,
or has been dropped.

5
Nowsonic Autark OD09
User manual
GB
www.nowsonic.com
The lightning flash with an arrowhead symbol within an equi-
lateral triangle is intended to alert the user to the presence of
uninsulated “dangerous voltage”within the product’s enclosure
that may be of sufficient magnitude to constitute a risk of
electric shock to persons.
The exclamation point within an equilateral triangle is intended
to alert the user to the presence of important operating and
maintenance(servicing) instructions in the literature accom-
panying the product.
WARNING:
To reduce the risk of fire or electric shock, do not expose this
apparatus to rain or moisture.
Do not expose this equipment to dripping or splashing and
ensure that no objects filled with liquids, such as vases, are placed
on the equipment.
This apparatus must be earthed.
Use a three-wire grounding type line cord like the one supplied
with the product.
Be advised that different operating voltages require the use of
different types of line cord and attachment plugs.
Always observe the local safety regulations.
This equipment should be installed near the socket outlet and
disconnection of the device should be easily accessible.
To completely disconnect this equipment from the AC Mains,
disconnect the power supply cord plug from the AC receptacle.
Please follow all instructions of the manufacturer for installation.
Do not install in a confined space.
Do not open the unit – risk of electric shock.
CAUTION!
Please note: Changes or modifications to the device not expressly
approved in this manual could void your authority to operate the
instrument.
Servicing
There are no user-serviceable parts inside.
All service must be performed by qualified personnel.
CAUTION: TO REDUCE THE RISK OF ELECTRIC SHOCK, DO NOT
REMOVE THE COVER. NO USER SERVICEABLE PARTS INSIDE.
REFER SERVICING TO QUALIFIED PERSONNEL ONLY.

6
Nowsonic Autark OD09
User manual
GB www.nowsonic.com
Introduction
Thank you very much for purchasing the Nowsonic Autark OD09! The
Nowsonic Autark OD09 is a powerful stage floodlight featuring up-to-
date LED technology, that can be operated wired or remote controlled.
Thanks to its internal battery pack, the unit can be operated up to 12
hours (with 2–3 colors) without mains connection. The nine 8 W LEDs
provide a very high light intensity in the colors red, green, blue, and
white. The 10 internal programs generate appealing color mixtures for
various application profiles. As an alternative to the internal programs,
an external control can be set up for three modes with 1, 4 or 8 chan-
nels via the DMX 512 protocol: the unit receives its control signal eit-
her wired or wirelessly from the internal receiver. Of course, the Autark
OD09 can also be operated in Master/Slave mode with other Autark
units. Additional control options are available by using an optional re-
mote control. For operating the menus, Autark OD09 provides a LED
display and touch sensitive menu buttons.
Thanks to the internal 12 V battery pack and the WDMX receiver,
Autark OD09 can be operated fully wirelessly in case it‘s difficult to
set up wiring or when installation must be done very quickly. Autark
OD09 has a very stable base for floor installation with locking screws
for a flexible orientation.
Features
Powerful 4 color stage flooder with advanced LED technology
Wired or wireless control via the DMX 512 protocol (three modes
with 1, 4 or 8 channels), in Master/Slave mode or via an IR remote
control
Auto mode with 10 internal programs
Internal wireless receiver for WDMX-control messages
Internal battery pack for stand-alone operation up to 12 hours
Electronic dimming from 0 to 100% without flickering
Stable base for floor installation
Applications
Powerful LED floodlight for stage applications and music clubs
Mobile flooder for DJs

7
Nowsonic Autark OD09
User manual
GB
www.nowsonic.com
Connectors and controls
The following outlets and indicators are available on the front panel of
Autark OD09:
1. LED section
The nine LEDs of Autark OD09 provide a maximum power of 8 watts
each and generate the colors red, green, blue, and white. Up to 48 LED
combinations are available.
NOTE: In battery operation, the LED power is limited to 5 watts to
ensure the longest possible operation time.
2. Battery indicator
The LEDs in the Battery Indicator section display the charging status
of the internal battery: all LEDs are lit when fully charged. In this case,
Autark OD09 can be operated up to 12 hours (with two or three colors)
without mains supply.
3. Menu and operating buttons
Autark OD09 is locally controlled via the touch buttons underneath
the LED display. Navigating the uppermost menu level is done via the
touch sensitive buttons MENU, and . For navigating the sub menu
level, press the ENTER button and again the and buttons. Press
the ENTER button in order to open a menu item or to confirm your
entry. Press again the ENTER or MENU button, to exit a sub menu. The
operation in the menus is described from page 7.
1
23
8888

8
Nowsonic Autark OD09
User manual
GB www.nowsonic.com
NOTE: When you tap one of the touch sensitive buttons, the
lights of Autark OD09 are immediately dimmed in order to protect
your eyes and to enhance visibility. When the operation is finished,
the LEDs reach full brightness after a few seconds.
4. SWITCH
This switch toggles Autark OD09 on and off. The internal battery of
Autark OD09 will only be charged when the unit is switched on.
In order to operate Autark OD09 with the internal battery pack, turn
on the unit with this switch without connecting the supplied power
cable to the mains supply. The charging capacity of the battery is
displayed on the battery charging indicator (2).
5. Power connector
The supplied CEE mains adapter is plugged to this connector. Use only
the supplied mains cable. If it gets lost, please contact the dealer from
whom you have purchased your Autark unit.
6. DMX IN socket
This connector allows to feed an external DMX signal to Autark OD09.
Autark OD09 can be controlled from an external DMX controller or
another Autark unit. In both cases, the Autark unit must be configured
as a slave device via the menu.
7. VALVE
This valve permanently vents the housing of the Autark OD09, so that
no heat accumulation occurs.
NOTE: Please make sure that the valve isn‘t blocked or covered, so
that an appropriate ventilation is guaranteed.

9
Nowsonic Autark OD09
User manual
GB
www.nowsonic.com
8. ANTENNA
The integrated antenna is connected to the internal WDMX receiver
of Autark OD09. Wireless operation is set up via the menu (see from
page 7).
9. DMX OUT socket
Via this connector you can feed the DMX signal of the Autark OD09 to
a following Autark unit: the source can either be the internal program
mode or a DMX control signal that is input via the DMX IN socket or
wirelessly via the internal WDMX receiver. When the internal program
mode is the source, the Autark unit must be configured as the Master
(via the menu). Otherwise you must select the slave mode.
NOTE: Please note that the last unit in a daisy chained configura-
tion via DMX or in Master/Slave mode should be terminated by a
termination resistor. Otherwise control problems may arise.
Operation
You can operate Autark OD09 either in Stand-alone or Master/Slave
mode or wired and remotely controlled respectively via DMX. In Stand-
alone mode, the sound sensing is automatically activated and toggles
the 10 internal programs depending on the detected music signal.
Wiring for Master/Slave mode
In Master/Slave mode, multiple Autark units can be linked whereat the
first unit serves as the master and all following units work as slaves. The
slave units receive their control messages from the master.
Proceed as follows:
1) Connect a XLR cable (not supplied) to the DMX OUT socket on
the rear panel of the master unit.
2) Connect the other (male) plug of the cable to the DMX IN
socket of the first slave device.
3) Connect additional slave units according to this pattern (Slave
DMX OUT to Slave DMX IN).
NOTE: Please note that the last unit in a daisy chained configura-
tion in Master/Slave mode should be terminated by a termination
resistor. Otherwise control problems may arise.
Next, you must set the devices to Master/Slave mode via their menus.
The operation in the menu is described from page 7.
Wiring in DMX mode
In combination with a DMX-capable controller, you can control one or
multiple Autark units in DMX mode via 1, 4, or 8 channels. For control
via DMX, proceed as follows:
1) Connect a standard high quality XLR audio cable (not supplied)
to the DMX out socket of the controller.

10
Nowsonic Autark OD09
User manual
GB www.nowsonic.com
NOTE: A suitable XLR audio cable connects the two signal leads
to PIN 2 and 3, while ground is soldered to PIN 1. Please make sure
that the wiring doesn‘t change within the cables: a polarity error
or short circuit between the Pins will at least impair or completely
stop the control functionality.
2) Connect the other (male) plug of the cable to the DMX IN
connector of the first Autark unit.
3) Connect additional Autark units according to this pattern (Slave
DMX OUT to Slave DMX IN).
NOTE: Please note that the last unit in a daisy chained configu-
ration via DMX should be terminated by a termination resistor.
Otherwise control problems may arise.
Next, you must enter an individual DMX address for each Autark unit
via its menu. The operation in the menu is described from page 7.
Wireless control via WDMX
Autark OD09 incorporates a WDMX receiver that can receive and
implement control signals from a suitable WDMX transmitter. For
remote control via WDMX, proceed as follows:
1) Connect a XLR audio cable (not supplied) to the DMX out socket
of the controller.
2) Connect the other (male) plug of the cable to the DMX In socket
of an optional WDMX transmitter (e. g. Nowsonic WRX-1).
3) Turn on the internal WDMX receiver of the Autark unit by
choosing ON and finally FUN in the U-D menu.
4) Next, set the DMX address of the Autark unit to A001 via the
Addr menu.
5) Finally, press the button at the external WDMX transmitter for
establishing and setting up the connection.
6) The connection is established, when the dot in the lower right of
the display of the Autark unit flashes.
Operation with battery
Autark OD09 integrates a battery pack which is automatically charged
when the unit is connected to the mains and turned on. Using the
internal battery, the unit can be operated up to 12 hours with two or
three colors. However, the power of the LEDs is automatically limited
to 5 watts.To operate Autark OD09 with the battery, just pull the mains
plug before powering the unit: after powering up, the current char-
ging status of the battery pack is shown via the LEDs of the battery
indicator.
In case of a malfunction, you can access and exchange the internal
battery pack via service cover on the back panel. Please contact first
the dealer from whom you have purchased the device.

11
Nowsonic Autark OD09
User manual
GB
www.nowsonic.com
Operation via the menu
You can operate Autark OD09 via the DMX control or via the touch
sensitive menu buttons underneath the display on the front panel.
For menu operation proceed as follows:
Select the desired menu item by repeatedly pressing the MENU
button. Alternatively, press the MENU button once and select the
desired menu item via the and buttons.
Open the selected menu by pressing the ENTER button: the
current setting flashes in the display and can now be modified.
Finally, the display returns to the previously selected menu item.
In order to adapt the settings, proceed as follows:
Choosing the Strobe mode
Using the and buttons, select the menu item Stro.
Confirm your entry by pressing the ENTER button.
Using the and buttons, select the desired strobe
mode (St00 to St30).
Confirm your entry by pressing the ENTER button.
Setting the light intensity for the color mode White,
Blue, Green or Red
Using the and buttons, select the menu item uhit /
blue / Green / red.
Confirm your entry by pressing the ENTER button.
Using the and buttons, set the desired light intensity
for the white / blue / green / red color component (off =
000, maximum = 255).
Confirm your entry by pressing the ENTER button.
Choosing the internal color mode
Using the and buttons, you can select one of the 51
internal color schemes (1to 51).
Confirm your entry by pressing the ENTER button.
Choosing the Auto mode
Using the and buttons, select the internal program
(AUT0 to AUt9).
Confirm your entry by pressing the ENTER button.
Using the and buttons, set the desired speed for the
changing of the programs (slow = SP1, fast = SP9).
Confirm your entry by pressing the ENTER button.
Choosing the DMX channel mode
Using the and , select the desired DMX channel
mode. The 1(K, 4(K and 8(K are available. For more
information about the DMX channels read from page 9.
Confirm your entry by pressing the ENTER button.
Entering the DMX address
Using the and buttons, select the desired DMX
address (A001 to A512).
Confirm your entry by pressing the ENTER button.
Activating the password protection
Using the and buttons, select the desired option
(0n = protection enabled, 0ff = protection disabled). In
the 0n position you must enter a password (see later).
Confirm your entry by pressing the ENTER button.
GREE
G000
G255
BLUE
B000
B255
Stat
RED
R000
R255
U000
U255
Stro
St00
St30
Colo
Co01
Co51
AUTo
AUT0
AUt9
SP 1
SP 9
1
4
8
0n
Pasd
0ff

12
Nowsonic Autark OD09
User manual
GB www.nowsonic.com
When the password protection for Autark OD09 is enabled, you must
enter the newly defined password before the menu settings can be
edited: this protects the Autark OD09 against direct access.
To disable the password protection and to edit the menu of Autark
OD09, proceed as follows:
1) Tap the ENTER button and swipe from left to right over all
buttons.
2) When 11--, 1---, 1-1- or 1--1 is displayed, you must repeat
the process: the menu is only released, when the display shows
111- or 1111. If entered correctly, a tone will sound.
Activating the internal W-DMX receiver
Using the and buttons, select the desired option (0n
= receiver enabled, 0ff = receiver disabled7off). When
you confirm 0n with the ENTER button, the display
reads fun and the receiver is activated.
Confirm your entry by pressing the ENTER button.
Displaying the operating time
Using the and buttons, select the item u10. When
you confirm u10 with the ENTER button, the current
operating time is displayed.
Exit the display by pressing the ENTER button.
Choosing Slave mode
Using the and buttons, select the SLA entry to ope-
rate the Autark OD09 in Slave mode with another Master
device. When you don‘t select SLA, the Autark OD09
always operates in master mode.
Confirm your entry by pressing the ENTER button.
u-d
0n Fun
0 f f
u 10
InF0 000h

13
Nowsonic Autark OD09
User manual
GB
www.nowsonic.com
Control messages in the DMX modes
Using the DMX protocol, you can control Autark OD09 either via 1, 4
or 8 channels. The DMX mode as well as the DMX address is set in the
menu (see previous section).
The following table lists the assignment between the DMX channels
and the functionality:
Channel Value Function
Channel 1 0All LEDs off
1–4 Color 1
5–9 Color 2
10–14 Color 3
… …
240–244 Color 48
245–249 Color 49
250–254 Color 50
255 Color 51
Mode 1: 1 DMX channel
Mode 2: 4 DMX channels
Channel Value Function
Channel 1 0–255 Red
Channel 2 0–255 Green
Channel 3 0–255 Blue
Channel 4 0–255 white

14
Nowsonic Autark OD09
User manual
GB www.nowsonic.com
Specications
Light source 9 × 4 color LEDs (red, green, blue, white,
8W each)
Operating voltage 100–240 V AC ~, 50–60 Hz
Rec. amperage 0.5A @ 230 V
Fuse T3 15 A
Power consumption 80W (115W while charging)
Battery capacity 12V, 20Ah
Battery recharging time approx. 10 hours
Battery operating time approx. 12 hours (max. 2–3 colors)
Control DMX, wired or wireless (WDMX); via
remote control (optional)
DMX connectors 3-pin XLR
DMX channels up to 8 channels
Electronic dimmer 0 to 100% without flickering
Protection class IP66
Tilting angle 220°, manually
Weight 10 kg (w/o packaging)
13 kg (incl. packaging)
Dimensions 345 × 360 × 160 mm (H × W × D, w/o
packaging)
475 × 325 × 320 mm (H × W × D, incl.
packaging)
Mode 3: 8 DMX channels
Channel Value Function
Channel 1 0–255 Master dimmer (0% to 100%)
Channel 2 0–255 Dimmer red (0% to 100%)
Channel 3 0–255 Dimmer green (0% to 100%)
Channel 4 0–255 Dimmer blue (0% to 100%)
Channel 5 0–255 Dimmer white (0% to 100%)
Channel 6 0–255 Strobe effect
Channel 7 0All LEDs off
1–27 Auto 0
28–55 Auto 1
56–83 Auto 2
84–111 Auto 3
112–139 Auto 4
149–167 Auto 5
168–195 Auto 6
196–223 Auto 7
224–251 Auto 8
252–255 Auto 9
Channel 8 0–255 Speed (fast – slow)

15
Nowsonic Autark OD09
User manual
GB
www.nowsonic.com
Scope of supply
Autark OD09: 1 pc
Power cord: 1 pc
User manual: 1 pc
Disclaimer
Nowsonic has taken all possible steps to ensure that the information
given here is both correct and complete.
In no event can Nowsonic accept any liability or responsibility for any
loss or damage to the owner of the equipment, any third party, or any
equipment which may result from use of this manual or the equip-
ment which it describes.
Servicing
If you have any question or encounter technical issues, please first con-
tact your local dealer from whom you have purchased the device.
In case servicing is required, please contact your local dealer. Other-
wise you may contact us directly. Please find our contact data on our
website under www.nowsonic.com.
NOTE: We take great care in packing the device in a well protec-
ted box at the factory, so any shipping damage is very unlikely.
However, should this happen please contact your supplier imme-
diately to report the damage. We recommend to keep the original
packing materials in case you need to ship or transport the device
at a later date.
Legal information
Copyright for this user manual © 2014: Nowsonic
Product features, specifications and availability are subject to change
without prior notice.
Edition v1.0, 06/2014
Part no. 310919

16
Nowsonic Autark OD09
Bedienungsanleitung
DE www.nowsonic.com
WICHTIGE SICHERHEITSHINWEISE
1) Lesen Sie diese Anleitung.
2) Bewahren Sie diese Anleitung auf.
3) Beachten Sie alle Warnungen.
4) Befolgen Sie alle Anweisungen.
5) Betreiben Sie dieses Gerät nicht in unmittelbarer Nähe von
Wasser.
6) Verwenden Sie zum Reinigen des Geräts ausschließlich ein
trockenes Tuch.
7) Halten Sie die Lüftungsschlitze frei! Folgen Sie bei der Installation
den Anweisungen des Herstellers.
8) Stellen Sie das Gerät nicht in der Nähe von Heizkörpern, Wärme-
speichern, Öfen oder anderer Wärmequellen auf.
9) Kleben Sie in keinem Fall den Schutzkontakt des Steckers ab. Ein
verpolungssicherer Stecker besitzt zwei Kontakte, von denen ein
Kontakt breiter ist als der andere. Ein Schukostecker besitzt zwei
Kontakte und einen dritten Erdungskontakt. Der breitere Kontakt
des verpolungssicheren Steckers bzw. der Erdungskontakt
des Schukosteckers dient Ihrer Sicherheit. Sollte der Stecker
des mitgelieferten Netzkabels nicht in Ihre Steckdose passen,
besorgen Sie sich im Fachhandel ein passendes Kabel.
10) Treten Sie nicht auf das Kabel, knicken Sie das Kabel nicht und
behandeln Sie Stecker und Buchsen besonders vorsichtig.
11) Verwenden Sie ausschließlich Zubehör, das vom Hersteller für
das Gerät vorgesehen ist.
12) Verwenden Sie nur Ständer, Stative oder Tische, die den Anforde-
rungen des Herstellers entsprechen oder die zum Lieferumfang
des Geräts gehören. Seien Sie beim Transport vorsichtig, um
Verletzungen durch verrutschende oder fallende Gegenstände
zu vermeiden.
13) Ziehen Sie während eines Gewitters den Netzstecker; ziehen
Sie den Netzstecker auch, wenn Sie das Gerät längere Zeit nicht
verwenden.
14) Wenden Sie sich im Service-Fall an qualifiziertes Personal. Lassen
Sie das Gerät von einem Fachmann überprüfen, wenn z.B.
Netzkabel oder -stecker beschädigt sind, wenn Flüssigkeit oder
Gegenstände in das Gehäuse gelangt sind, das Gerät Regen oder
Feuchtigkeit ausgesetzt war, das Gerät fallen gelassen wurde,
nicht ordnungsgemäß funktioniert oder anderweitig beschädigt
wurde.

17
Nowsonic Autark OD09
Bedienungsanleitung
DE
www.nowsonic.com
Das Blitzsymbol innerhalb eines gleichseitigen Dreiecks soll
den Anwender auf nicht isolierte Leitungen und Kontakte
im Geräteinneren hinweisen, an denen hohe Spannungen
anliegen, die im Fall einer Berührung zu lebensgefährlichen
Stromschlägen führen können.
Das Ausrufezeichen innerhalb eines gleichseitigen Dreiecks soll
den Anwender auf wichtige Bedienungs- sowie Servicehinweise
in den dazugehörigen Handbüchern aufmerksam machen.
WARNUNG:
Verringern Sie die Gefahr von Feuer und elektrischen Strom-
schlägen, indem Sie das Gerät nicht Regen oder Feuchtigkeit
aussetzen.
Stellen Sie keine Behälter mit Flüssigkeiten auf das Gerät, da diese
umkippen könnten und Wasser in das Gerät gelangen könnte.
Dieses Gerät muss geerdet sein.
Verwenden Sie ein geschirmtes Netzkabel mit drei Leitern wie das
mit dem Gerät ausgelieferte Netzkabel.
Beachten Sie, dass bei unterschiedlichen Betriebsspannungen
unterschiedliche Netzkabel und/oder Netzstecker benötigt
werden.
Beachten Sie zu jeder Zeit Ihre lokalen Sicherheitsvorschriften.
Stellen Sie das Gerät in der Nähe einer Netzsteckdose auf. Die
Steckdose sollte immer leicht zugänglich sein.
Um das Gerät völlig stromlos zu machen, ziehen Sie den
Netzstecker aus der Steckdose.
Befolgen Sie bei der Aufstellung immer alle Hinweise des
Herstellers.
Betreiben Sie das Gerät nicht unter beengten Platzverhältnissen.
Öffnen Sie das Gerät nicht – Gefahr eines Stromschlags.
VORSICHT!
Beachten Sie, dass alle Änderungen oder Modifikationen am Gerät,
die nicht ausdrücklich in diesem Handbuch eingeräumt werden, Ihre
Berechtigung zum Betrieb dieses Gerät aufheben können
Wartung
Es befinden sich keine vom Anwender zu wartenden Teile im
Gerät.
Lassen Sie das Gerät nur von qualifiziertem Fachpersonal
reparieren.
VORSICHT: ZUM SCHUTZ VOR STROMSCHLÄGEN DARF DAS GE
HÄUSE NICHT GEÖFFNET WERDEN. ES BEFINDEN SICH KEINE
VOM ANWENDER TAIUSCHBAREN BAUTEILE IM GERÄT. WENDEN
SIE SICH IM SERVICEFALL AN QUALIFIZIERTES FACHPERSONAL.

18
Nowsonic Autark OD09
Bedienungsanleitung
DE www.nowsonic.com
Einleitung
Vielen Dank, dass Sie sich für den Bühnenfluter Nowsonic Autark
OD09 entschieden haben. Der Nowsonic Autark OD09 ist ein beson-
ders leistungsfähiger Bühnenfluter in moderner LED-Technologie, der
kabelgebunden oder drahtlos betrieben werden kann. Dank eines in-
ternen Akkus ist ein vom Stromnetz unabhängiger Betrieb über eine
Dauer von bis zu 12 Stunden (bei 2 bis maximal 3 Farben) möglich. Die
neun 8-Watt-LEDs liefern eine besonders hohe Lichtleistung in den
Farben Rot/Grün/Blau/Weiß, über die 10 internen Programme lassen
sich ansprechende Farbmischungen für verschiedene Anwendungs-
profile erzeugen. Alternativ zu den internen Programmen kann eine
externe Steuerung im DMX 512 Protokoll über drei Modi mit 1, 4 oder
8 Kanälen eingerichtet werden: Die Steuerung erfolgt dann wahlweise
drahtgebunden oder dank des internen Empfängers drahtlos. Natür-
lich kann Autark OD09 auch herkömmlich im Master/Slave-Modus
mit anderen Autark-Einheiten betrieben werden, über eine optional
erhältliche Fernbedienung ergeben sich weitere Steuerungsmöglich-
keiten. Für die Bedienung in den Menüs bietet Autark OD09 am Gerät
ein LED-Display sowie berührungsempfindliche Touch-Controller für
die Menüführung.
Dank des integrierten 12 V Akkus und WDMX-Empfängers lässt sich
Autark OD09 vollständig kabellos betreiben, sofern eine Verlegung
der Kabel schwierig ist oder die Einrichtung besonders schnell gehen
muss. Für die Aufstellung auf dem Boden bietet Autark OD09 einen
besonders stabilen Sockel mit Feststellschrauben für eine flexible
Ausrichtung.
Merkmale
Leistungsstarker 4-Farb-Bühnen-Fluter in moderner LED-Technik
Kabelgebundene oder kabellose Steuerung über das DMX 512
Protokoll (drei Modi: 1, 4 und 8 Kanäle), im Master/Slave-Modus
oder über eine optionale IR-Fernbedienung
Automatik-Modus mit 10 internen Programmen
Integrierter Drahtlos-Empfänger für WDMX-Steuersignale
Integriertes Batteriemodul für einen unabhängigen Betrieb für bis
zu 12 Stunden
Elektronisches Dimmen im Bereich von 0 bis 100% ohne Flackern
Stabiler Standfuß zur Aufstellung auf dem Boden
Anwendungsbereiche
Leistungsstarker LED-Fluter für den Bühnenbetrieb und Musik-
Clubs
Mobiler Fluter für DJs

19
Nowsonic Autark OD09
Bedienungsanleitung
DE
www.nowsonic.com
Anschlüsse und Bedienelemente
Auf der Vorderseite von Autark OD09 stehen folgende Bedienelemen-
te und Anzeigen zur Verfügung:
1. LED-Sektion
Die neun LEDs von Autark OD09 sind für eine maximale Leistung von
8 Watt ausgelegt und können die Farben Rot, Grün, Blau und Weiß
erzeugen. Insgesamt sind bis zu 48 LEDs Kombinationen möglich.
ANMERKUNG: Im Batteriebetrieb wird die Leistung der LEDs auf
5 Watt begrenzt, um eine möglichst lange Laufzeit zu gewähr-
leisten.
2. Batterieladeanzeige
Auf den LEDs im Abschnitt Battery Indicator wird der aktuelle Lade-
zustand der internen Batterie dargestellt: Bei voller Ladung leuchten
alle LEDs. In diesem Fall können Sie Autark OD09 (mit zwei bis maxi-
mal drei Farben) bis zu 12 Stunden ohne Anschluss an das Stromnetz
betreiben.
3. Menü und Bedientasten
Über die Touch-Controller unter dem LED-Display nehmen Sie die
lokale Steuerung von Autark OD09 vor. Über die berührungsemp-
findlichen Tasten MENU und und navigieren Sie in der obersten
Ebene im Menü, mit der Taste ENTER und den Tasten und navi-
gieren Sie innerhalb der Untermenüs. Um einen Menüpunkt zu öffnen
oder eine Eingabe zu bestätigen, drücken Sie die Taste ENTER. Um
ein Untermenü zu verlassen, drücken Sie die Taste ENTER oder MENU
erneut. Die Bedienung in den Menüs ist ab Seite 7 beschrieben.
1
23
8888

20
Nowsonic Autark OD09
Bedienungsanleitung
DE www.nowsonic.com
ANMERKUNG: Wenn Sie eine der berührungsempfindlichen
Tasten antippen, werden die Leuchtmittel von Autark OD09 zum
Schutz Ihrer Augen und zugunsten einer besseren Sicht am Gerät
sofort abgedunkelt. Wenn die Bedienung abgeschlossen ist, errei-
chen die Leuchtmittel nach wenigen Sekunden wieder ihre volle
Leuchtkraft.
4. SWITCH
Mit diesem Schalter schalten Sie Autark OD09 ein bzw. aus. Die inter-
ne Batterie von Autark OD09 wird nur dann geladen, wenn das Gerät
eingeschaltet ist.
Um Autark OD09 über die interne Batterie zu betreiben, schalten Sie
die Einheit über diesen Schalter ein, ohne das mitgelieferte Netzkabel
an das Stromnetz anzuschließen. Die Ladekapazität der Batterie wird
auf der Batterieladeanzeige (2) dargestellt.
5. Netzanschlussbuchse
An dieser Kupplung schließen Sie das im Lieferumfang enthaltene
CEE-Netzkabel an. Verwenden Sie in jedem Fall das mitgelieferte Netz-
kabel: Im Fall eines Verlusts wenden Sie sich bitte an den Händler, bei
dem Sie Ihre Autark-Einheit gekauft haben.
6. Buchse DMX IN
Über diese Kupplung können Sie Autark OD09 über ein externes
DMX-Signal ansteuern.
Dabei kann Autark OD09 das Steuersignal wahlweise von einem exter-
nen DMX-Controller oder von einer anderen Autark-Einheit beziehen:
In beiden Fällen muss die Autark-Einheit über das Menü als Slave-Ein-
heit eingerichtet werden.
Table of contents
Languages:
Other Nowsonic Floodlight manuals
Popular Floodlight manuals by other brands
Larson Electronics
Larson Electronics LEDWP-LP-450-TRN-DCM instruction manual
Standard
Standard 67021 installation instructions
ADJ
ADJ WiFLY EXR HEX5 IP User instructions
Elation
Elation ELAR EXFLOOD Brochure & specs
Eye Lighting
Eye Lighting H373 Series Installation & maintenance
NightSearcher
NightSearcher SOLOSTAR user manual
