9
7. Program and Check number of times to repeat dialing in an alarm state
With the dialer in a programming state: press “6”to input alarm dialing times (0-9), press "ENTER”.
If “∩”displays it means the input was correct, and the dialer will return to state “5”.
Program how many times dialing should be repeated during an alarm state (initial setting is 5 times)
0= unlimited dialing;
1-9: repeat dialing 1-9 times
To find out how times the dialer is programmed to repeated dialing:
While in a programming state, press “3”and then “6”,
the 7-segment display will show the number of times it is programmed to repeat dialing, and then you will hear a
“Du”.
Note: for SMS alarm methods, the dialer will stop sending the message if the message is sent successfully. It is
not ruled by the programmed number of repeat dialing times.
8. Save and Check password:
To store a password (Initial password is 0911): the dialer supports a 4-digit private password.
If the private password will be 1234, while operating in a programming state:
press “PAUSE”→“1”“2”“3”“4”→“ENTER”and hear a tone “Du”which means the input is finished
(the password must be 4 digits, if less than 4 digits, system will display “E”and enter state
“5”..
Inquire password; in programming state (state “5”), press “3”and then “PAUSE”, monitor display password, and hear a
tone “Du’after display is done.
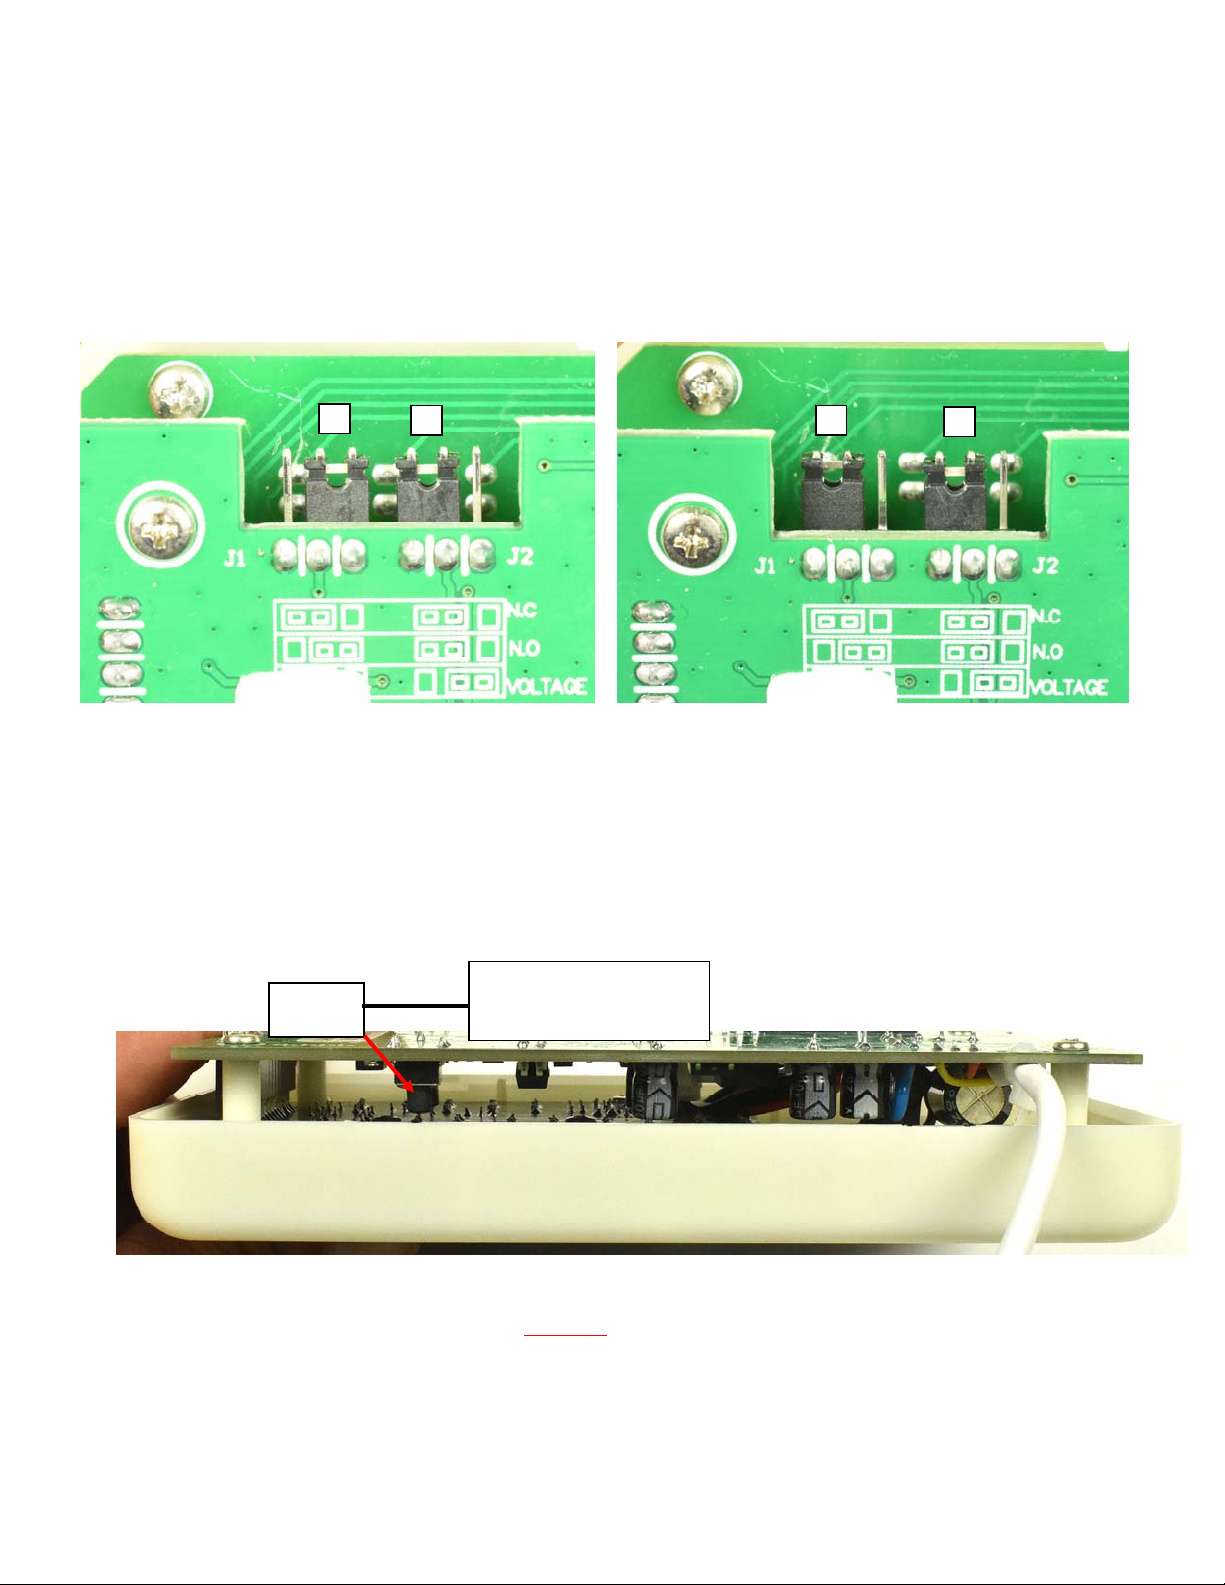
Note: If user loses the password, they can open the back cover of the dialer, power the Dialer ON, and press the
“RESET BUTTON" (see page 2). Password will be changed to the default one: 0911, but all other programmed
information (data) will not be lost.
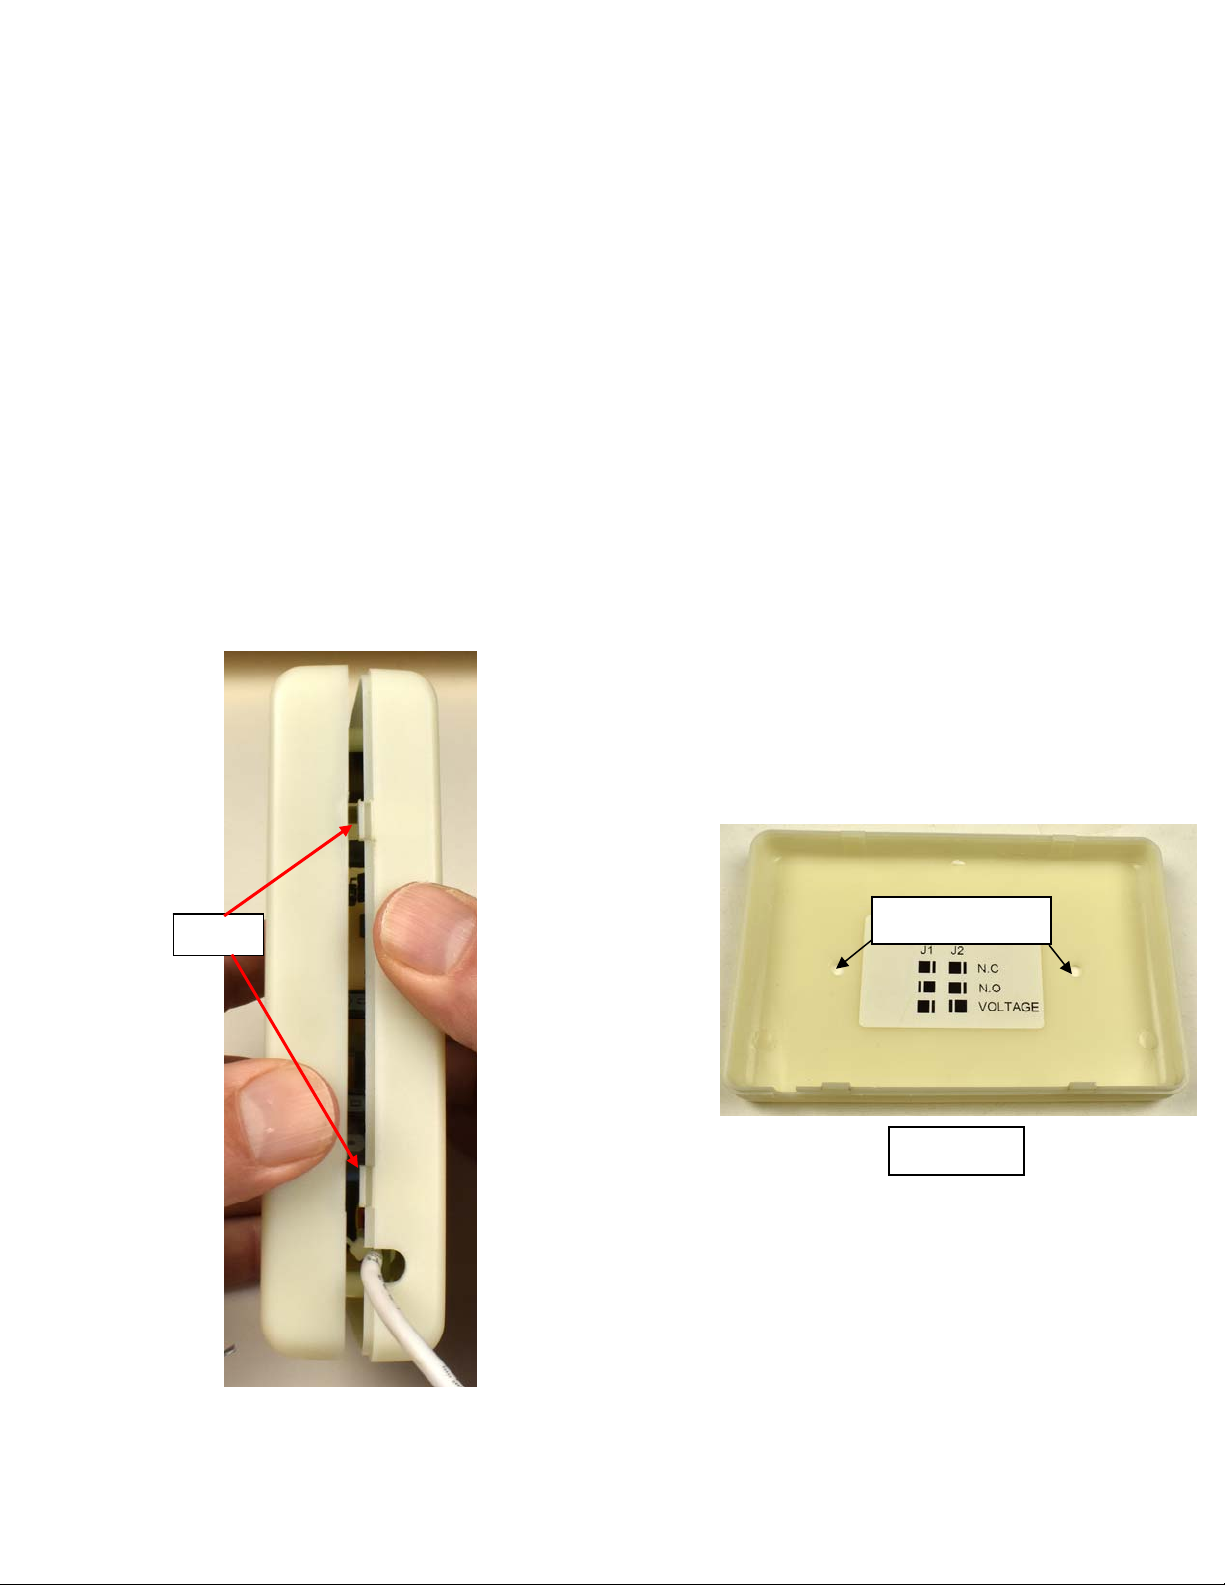
CAUTION: TO PRESS THE RESET BUTTON, INSERT A NON-CONDUCTIVE MATERIAL BETWEEN THE
CIRCUIT BOARDS WHILE THE UNIT IS ON AND PRESS THE BUTTON. USING A CONDUCTIVE
MATERIAL MAY SHORT THE CIRCUIT BOARD AND DAMAGE YOUR DIALER, VOIDING THE
WARRANTY.
9. Program and Check alarm trigger delay
You can control the delay time that the trigger must be present before the dialer will go into an alarm state and begin
dialing.
In programming state, press “7”and enter the triggering delay (0=0.5 second,1=1 second, 2=2 seconds,.....9=9
seconds), and then press “ENTER”.
If “∩”is displayed it means the input is correct and it will return to state 5.
To determine the presently programmed delay time:
In programming state, press “3”and “7”,
The 7-segment display will show triggering time , followed by a tone “Du”.
Note: the default trigger delay time is 0.5 second.
10. Stop Alarm Dialing on Dialer.
While triggered, the AUTO DIALER will automatically alarm by dialing the numbers saved. If a user wants to stop it, input
private code while “0”displayed. Suppose code is 1234, “1234”will be displayed instead of “0”after input. If the code is
correct, the alarm will be withdrawn followed by the “Du…”sound, and the dialer will return to standby mode.
The User must input the 4 digit password correctly. An incorrect password will fail to withdraw the alarm.