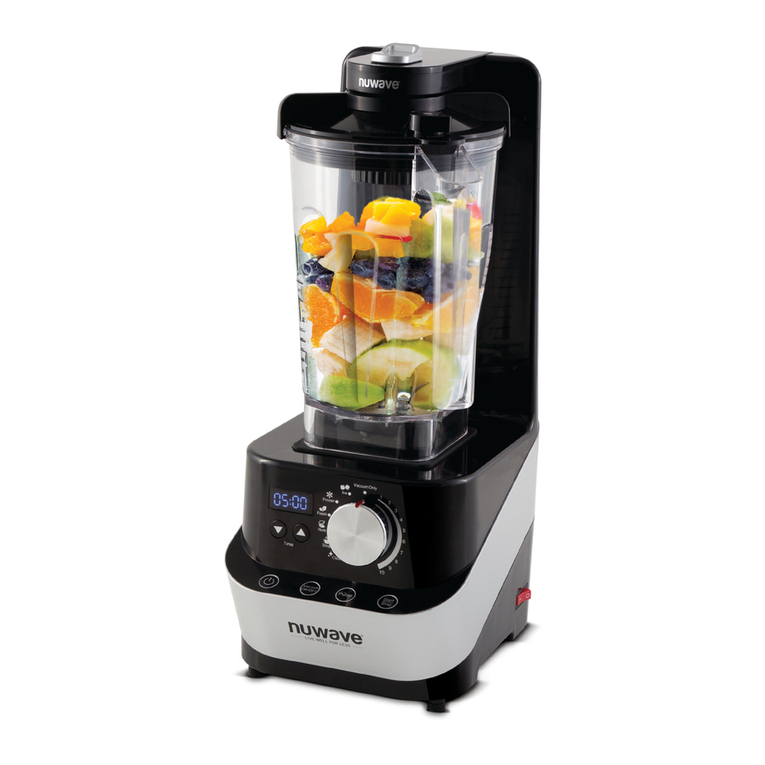
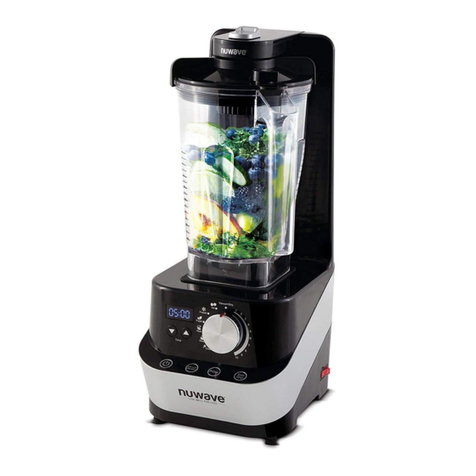
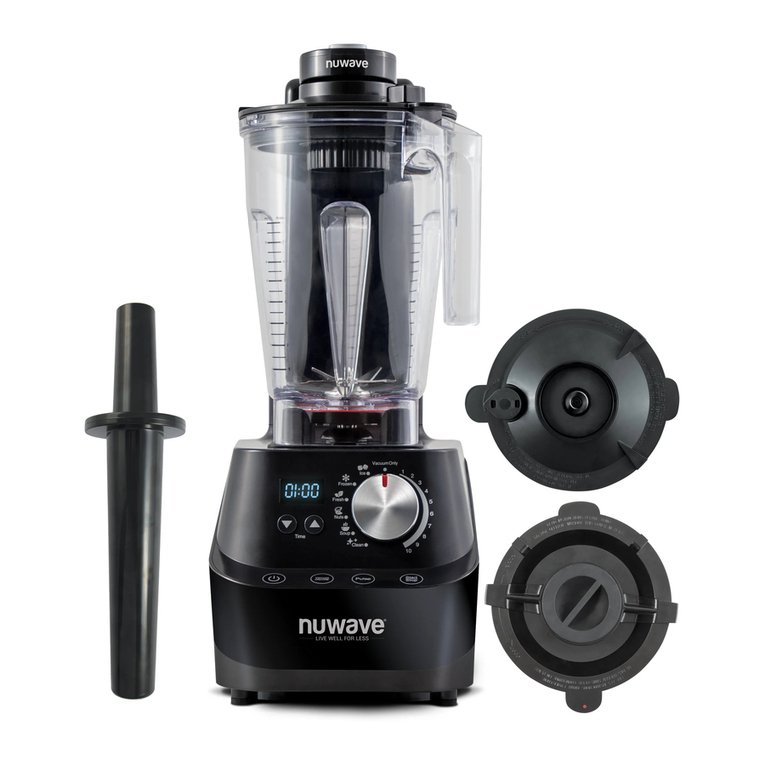
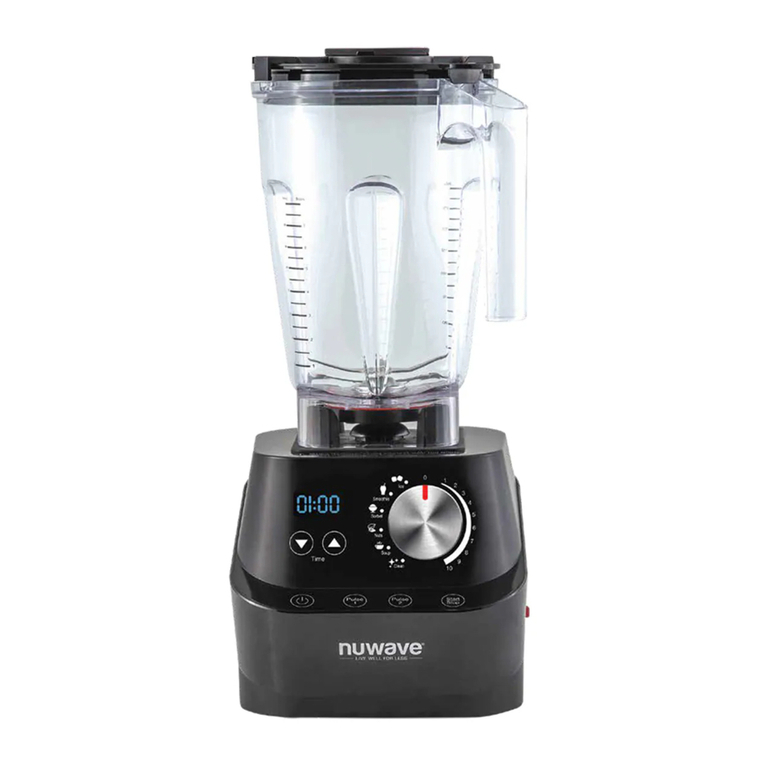
NuWave Moxie Pro User manual

Owner’s Manual & Complete Recipe Book
NuWave Moxie® Pro
High-Performance Blender

2 • NuWave Electric Skillet Complete Cookbook
As a special thank-you for registering your NuWave unit, you’ll
automatically receive an additional 6 months added to your limited
manufacturer’s warranty!*
All you have to do is follow these
simple steps.
Using your smartphone or
smart device, scan the QR code
located on the unit label on the
back of the unit.
You will be directed to NuWave’s
product registration page with
your unit’s unique serial number
automatically entered in the
appropriate field.
NOTE: If you do not have a
web-enabled smart device,
simply visit nuwavenow.com/QR
and manually enter in your unit’s
serial number.
Fill out the remaining information
and complete the optional survey.
Once you submit your
information, you will receive a
confirmation email containing
your extended warranty details.
1
2
3
4
1
2
3
Open your mobile app store
(App Store, Google Play).
Search for "QR code readers."
Simply download the QR code reader to your phone,
open it, scan the code and you are ready to go.
NOTE: You may need to open your downloaded QR
code reader each time you want to scan a QR code.
DOWNLOAD THE QR CODE
APP TO YOUR MOBILE DEVICE
6
for an additional
months
warranty!
REGISTER
NOW!
*Register your product within 1 year of date of purchase for a free
6-month extension of your limited warranty.
QR code readers

1-877-689-2838
www.nuwavenow.com
For more about our innovative products, visit:
With the NuWave Primo™ Combo
Grill, there’s no need to worry about
hot spots or dried-out leftovers. The
intuitive controls of this countertop
smart oven make it incredibly easy
to cook like a professional chef.
Everything from large family meals to
frozen foods cook with ease, without
preheating or defrosting.
NuWave Primo™
Combo Grill
NuWave PIC®
(Precision Induction
Cooktop)
Cook faster, safer, and
more efficiently than you
ever could on your gas or
electric stovetop.
NuWave
Nutri-Pot®6Q
Digital Pressure Cooker
Super-heated air cooks
your food to crispy,
tender perfection.
The digital touch screen
gives you precise
temperature control.
Easily cook rice, poultry,
vegetables and more all
with the press of a button!
The Nutri-Pot’s safety
release valve and hinged
lid make for convenient
and safe operation.
NuWave Brio®6Qt
Digital Air Fryer

With the simple press of a button, the
NuWave Moxie can remove all the
excess air from the blender.
By vacuuming the air out of the
blender, you can ensure no air is
being mixed with your ingredients
during the blending process,
maximizing the nutritional value and
ensuring your blender creations will
remain fresher longer.
1-877-689-2838
For more about our innovative products, visit: www.nuwavenow.com
NuWave BruHub®
Coffee Maker
Quality and convenience at your
ngertips. The NuWave BruHub
accommodates virtually all of your
favorite single-serve pods, but
with more avor. Makes an 8- or
12-ounce cup and full carafe.
The thermal stainless steel carafe
keeps coffee hot for hours.
NuWave Duralon®Healthy
Ceramic
Non-Stick Cookware
Coated with Duralon Healthy Ceramic
Non-Stick coating for easy cleanup, this
versatile cookware is perfect for use
in ovens or on gas, electric, and even
induction cooktops.
NuWave Moxie®
High-Performance
Vacuum Blender
NuWave Bravo™XL
The NuWave Bravo™ XL Smart
Oven is an air fryer, toaster, and
convection oven all in one! The
Bravo features an extra-large,
1-cubic-foot capacity. Includes
12 convenient, one-touch pre-
programmed presets. Set precise
temperatures from 100˚F to 450˚F.

TABLE OF CONTENTS
OWNER’S MANUAL
Important Safeguards .................... 9
Additional Safeguards.................. 10
Parts Description...........................11
Assembly Guide...................... 12-13
Operating Instructions............. 14-16
Care & Maintenance ............... 16-17
Troubleshooting ........................... 18
Limited Warranty..................... 19-20
Juices
Green Emotion............................. 22
Tummy Elixir ................................ 23
Carrot-Ginger Bell Pepper
Pick-Me-Up .................................. 24
Almond Milk ................................. 25
Carbonara.................................... 26
Jams & Spreads
Fig Jam ........................................ 28
Homemade Hazelnut Spread....... 29
Nut Butter..................................... 30
Guacamole................................... 31
Homemade Mayonnaise.............. 32
Sauces
Applesauce .................................. 34
White Bean Hummus................... 35
Sun-Dried Tomato Pesto.............. 36
Cranberry Sauce.......................... 37
Salsa Verde.................................. 38
Tzatziki Sauce.............................. 39
Tuscan Pesto ............................... 40
Thai Peanut Dipping Sauce ......... 41
Nacho Cheese Sauce.................. 42
Hummus....................................... 43
Dressings
Classic Dijon Salad Dressing....... 45
Ginger-Lime Dressing.................. 46
Classic Ranch Dressing............... 47
Soy Sesame Dressing ................. 48
Classic Caesar Dressing.............. 49
Lemon Poppy Seed Dressing ...... 50
Soups
Cumin-Scented Carrot Soup........ 52
Chilled Fruit Soup ........................ 53
Beet Soup .................................... 54
Tomato Basil Bisque .................... 55
Gazpacho..................................... 56
Potato Trufe Cauliower Soup ... 57
Desserts
Blueberry Lemon Mufns............. 59
Banana-Oat Pancakes................. 60
Classic Crepes............................. 61
Spanish........................................... 62
IMPORTANT SAFEGUARDS
READ ALL INSTRUCTIONS
WARNING: When using the Moxie Blender, basic safety precautions
should always be followed:
1. To protect against risk of electrical shock, do not immerse Blender Base,
cord, plug, or any part of the main unit in water or any other liquids.
2. Close supervision is necessary when any appliance is used by or
near children.
3. Turn the appliance OFF, then unplug from the outlet when not in use,
before assembling or disassembling parts, and before cleaning. To unplug,
grasp the plug and pull from the outlet. Never pull from the power cord.
4. Avoid contact with moving parts.
5. Do not operate the Moxie Blender with a damaged cord or plug, if the
appliance malfunctions, is dropped, or damaged in any manner. Contact
Customer Service at 1-877-689-2838 or email help@nuwavenow.com for
information on examination, repair, or adjustment.
6. NOT INTENDED FOR OUTDOOR USE.
7. FOR HOUSEHOLD USE ONLY.
8. Do not let cord hang over the edge of table or counter. Do not let cord
contact hot surfaces, including from a stove.
9. Keep hands, utensils, and foreign objects out of the Jar while blending to
reduce the risk of severe injury to persons or damage to blender. A scraper
may be used, but only when blender is NOT running.
10. Do not place on or near a hot gas or electric burner, or in a heated oven.
11. CAUTION! Blades are sharp. Handle blender carefully. Do not handle blades.
12. Always operate blender with Lid and Jar correctly in place. Blender will not
operate if Lid is not firmly in place and the dot is not lined up with the handle.
13. Alteration or modification of any part of the blender or the use of
attachments not recommended by the manufacturer may cause fire, injury,
or damage to property.
14. Do not add hot or boiling liquids to Jar.
15. Never knock Jar against a surface to loosen ingredients. Remove Jar from
Moxie Blender’s Base first, then use a rubber spatula to remove mixture
from bottom of Jar.
16. Do not shake or rattle Jar while in use.
17. Never remove Jar before the Moxie Blender’s blades have come to a
complete stop.
18. When making nut butters or recipes with oil-based ingredients, do not process
for more than 1 minute after the mixture begins to circulate in Jar. Blending for
longer periods than this can cause overheating of the Moxie Blender.
19. Keep manual handy for future reference.
9
Owner’s Manual

10
Owner’s Manual
11
Owner’s Manual
ADDITIONAL SAFEGUARDS
Electrical Information
The Moxie Blender is supplied with a short power cord to reduce the risk
of entanglement or tripping over a longer cord. Extension cords may be
used if care is exercised in their use. If an extension cord is used:
1. The marked electrical rating of the extension cord should be at least as
great as the electrical rating of the Moxie Blender.
2. The longer cord should be arranged so that it will not drape over
the countertop or tabletop where it could be pulled on by children or
tripped over unintentionally. The Moxie Blender should be operated
on a separate electrical outlet from other operating appliances due
to wattage limitations. Certain models of the appliances may have a
polarized plug (one blade is wider than the other). To reduce the risk
of an electric shock, this plug is intended to fit into a polarized outlet
one way. If the plug does not fit fully into the outlet, reverse the plug.
If the plug still does not fit properly, contact a qualified electrician.
Do not attempt to modify the plug in any way.
3. If the appliance is of the grounded type, the cord set or extension cord
should be a grounding-type 3-wire cord.
SEE CARE AND MAINTENANCE BEFORE USE
SAVE THESE INSTRUCTIONS
Read and understand the entire manual before using the Moxie Blender.
DO NOT USE THE UNIT FOR OTHER THAN INTENDED USE.
Note: Put the Moxie on a surface that is horizontal, even, and stable.
This appliance is intended for normal household use. It is not intended to be used
in environments such as kitchen staffs of shops, offices, farms, or other work
environments. Nor is it intended to be used by clients in hotels, motels, bed and
breakfasts, and non-residential environments.
1. DO NOT remove blades in any way or attempt to remove for cleaning.
2. Turn power off and unplug Moxie Blender BEFORE touching movable parts or
reaching in with a utensil. Turn power OFF and unplug when Moxie Blender is
unattended.
3. Do not operate blender if abnormal sounds or motion is detected. If a hard
or foreign object comes into contact with blades in Jar, do not serve. Inspect
the Moxie Blender’s blade assembly after each use, and if there are loose,
damaged, or missing parts, contact Customer Service at 1-877-689-2838 or
email help@nuwavenow.com.
4. Always use extreme caution when operating and maintaining the Moxie Blender
or any appliance.
5. The appliance is not intended to be operated by means of an external timer or
separate remote-control system.
6. Children should be supervised to ensure that they do not play with the appliance.
WARNING: Never use the Moxie Blender’s blade assembly with loose,
damaged, or missing parts.
NOTICE: THE FAILURE TO FOLLOW ANY OF THE IMPORTANT SAFEGUARDS,
ADDITIONAL SAFEGUARDS, OR THE INSTRUCTIONS FOR SAFE USE IS A
MISUSE OF YOUR MOXIE BLENDER THAT CAN VOID YOUR WARRANTY AND
CREATE THE RISK OF SERIOUS INJURY.
PARTS DESCRIPTION
1
4
Plunger Cap
Part #: 27414
Plunger Lid
Part #: 27413
Plunger Lid Seal Ring
Part #: 27418
Jar
Part #: 27411
Blender Base
Part #: 27471
Plunger
Part #: 27416
1
2
3
4
5
6
3
6
2
5
Lock
Close
Open
Close
Open
Lock
Close
Open
Close
Open
Lock
Close
Open
Close
Open
Lock
Close
Open
Close
Open
Lid Lock

12 13
Owner’s ManualOwner’s Manual
ASSEMBLY GUIDE ASSEMBLY GUIDE (Continued)
Lock
Close
Open
Close
Open
Plunger Lid Assembly
1. Line up red dot on Lid with the handle.
2. Push down on the Lid until it sits firmly in place.
3. The Lid Lock has two Lock Hooks that will lock the Lid in place. Make sure
the two Lock Hooks line up with the Jar Tabs.
• Turn the Lid Lock clockwise to close and lock.
• To unlock, turn the Lid Lock counterclockwise.
Jar Tabs
(1 on each side)
Lid Lock Hooks
(1 on each side) UnlockLock
Plunger Cap
Lock
Close
Open
Close
Open
Lock
Close
Open
Close
Open
Plunger Lid
Jar
The Plunger Cap is removed
when adding additional
ingredients while blending.
CAUTION
Make sure all parts are securely attached.
WARNING: As with most electrical appliances, electrical parts are live even
when the Moxie Blender is off. Be sure the unit is unplugged when assembling.
Plunger
When using the Plunger
Remove the Plunger Cap from the Plunger Lid before inserting the Plunger.
The Plunger Lid is designed with the hole opening so that the Plunger does not
come into contact with blades.
When not using Plunger, place Plunger Cap in Plunger Lid by pressing down.
Lock
Close
Open
Close
Open
Jar Assembly with the Plunger Lid
1. Place the Jar on Base by aligning it on top
of the 4 Rubber Columns.
2. Press Lid down firmly onto the Jar.
Lock
Close
Open
Close
Open
4 Rubber Columns
Lid Lock

14 15
Owner’s ManualOwner’s Manual
OPERATING INSTRUCTIONS
21
Sorbet
Smoothie
21
Sorbet
Smoothie
ON OFF
Power Button ON/OFF
1. Turn the red main Base Power Switch ON. Switch is located
on the right side of Blender Base.
• The “Power” button will flash.
2. Press “Power” button once to turn the unit on.
• The LED display will show the default time for the
selected setting. If no setting is selected the LED display
will show “0:00”.
• The “Start/Stop” button will flash.
3. Press “Power” button again to turn the unit off.
• The “Power” button will flash until the red main Base Power
Switch is turned off or the unit is unplugged.
Start/Stop
1. Turn the dial to choose the appropriate blending function.
2. Press “Start/Stop” to start blending.
3. Press “Start/Stop” again to stop blending.
Time Setting
Press the up and down arrows to increase or decrease the
time on the display.
• Times are displayed in minutes and seconds.
• This can be done on all settings.
Example:
Press "Power" button. Turn dial to “Ice”. “0:15” (15 seconds)
will be displayed. Press up and down arrows to adjust the time.
Press "Start/Stop".
OPERATING INSTRUCTIONS (Continued)
Pulse 1 & Pulse 2
Use either "Pulse 1" or "Pulse 2" for quick bursts of high-
powered blending.
• Pulse 2 will have a higher RPM than Pulse 1.
• When using either Pulse 1 or Pulse 2, the LED display will show
the default time that the dial is set to and will not change unless
the setting is changed.
Numbered Settings
For standard blending, select from one of the numbered settings
between 1 and 10.
1. Turn the dial to desired setting between 1 and 10. Default will be
set to “3:00”.
2. Adjust the time if desired, then press “Start/Stop” to begin blending
at selected setting.
3. Adjust the number setting using the dial at any point while
blending, if needed.
• The lowest setting is #1 (5,000 RPM). The highest setting is
#10 (27,000 RPM).
1
2
Icon Default
Min. : Sec.
Min. Max. Notes
Min. : Sec.
1-10* 3:00 0:05 5:00 Adjustable speed
Ice 0:15 0:05 2:00 Ice-based drinks
Smoothie 0:35 0:05 2:00 Frozen drinks
Sorbet 0:30 0:05 2:00 Frozen desserts
Nuts 1:30 0:05 2:00 Jams and spreads
Soup 3:00 0:05 5:00 Soup and hot
chocolate
Clean** 0:15 0:05 2:00 Self-cleaning
Icon Setting
For more specialized blending tasks, select one of the preset icons with
the dial. Each icon setting has a default time and RPM built into the unit.
1. Turn the dial to your desired icon setting. The LED display will show the
default time.
2. Adjust the time, if needed, then press “Start/Stop” to begin blending at your
selected setting.
• If desired, increase or decrease time at any point while blending.
21
Sorbet
Smoothie
21
Sorbet
Smoothie

16 17
Owner’s ManualOwner’s Manual
OPERATING INSTRUCTIONS (Continued)
*Note:
• When blending for a long period of time, steam may escape from Plunger Cap.
• Always start with cold liquids when blending. DO NOT add hot liquids to
the blender.
• Do not fill Jar above ¾capacity. For best results, do not fill more than 1.5
liters (51 fl oz) of liquid.
**Tips for Cleaning:
• Add water and 1-2 drops of liquid dish soap to the Jar, place on the Base, and
close the Lid.
• Turn the dial to “Clean”. “0:15” will be shown on the LED display. Adjust the
time if desired, then press “Start/Stop”.
• Once finished, remove the Jar, rinse thoroughly, and dry before using.
For detailed instructions on cleaning, see Care and Maintenance.
CAUTION
Moving parts may become hot with extended use.
DO NOT TOUCH.
CARE & MAINTENANCE (Continued)
Removal of Lid Seal Ring may be necessary for cleaning or if the part
is worn, damaged, or needs replacing. To assemble:
1. Line the inside of the Lid Seal Ring into the rim.
2. Press the Seal Ring into the rim to ensure it is properly sealed.
3. Make sure the lower part of the Seal Ring lines up with the bottom side
of the rim.
Lock
Close
Open
Close
Open
Seal Ring
Plunger Lid Rim
Lock
Close
Open
Close
Open
Lock
Close
Open
Close
Open
Before First Use:
Wash all removable parts in warm, soapy water or in the dishwasher, top rack
only. The Jar can be washed using the “Clean” function. See “Operating
Instructions” for details.
Lock
Close
Open
Close
Open
Lock
Close
Open
Close
Open
Jar Seal Ring
Plunger Cap
Plunger Lid
Plunger
Do not immerse the Moxie Base in water. Clean with
a damp sponge or cloth and wipe dry.
CAUTION
The power cord needs to be unplugged from the power
source before inserting or removing any attachments and
before cleaning.
CARE & MAINTENANCE

18 19
Owner’s ManualOwner’s Manual
Problem: Solution(s):
Unit does not turn on.
1. Plug may not be in the outlet. Plug in unit.
2. Red Power Switch on right side of Base may not
be on. Check to see if Power Switch is on.
Blender does not
work when plugged
in and Power button
and Power Switch
are both ON.
Lid is not on Jar properly. Line up red dot on top of
Lid with the Jar’s handle and press Lid down firmly to
secure onto Jar.
Blender is not
running at a high
enough speed for
your recipe.
1. Dial is not on the correct setting. Turn the dial to
proper setting based on recipe.
2. Jar is overloaded. Reduce amount of ingredients.
Blender becomes
clogged and not
operating efficiently.
1. Certain ingredients can cause clogging.
Remove Plunger Cap from Lid and insert
Plunger through hole. Press ingredients down
and around until mixture loosens around bottom
of Jar.
2. Ingredient amounts higher than specified are
being used. Do not fill Jar above ¾ capacity (1.5
liters, 51 fl oz).
3. Large pieces of ice are not mixing properly. Use
smaller pieces of ice.
Blended mixture has
lumps or texture is
not even.
Air pocket has formed (cavitation) and mixture is
too cold or has solidified in areas, and blades are
spinning in cavity. Increase temperature by reducing
ice in recipe.
Noises or motions
unusual for normal
operation of the
blender are detected.
1. Blade assembly may be loose, missing a part,
or possibly damaged. Turn blender OFF and
unplug immediately. DO NOT disassemble blade
assembly. Call Customer Service: 1-877-689-2838
or email help@nuwavenow.com.
2. Foreign objects from ingredients may have been
put into Jar and are making unusual sounds.
Prior to adding ingredients to Jar and blending,
clean fruits/other ingredients and remove all
debris or any objects.
TROUBLESHOOTING
The Moxie Blender was engineered with an automatic shut-off feature to prevent
overheating during use. If the blender shuts off to cool itself down, an odor may
be detected. Unplug the unit and wait for it to completely cool down. To prevent
overheating, do not process at speeds not recommended.
LIMITED WARRANTY
The NuWave Moxie® Pro High-Performance Blender
THE MANUFACTURER WARRANTS
The NuWave Moxie Pro High-Performance Blender is warranted to be free from
manufacturer defects. This Warranty covers original owner of this Blender for
personal household use only. This Warranty does not apply to products used
for commercial, rental or resale purposes. Motor is warranted for 5 years from
the date of purchase, under normal household use, and when operated in
accordance with the Manufacturer’s written instructions. Jar, Blades, Plunger
Lid, Plunger, Plunger Cap, Lid Seal Ring, and Blender Base are warranted
for 1 year from the date of purchase, under normal household use, and when
operated in accordance with the Manufacturer’s written instructions. The
Manufacturer will provide the necessary parts and labor to repair or replace
any part of the NuWave Moxie Pro High-Performance Blender at NuWave, LLC
Service Department. After the expiration of the warranty, the cost of the labor
and parts will be the responsibility of the owner.
THE WARRANTY DOES NOT COVER
The Limited Warranty is voided if repairs are made by an unauthorized dealer
and/or the serial number data plate is removed and/or defaced. Normal
deterioration of finish due to use or exposure is not covered by this Warranty.
This Limited Warranty does not cover failure, damages or inadequate
performance due to accident, acts of God (such as lightning), fluctuations in
electric power, alterations, abuse, misuse, misapplications, corrosive-type
atmospheres, improper installation, failure to operate in accordance with
the Manufacturer’s written instructions, abnormal use or commercial use.
NuWave, LLC reserves the right to void the Limited Warranty, where allowable
by law, for products purchased from an unauthorized dealer.
TO OBTAIN SERVICE
The owner shall have the obligation and responsibility to: pay for all services
and parts not covered by the warranty; prepay the freight to and from Service
Department for any part or system returned under this warranty; and carefully
package the product using adequate padding material to prevent damage in
transit. The original container is ideal for this purpose. Include in the package
the owner’s name, address, daytime telephone number, a detailed description
of the problem, and your “RGA number.” Call 1-877-689-2838 or email
help@nuwavenow.com to obtain the RGA number (Return Goods
Authorization number). Provide the cooking system model & serial number
and proof of date of purchase (a copy of the receipt) when making claims
under this warranty.
MANUFACTURER’S OBLIGATION
The Manufacturer’s obligation under this Limited Warranty is limited, to the
extent allowable by law, to repairing or replacing any part covered by this
Limited Warranty which upon examination is found to be defective under
normal use. The Limited Warranty is applicable only within the continental

21
Recipes
20
Owner’s Manual
LIMITED WARRANTY (Continued)
United States and only to the original purchaser of the manufacturer’s
authorized channels of distribution. THE LIMITED WARRANTY MAY NOT BE
ALTERED, VARIED OR EXTENDED EXCEPT BY A WRITTEN INSTRUMENT
EXECUTED BY THE MANUFACTURER. THE REMEDY OF REPAIR OR
REPLACEMENT AS PROVIDED UNDER THIS LIMITED WARRANTY IS
EXCLUSIVE. IN NO EVENT SHALL THE MANUFACTURER BE LIABLE
FOR ANY CONSEQUENTIAL OR INCIDENTAL DAMAGES TO ANY
PERSON, WHETHER OR NOT OCCASIONED BY NEGLIGENCE OF THE
MANUFACTURER, INCLUDING WITHOUT LIMITATION, DAMAGES FOR
LOSS OF USE, COSTS OF SUBSTITUTION, PROPERTY DAMAGE, OR
OTHER MONEY LOSS.
Some states do not allow the exclusion or limitation of incidental or
consequential damages, so the above limitation exclusions may not apply.
This Limited Warranty gives specific legal rights, and there may also be other
rights which vary from state to state. EXCEPT AS OTHERWISE EXPRESSLY
PROVIDED ABOVE, THE MANUFACTURER MAKES NO WARRANTIES
EXPRESSED OR IMPLIED ARISING BY LAW OR OTHERWISE, INCLUDING
WITHOUT LIMITATION, THE IMPLIED WARRANTIES OF MERCHANTABILITY
AND FITNESS FOR A PARTICULAR PURPOSE TO ANY OTHER PERSON.
READ YOUR OWNER’S MANUAL. IF YOU STILL HAVE ANY QUESTIONS
ABOUT OPERATION OR WARRANTY OF THE PRODUCT, PLEASE
CONTACT NUWAVE, LLC.
READ YOUR OWNER’S MANUAL
If you still have any questions about operation or warranty
of the product, please contact NuWave, LLC at: 1-877-689-2838
or email [email protected].
Juices

22 23
RecipesRecipes
Tummy Elixir
Ingredients:
1 (3-ounce) piece fresh unpeeled ginger, rinsed well
1 whole lemon, rinsed well
1 liter purified or spring water
1 sprig fresh mint
2 tablespoons agave nectar
Directions:
1. Place all ingredients in blender, set to 10, and blend for 1-2 minutes.
2. Refrigerate overnight before drinking. Drink it straight or strain to remove
the pulp.
Green Emotion
Ingredients:
2 cups fresh kale, rinsed well
2 cups fresh spinach, rinsed well
1 bunch fresh parsley
1 liter purified water
Juice of 1 lemon
Directions:
Add all ingredients to blender, set to 10, and blend for 1-2 minutes.

24 25
RecipesRecipes
Almond Milk
Ingredients:
1 cup almonds
3 cups distilled water
Directions:
1. Place all ingredients in blender and pulse 5-6 times.
2. Scrape sides of blender with a rubber spatula.
3. Continue to pulse for no longer than 1 minute at a time until milk is smooth.
4. Once ready, strain milk through a fine strainer or jelly bag.
Carrot-Ginger Bell Pepper Pick-Me-Up
Ingredients:
3 ounces fresh unpeeled ginger, rinsed well
3 large unpeeled carrots, rinsed well
8 ounces all-natural coconut water
2 red peppers, cored, seeds removed, rinsed well
Directions:
Add all ingredients to blender, set to 5, and blend for 2 minutes.

26 27
RecipesRecipes
Jams
& Spreads
Carbonara
Ingredients:
½ pound pancetta or high-quality bacon, cut into small cubes
1 small onion, finely chopped
2 cloves freshly peeled garlic
½cup heavy cream
½cup milk
2 cups freshly grated Parmesan cheese
2 eggs
1 tablespoon flour
Directions:
1. Add pancetta, garlic, and onions to a large skillet. Fry on medium heat until
the pancetta renders all its fat and is crispy, but not burned. Do not burn
garlic cloves.
2. Drain the fat from the pancetta. Place pancetta, garlic, and onion into
the blender.
3. Add flour, cream, and milk to blender, set to 10, and blend for 5 minutes.
4. Let cream mixture rest in the blender for 5 minutes.
5. Add eggs, set blender to 4, and blend for about 20 seconds.
6. Add cheese and serve over spaghetti.
Lid:
Plunger Lid only

28 29
RecipesRecipes
Homemade Hazelnut Spread
Ingredients:
2 cups hazelnuts
10 ounces milk chocolate, chopped
2-3 tablespoons canola oil
2 tablespoons powdered sugar
2 tablespoons dark cocoa powder
½teaspoon of vanilla extract
Pinch sea salt
Directions:
1. Place hazelnuts on a cookie sheet and toast in an oven at 400°F
for 8-10 minutes.
2. Once toasted, place hazelnuts in a clean kitchen towel and rub the skins off.
Transfer to blender Jar.
3. Add all remaining ingredients to blender.
4. Set blender to 10 and blend for about 1 minute or until creamy, scraping
occasionally with a rubber spatula, if necessary.
5. Refrigerate overnight, allowing the spread to firm up.
Fig Jam
Ingredients:
1 pound fresh figs, washed, stemmed, and halved
½ cup water
2 tablespoons agave nectar or honey
Sea salt and freshly ground black pepper to taste
1 teaspoon sumac
Juice and zest of 1 lemon
1 tablespoon dark molasses
Directions:
1. In a large nonreactive (stainless steel, ceramic, metal with enamel coating)
saucepan, bring water, lemon juice, zest, molasses, and agave to a boil.
2. Add gs and simmer over medium heat for about 10 minutes.
3. Add salt, pepper, and sumac to g mixture.
4. Transfer all ingredients to blender and pulse until smooth.

30 31
RecipesRecipes
Guacamole
Ingredients:
4 fresh ripe avocados
¼ cup freshly squeezed lime juice
1 small shallot or sweet onion
2 cloves garlic
1 teaspoon sea salt
1 bunch fresh cilantro, rinsed, shaken dry
¼teaspoon cayenne pepper (optional)
1 roasted fresh tomato (optional)
Directions:
1. Add lime juice, shallot (or onion), garlic, and cilantro to blender. Set blender
to 3 and blend for about 30 seconds.
2. Add avocado and pulse 6-8 times until puree comes together.
3. Add cilantro and roasted tomato. Set blender to 3 and blend for 30 seconds
until a rich, chunky puree comes together. Scrape occasionally with a rubber
spatula, if necessary.
4. Season guacamole with sea salt and a pinch of cayenne pepper.
Nut Butter
Ingredients:
4 cups nuts, shelled, skins removed
½cup of nut oil
Directions:
1. Add all ingredients to blender.
2. Set blender to 1 and blend, slowly increasing speed until mixture reaches
desired consistency, scraping occasionally with a rubber spatula,
if necessary.
Tips:
• This recipe can be made with peanuts, hazelnuts, almonds, or cashews. It is
recommended to use the oil from the same type of nut that's blended.
• The nuts can be either raw or roasted.

32 33
RecipesRecipes
Sauces
Homemade Mayonnaise
Ingredients:
1 egg yolk
¼teaspoon Dijon mustard
1 tablespoon lemon juice
¼teaspoon white vinegar
¼teaspoon Worcestershire sauce
1 tablespoon warm water
1½cups canola oil, divided
Sea salt to taste
Tabasco®sauce to taste
Directions:
1. Add egg yolk, mustard, lemon juice, vinegar, Worcestershire, warm water,
and ½cup oil to blender.
2. Set blender to 10 and blend for 1 minute.
3. Slowly add oil while continuing to blend until mixture reaches thickness
of traditional mayonnaise.
4. Season with salt and Tabasco®.
5. Refrigerate overnight.

34 35
RecipesRecipes
White Bean Hummus
Ingredients:
16 ounces home-cooked or high-quality canned Great Northern or cannellini
beans, drained, rinsed
Juice and zest from 1 lemon
1 teaspoon chili flakes
2 cloves garlic
1 small bunch Italian parsley, leaves only
Sea salt and freshly ground pepper to taste
½cup extra-virgin olive oil
Directions:
1. Add lemon juice, zest, garlic, parsley, and olive oil to blender and pulse for
30 seconds.
2. Let garlic mixture sit in blender for 10 minutes to develop avors.
3. Add beans and chili akes to blender. Set to 10 and blend for
2 minutes or until smooth, scraping occasionally with a rubber spatula,
if necessary.
4. Season with salt and pepper.
Applesauce
Ingredients:
6 Jonathan or McIntosh apples, quartered, cores removed
½cup sugar (or ¼cup agave)
½teaspoon cinnamon
⅛teaspoon sea salt
Juice and zest of 1 lemon
1 tablespoon apple cider vinegar (optional)
Directions:
1. Combine sugar, lemon juice, zest, and vinegar in a large pot and bring up to
a boil.
2. Once mixture is clear and sugar has dissolved, add apples to mixture.
Lower the heat and simmer for 1-2 minutes.
3. Transfer mixture to blender and add cinnamon and salt.
4. Set blender to 10 and blend for 5 minutes. If needed, set blender to 10 and
blend for an additional 5 minutes or until desired consistency is reached.
5. Let applesauce cool. Refrigerate until ready to serve.
Tip:
If you prefer raw applesauce, simply add all ingredients to the blender and set to
10 for 2-3 minutes.

36 37
RecipesRecipes
Cranberry Sauce
Ingredients:
2 (12-ounce) bags fresh cranberries
1 cup sugar
2 tablespoons fresh rosemary
Juice and zest of 3 oranges
⅛teaspoon nutmeg
¼teaspoon sea salt
Directions:
1. Place all ingredients in blender, set to 10, and blend for 5 minutes.
2. Let the sauce rest for 5 minutes before blending on the same setting for an
additional 5 minutes.
3. Allow sauce to cool. Refrigerate until ready to serve.
Sun-Dried Tomato Pesto
Ingredients:
6 fresh plum or Roma tomatoes, washed, cut in half
8 ounces sun-dried tomatoes
2 cloves fresh garlic
¼cup pine nuts
1 small onion or medium shallot
1 tablespoon tomato paste
¼cup dry red wine
1 tablespoon red wine vinegar
¼cup fresh basil leaves
½cup extra-virgin olive oil
Sea salt and freshly ground pepper to taste
Directions:
1. Soak sun-dried tomatoes in the wine for 10 minutes; set aside.
2. Add plum tomatoes, garlic, and onion to blender and pulse 5-6 times.
3. Add red wine-soaked tomatoes and pulse 5-6 times.
4. Add all remaining ingredients. Set blender to 10 and blend for 45 seconds,
scraping occasionally with a rubber spatula, if necessary.

38 39
RecipesRecipes
Tzatziki Sauce
Ingredients:
16 ounces plain full-fat Greek yogurt
2 English cucumbers, peeled, cut in half, seeds removed
¼cup extra-virgin olive oil
Juice and zest of 1 fresh lemon
2 tablespoons fresh dill leaves
1 teaspoon dried or fresh mint
3 cloves garlic
1 tablespoon sumac (optional)
Sea salt and freshly ground pepper to taste
Directions:
1. Place cucumbers, garlic, mint, lemon juice, and dill in blender and pulse
3-4 times.
2. Let cucumber mixture sit in blender for 10 minutes to develop avor.
3. Add yogurt and oil and pulse 6-8 times until sauce is homogenous.
4. Add sea salt, pepper, and sumac and pulse for 5-10 seconds.
5. Serve with lemon zest.
Salsa Verde
Ingredients:
1½pounds of tomatillos, husked
1 small onion, peeled
2 cloves garlic
2 serrano peppers
1 jalapeño (optional)
1 small bunch cilantro, rinsed, shaken dry
1 tablespoon dried Mexican oregano
1 teaspoon dried cumin
Sea salt to taste
1 teaspoon sumac (optional)
2 cups warm water
1 tablespoon lime juice
1 tablespoon extra-virgin olive oil
Directions:
1. Add tomatillos, onion, garlic, and peppers to blender. Pulse 5-8 times
until chunky to achieve a thicker consistency.
2. Set blender to 10. Blend for 4-5 minutes, adding warm water 1 cup at time,
until completely incorporated.
3. Add sumac, lime juice, olive oil, cumin, and salt and pulse 3 times.
4. Add the fresh and dried herbs and pulse 4-5 times.
5. Refrigerate overnight.
Tip:
Use as a salsa dip or a sauce for roasted sh or chicken.
Other manuals for Moxie Pro
1
Table of contents
Other NuWave Blender manuals

NuWave
NuWave Moxie Vacuum User manual

NuWave
NuWave Twister HL-2070 User manual

NuWave
NuWave Moxie Vacuum Quick guide

NuWave
NuWave Twister Quick guide

NuWave
NuWave INFINITY 28202 User manual

NuWave
NuWave INFINITY 28202 User manual

NuWave
NuWave Infinity ProPlus 28301 User manual

NuWave
NuWave 28401 User manual

NuWave
NuWave Moxie Pro User manual

NuWave
NuWave Moxie 28101 User manual