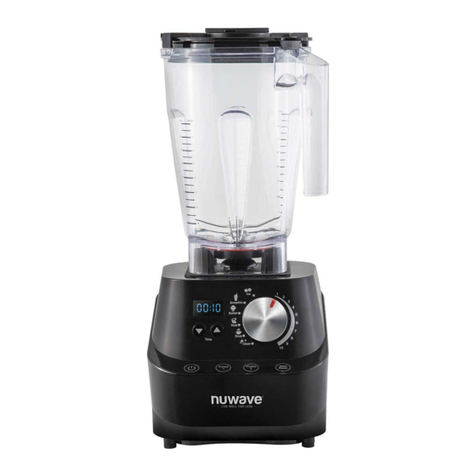
NuWave INFINITY 28202 User manual

Questions or Concerns?
Toll Free: 1-877-689-2838 • help@nuwavenow.com
(Mon-Fri 7:30am-4:30pm CST)
Owner’s Manual
Model 28202
INFINITY BLENDER
TM
Lock
Close
Open
Close
Open

23
nuwavenow.com
TABLE OF CONTENTS
Congratulations on your NuWave® Innity™ Blender! We’re
incredibly excited for you as you begin your healthy home cooking
journey with your new Innity™Blender.
We want to make sure you get the most out of your Innity™Blender
cooking experience, so we have provided detailed instructions
here in this manual for you to know all the ins and outs to be a
successful NuWave®home cook. We have also included a handy
Quick Start Guide and Recipe Book which contains details on all of
the preset recipes written and developed by our team of talented
chefs that are already programmed into your Innity™Blender.
We want every step of your NuWave®experience to be as easy and
rewarding as possible, so if you have any questions, comments, or
concerns, please don’t hesitate to contact our Customer Service by
calling 1-877-689-2838 • help@nuwavenow.com (Mon-Fri 7:30am-
4:30pm CST).
Visit nuwavenow.com to see our other NuWave products and accessories.
#nuwavenow
Connect with us!
Welcome to the NuWave®Family!
Owner’s Manual
Important Safeguards ....................................................................
Parts & Accessories.......................................................................
Assembly Guide.............................................................................
Quick Start .....................................................................................
Instructions.....................................................................................
Cleaning & Maintenance.................................................................
Troubleshooting Guide ...................................................................
Limited Warranty .............................................................................
Spanish.............................................................................................
Replacement Parts ..........................................................................

REGISTER
NOW!
12 for an additional
-month
warranty!
45
Using your smartphone or
smart device, scan the QR
code located on the back of the
Innity™Blender.
You will be directed to NuWave’s
product registration page with
your Innity™ Blender’s unique
serial number automatically
entered in the appropriate eld.
NOTE: If you do not have a
web-enabled smart device,
simply visit nuwavenow.com/
QR and manually enter in your
Innity™ Blender’s serial number.
Fill out the remaining information
and complete the optional survey.
Once you submit your
information, you will receive
a conrmation email containing
your extended warranty details.
1
2
3
4
*Register your product within 1 year of date of purchase for a free
12-month extension of your limited warranty.
Open your mobile app store
(App Store, Google™Play).
Search for "QR code readers."
Simply download the QR code reader to your phone,
open it, scan the code and you are ready to go.
NOTE: You may need to open your downloaded QR
code reader each time you want to scan a QR code.
1
2
3
DOWNLOAD THE QR CODE
APP TO YOUR MOBILE DEVICE
QR code readers
nuwavenow.com
As a special thank-you for registering your NuWave® Innity™
Blender, you’ll automatically receive an additional 12 months
added to your limited manufacturer’s warranty!*
All you have to do is follow these simple steps.

67
nuwavenow.com
IMPORTANT SAFEGUARDS
HOUSEHOLD USE ONLY • READ ALL INSTRUCTIONS BEFORE USE
ENGLISHImportant Safeguards
important safeguards
WARNING: When using the Innity™ Blender, basic safety
precautions should always be followed:
1. To protect against risk of electrical shock, do not immerse
Blender Base, cord, plug, or any part of the main unit in water
or any other liquids.
2. Close supervision is necessary when any appliance is used near
children. The Innity™Blender is not intended for use by children,
persons with reduced physical, sensory, or mental capabilities or
those with lack of expertise or knowledge of this unit.
3. Avoid contact with moving parts.
4. Do not operate the Innity™Blender with a damaged cord or
plug, if the appliance malfunctions, is dropped, or damaged in
any manner. Contact Customer Service at 1-877-689-2838 or
email help@nuwavenow.com for information on examination,
repair, or adjustment.
5. NOT INTENDED FOR OUTDOOR USE. FOR HOUSEHOLD
USE ONLY. This appliance is intended for normal household
use. It is not intended to be used in environments such as
staff kitchens/cafeterias in shops, offices, farms, or other
work environments, nor is it intended to be used by guests in
hotels, motels, bed and breakfasts, or any other non-residential
environments.
6. Do not let cord hang over the edge of table or counter. Do not
let cord contact hot surfaces, including from a stove.
7. Discard the protective plastic covering the power plug before use.
8. Do not place on or near a hot gas or electric burner, or in a
heated oven or on a stovetop.
9. Keep hands, utensils, and foreign objects out of the Jar while
blending to reduce the risk of severe injury to persons or
damage to blender. A scraper may be used, but only when
blender is NOT running.
10. CAUTION! Blades are sharp. Handle blender carefully. Do not
handle blades.
11. ALWAYS operate the blender with the Lid and Jar correctly
in place. The Plunger Lid should be firmly closed with the dot
properly lined up with the handle.
12. Alteration or modification of any part of the blender or the use of
attachments not recommended by the manufacturer may cause
fire, injury, or damage to property.
13. Do not use the unit for other than its intended use.
14. Do not add hot or boiling liquids to Jar.
15. NEVER knock the Jar against any surface to loosen stuck-on
ingredients. Always remove the Jar from the Infinity™Blender
Pro Plus’ Base first, then use a rubber spatula to remove the
stuck-on ingredients from bottom of the Jar. Do not use metal
utensils as doing so can damage the Jar.
16. Do not shake or rattle Jar while in use.
17. Never remove Jar before the Infinity Blender™’s blades have
come to a complete stop.
18. First turn off then unplug the Innity™Blender from outlet when
not in use, before putting on or taking off parts, and before
cleaning.
19. Keep manual handy for future reference.
Electrical Information
A short power-supply cord is provided to reduce the risk
resulting from becoming entangled in or tripping over a
longer cord. Longer detachable power-supply cords or
extension cords are available and may be used if care is
exercised in their use. If a longer detachable power-supply
cord or extension cord is used:
1. The marked electrical rating of the extension cord should be
at least as great as the electrical rating of the appliance.
2. The longer cord should be arranged so that it will not drape
over the countertop or tabletop where it could be pulled on
or tripped over unintentionally. The Innity™Blender should
be operated on a separate electrical outlet from other
operating appliances due to wattage limitations.
The appliance has a polarized plug (one blade is wider
than the other). To reduce the risk of electric shock, this
plug is intended to fit into a polarized outlet only one way.
If the plug does not fit fully into the outlet, reverse the plug.
If it still does not fit, contact a qualified electrician. Do not
attempt to modify the plug in any way.
3. If the appliance is of the grounded type, the cord set or
extension cord should be a grounding-type 3-wire cord.
ADDITIONAL SAFEGUARDS
SEE CLEANING & MAINTENANCE BEFORE USE
89
nuwavenow.com
IMPORTANT SAFEGUARDS
HOUSEHOLD USE ONLY • READ ALL INSTRUCTIONS BEFORE USE
ENGLISHImportant Safeguards
important safeguards
SAVE THESE INSTRUCTIONS
Read and understand the entire manual before using the
Innity™Blender.
DO NOT USE THE INFINITY BLENDER™FOR OTHER
THAN ITS INTENDED USE.
Note: Put the Innity™Blender on a surface that is horizontal, even,
and stable. This appliance is intended for normal household use. It
is not intended to be used in environments such as staff kitchens/
cafeterias of shops, ofces, farms, or other work environments,
nor is it intended to be used by clients in hotels, motels, bed and
breakfasts, and non-residential environments.
NOTICE: THE FAILURE TO FOLLOW ANY OF THE IMPORTANT
SAFEGUARDS, ADDITIONAL SAFEGUARDS, OR THE
INSTRUCTIONS FOR SAFE USE IS A MISUSE OF YOUR
INFINITY™BLENDER THAT CAN VOID YOUR WARRANTY AND
CREATE THE RISK OF SERIOUS INJURY.
WARNING
In case of malfunctions, immediately unplug and contact
Customer Service Department 1-877-689-2838 (Mon - Fri
7:30am to 4:30pm CST) • help@nuwavenow.com
1. Do not place the Innity™ Blender close to ammable materials,
heating units, or wet environments.
2. It is normal for some smoke to escape the Innity™Blender
when blending for the rst time.
3. If a lot of smoke is escaping from the air vent during
operation, unplug the Innity™Blender immediately and
contact Customer Service.*
4. DO NOT remove the blades in any way or attempt to remove
for cleaning.
5. Extreme caution must be exercised when operating the Innity
Blender™or any other appliance.
6. Do not move the Innity™Blender while in operation. Only after
the Innity™ Blender has nished blending and has completely
cooled should moving be attempted. Always wait for the
Innity™Blender to cool down prior to handling it.
7. Children should be supervised to ensure that they do not play
with the Innity™Blender.
8. If any trouble arises during operation, service MUST be done
by NuWave®LLC or authorized by the manufacturer for repairs.
9. Do not disassemble the Innity™Blender or replace any parts
without prior written consent from the manufacturer.
10. Do not use metal utensils as this can damage the Jar.
11. Make sure the Innity™Blender is always clean prior to use.
12. Turn power off and unplug Innity™Blender blender BEFORE
touching movable parts or reaching in with a utensil. Turn
power OFF and unplug when Innity™Blender is unattended.
13. Do not operate Innity™Blender if abnormal sounds or motion
is detected. If a hard or foreign object comes into contact with
blades in Jar, do not serve.
14. Inspect the Innity™ Blender’s blade assembly after each
use, and if there are loose, damaged, or missing parts,
contact Customer Service at 1-877-689-2838 or email help@
nuwavenow.com.
15. Always use extreme caution when inspecting or maintaining the
Innity™Blender or any appliance.
16. The Innity™Blender is not intended to be operated by means
of an external timer or separate remote-control system.
*Customer Service Department: 1-877-689-2838 (Mon - Fri
7:30am to 4:30pm CST) • help@nuwavenow.com
CAUTION
Never use the Innity™ Blender’s blade assembly with loose,
damaged, or missing parts.

parts & accessories
10 11
nuwavenow.com
ENGLISHParts & Accessories
PARTS & ACCESSORIES ASSEMBLY GUIDE
To order replaceable parts head over to Replaceable Parts
section and then NuWaveNow.com.
1
4
3
6
2
Lock
Close
Open
Close
Open
Lock
Close
Open
Close
Open
Lock
Close
Open
Close
Open
Lock
Close
Open
Close
Open
Lid Lock
5
7
Plunger Cap
Part #: MXA4
Plunger Lid
Part #: MXA3
Plunger Lid Seal Ring
(comes assembled onto Lid)
Part #: MXP2
Jar with Blade
Part #: MXA1
Blender Base
Part #: MXA15
Plunger
Part #: MXA6
Silicone Pad
Part #: MXA21
1
2
3
4
5
6
7
Lock
Close
Open
Close
Open
Plunger Lid Assembly
1. Line up red dot on the Lid with the handle.
2. Push down on the Lid until it sits firmly in place.
3. The Lid Lock has two Lock Hooks that will lock the Lid in place.
Make sure the two Lock Hooks line up with the Jar Tabs.
• Turn the Lid Lock clockwise to close and lock.
• To unlock, turn the Lid Lock counterclockwise.
Jar Tabs
(1 on each side)
Lid Lock Hooks
(1 on each side)
Unlock
Lock
Lock
Close
Open
Close
Open
Plunger Lid
Jar
The Plunger Cap is removed when
adding additional ingredients while
blending.
Lid Lock
CAUTION
Make sure all parts are securely attached.

assembly
12 13
nuwavenow.com
ENGLISHQuick Start
ASSEMBLY GUIDE QUICK START
WARNING
WARNING: As with most electrical appliances, electrical
parts are live even when the Innity™ Blender is off. Make
sure the Innity™Blender is unplugged when assembling.
Using the Plunger
Remove the Plunger Cap from the Plunger Lid before inserting the
Plunger. The Plunger Lid is designed with the hole opening so that
the Plunger does not come into contact with blades when moving
ingredients around. When not using the Plunger, place the Plunger
Cap in the Plunger Lid by pressing down.
Lock
Close
Open
Close
Open
Plunger
Lock
Close
Open
Close
Open
Jar Assembly with the Plunger Lid
1. Place the Jar on the Base by
aligning it on top of the 4 Rubber
Columns.
2. Press the Lid firmly down onto
the Jar.
Lock
Close
Open
Close
Open
4 Rubber
Columns
Blending times and speeds can be adjusted before and during
the blending process. Press the up and down arrows or turn
the dial to set or adjust.
Turn the Innity™Blender ON and OFF.
Turn the red main Base Power Switch ON. Switch is located on the
right side of Blender Base. Press Power button once to turn your
Innity™Blender on. Press the Power button again and press the
red main Base Power Switch OFF to turn your Innity Blender™off.
Start blending. The LED display will show the default time for
your selected setting.
Turn the dial to choose your appropriate blending function. Press
Start/Pause to start blending. Press Start/Pause again to stop
blending.
Note: Do not ll Jar above ¾ capacity. For best results, do not ll more
than 1.5 liters (51 oz) of liquid. Refer to “Instructions” for more.
Set your time. Press the up and down arrows to increase or
decrease the time on the display.
Times are displayed in minutes and seconds. Adjustments can be
made on all settings.
21
0

quick start
14 15
nuwavenow.com
ENGLISHInstructions
QUICK START INSTRUCTIONS
Notes:
• When blending for a long period of time liquids may become
hot and steam may escape from the Plunger Cap.
Use the numbered settings. Default time is 3 min.
For standard blending you can select from one of the numbered
speed settings between 1 and 10. Adjust to desired time, then press
Start/Pause to begin blending.
Note: The lowest setting is #1 (5,000 RPM). The highest setting is
#10 (17,000 RPM).
Icon settings are for specialized blending tasks. Each icon
setting has default time and RPM built in.
Turn the dial to desired icon setting and press Start/Pause to
begin blending.
Note: Always start with cold liquids when blending. DO NOT add
hot liquids to the Innity™Blender.
Cleaning your Innity™Blender Jar:
Add water and 1-2 drops of liquid dish soap to your Jar, place on
the Base, and close the Lid. Turn the dial to Clean. 00:15 will be
shown on the LED display. Adjust the time if desired, and then
press Start/Pause. Once nished, remove the Jar, rinse thoroughly,
and dry before using.
Note: For detailed instructions on cleaning refer to “Cleaning &
Maintenance.”
Getting Started
1. Turn the red main Base Power Switch ON. Switch is located on
the right side of Blender Base.
• The Power button will flash.
2. Press Power button once to turn your Innity™Blender on. The
LED display will show the default time for the selected setting.
3. Turn the dial to choose your appropriate blending function.
4. Press Start/Pause to start blending.
5. Press Start/Pause again to stop blending.
6. Press the Power button again and press the red main Base
Power Switch OFF to turn your Innity™Blender off.
Time Setting
Press the up and down arrows on your Innity™
Blender to increase or decrease the time on the
display.
• Times are displayed in minutes and seconds.
• Blending times can be adjusted when using
any setting.
Example:
Press Power button. Turn dial to Ice. 00:15 (15
seconds) will be displayed. Press up and down arrows to adjust the
time. Press Start/Pause.
Numbered Settings
For standard blending you can select your blending speed from one
of the numbered settings from 1 to 10.
1. Turn the dial to your desired settings from 1 to 10.
2. Adjust the time, if desired, then press Start/Pause to begin
blending at your selected setting.
3. Adjust the number setting using the dial at any point while
blending, if needed.
Pulse Function
The Innity™Blender offers two Pulse functions where the power
settings are fully adjustable.
1. Press Pulse 1 for short bursts of blending at low power (25%
Power).
• Press and hold Pulse 1 for continuous blending. Once the
button is released, blending will end.
00:15

instructions
16
INSTRUCTIONS
17
nuwavenow.com
ENGLISHCleaning & Maintenance
CLEANING & MAINTENANCE
• The display will show the default time for the function you have
selected. Once the button is released, blending will end.
• The percentage of power used can be adjusted by holding
Pulse 1 and rotating the dial.
• The percentage will change in 10% increments. Hold the Up
and Down buttons to move percentage points faster.
2. Press Pulse 2for short bursts of blending at high power (100%
Power).
• Press and hold Pulse 2 for continuous blending. Once the
button is released, blending will end.
• The display will show the default time for the function you have
selected. Once the button is released, blending will end.
• The percentage of power used can be adjusted by holding
Pulse 2 and rotating the dial.
• The percentage will change in 10% increments. Hold the
Up and Down buttons to move
percentage points faster.
Icon Settings
For more specialized blending tasks you
can select one of the preset icons with
the dial. Each icon setting has a default
time and RPM built into your Infinity™
Blender.
1. Turn the dial to your desired icon
setting. The LED display will show
the default time.
2. Adjust the time, if needed, then press Start/Pause to begin
blending at your selected setting.
• If desired, increase or decrease time at any point while
blending.
*Notes:
• When blending for a long period of time, steam may escape from
Plunger Cap.
• Always start with cold liquids when blending. DO NOT add hot
liquids to the blender.
• Do not fill the Jar above ¾ capacity. For best results, do not fill
more than 1.5 liters (51 fl oz) of liquid.
Pulse
1
Pulse
2
Start
Pause
Time
0
Icon Default
Min. : Sec.
Min.
Sec.
Max.
Min. Notes
1-10* 03:00 00:05 05:00 Adjustable speed
Ice 00:15 00:05 02:00 Ice-based drinks
Smoothie 00:35 00:05 02:00 Frozen drinks
Sorbet 00:30 00:05 02:00 Frozen desserts
Nuts 01:30 00:05 02:00 Jams and spreads
Soup 03:00 00:05 05:00 Soup and hot
chocolate
Clean** 00:15 00:05 02:00 Self-cleaning
21
0
**Tips for Cleaning Your Innity™Blender Jar:
• Add water and 1-2 drops of liquid dish soap to your Jar, place on
the Base, and close the Lid.
• Turn the dial to Clean. 00:15 will be displayed. Adjust the time, if
desired, then press Start/Pause.
• Once finished, remove the Jar, rinse thoroughly, and dry before
using.
For detailed instructions on cleaning your Innity™Blender
see Cleaning and Maintenance.
21
0
CAUTION
Moving parts may become hot with extended use.
DO NOT TOUCH.
CAUTION
The power cord needs to be unplugged from the power
source before inserting or removing any parts or
attachments and before cleaning.

cleaning & maintenance
18 19
nuwavenow.com
ENGLISHTroubleshooting Guide
CLEANING & MAINTENANCE TROUBLESHOOTING GUIDE
Lock
Close
Open
Close
Open
Lock
Close
Open
Close
Open
Before First Use
Wash all removable parts in warm, soapy water or in the
dishwasher, top rack only. The Jar can be washed using the Clean
function. See “Instructions” for details.
Lock
Close
Open
Close
Open
Lock
Close
Open
Close
Open
Jar with Blade
Plunger Cap Plunger Lid
Seal Ring
Plunger
Lid Seal Ring Assembly
It may be necessary to remove the Lid Seal Ring for occasional
cleaning or to replace the part if it becomes worn or damaged.
To assemble:
1. Line the inside of the Lid Seal Ring into the rim.
2. Press the Seal Ring into the rim to ensure it is properly sealed.
3. Make sure the lower part of the Seal Ring lines up with the
bottom side of the rim.
Lock
Close
Open
Close
Open
Seal Ring
Plunger Lid Rim
Do not immerse Innity™Blender
Base in water. Clean with damp
sponge or cloth and wipe dry.
Silicone Pad Removal
It may be necessary to remove the Silicone Pad for occasional
cleaning or to replace the part if it becomes worn or damaged.
To remove:
1. Lift up one corner of the Silicone Pad.
2. The Silicone Pad is tightly secured so make sure to carefully
pull out the Pad until it is removed.
Silicone Pad Cleaning
The Silicone Pad is dishwasher-safe, top rack only. It can only be
hand washed with warm soapy water.
The Innity™Blender was engineered with an automatic shut-off
feature to prevent overheating during use. If the Innity™Blender
shuts off to cool itself down, an odor may be detected. Unplug the
Innity™Blender and wait for it to completely cool down. To prevent
overheating, do not process at speeds not recommended.
TROUBLESHOOTING GUIDE
The Innity™ Blender is not turning on or working.
1. Plug may not be in the outlet. Plug in the Innity™Blender into
an appropriate power source.
2. The Red Power Switch on right side of Base may not be on.
Check to see if the Power Switch is on.
The Innity™Blender does not work when plugged in and
Power button and Power Switch are both ON.
The Lid is not on the Jar properly. Line up red dot on top of the
Lid with the Jar’s handle and press the Lid down firmly to secure
onto the Jar.
The Innity™Blender is not running at a high enough speed
for the recipe.
1. The Dial is not on the correct setting. Turn the Dial to proper
setting based on the recipe.
2. The Jar is overloaded. Reduce the amount of your
ingredients.

troubleshooting guide
20 21
nuwavenow.com
ENGLISHLimited Warranty
TROUBLESHOOTING GUIDE LIMITED WARRANTY
The Innity™Blender becoming clogged and not operating
efficiently.
1. Certain ingredients can cause clogging. When using the Plunger Lid,
remove the Plunger Cap from the Lid and insert the Plunger through
hole. Press the ingredients down and around until mixture loosens
around the bottom of the Jar.
2. The ingredient amounts higher than specified are being used. Do
not fill the Jar above ¾ capacity (1.5 liters, 51 fl oz).
3. Large pieces of ice are not mixing properly. Use smaller pieces of ice.
The blended mixture has lumps or the texture is not even.
Air pocket has formed (cavitation) and mixture is too cold or has
solidified in areas, and the blades are spinning in cavity. Increase the
temperature by reducing ice in the recipe.
Noises or motions unusual for the normal operation of the Innity™
Blender are detected.
1. The Blade assembly may be loose, missing a part, or possibly
damaged. Turn the Innity™Blender OFF and unplug immediately.
DO NOT disassemble the Blade assembly. Call Customer Service:
2. Foreign objects from ingredients may have been put into the Jar and
are making unusual sounds. Prior to adding your ingredients to the
Jar and blending, clean fruits/other ingredients and remove all debris
or any objects.
The NuWave® Innity™ High-Performance Blender
THE MANUFACTURER WARRANTS
The NuWave® Innity™High-Performance Blender is warranted to
be free from manufacturer defects. This Warranty covers original
owner of this Blender for personal household use only. This Warranty
does not apply to products used for commercial, rental or resale
purposes. The Innity Blades, Bearings, Motor Blender Base,
Blender Jar, Lid and Plunger are warranted for the lifetime of the
unit under normal household use, and when operated in accordance
with the Manufacturer’s written instructions. The NuWave® Innity™
High-Performance Blender is warranted for household use only and
not intended for commercial use. The Manufacturer will provide the
necessary parts and labor to repair any part of the NuWave® Innity™
High-Performance Blender at NuWave, LLC Service Department.
Should the warranty be voided for any reason, the cost of the labor
and parts will be the responsibility of the owner.
Customer must register their NuWave® Innity™High-Performance
Blender within six (6) months of purchase date to be eligible for
warranty coverage. Customer can register by scanning the QR
code on the back of the unit, or by visiting www.nuwavenow.com/qr.
If customer fails to register their unit within 6 months of purchase,
the warranty will be voided.
THE WARRANTY DOES NOT COVER
The Limited Warranty is voided if repairs are made by an
unauthorized dealer and/or the serial number data plate is removed
and/or defaced. Normal fading or discoloration of the product
caused by exposure to sunlight or chemicals such as ammonia,
laundry detergent, or household bleach is not covered by this
Warranty. This Limited Warranty does not cover failure, damages
or inadequate performance due to accident, acts of God (such as
lightning), uctuations in electric power, alterations, abuse, misuse,
misapplications, corrosive-type atmospheres, failure to operate in
Error Message: Solution(s)
Er1
The NTC Temperature Sensor has short circuted.
Contact NuWave Customer Service 1-877-689-2838
or help@nuwavenow.com.
Er2
The NTC Temperature Sensor is open. Contact
NuWave Customer Service 1-877-689-2838
or help@nuwavenow.com.
Er3
The NTC Sensor has overheated. Turn the Infini-
ty™Blender off and allow it to cool. If the Infinity™
Blender is not working after it cools down, Contact
NuWave Customer Service 1-877-689-2838 or
help@nuwavenow.com.

limited warranty
22 23
nuwavenow.com
ENGLISHLimited Warranty
LIMITED WARRANTY
accordance with the Manufacturer’s written instructions, abnormal
use or commercial use. The Limited Warranty is voided if, e.g., items
that are not food or drink are blended inside the unit. Damages
caused by improper use, including without limitation removing the jar
while the motor is operating, are not covered by the Limited Warranty.
NuWave, LLC reserves the right to void the Limited Warranty, where
allowable by law, for products purchased from an unauthorized
dealer or if sold or transferred by the original owner.
TO OBTAIN SERVICE
The owner shall have the obligation and responsibility to: pay for all
services and parts not covered by the warranty; prepay the freight to
and from Service Department for any part or system returned under
this warranty; and carefully package the product using adequate
padding material to prevent damage in transit. The original container
is ideal for this purpose. Include in the package the owner’s name,
address, daytime telephone number, a detailed description of the
problem, and your “RGA number.” Call 1-877-689-2838 or email
help@nuwavenow.com to obtain the RGA number (Return Goods
Authorization number). Provide the system model & serial number
and proof of date of purchase (a copy of the receipt) when making
claims under this warranty.
MANUFACTURER’S OBLIGATION
The Manufacturer’s obligation under this Limited Warranty is
limited, to the extent allowable by law, to repairing or replacing any
part covered by this Limited Warranty which upon examination is
found to be defective under normal use. The Limited Warranty is
applicable only within the continental United States and only to the
original purchaser of the manufacturer’s authorized channels of
distribution. THE LIMITED WARRANTY MAY NOT BE ALTERED,
VARIED OR EXTENDED EXCEPT BY A WRITTEN INSTRUMENT
EXECUTED BY THE MANUFACTURER. THE REMEDY OF
REPAIR OR REPLACEMENT AS PROVIDED UNDER THIS
LIMITED WARRANTY IS EXCLUSIVE. IN NO EVENT SHALL THE
MANUFACTURER BE LIABLE FOR ANY CONSEQUENTIAL OR
INCIDENTAL DAMAGES TO ANY PERSON, WHETHER OR NOT
OCCASIONED BY NEGLIGENCE OF THE MANUFACTURER,
INCLUDING WITHOUT LIMITATION, DAMAGES FOR LOSS OF
USE, COSTS OF SUBSTITUTION, PROPERTY DAMAGE, OR
OTHER MONEY LOSS.
Some states do not allow the exclusion or limitation of incidental
or consequential damages, so the above limitation exclusions
may not apply. This Limited Warranty gives specic legal rights,
and there may also be other rights which vary from state to
state. EXCEPT AS OTHERWISE EXPRESSLY PROVIDED
ABOVE, THE MANUFACTURER MAKES NO WARRANTIES
EXPRESSED OR IMPLIED ARISING BY LAW OR OTHERWISE,
INCLUDING WITHOUT LIMITATION, THE IMPLIED WARRANTIES
OF MERCHANTABILITY AND FITNESS FOR A PARTICULAR
PURPOSE TO ANY OTHER PERSON. READ YOUR OWNER’S
MANUAL. IF YOU STILL HAVE ANY QUESTIONS ABOUT
OPERATION OR WARRANTY OF THE PRODUCT, PLEASE
CONTACT NUWAVE, LLC.
READ YOUR OWNER’S MANUAL
If you still have any questions about operation or warranty of the
product, please contact NuWave, LLC at: 1-877-689-2838 or email
help@nuwavenow.com.

limited warranty
24 25
LIMITED WARRANTY
¿Preguntas o Inquietudes?
Sin costo: 1-877-689-2838 • help@nuwavenow.com
(Lun-Vie 7:30am-4:30pm hora central)
Manual del Propietario
Modelo 28202
Lock
Close
Open
Close
Open
LICUADORA INFINITY
TM

26 27
Usando su teléfono inteligente o
dispositivo inteligente, escanee el
código QR ubicado en la etiqueta
de su producto en la parte
posterior de el Innity™Blender.
Se le dirigirá a la página de
registro del el Innity™Blender
con el número de serie único
de su Innity™Blender que se
ingresa automáticamente en el
campo correspondiente.
NOTA: Si no tiene un dispositivo
inteligente habilitado para
la web, simplemente visite
nuwavenow.com/QR e ingrese
manualmente el número de
serie de su Innity™Blender.
Complete la información restante
y complete la encuesta opcional.
Una vez que envíe su
información, recibirá un correo
electrónico de conrmación
con los detalles de la garantía
extendida.
1
2
3
4
* Registre su Innity Blender™ dentro de 1 año a partir de la
fecha de compra para una extensión gratuita de 12 meses de
garantía limitada.
nuwavenow.com
Como agradecimiento especial por registrar su NuWave®
Innity™ Blender, ¡recibirá automáticamente 12 meses
adicionales a su garantía limitada del fabricante!*
Todo lo que tiene que hacer es seguir estos simples pasos.
¡REGÍSTRESE
AHORA!
12
¡para una garantía
adicional de
meses!
Abra su tienda de aplicaciones móviles (App Store,
Google™ Play).
Busque “lectores de códigos QR.”
Simplemente descargue el lector de códigos QR a su
teléfono, ábralo y escanee el código, ya está listo para
comenzar.
NOTA: Es posible que deba abrir el lector de código QR
descargado cada vez que desee escanear un código QR.
1
2
3
DESCARGUE LA APLICACIÓN QR
CODE EN SU DISPOSITIVO MÓVIL
lectores de códigos QR
ESPAÑOL

28 29
nuwavenow.com
ESPAÑOL
IMPORTANT SAFEGUARDS
HOUSEHOLD USE ONLY • READ ALL INSTRUCTIONS BEFORE USE
¡Enhorabuena por la compra de su NuWave® Innity™Blender!
Estamos increíblemente emocionados por usted a medida que
comience su cocina casera saludable con su nuevo Innity Blender™.
Queremos asegurarnos de que aproveche al máximo su
experiencia de cocina Innity™ Blender, por lo que hemos
proporcionado instrucciones detalladas aquí en este manual
para que conozca todos los detalles para ser un cocinero casero
exitoso de NuWave®. También hemos incluido una práctica Guía
de Inicio Rápida y un Libro de Recetas que contiene detalles
sobre todas las recetas preestablecidas escritas y desarrolladas
por nuestro equipo de talentosos chefs que ya están programadas
en su Innity™Blender.
Queremos que cada paso de su experiencia NuWave® sea lo más
fácil y graticante posible, por lo que si tiene alguna pregunta,
comentario o inquietud, no dude en ponerse en contacto con
nuestro Servicio al Cliente llamando al 1-877-689-2838 • help@
nuwavenow.com (de Lunes a Viernes de 7:30 a.m. a 4:30 p.m.
hora central).
Visite nuwavenow.com para ver nuestros otros productos
y accesorios NuWave®.
#nuwavenow
¡Conéctese con nosotros!
Bienvenido a la familia NuWave®
MEDIDAS DE SEGURIDAD IMPORTANTES
PARA USO DOMÉSTICO SOLAMENTE Y LEA TODAS LAS
INSTRUCCIONES ANTES DE USARLO
Medidas de Seguridad
Importantes
LEA TODAS LAS INSTRUCCIONES
ADVERTENCIA: Al usar Innity™Blender, siempre se deben seguir
las precauciones básicas de seguridad:
1. Para protegerse contra el riesgo de descarga eléctrica, no
sumerja la base de la licuadora, el cable, el enchufe ni ninguna
parte de la unidad principal en agua ni en ningún otro líquido.
2. Es necesaria una estrecha supervisión cuando se utiliza
cualquier aparato cerca de niños. Innity™Blender no está
diseñado para ser usado por niños, personas con capacidades
físicas, sensoriales o mentales reducidas o personas con falta
de experiencia o conocimiento de esta unidad.
3. Evite el contacto con piezas móviles.
4. No opere Innity™Blender con un cable o enchufe dañado, si
el aparato no funciona correctamente, se cae o se daña de
alguna manera. Comuníquese con Servicio al Cliente al 1-877-
689-2838 o envíe un correo electrónico a help@nuwavenow.
com para obtener información sobre el examen, la reparación,
o ajuste.
5. NO ESTÁ DISEÑADO PARA EL USO AL AIRE LIBRE. SOLO
PARA USO DOMÉSTICO. Este aparato está diseñado para
un uso doméstico normal. No está destinado a ser utilizado
en entornos tales como cocinas/cafeterías para el personal
en tiendas, ocinas, granjas u otros entornos de trabajo, ni
está destinado a ser utilizado por huéspedes en hoteles,
moteles, bed and breakfasts o cualquier otro lugar que no sea
ambientes residenciales.
6. No deje que el cable cuelgue del borde de la mesa o
mostrador. No permita que el cable entre en contacto con
supercies calientes, incluso de una estufa.
7. Deseche el plástico protector que cubre el enchufe de
alimentación antes del uso.
8. No lo coloque sobre o cerca de un quemador de gas o eléctrico
caliente, o en un horno caliente.
9. Mantenga las manos, los utensilios y los objetos extraños fuera
del recipiente mientras los mezcla para reducir el riesgo de
lesiones graves a personas o daños a la licuadora. Se puede
usar un raspador, pero solo cuando la licuadora no
este corriendo.

30 31
nuwavenow.com
ESPAÑOL
Medidas de Seguridad
Importantes
MEDIDAS DE SEGURIDAD IMPORTANTES
PARA USO DOMÉSTICO SOLAMENTE Y LEA TODAS LAS
INSTRUCCIONES ANTES DE USARLO
10. ¡PRECAUCIÓN! Las cuchillas son aladas. Manejar la
licuadora con cuidado. No manipule las cuchillas.
11. SIEMPRE utilice el Innity™Blender con la Tapa y la Jarra
correctamente en su lugar. El Tapón del Émbolo debe
colocarse rmemente en su lugar con el punto correctamente
alineado con el mango.
12. La alteración o modicación de cualquier parte de la licuadora
o el uso de accesorios no recomendados por el fabricante
puede causar incendios, lesiones o daños a la propiedad.
13. No utilice la unidad para otro uso que no sea el previsto.
14. No agregue líquidos calientes o hirviendo a la jarra.
15. NUNCA golpee la Jarra contra una supercie para aojar alimentos
atascados. Retire siempre la Jarra de la Base de el Innity™
Blender primero, luego use una espátula de goma para retirar los
ingredientes pegados en la parte inferior de la Jarra. No utilice
utensilios metálicos, ya que esto puede dañar la Jarra.
16. No agite ni sacuda el tarro mientras esté en uso.
17. Nunca retire el recipiente antes de que las cuchillas de Innity
Blender™se hayan detenido por completo.
18. Cuando prepare mantequillas o recetas con ingredientes
a base de aceite, no las procese por más de 1 minuto
después de que la mezcla comience a circular en la jarra. La
mezcla durante períodos más prolongados puede causar el
sobrecalentamiento de Innity™Blender.
19. Primero apague y luego desenchufe el Innity Blender™del
tomacorriente cuando no esté en uso, antes de poner o quitar
partes y antes de limpiar.
20. Mantenga el manual a mano para futuras referencias.
MEDIDAS DE SEGURIDAD ADICIONALES
VER LA LIMPIEZA Y MANTENIMIENTO ANTES DE USAR
Información Eléctrica
El Innity™Blender se suministra con un cable de
alimentación corto para reducir el riesgo de enredos o
tropezar con un cable más largo. Se pueden usar cables
de extensión si se tiene cuidado en su uso. Si se utiliza un
cable de extensión:
1. La clasificación eléctrica marcada del cable de extensión
debe ser al menos tan grande como la clasificación eléctrica
de el Innity™Blender.
2. El cable más largo debe colocarse de modo que no cuelgue
sobre la encimera o sobre la mesa donde los niños puedan
tirar de él o tropezarse involuntariamente. El Innity™
Blender debe operarse en una toma de corriente separada
de otros aparatos debido a limitaciones de potencia. Ciertos
modelos pueden tener un enchufe polarizado (una clavija
es más ancha que la otra). Para reducir el riesgo de una
descarga eléctrica, este enchufe está diseñado para encajar
en una toma polarizada de una manera. Si el enchufe no
encaja completamente en la toma de corriente, invierta el
enchufe. Si aún así el enchufe no se ajusta correctamente,
contacte a un electricista calificado. No intente modificar el
enchufe de ninguna manera.
3. Si el aparato es del tipo conectado a tierra, el juego de
cables o el cable de extensión debe ser un cable de 3
cables tipo conexión a tierra.

32 33
nuwavenow.com
ESPAÑOL
Medidas de Seguridad
Importantes
MEDIDAS DE SEGURIDAD IMPORTANTES
PARA USO DOMÉSTICO SOLAMENTE Y LEA TODAS LAS
INSTRUCCIONES ANTES DE USARLO
GUARDA ESTAS INSTRUCCIONES
Lea y comprenda todo el manual antes de usar el Innity™
Blender.
NO UTILICE LA UNIDAD PARA OTRO USO QUE NO
SEA EL PREVISTO.
Nota: Coloque el Innity™ Blender en una supercie que sea
horizontal, uniforme y estable. Este aparato está diseñado para
uso doméstico normal. No está diseñado para ser utilizado en
entornos como el personal de cocinas / cafeterías de tiendas,
ocinas, granjas u otros entornos de trabajo, ni está destinado a
ser utilizado por clientes en hoteles, moteles, bed and breakfast y
entornos no residenciales.
AVISO: LA FALTA DE SEGUIR CUALQUIERA DE LAS
MEDIDAS DE SEGURIDAD IMPORTANTES, LAS MEDIDAS DE
SEGURIDAD ADICIONALES O LAS INSTRUCCIONES PARA
EL USO SEGURO ES UN ABUSO DE SU INFINITY™BLENDER
QUE PUEDE ANULAR SU GARANTÍA Y CREAR EL RIESGO DE
LESIONES GRAVES.
ADVERTENCIA
En caso de mal funcionamiento, Inmediatamente desconecte y
contacte Departamento de servicio al cliente.
1-877-689-2838 (Lun - Vie 7:30am - 4:30pm hora central) o help@
nuwavenow.com
1. No coloque el Innity™ Blender cerca de materiales inamables,
unidades de calefacción o ambientes húmedos.
2. Es normal que algo de humo se escape de Innity™Blender
cuando se mezcla por primera vez.
3. Si se escapa mucho humo de la salida de aire durante la
operación, desenchufe el Innity™Blender de inmediato y
comuníquese con el Servicio al Cliente.*
4. NO retire las cuchillas de ninguna manera ni intente quitarlas
para limpiar.
5. Se debe tener mucho cuidado al operar el Innity™Blender o
cualquier otro aparato.
6. No mueva el Innity™Blender mientras esté en funcionamiento.
Solo después de que el Innity™Blender haya terminado de
mezclar y se haya enfriado por completo, se debe intentar
mover. Siempre espere a que el Innity™Blender se enfríe
antes de manipularlo.
7. Los niños deben ser supervisados para asegurarse de que no
jueguen con el Innity™Blender.
8. Si surge algún problema durante la operación, el servicio DEBE
ser realizado por NuWave®LLC o autorizado por el fabricante
para reparaciones.
9. No desmonte el Innity™Blender ni reemplace ninguna pieza
sin el consentimiento previo por escrito del fabricante.
10. No use utensilios de metal ya que esto puede dañar el
recipiente.
11. Asegúrese de que el Innity™Blender™esté siempre limpio
antes de usarlo.
12. Apague la unidad y desenchufe el Innity™Blender ANTES de
tocar las partes móviles o de alcanzar un utensilio. Apague la
alimentación y desenchúfela cuando el Innity™Blender esté
desatendido.
13. No opere la licuadora si se detectan sonidos o movimientos
anormales. Si un objeto duro o extraño entra en contacto con
las cuchillas en el recipiente, no lo sirva.
14. Inspeccione el conjunto de cuchillas de el Innity™Blender
después de cada uso, y si hay piezas sueltas, dañadas o
faltantes, comuníquese con el Servicio al Cliente al
15. 1-877-689-2838 o envíe un correo electrónico a help@
nuwavenow.com.
16. Siempre tenga mucho cuidado al inspeccionar o mantener el
Innity™Blender o cualquier otro aparato.
17. El aparato no está diseñado para ser operado por medio de un
temporizador externo o un sistema de control remoto separado.
*Departamento de servicio al cliente: 1-877-689-2838 (luin - Vie
7:30am - 4:30pm hora central) o help@nuwavenow.com
PRECAUCIÓN
Nunca use el ensamblaje de cuchillas de Innity™Blender
con piezas sueltas, dañadas o faltantes.

partes y accesorios
34 35
nuwavenow.com
PARTES Y ACCESORIOS GUÍA DE MONTAJE
ESPAÑOLGuía de Montaje
Para pedir piezas reemplazables, diríjase a la sección Piezas reemplazables
y luego a NuWaveNow.com.
1
4
3
6
2
5
Lock
Close
Open
Close
Open
Lock
Close
Open
Close
Open
Lock
Close
Open
Close
Open
Lock
Close
Open
Close
Open
Bloqueo de
la tapa
Lock
Close
Open
Close
Open
Ensamble de la Tapa del Émbolo
1. Alinee el punto rojo en la Tapa con el mango.
2. Presione hacia abajo la Tapa hasta que quede firmemente en
su lugar.
3. El bloqueo de la Tapa tiene dos seguros
• Gire el bloqueo de la Tapa en sentido de las manecillas del
reloj para cerrar y bloquear.
• Para desbloquear, gire el bloqueo de la Tapa en sentido
contrario a las manecillas del reloj.
Bloquear
Tapa del Émbolo
Lock
Close
Open
Close
Open
Tapón del Émbolo
Jarra
La Tapa del Émbolo y el Tapón del
Émbolo se usan cuando se agregan
ingredientes adicionales mientras se licua.
Seguros de
la tapa
(1 en cada lado)
Lengüetas
de la Jarra
(1 en cada lado) Desbloquear
PRECAUCIÓN
Asegúrese de que todas las piezas estén bien fijadas.
Tapón del Émbolo
Parte #: MXA4
Tapa del Émbolo
Parte #: MXA3
Anillo de sello
Parte #: MXP2
Jarra con Cuchilla
Parte #: MXA1
Base de la Licuadora
Parte #: MXA15
Émbolo
Parte #: MXA6
Almohadilla de Silicona
Parte #: MXA21
1
2
3
4
5
6
7
7

guía de montaje
36 37
nuwavenow.com
GUÍA DE MONTAJE INICIO RÁPIDO
ESPAÑOLInicio Rápido
Lock
Close
Open
Close
Open
Embolo
Al usar el Émbolo
Retire el Tapón del Émbolo de la Tapa antes de insertar el Émbolo.
La Tapa del Émbolo está diseñada con la abertura del orificio para
que el Émbolo no entre en contacto con las cuchillas.
Cuando no use el Émbolo, coloque el Tapón en la Tapa presionando
hacia abajo.
Lock
Close
Open
Close
Open
Ensamble de la Jarra con la Tapa
del Émbolo
1. Coloque la Jarra en la Base
alineándolo sobre las 4 Columnas
de Goma.
2. Presione la Tapa firmemente hacia
abajo en la Jarra.
Lock
Close
Open
Close
Open
4 Columnas
de Goma
21
0
Los ajustes y los tiempos se pueden ajustar antes y durante
el proceso de fusión. Presione las echas hacia arriba y hacia
abajo para establecer o ajustar.
Encienda y apague el Innity™Blender.
Encienda el interruptor de alimentación de la base principal rojo. El
interruptor está ubicado en el lado derecho de la Base. Presiona
el botón de Encendido una vez para encender tu Innity™Blender.
Presione Power nuevamente para apagar el Innity™Blender.
Empieza a lucuar. La pantalla LED mostrará el tiempo
predeterminado para la conguración seleccionada.
Gire la perilla para elegir la función adecuada. Presiona
Start/Pause para comenzar a mezclar. Presione Start/Pause
nuevamente para detener la mezcla.
Nota: No llene la jarra por encima de la capacidad. Para obtener
los mejores resultados, no llene más de 1.5 litros (51 oz) de
líquido. Consulte el manual para más informacion.
Elija el tiempo. Presione las echas hacia arriba y hacia abajo
para aumentar o disminuir el tiempo en la pantalla.
Los tiempos se muestran en minutos y segundos. Los ajustes se
pueden hacer en todas las funciones.

inicio rápido
38 39
nuwavenow.com
INICIO RÁPIDO INSTRUCCIONES
ESPAÑOLInstrucciones
Notas:
• Al mezclar durante un largo período de tiempo, los líquidos
pueden calentarse y el vapor puede escapar de la tapa del
émbolo. Consulte el manual para más.
Utilice los ajustes numerados. El tiempo predeterminado es
de 3 min. Cuando esté en vacío, el valor predeterminado se
establecerá en 2 min.
Para la mezcla estándar, puede seleccionar uno de los ajustes
numerados entre 1 y 10. Ajuste a timepo deseado, luego presione
Start/Pause para comenzar la mezcla.
Nota: El ajuste más bajo es el # 1 (5,000 RPM). El ajuste más alto
es # 10 (17,000 RPM).
Conguración del icono. Para tareas de mezcla especializadas.
Cada conguración de ícono tiene tiempo predeterminado y
RPM incorporados.
Gire la perilla a la conguración de icono deseada y presione Start/
Pause para comenzar a mezclar.
Nota: Comience siempre con líquidos fríos al licuar. NO agregue
líquidos calientes a la licuadora.
Limpiando tu Innity™Blender Jar:
Agregue agua y 1-2 gotas de jabón líquido para platos a su
recipiente, colóquelo en la base y cierre la tapa. Gire la perilla para
limpiar. 00:15 se mostrará en la pantalla LED. Ajuste el tiempo si lo
desea, y luego presione Start/Pause. Una vez que haya terminado,
retire la jarra, enjuague bien y seque antes de usar.
Nota: Para obtener instrucciones detalladas sobre la limpieza,
consulte “Limpieza y mantenimiento” en el manual del usuario.
Empezando
1. Encienda el interruptor de alimentación de la base principal
rojo. El interruptor está ubicado en el lado derecho de la base
de la licuadora.
• El botón de encendido parpadeará.
2. Presiona el botón de Encendido una vez para encender
tu Innity™Blender. La pantalla LED mostrará el tiempo
predeterminado para la configuración seleccionada.
3. Gire la perilla para elegir la función de fusión adecuada.
4. Presiona Start/Pause para comenzar a mezclar.
5. Presione Start/Pause nuevamente para detener la mezcla.
Presiona el botón ON/OFF nuevamente y presiona el
Interruptor de Encendido de la Base principal rojo para apagar
tu Innity™Blender.
Configuración de la hora
Presione las flechas hacia arriba y hacia abajo para aumentar o
disminuir el tiempo en la pantalla.
1. Los tiempos se muestran en minutos y segundos.
2. Esto se puede hacer en todos los ajustes.
Ejemplo:
Presione el botón de encendido. Gire la perilla a
Ice. Se mostrará 00:15 (15 segundos). Presione
las flechas hacia arriba y hacia abajo para ajustar
el tiempo. Presione Start/Pause.
Configuraciones Numeradas
Para la mezcla estándar, seleccione una de las
configuraciones numeradas entre 1 y 10.
1. Gire la perilla a la configuración deseada
entre 1 y 10. Cuando esté en vacío, el valor
predeterminado será 02:00.
2. Ajuste el tiempo si lo desea [1], luego presione Start/Pause
para comenzar a mezclar en la
configuración seleccionada.
3. Ajuste la configuración del número usando la perilla en
cualquier punto mientras mezcla, si es necesario.
• La configuración más baja es #1 (5,000 RPM).
• La configuración más alta es #10 (17,000 RPM).
Función Pulse
El Infinity™Blender ofrece dos funciones de pulso en las que la
configuración de energía es totalmente ajustable.
00:15
Other manuals for INFINITY 28202
3
Table of contents
Languages:
Other NuWave Blender manuals

NuWave
NuWave Moxie 28101 User manual

NuWave
NuWave Moxie Vacuum Quick guide

NuWave
NuWave Twister HL-2070 User manual

NuWave
NuWave Moxie Vacuum User manual

NuWave
NuWave ON-THE-GO User manual

NuWave
NuWave Moxie Pro User manual

NuWave
NuWave 28401 User manual

NuWave
NuWave INFINITY 28202 User manual

NuWave
NuWave Twister Quick guide

NuWave
NuWave Infinity ProPlus 28301 User manual