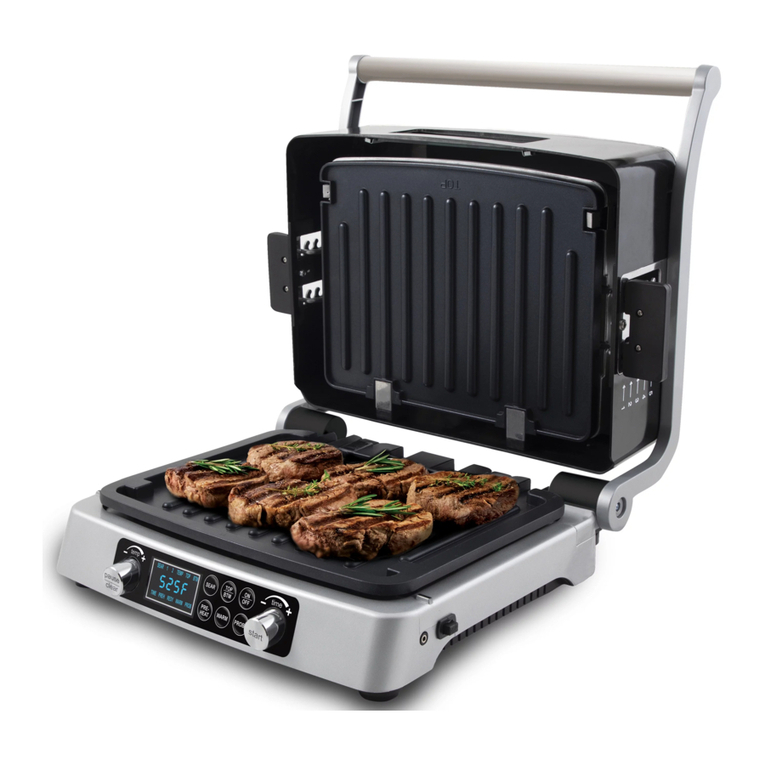
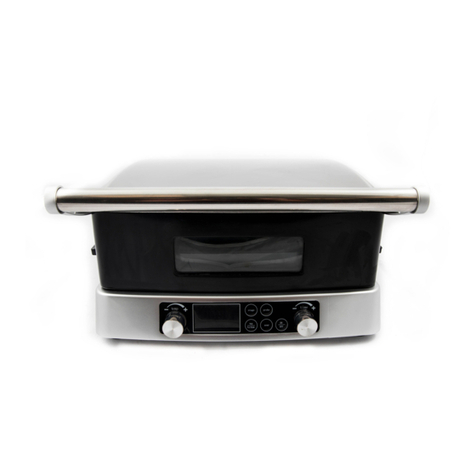
NuWave Primo User manual

OWNER’S MANUAL
nuwavenow.com
®
with Temperature Probe

Open your mobile app store
(App Store, Google Play).
Search for "QR code readers."
Simply download the QR code reader to your phone,
open it, scan the code and you are ready to go.
NOTE: You may need to open your downloaded QR
code reader each time you want to scan a QR code.
nuwavenow.com
2 3
nuwavenow.com
2 3
b
REGISTER
NOW!
3for an additional
-month
warranty!
As a special thank-you for registering your NuWave
Primo, you’ll automatically receive an additional 3
months added to your limited manufacturer’s warranty!*
All you have to do is follow these simple steps.
Using your smartphone or
smart device, scan the QR code
located on the back of the Primo.
You will be directed to NuWave’s
product registration page with
your Primo’s unique serial
number automatically entered in
the appropriate eld.
NOTE: If you do not have a
web-enabled smart device,
simply visit nuwavenow.com/
QR and manually enter in your
Primo’s serial number.
Fill out the remaining information
and complete the optional survey.
Once you submit your
information, you will receive
a conrmation email containing
your extended warranty details.
1
2
3
4
*Register your product within 1 year of date of purchase
for a free 3-month extension of your limited warranty.
1
2
3
DOWNLOAD THE QR CODE
APP TO YOUR MOBILE DEVICE
QR code readers

table of contents nuwavenow.com
4 5
ENGLISH
nuwavenow.com
TABLE OF CONTENTS
4 5
IMPORTANT SAFEGUARDS
HOUSEHOLD USE ONLY • READ ALL INSTRUCTIONS BEFORE USE
OWNER’S MANUAL
Important Safeguards .......................................................5-8
Parts & Accessories............................................................. 9
Assembly Guide................................................................. 10
Quickstart........................................................................... 11
Instructions....................................................................12-21
Cleaning & Maintenance..................................................... 22
Troubleshoot Guide........................................................22-23
Limited Warranty ............................................................24-27
Spanish............................................................................28-53
Replaceable Parts...........................................................54-55
WARNING: When using the Primo®, basic safety precautions
should always be followed:
1. Read all instructions, safeguards, and warnings before using
the Primo.
2. Do not touch hot surfaces. Use handles or knobs.
3. Use the handles on the Power Head or use oven mitts.
4. To protect against electrical shock, do not immerse cord, plugs,
or the Primo in water or other liquids.
5. Close supervision is necessary when any unit is used by or near
children. The Primo is not intended for use by children, persons
with reduced physical, sensory, or mental capabilities or those
with lack expertise or knowledge of this Primo.
6. Unplug the Primo from outlet when not in use and before cleaning.
7. Allow the Primo to cool before cleaning, putting on or taking off parts.
8. Do not operate Primo with a damaged cord or plug or after the
appliance malfunctions or has been damaged in any manner.
Return appliance to the nearest authorized service facility for
examination, repair, or adjustment.
9. The use of other accessories that are not intended to be used
with the Primo is not recommended. Doing so may damage the
Primo and can cause accidents.
10. NOT INTENDED FOR OUTDOOR USE. HOUSEHOLD USE ONLY.
11. Do not let cord hang over edge of table or counter or touch
hot surfaces.
12. Do not place on or near a hot gas, electric burner, or in a
heated oven.
13. The Primo Base will accumulate hot liquids from cooking.
Use extreme caution when removing the Base (or Grill Plate)
containing hot liquids.
14. Never put the Primo against the wall or other appliances. There
should be at least 3 inches of free space for the back side, left/
right sides, and the upper side of the Primo.
15. Do not place anything on top of the Primo.
16. Always remove the Dome away from you so the escaping steam
is directed away from your face.
17. To disconnect, turn the Primo OFF, then remove plug from the
wall outlet.
nuwavenow.com

important safeguards nuwavenow.com
6 7
ENGLISH
nuwavenow.com
IMPORTANT SAFEGUARDS
HOUSEHOLD USE ONLY • READ ALL INSTRUCTIONS BEFORE USE
6 7
18. It is normal for some smoke to escape the Primo when heating
for the first time.
19. If a lot of smoke is escaping from the air vent during operation,
unplug the Primo immediately and contact Customer Service.*
20. Do not clean with metal scouring pads. Pieces can break off the
pad and touch electrical parts, creating a risk of electric shock.
21. The Primo is not intended to be operated by means of an
external timer or separate remote-control system.
22. Keep manual handy for future reference.
*Customer Service Department:
1-877-689-2838 • help@nuwavenow.com
Electrical Information
A short power-supply cord (or detachable power-supply cord)
is provided to reduce the risk of becoming entangled in or
tripping over a longer cord. Longer detachable power-supply
cords or extension cords are available and may be used if care
is exercised in their use. If a longer detachable power-supply
cord or extension cord is used:
1. The marked electrical rating of the extension cord should be
at least as great as the electrical rating of the appliance.
2. The longer cord should be arranged so that it will not drape
over the countertop or tabletop where it could be pulled on or
tripped over unintentionally. The Primo should be operated on
a separate electrical outlet from other operating appliances
due to wattage limitations. The appliance has a polarized
plug (one blade is wider than the other). To reduce the risk
of electric shock, this plug is intended to fit into a polarized
outlet only one way. If the plug does not fit fully into the outlet,
reverse the plug. If it still does not fit, contact a qualified
electrician. Do not attempt to modify the plug in any way.
3. If the appliance is of the grounded type, the cord set or
extension cord should be a grounding-type 3-wire cord.
SEE CLEANING AND MAINTENANCE BEFORE USE
ADDITIONAL SAFEGUARDS
1. Do not place the Primo close to flammable materials, heating
units, or wet environments.
2. Do not replace with other parts that are not designed specifically
for the Primo.
3. Do not move the Primo while in operation. Only after the Primo
has completely cooled should moving be attempted. Always wait
for the appliance to cool down prior to handling it.
4. Never block the air vents.
5. Use extreme caution when operating the Primo or any
other appliance.
6. Stop or pause cooking before removing the Dome. The Dome
with Power Head should be placed on the Dome Holder.
WARNING
In case of malfunctions,
unplug the Primo and contact Customer
Service:
1-877-689-2838 • help@nuwavenow.com
SAVE THESE INSTRUCTIONS
Read and understand the entire manual before using the Primo.
NOTICE: THE FAILURE TO FOLLOW ANY OF THE IMPORTANT
SAFEGUARDS, ADDITIONAL SAFEGUARDS, OR THE
INSTRUCTIONS FOR SAFE USE IS A MISUSE OF YOUR PRIMO
THAT CAN VOID YOUR WARRANTY AND CREATE THE RISK OF
SERIOUS INJURY.
DO NOT USE THE PRIMO FOR ANYTHING OTHER THAN ITS
INTENDED USE.
Note: Place the Primo on a surface that is horizontal, even, and
stable. The Primo is intended for normal household use. It is not
intended to be used in environments such as staff kitchens/cafeterias
of shops, offices, farms, or other work environments, nor is it intended
to be used by clients in hotels, motels, bed and breakfasts, and non-
residential environments.

important safeguards nuwavenow.com
8 9
ENGLISH
nuwavenow.com
IMPORTANT SAFEGUARDS
HOUSEHOLD USE ONLY • READ ALL INSTRUCTIONS BEFORE USE
8 9
CAUTION
• Do not cover the air inlet and outlet
vents while the Primo is operating.
• Do not pour oil into the Base or onto the
Grill Plate, as this may create a fire hazard.
• Never touch the insides or outside of
the Primo while it is operating.
7. If any trouble arises during operation, any service MUST be done by
NuWave LLC or authorized by the manufacturer for repairs.*
8. Do not disassemble the Primo or replace any parts without prior
written consent from the manufacturer.
9. Children should be supervised to ensure that they do not play
with the appliance.
10. Make sure the Primo is always clean prior to cooking.
11. DO NOT use Grill Plate outside of Base.
*Customer Service:
1-877-689-2838 • help@nuwavenow.com
PARTS & ACCESSORIES
1
3
5
2
6
4
PROBE
To order replaceable parts head over to Replaceable Parts section
and then NuWaveNow.com.
Power Head
Part #: 26701
Probe
Part #: 26706
Power Dome
Part #: 26702
1
2
3
Dome Holder
Part #: 26707
Non-Stick Grill Plate
Part #: 26704
Base
Part #: 26705
4
5
6

nuwavenow.com 11
ENGLISH
nuwavenow.com 11
assembly guide
1010
ASSEMBLY GUIDE
TOP
PROBE
Lock
PROBE
Connecting Power Head to Dome
1. Place Power Head on rim
of Dome.
2. Lock into place by rotating Power
Head clockwise until the locking
lugs are engaged.
Assembling the Primo
1. Place Base on a firm, stable
surface. Do not place on
a stovetop.
2. Match the cutout of the
Base with the plug inlet of the
Grill Plate. Place Grill Plate
inside Base.
3. Connect power cord to Grill Plate.
4. Place food on Grill Plate.
5. Place Power Dome with Power
Head over food. Connect to the
Base. Dome should fit evenly
and securely onto Base.
6. If using Probe, insert plug of
Probe into Power Head (jack).
Next, insert other end of Probe
through hole in Power Dome and
lift up Power Head with Power
Dome. Insert Probe end properly
into food. Close down Power
Head with Dome.
7. Plug the Primo and press ON/
OFF.
8. Set cook time and temperature
according to recipe requirements.
9. After cooking, remove Dome
with Power Head and place onto
Dome Holder. Do not leave on
Dome Holder for extended period
of time as warping may occur.
QUICKSTART
50
50
ON/OFF
Press ON/OFF. This button also stops any cooking function. While
cooking, press ON/OFF to cancel.
START/PAUSE
Select a cooking function, press START/PAUSE to begin cooking.
Cooking temp range 50˚F - 400˚F.
WARM/REHEAT
For WARM, press WARM/REHEAT. Press START/PAUSE to begin.
For REHEAT, press and hold down WARM/REHEAT for 1 second.
The Primo will begin automatically.
PREHEAT
Press PREHEAT. The temp and time are adjustable using Up or
Down arrows. To begin, press START/PAUSE. Once it has reached
the set temperature, the Primo will beep twice and automatically begin
to cook. To begin cooking, press START/PAUSE.
SEAR
Press SEAR. If preferred, adjust Sear temp and time and press
START/PAUSE.
PROBE
Plug the Probe into the Power Head (jack). Press PROBE. Set Probe
target internal temperature for food using the Up or Down arrows. Bring
through hole and insert the Probe into your food. Press START/PAUSE
to begin cooking.
PROG
Press PROG and press the Up or Down arrows to choose preset
items (1-100) to cook. Press START/PAUSE to begin the chosen
program. Press Up or Down arrows when in each cooking function to
adjust temps and times.
TOP/BTM
Press TOP/BTM and press Up or Down arrows to adjust TOP
percentage. As the TOP percentage changes, so will the BTM. Press
TOP/BTM again to adjust BTM. As the BTM percentage changes, so
will the TOP. The Top/BTM defaults are 30%/70%.
STAGE
To add a cooking stage, press STAGE once and adjust temperature
and time by pressing the Up or Down arrows.

instructions nuwavenow.com
12 13
ENGLISH
nuwavenow.com
INSTRUCTIONS
12 13
Getting Started
1. Press ON/OFF once to turn
your Primo on.
2. Press START/PAUSE to
begin cooking at 350°F for 15
minutes, which are the
default settings.
• 00:15 will be displayed and a
countdown will begin.
• Both the cooking temperature and time can be adjusted during
cooking by pressing TEMP/TIME then pressing the Up or
Down arrows to adjust each.
3. Press START/PAUSE once during cooking to pause.
• PREHEAT and PROBE will not work when the Primo is
paused.
4. Press START/PAUSE a second time to resume cooking.
• Remaining cooking time will be displayed and the countdown
will continue.
TEMP/TIME Function
1. Press ON/OFF.
• To adjust temperature, press
the Up or Down arrows.
Adjustable in 5°F increments.
To change temperature
faster, hold down the Up or
Down arrows.
• To adjust time, press TEMP/
TIME. Press the Up or
Down arrows.
• Time will adjust in 1-minute increments. To change time faster,
hold down the Up or Down arrows.
2. Press START/PAUSE. The Primo will cook your food at the
adjusted cooking temperature and time.
• When the Primo is finished cooking, End will be displayed and
the Primo will beep three times.
50
50
PREHEAT Function
The Preheat function ensures that the Primo reaches your desired
temperature before cooking begins.
1. Press ON/OFF.
• To adjust cooking temperature, press the Up or Down arrows.
• To adjust cooking time, press TEMP/TIME. Press the Up or
Down arrows until desired time is reached.
2. Press PREHEAT. The display
will show the adjusted
cooking temperature.
3. The Primo will begin to preheat.
The set Preheat temperature
will flash during preheating.
• Once the Preheat
temperature is reached, the
Primo will beep twice and automatically begin to cook.
4. Remove the Power Head with Dome and place your food on the
Grill Plate.
5. Return Power Head with Dome to Primo and press START/
PAUSE. This will begin the cooking process at the set
temperature and time.
• When the cooking is finished, End will be displayed and the
Primo will beep three times.
Note: If the Primo Power Head is removed from the Dome, the Primo
will not turn off.
50
50
50
50

instructions nuwavenow.com
14 15
ENGLISH
nuwavenow.com
INSTRUCTIONS
14 15
SEAR Function
SEAR 1
SEAR 1 will always be BEFORE
the regular cooking stage.
Default - 450°F, 5 minutes.
1. Press ON/OFF.
2. Press SEAR once.
3. Press START/PAUSE. The
Primo will preheat at 450°F and
then sear at 450°F for 5 minutes
and then cook at 350°F for 15 minutes (default).
• When the Primo is finished cooking, End will be displayed.
To adjust your regular cooking temperature and time:
1. Press ON/OFF.
2. Press Up or Down arrows to adjust the desired temperature.
3. Press TEMP/TIME. Press the Up or Down arrows to adjust to
your desired time.
4. Press SEAR once.
5. Press START/PAUSE.
• The Primo will preheat at 450°F and then sear at 450°F for
5 min., cook at selected temperature and time, and finish
cooking and display End.
SEAR 1 2
Default - 450°F, 10 minutes.
1. Press ON/OFF.
2. Press SEAR three times.
3. Press START/PAUSE.
• The Primo will sear your food
at 450°F for 5 min. (SEAR
1), then cook at 350°F for
15 min. (default). Next, it will sear again at 450°F for 5 min.
(SEAR 2).
• When the Primo is finished cooking, End will
be displayed.
To adjust your regular cooking temperature and time:
1. Press ON/OFF.
2. Press Up or Down arrows to adjust the desired temperature.
3. Press TEMP/TIME. Press the Up or Down arrows to adjust the
desired time.
4. Press SEAR twice.
5. Press START/PAUSE.
50
50
50
50
• The Primo will preheat at 450°F and then sear at 400°F for 5
minutes (SEAR 1), cook at selected temperature and time, sear
again at 450°F for 5 minutes (SEAR 2), and then finish cooking
and will display End.
Setting different SEAR 1 and SEAR 2 temperatures and times:
1. Press ON/OFF.
2. Press SEAR once. SEAR 1, TEMP, and 450F will be displayed.
To adjust the SEAR 1 cooking temperature and time:
3. Press Up or Down arrows to adjust to the desired temperature.
4. Press TEMP/TIME. Press Up or Down arrows to adjust to your
desired time.
5. Press SEAR again. SEAR 2, TEMP, and 450F will be displayed.
To adjust the SEAR 2 cooking temperature and time:
6. Press Up or Down arrows to adjust to your desired temperature.
7. Press TEMP/TIME. Press the Up or Down arrows to adjust to your
desired time.
• The Primo will cook SEAR 1 at set temperature and time,
cook at 350°F for 15 minutes (default), then cook at SEAR 2
at the set temperature and time.
Notes:
• Press SEAR four times to clear out the Sear function.
• Preheat temperature for all Sear functions is 450°F.
• Maximum Temp and Time for all sear functions is 5 minutes.
SEAR 2
SEAR 2 will always be AFTER the
regular cooking stage. Default -
450°F, 5 minutes.
1. Press ON/OFF.
2. Press SEAR three times.
3. Press START/PAUSE.
• The Primo will cook your food
at 350°F for 15 min. (default), then sear at 450°F for 5 min.
(SEAR 2). When the Primo is finished cooking, End will be
displayed.
To adjust your regular cooking temperature and time:
1. Press ON/OFF.
2. Press Up or Down arrows to adjust to your desired temperature.
3. Press TEMP/TIME. Press Up or Down arrows to adjust the
desired time.
4. Press SEAR three times.
5. Press START/PAUSE.
50
50

instructions nuwavenow.com
16 17
ENGLISH
nuwavenow.com
INSTRUCTIONS
16 17
• The Primo will cook your food at selected temperature and
time, sear at 400°F for 10 minutes, and then finish cooking
and display End.
STAGE Function
You can program a maximum of 5
stages into your Primo.
1. Press ON/OFF. This is Stage
1 cooking.
• Adjust cooking temperature
by pressing the Up or
Down arrows.
• Adjust cooking time by
pressing TEMP/TIME. Press the Up or Down arrows to adjust
the time.
2. Press STAGE.
• To adjust the cooking
temperature press the Up or
Down arrows.
• Adjust cooking time by
pressing TEMP/TIME. The
display will show TIME,
STAGE 2, and 00:00. Press the Up or Down arrows to adjust
the desired cooking time.
3. Press STAGE again to program a third stage of cooking. The
display will show default cooking temperature 350°F, TEMP, and
STAGE 3.
• To adjust the cooking temperature for stage 3, press the Up or
Down arrows to adjust your desired cooking temperature.
• Adjust cooking time by pressing TEMP/TIME. The display
will show TIME, STAGE 3, and 00:00. Press the Up or Down
arrows to adjust your desired cooking time.
4. Press START/PAUSE to begin cooking. The Primo will cook,
following the stages that were programmed.
• A maximum of 5 stages can be programmed.
Example: Cook Stage 1 at 300°F for 17 min. »Cook Stage 2 at
360°F for 30 min. »Cook Stage 3 at 400°F for 5 min.
1. Press ON/OFF. Press the Up or Down arrows to adjust cooking
temperature to 300˚F.
2. Press TEMP/TIME. Press the Up or Down arrows to adjust
cooking time to 00:17.
3. Press STAGE. Press the Up or Down arrows to adjust cooking
temperature to 360˚F.
50
50
4. Press TEMP/TIME. Press the Up or Down arrows to adjust
cooking time to 00:30.
5. Press STAGE again. Press the Up or Down arrows to adjust
cooking temperature to 400˚F.
6. Press TEMP/TIME. Press the Up or Down arrows to adjust
cooking time to 00:05. Press START/PAUSE.
PROG Function
The Program button represents
Memory Entry and Memory Recall.
Preset Programs
Preset Programs given numbers 1 to
100 and can be adjusted.
To recall a preset program:
1. Press ON/OFF.
2. Press PROG.
• Choose the program number (1-100) by pressing the Up or
Down arrows.
• Once program number is chosen, press START/PAUSE.
The Primo will cook your preprogrammed recipe.
Note: Preset temperatures and times for program recipes 1-100 can
be adjusted. Adjusted temps and times will not be saved when a
program number (1-100) is recalled once again.
To program your own recipe:
1. Press ON/OFF.
2. Press PROG. The display will show PROG and 101.
3. Press Up or Down arrows to choose the program number to save
a recipe to. Program numbers can be chosen between 101-150.
4. Press PROG again to save your recipe to the desired
program number.
Note: 101 to 150 can be preprogrammed for your own saved recipes.
Program your recipe after cooking:
1. Press ON/OFF.
2. Set cooking functions including temperatures and times.
3. Press START/PAUSE.
4. Once cooking is finished and End is displayed, press PROG.
The display will show PROG and 101.
5. Press Up or Down arrows to choose the program number to
save your recipe to. Program numbers can be chosen between
101-150.
6. Press PROG again to save your recipe to the desired
program number.
50
50

instructions nuwavenow.com
18 19
ENGLISH
nuwavenow.com
INSTRUCTIONS
18 19
Notes:
• There are 100 preprogrammed recipes in the Primo that can be
adjusted (number 1 to 100).
• Preset temperatures and times for program recipes 1-100 can
be adjusted. Adjusted temps and times will not be saved when a
program number (1-100) is recalled once again.
• Up to 100 unique programs (recipes) can be stored (number 101
to 150).
Memory Recall
1. Press ON/OFF.
2. Press PROG. The display will show 1 and PROG.
• Choose the program number (1-150) by pressing the Up or
Down arrows.
• Once program number is chosen, press START/PAUSE. The
Primo will cook the preprogrammed recipe.
• Numbers 1-100 are preset programs.
• Numbers 101-150 are user-set programs.
Note: If a program number is chosen that already has a recipe
assigned to it, any new recipe you program into that number will
override the previous recipe.
WARM/REHEAT Function
The Warm function is used to keep your food items warm in the
Primo after cooking has completed until you are ready to serve it.
The default setting for Warm is 140°F for 1 hour.
1. Press ON/OFF and set the
cooking recipe.
2. Press WARM/REHEAT.
• To adjust the warming
temperature, press the Up or
Down arrows.
• To adjust the amount of time
the Primo will keep your food
warm, press TEMP/TIME. Press the Up or Down arrows to
reach the desired warming time. The default warm time is 1
hour (01:00). The maximum warming time is 3 hours (03:00).
3. Press START/PAUSE to begin cooking. The Primo will cook at set
cooking temperature and time, and then will go into Warm mode.
• To leave the Warm function, press WARM/REHEAT and
WARM will no longer be displayed.
50
50
REHEAT
The default is set to 360°F for 4 minutes.
1. Press ON/OFF.
2. Press and hold down
WARM/REHEAT for 1 second to
select REHEAT. The Primo will
beep and begin
reheating automatically.
TOP/BOTTOM Function
This refers to the amount of heat
coming from the top and bottom heating elements. You can adjust
your Primo to cook from the top or bottom and the amount of power.
Default - Top 30%, Bottom 70%.
1. Press ON/OFF.
2. Press TOP/BTM. TOP will flash.
• Press the Up or Down
arrows to adjust TOP heat
percentage. As TOP goes
higher, BOTTOM goes
lower. TOP and BOTTOM
percentages will always
equal 100%.
• When using TOP only at 100%, FP will be displayed.
• BOTTOM max power is 70%.
• The Primo will cook your food using the adjusted top and
bottom power levels.
• When finished, the display will show End and the Primo will
beep three times.
PROBE Function
The digital temperature Probe is used to show an accurate internal
temperature of your food.
1. Press ON/OFF. Place food on Grill Plate.
2. Plug the Probe into the Power Head (Jack). Next, insert other
end of Probe through hole in Power Dome and lift up Power
Head with Power Dome. Insert Probe end properly into your food.
Replace the Power Head with Dome.
50
50
50
50

instructions nuwavenow.com
20 21
ENGLISH
nuwavenow.com
INSTRUCTIONS
20 21
3. Press and hold down PROBE to display the set target
temperature of Probe.
• Press the Up or Down arrows to adjust desired Probe
temperature. Once temperature is adjusted, the temperature
will stay displayed.
4. Press START/PAUSE. Primo will start to cook your food to the set
internal probe temperature.
• During cooking, the display will show probe temperature.
• Press PROBE to see the
current Probe temperature.
• Press TEMP/TIME to see the
cooking temperature.
Note: The Primo will continue to
cook your food until the target Probe
temperature is achieved regardless
of the cooking time set.
Example: Probe temperature: 200°F »Regular cooking temperature:
400°F, 5 min. »SEAR 2: 425°F, 2 min. »Warm: 140°F, 30 min.
1. If Probe temperature was not achieved under regular cooking
(400˚F, 00:05), Primo will go to SEAR 2. If probe temperature
is still not achieved in SEAR 2, Primo will go back to regular
cooking temperature 400°F and continue to cook until probe
temperature is achieved. Afterward, Primo will go into Warm.
• If the set cooking time is finished but probe temperature has
still not yet been achieved, the Primo will continue cooking
at the stage (last step) before going into Warm function (as
written above).
2. Press TEMP/TIME to see remaining cooking time. ON will be
displayed and stay at ON, indicating that the preset cooking time
has run out.
• Probe temperature range: 50°F~212°F.
• If the set cooking temperature is lower than target probe
temperature, the display will show Prob and the Primo will
beep three times and will not start cooking.
• If Probe is unplugged and PROBE is pressed, the Primo will
display Prob and will beep three times, indicating that the Probe
is not inserted into the Probe Jack in the Power Head.
Example: SEAR 1 »STAGE 1,2,3 »SEAR 2 »WARM » Probe
temperature: 200°F.
1. If probe temperature was achieved (200˚F) at STAGE 2, the
Primo will stop cooking for all outstanding stages but still cook
SEAR 2 and Warm.
2. To avoid “unsafe” status (probe is shunted outside of the cavity,
but oven started working with probe activated), Prob will be
displayed and the Primo (heating process) will shut off:
• If target cooking temperature is more than 250°F and Probe
senses temperature is not increasing more than 5°F during
first 60 minutes of cooking.
Or
• If target cooking temperature is less than 250°F and Probe
senses temperature is not increasing more than 5°F during
first 120 minutes of cooking.
50
50

nuwavenow.com 23
ENGLISH
nuwavenow.com 23
cleaning & maintenance
22
CLEANING & MAINTENANCE
22
Before First Use:
Clean the Primo and accessories before first use, after every use, or
between large batches.
The Grill Plate has a non-stick coating. Do not use metal utensils or
harsh abrasives when cleaning as this can damage the coating.
• Unplug the appliance and make sure it cools completely.
• Use a damp cloth to wipe the outside of the Primo.
• Hand-wash the Power Dome (disconnected from Power Head), Grill
Plate, and Base or clean in the dishwasher.
Storage
• Unplug the appliance and let it cool down completely.
• Make sure that all the parts are cleaned and dry.
IMPORTANT - Do not immerse Power
Head in water or attempt to cycle
through dishwasher. The outer
surface may be cleaned by wiping
carefully with a damp dishcloth or
sponge. Make sure the Primo has
cooled completely prior to cleaning.
The Primo was engineered with an automatic shut-off feature to
prevent overheating during use. If the Primo shuts off to cool itself
down, an odor may be detected. Unplug the Primo and wait for it
to completely cool down. To prevent overheating, cooking at higher
temperatures or longer cook times is not recommended.
The Primo does not turn on.
Plug may not be in the outlet. Plug in the Primo.
The food is cooked unevenly.
Check cooking process throughout. Turn or rotate as needed to
ensure even cooking.
The Primo is not heating.
Make sure the Primo is plugged in. Unplug Primo and plug the Primo
back in and see if the Primo comes up to correct temperature.
If the Primo continues to not heat up, contact Customer Service at
1-877-689-2838 or email help@nuwavenow.com.
Error Code Prb1 is displayed and Probe is not working.
Probe not connected to the Primo. Connect Probe to the Primo.
Error Code Prb2 is displayed and Probe target temp is higher
than cooking temp.
Probe target temperature higher than cooking temperature. Reset
Probe target temperature lower than cooking temperature.
Error Code Prb3 is displayed and Probe has a short circuit.
Turn the Primo off to cool. If still not working contact Customer
Service.
Error Code Prb4 is displayed and Probe Sensor is not detecting
temperature increase.
Allow food to come up to room temperature or thaw before inserting
Probe into food.
Error Code Er1 is displayed and the Primo is not cooking.
Turn the Primo off and unplug to cool. If still not working after
cooling and turned on, contact Customer Service.
Error Code Err1 is displayed and the Primo is not cooking.
Temperature Sensor Short Circuit. Contact Customer Service.
Error Code Err2 is displayed and the Primo is not cooking.
Temperature Sensor is open. Contact Customer Service.
Error Code Err3 is displayed and the Primo is not cooking.
Top heater in abnormal condition. Contact Customer Service.
Error Code Err4 is displayed and the Primo is not cooking.
Bottom heater in abnormal condition (circuit broken). Contact
Customer Service.
TROUBLESHOOT GUIDE
TROUBLESHOOT GUIDE

limited warranty nuwavenow.com
24 25
ENGLISH
nuwavenow.com
LIMITED WARRANTY
24 25
The NuWave Primo®
THE MANUFACTURER WARRANTS
The Primo, including the Power Head, Probe, Power Dome,
Dome Holder, Non-Stick Grill Plate, and Base are to be free from
manufacturer defects.
All electrical components are warranted for 1 year from the date
of purchase, under normal household use, and when operated
in accordance with the Manufacturer’s written instructions. The
Manufacturer will provide the necessary parts and labor to repair
any part of the Primo at NuWave LLC Service Department. After the
expiration of the warranty, the cost of the labor and parts will be the
responsibility of the owner.
THE WARRANTY DOES NOT COVER
The Limited Warranty is voided if repairs are made by an unauthorized
dealer or the serial number data plate is removed or defaced. Normal
deterioration of nish due to use or exposure is not covered by this
Warranty. This Limited Warranty does not cover failure, damages
or inadequate performance due to accident, acts of God (such as
lightning), uctuations in electric power, alterations, abuse, misuse,
misapplications, corrosive-type atmospheres, improper installation,
failure to operate in accordance with the Manufacturer’s written
instructions, abnormal use or commercial use. NuWave LLC reserves
the right to void the Limited Warranty, where allowable by law, for
products purchased from an unauthorized dealer.
TO OBTAIN SERVICE
The owner shall have the obligation and responsibility to: pay for all
services and parts not covered by the warranty; prepay the freight to
and from Service Department for any part or system returned under
this warranty; and carefully package the product using adequate
padding material to prevent damage in transit. The original container
is ideal for this purpose. Include in the package the owner’s name,
address, daytime telephone number, a detailed description of the
problem, and your “RGA number.” (Call 1-877-689-2838) or email
help@nuwavenow.com to obtain the RGA number (Return Goods
Authorization number). Provide the cooking system model & serial
number and proof of date of purchase (a copy of the receipt) when
making claims under this warranty.
MANUFACTURER’S OBLIGATION
The Manufacturer’s obligation under this Limited Warranty is
limited, to the extent allowable by law, to repairing or replacing any
part covered by this Limited Warranty which upon examination is
found to be defective under normal use. The Limited Warranty is
applicable only within the continental United States and only to the
original purchaser of the manufacturer’s authorized channels of
distribution. THE LIMITED WARRANTY MAY NOT BE ALTERED,
VARIED OR EXTENDED EXCEPT BY A WRITTEN INSTRUMENT
EXECUTED BY THE MANUFACTURER. THE REMEDY OF
REPAIR OR REPLACEMENT AS PROVIDED UNDER THIS
LIMITED WARRANTY IS EXCLUSIVE. IN NO EVENT SHALL THE
MANUFACTURER BE LIABLE FOR ANY CONSEQUENTIAL OR
INCIDENTAL DAMAGES TO ANY PERSON, WHETHER OR NOT
OCCASIONED BY NEGLIGENCE OF THE MANUFACTURER,
INCLUDING WITHOUT LIMITATION, DAMAGES FOR LOSS OF
USE, COSTS OF SUBSTITUTION, PROPERTY DAMAGE, OR
OTHER MONEY LOSS.
Some states do not allow the exclusion or limitation of incidental
or consequential damages, so the above limitation exclusions
may not apply. This Limited Warranty gives specic legal rights,
and there may also be other rights which vary from state to state.
EXCEPT AS OTHERWISE EXPRESSLY PROVIDED ABOVE, THE
MANUFACTURER MAKES NO WARRANTIES EXPRESSED OR
IMPLIED ARISING BY LAW OR OTHERWISE, INCLUDING WITHOUT
LIMITATION, THE IMPLIED WARRANTIES OF MERCHANTABILITY
AND FITNESS FOR A PARTICULAR PURPOSE TO ANY OTHER
PERSON. READ YOUR OWNER’S MANUAL. IF YOU STILL HAVE
ANY QUESTIONS ABOUT OPERATION OR WARRANTY OF THE
PRODUCT, PLEASE CONTACT NUWAVE LLC.
DISPUTE RESOLUTION PROCEDURE. For disputes relating to use
of the website or use or purchase of a NuWave product or service
(collectively “Disputes”), you agree to first contact NuWave LLC
at (877) 689-2838 (phone), (847) 367-5486 (facsimile), or legal@
nuwavenow.com (email). If we cannot resolve your dispute informally,
any and all disputes shall be submitted to final and binding arbitration.
You may start the arbitration process by submitting in writing a
demand to the American Arbitration Association (“AAA”) and sending
a copy to NuWave. NuWave will pay all filing costs. A single arbitrator
of the AAA will conduct the arbitration in a location convenient to

limited warranty nuwavenow.com
26 27
ENGLISH
nuwavenow.com
LIMITED WARRANTY
26 27
you or by phone. The arbitrator’s award will be binding and may
be entered as a judgment in a court of competent jurisdiction. The
arbitration will be conducted in accordance with the provisions of
AAA’s Commercial Arbitration Rules and Mediation Procedures in
effect at the time of submission of your demand for arbitration. See
https://www.adr.org/sites/default/files/CommercialRules_Web.pdf.
Except as may be required by law as determined by an arbitrator, no
party or arbitrator may disclose the existence, content, or results of
any arbitration hereunder without prior written consent of both parties.
A. WAIVER OF RIGHT TO SUE. By agreeing to arbitration you
understand that, to the maximum extent permitted by law, you are
agreeing to waive your right to file suit in any court, to a court hearing,
judge trial, and jury trial.
B. CLASS ACTION WAIVER. To the maximum extent permitted
by law you expressly agree to refrain from bringing or joining any
claims in any representative or class-wide capacity, including but not
limited to, bringing or joining any claims in any class action or class-
wide arbitration.
C. OPT OUT PROCEDURE. To opt out of arbitration you must
contact NuWave. To request to opt out of arbitration contact us at
legal@nuwavenow.com (email), NuWave LLC, 560 Bunker Ct.,
Vernon Hills, IL 60061, U.S.A., (847) 367-5486 (fax), or (877) 689-
2838 or (224) 206-3019 (phone). You will have thirty (30) days from
the date of product delivery to opt out of arbitration with respect
to any dispute arising out of or relating to use or purchase of any
NuWave product. If more than 30 days have passed you are not
eligible to opt out of arbitration and will have waived your right to
sue or participate in a class action with respect to the dispute arising
out of your purchase or use of a NuWave product. For any dispute
arising out of your use of NuWave’s website, you have thirty (30)
days from the date you provided information to the website to opt
out of arbitration. If more than 30 days have passed you are not
eligible to opt out of arbitration and you will have waived your right
to sue and participate in a class action with respect to the dispute
arising out of your use of NuWave’s website.
D. SOME MATTERS ARE NOT SUBJECT TO ARBITRATION.
Notwithstanding the foregoing, the following shall not be subject
to arbitration and may be adjudicated only in the state and federal
courts of Illinois: (i) any dispute, controversy, or claim relating to
or contesting the validity of our intellectual property rights and
proprietary rights, including without limitation, patents, trademarks,
service marks, copyrights, or trade secrets; (ii) an action by a party
for temporary, preliminary, or permanent injunctive relief, whether
prohibitive or mandatory, or other provisional relief; or (iii) interactions
with governmental and regulatory authorities. You expressly agree
to refrain from bringing or joining any claims in any representative or
class-wide capacity, including but not limited to, bringing or joining any
claims in any class action or any class-wide arbitration.
READ YOUR OWNER’S MANUAL
If you still have any questions about operation or warranty of the
product, please contact NuWave LLC at: 1-877-689-2838 or email
help@nuwavenow.com.

nuwavenow.com
28 29
nuwavenow.com
28 29
Como agradecimiento especial por registrar su Primo, ¡recibirá
automáticamente 3 meses adicionales a su garantía limitada del
fabricante!*
Todo lo que tiene que hacer es seguir estos
simples pasos.
Usando su teléfono inteligente o
dispositivo inteligente, escanee
el código QR ubicado en la parte
posterior de su Primo.
Se le dirigirá a la página de registro
del producto NuWave con el número
de serie único de su Primo que
se ingresa automáticamente en el
campo correspondiente.
NOTA: Si no tiene un dispositivo
inteligente habilitado para la web,
simplemente visite nuwavenow.
com/QR e ingrese manualmente el
número de serie de su Primo.
Complete la información restante y
complete la encuesta opcional.
Una vez que envíe su información,
recibirá un correo electrónico de
conrmación con los detalles de la
garantía extendida.
1
2
3
4
* Registre su producto dentro de 1 año a partir de la fecha
de compra para una extensión gratuita de 3 meses de
garantía limitada.
¡REGÍSTRESE
AHORA!
MANUAL DEL
PROPIETARIO
nuwavenow.com
Combo Parilla y Horno
con Sensor de Temperatura
®

nuwavenow.com
30 31
nuwavenow.com
MEDIDAS DE SEGURIDAD IMPORTANTES
USO DOMÉSTICO SOLAMENTE • LEA TODAS LAS INSTRUCCIONES
ANTES DE USAR
30 31
SPANISH
Abra su tienda de aplicaciones móviles (App Store,
Google Play).
Busque “lectores de códigos QR”.
Simplemente descargue el lector de códigos QR a su
teléfono, ábralo y escanee el código, ya está listo para
comenzar.
NOTA: Es posible que deba abrir el lector de código QR
descargado cada vez que desee escanear un código QR.
1
2
3
DESCARGUE LA APLICACIÓN QR
CODE EN SU DISPOSITIVO MÓVIL
lectores de códigos QR
3
¡para una garantía
adicional de
meses! ADVERTENCIA: Al usar el Primo®, siempre se deben seguir las
precauciones básicas de seguridad:
1. Lea todas las instrucciones, medidas de seguridad y
advertencias antes de usar el Primo.
2. No toque las superficies calientes. Utilice asas o perillas.
3. Use las asas de la Cabeza de Potencia o use guantes para horno.
4. Para protegerse contra descargas eléctricas, no sumerja el cable,
los enchufes ni la Cabeza de Potencia en agua u otros líquidos.
5. Es necesaria una estrecha supervisión cuando cualquier
unidades utilizada por niños o cerca dellos. El Primo no está
diseñado para ser utilizado por niños, personas con capacidades
físicas, sensoriales o mentales reducidas o personas con falta de
experiencia o conocimiento de este Primo.
6. Desenchufe el Primo del tomacorriente cuando no esté en uso y
antes de limpiarlo.
7. Permita que el Primo se enfríe antes de limpiar, poner o
quitar partes.
8. No opere el Primo con un cable o enchufe dañado o despuésde
que el aparato no funcione correctamente o se haya dañado
de alguna manera. Devuelva el aparato al centro de servicio
autorizado más cercano para que lo examinen, reparen o ajusten.
9. No se recomienda el uso de otros accesorios que no estén
diseñados para usarse con el Primo. Hacerlo puede dañar el
Primo y causar accidentes.
10. NO DISPONIBLE PARA USO EN EXTERIORES. Uso doméstico
solamente.
11. No deje que el cable cuelgue del borde de la mesa o barra o
toque superficies calientes.
12. No lo coloque sobre o cerca de un quemador caliente eléctrico o
de gas, o en dentro de un horno caliente.
13. La base del Primo acumulará líquidos calientes de la cocción.
Tenga mucho cuidado al retirar la base (o la placa de la parrilla)
que contenga líquidos calientes.
14. Nunca ponga el Primo contra la pared u otros aparatos.
Debe haber al menos 3 pulgadas de espacio libre para el lado
posterior, los lados izquierdo/derecho y la parta de arriba
del Primo.
15. No coloque nada encima del Primo.
16. Siempre retire el domo lejos de usted para que el vapor que
escape se dirija lejos de su cara.
17. Para desconectar, apague el Primo, luego retire el enchufe del
tomacorriente de pared.

medidas de seguridad importantes nuwavenow.com
32 33
nuwavenow.com
MEDIDAS DE SEGURIDAD IMPORTANTES
USO DOMÉSTICO SOLAMENTE • LEA TODAS LAS INSTRUCCIONES
ANTES DE USAR
32 33
SPANISH
18. Es normal que algo de humo escape del Primo cuando se
calienta por primera vez.
19. Si se escapa mucho humo de la salida de aire durante la
operación, desenchufe el Primo de inmediato y comuníquese
con Servicio al Cliente.*
20. No limpiar con fibras metálicas. Las piezas pueden romper la
fibra y tocar las partes eléctricas, lo que implicaría un riesgo de
descarga eléctrica.
21. El Primo no está diseñado para ser operado por medio de un
temporizador externo o un sistema de control remoto separado.
22. Mantenga el manual a la mano para futuras referencias.
*Departamento de servicio al cliente:
1-877-689-2838 • help@nuwavenow.com
VER LIMPIEZA Y MANTENIMIENTO ANTES DE USAR
Información eléctrica
Se proporciona un cable de suministro de energía corto (o
cable de suministro de energía desmontable) para reducir el
riesgo resultante de enredarse o tropezar con un cable más
largo. Los cables de alimentación desmontables más largos
o los cables de extensión están disponibles y se pueden
usar si se tiene cuidado en su uso. Si se utiliza un cable de
alimentación o un cable de extensión desmontable más largo:
1. La calificación eléctrica marcada del cable de extensión
debe ser al menos tan grande como la calificación eléctrica
del aparato.
2. El cable más largo debe estar dispuesto de modo que no se
cuelgue sobre la encimera o sobre la mesa, donde se pueda
tirar o tropezar involuntariamente. El Primo debe operarse
en una toma eléctrica separada de otros aparatos operativos
debido a las limitaciones de vataje. El aparato tiene un
enchufe polarizado (una cuchilla es más ancha que la otra).
Para reducir el riesgo de descarga eléctrica, este enchufe
está diseñado para encajar en una toma de corriente
polarizada de una sola manera. Si el enchufe no encaja
completamente en el tomacorriente, invierta el enchufe. Si
aún no encaja, comuníquese con un electricista calificado.
No intente modificar el enchufe de ninguna manera.
3. Si el aparato es del tipo con conexión a tierra, el juego de
cables o el cable de extensión debe ser un cable de 3 hilos
con conexión a tierra.
MEDIDAS DE SEGURIDAD ADICIONALES
1. No coloque el Primo cerca de materiales inflamables, unidades
de calefacción o ambientes húmedos.
2. No reemplace con otras partes que no estén diseñadas
específicamente para el Primo.
3. No mueva el Primo mientras esté en funcionamiento. Solo
después de que el Primo se haya enfriado completamente debe
intentarse el movimiento. Espere siempre a que el aparato se
enfríe antes de manipularlo.
4. Nunca bloquee las salidas de aire.
5. Tenga mucho cuidado al operar el Primo o cualquier
otro aparato.
6. Pare o pause la cocción antes de retirar el Domo. El Domo con
la cabeza de potencia deben colocarse en el soporte del domo.
7. Si surge algún problema durante la operación, cualquier servicio
DEBE ser realizado por NuWave LLC o autorizado por el
fabricante para reparaciones.*
ADVERTENCIA
En caso de mal funcionamiento, desenchufe
su Primo y comuníquese con el Departamento
de Servicio al Cliente. 1-877-689-2838
help@nuwavenow.com
GUARDE ESTAS INSTRUCCIONES
Lea y comprenda todo el manual antes de usar el Primo.
AVISO: LA FALTA DE SEGUIR CUALQUIERA DE LAS MEDIDAS
DE SEGURIDAD IMPORTANTES, LAS MEDIDAS DE SEGURIDAD
ADICIONALES O LAS INSTRUCCIONES PARA EL USO SEGURO
ES UN ABUSO DE SU PRIMO QUE PUEDE ANULAR SU
GARANTÍA Y CREAR EL RIESGO DE LESIONES GRAVES.
NO USE EL PRIMO PARA NINGÚN OTRO USO QUE EL
PROPUESTO.
Nota: Coloque el Primo en una superficie que sea horizontal,
uniforme y estable. El Primo está destinado para uso doméstico
normal. No está diseñado para ser utilizado en entornos como el de
personal de cocinas/cafeterías de tiendas, oficinas, granjas u otros
entornos de trabajo, ni está destinado para ser utilizado por clientes
en hoteles, moteles, bed and breakfast y entornos no residenciales.

medidas de seguridad importantes nuwavenow.com
34 35
nuwavenow.com
MEDIDAS DE SEGURIDAD IMPORTANTES
USO DOMÉSTICO SOLAMENTE • LEA TODAS LAS INSTRUCCIONES
ANTES DE USAR
34 35
SPANISH
PARTES Y ACCESORIOS
8. No desarme el Primo ni reemplace ninguna pieza sin el
consentimiento previo por escrito del fabricante.
9. Los niños deben ser supervisados para asegurarse de que no
jueguen con el aparato.
10. Asegúrese de que el Primo esté siempre limpio antes de cocinar.
11. No utilice la placa de la parrilla fuera de la base.
*Departamento de Servicio al Cliente:
1-877-689-2838 • help@nuwavenow.com
PRECAUCIÓN
• No cubra las rejillas de entrada y salida de
aire mientras el Primo esté funcionando.
• No vierta aceite en la base ni en la placa
de la parrilla, ya que esto puede crear un
riesgo de incendio.
• Nunca toque el interior ni el exterior del
Primo mientras esté funcionando.
1
3
5
2
6
4
PROBE
Para pedir piezas reemplazables, diríjase a la sección Piezas
reemplazables y luego a NuWaveNow.com.
Cabeza de Potencia
Parte #: 26701
Sensor
Parte #: 26706
Domo
Parte #: 26702
1
2
3
Soporte para el Domo
Parte #: 26707
Placa de la Parrilla
Antiadherente
Parte #: 26704
Base
Parte #: 26705
4
5
6

guía de montaje nuwavenow.com
36 37
SPANISH
nuwavenow.com
GUÍA DE MONTAJE
36 37
INICIO RÁPIDO
TOP
PROBE
Lock
PROBE
Colocando la cabeza de potencia en
el domo
1. Coloque la cabeza de potencia en el
borde del domo.
2. Asegúrela en su lugar girando la
cabeza de potencia en el sentido
de las agujas del reloj hasta que
las lengüetas de bloqueo estén
enganchadas.
Ensamble del Primo
1. Coloque la base sobre una
superficie firme y estable. No colocar
sobre una estufa.
2. Encuentre el recorte de la Base con
la entrada del enchufe de la placa
de la parrilla. Coloque la placa de la
parrilla dentro de la base.
3. Conecte el cable de alimentación a
la placa de la parrilla.
4. Coloque los alimentos en el plato de
la parrilla.
5. Coloque el domo con la cabeza
de potencia sobre los alimentos.
Conecte a la Base. El domo debe
encajar de manera uniforme y
segura en la base.
6. Si usa el sensor, inserte el enchufe del
sensor en el cabezal de alimentación
(conector). Luego, inserte el otro
extremo del sensor a través del orificio
en el domo y levante la cabeza de
potencia con el domo. Inserte el
extremo del sensor correctamente
en los alimentos. Cierre la cabeza de
potencia con el domo.
7. Enchufe su Primo y presione ON/OFF.
8. Ajuste el tiempo de cocción y la
temperatura de acuerdo con los
requisitos de la receta.
9. Después de cocinar, retire el
domo con la cabeza de potencia
y recárguelos sobre el soporte del
domo. No lo deje en el soporte
del domo durante un período de
tiempo prolongado, ya que pueden
producirse deformaciones.
50
50
ON/OFF
Presione ON/OFF. Este botón también detiene cualquier función
decocción. Mientras cocina, presione ON/OFF para cancelar.
START/PAUSE
Seleccione una función de cocción, presione START/PAUSE para
comenzar a cocinar. Rango de temperatura de cocción 100˚F - 400˚F.
WARM/REHEAT
Para WARM, presione WARM / REHEAT. Presione START / PAUSE
para comenzar. Para REHEAT, mantenga presionado WARM /
REHEAT durante 2 segundos. El Primo se iniciará automáticamente.
PREHEAT
Para WARM (Mantener Caliente), presione WARM/REHEAT.
Presione START/PAUSE para comenzar. Para REHEAT (Recalentar),
mantenga presionado WARM/REHEAT durante 2 segundos. El Primo
se iniciará automáticamente.
SEAR
Presione SEAR. Si lo preere, ajuste la temperatura y el tiempo de
abrasión y presione START/PAUSE.
PROBE
Conecte el sensor en su Primo Primo (Jack). Presione PROBE. Ajuste
la temperatura interna objetivo del sensor para los alimentos con las
echas hacia arriba y hacia abajo. Pase por el oricio e inserte el otro
extremo del sensor en su comida. Cierre la cabeza de potencia con el
domo. Presione START/PAUSE para comenzar a cocinar.
PROG
Presione PROG y presione las echas hacia arriba o hacia abajo
para elegir elementos predeterminados (1-100) para cocinar.
Presione las echas hacia arriba o hacia abajo cuando esté en cada
función de cocción para ajustar las temperaturas y los tiempos.
Presione START/PAUSE para comenzar el programa elegido.
TOP/BTM
Presione TOP/BTM y presione las echas hacia arriba o hacia
abajo para ajustar el porcentaje de TOP. A medida que el porcentaje
de TOP cambie, también lo hará el de BTM. Presione TOP/BTM
nuevamente para ajustar BTM. A medida que el porcentaje de BTM
cambie, también lo hará el de TOP. Los valores predeterminados de
TOP/BTM son 30/70.
STAGE
Para agregar una etapa de cocción, presione STAGE una vez yajuste
presionando las flechas hacia arriba o hacia abajo.

instrucciones nuwavenow.com
38 39
SPANISH
nuwavenow.com
INSTRUCCIONES
38 39
Empezando
1. Presione ON/OFF una vez para
encender su Primo.
2. Presione START/PAUSE para
comenzar a cocinar a 360°F
durante 15 minutos, que son los
ajustes predeterminados.
• Se mostrará 00:15 y
comenzará una
cuenta regresiva.
• Tanto la temperatura como el tiempo de cocción se pueden
ajustar durante la cocción presionando TEMP/TIME y luego
presionando los botones Arriba y Abajo para ajustar cada uno.
3. Presione START/PAUSE una vez durante la cocción para hacer
una pausa.
• Durante la pausa, PREHEAT y PROBE no funcionarán.
4. Presione START/PAUSE por segunda vez para reanudar
la cocción.
• Se mostrará el tiempo de cocción restante y la cuenta
regresiva continuará.
Función de TEMP/TIME
1. Presione ON/OFF.
• Para ajustar la temperatura,
presione las echas hacia
arriba o hacia abajo. Ajustable
en incrementos de 5°F. Para
cambiar la temperatura
más rápido, mantenga
presionadas las echas hacia
arriba o hacia abajo.
• Para ajustar el tiempo,
presione TEMP/TIME.
Presione las echas hacia
arriba o hacia abajo.
• El tiempo se ajustará en
incrementos de 1 minuto.
Para aumentar o disminuir el
tiempo más rápido, mantenga
presionadas las echas hacia arriba o hacia abajo.
2. Presione START/PAUSE. El Primo cocinará su comida a la
temperatura y el tiempo de cocción ajustados.
• Cuando el Primo haya terminado de cocinar, se mostrará End
y el Primo emitirá un pitido tres veces.
50
50
50
50
Función de PREHEAT
La función de precalentamiento asegura que el Primo alcance la
temperatura deseada antes de que comience la cocción.
1. Presione ON/OFF.
• Para ajustar la temperatura de cocción, presione las echas
hacia arriba o hacia abajo.
• Para ajustar el tiempo de cocción, presione TEMP/TIME.
• Presione las echas hacia arriba o hacia abajo hasta alcanzar
el tiempo deseado.
2. Presione PREHEAT. La pantalla mostrará el ajuste de
temperatura de coccion.
3. Presione START/PAUSE. El Primo comenzará a precalentar. La
temperatura de precalentamiento ajustada parpadeará durante el
precalentamiento.
• Una vez que se alcanza la temperatura de precalentamiento,
el Primo iniciará una cuenta regresiva de 5 minutos.
• La pantalla mostrará READY y parpadeará 5, lo que indica que
quedan 5 minutos para colocar su comida en el Primo.
• El Primo mantendrá la temperatura de precalentamiento
durante la cuenta regresiva de 5 minutos. Cuando termine la
cuenta regresiva, el Primo se apagará.
4. Retire la cabeza de potencia con el domo y coloque su comida
en la placa de la parrilla.
5. Regrese la cabeza de potencia con el domo al Primo y presione
START/PAUSE. Esto comenzará el proceso de cocción a la
temperatura y el tiempo establecidos.
• Cuando la cocción nalice, se mostrará End y el Primo pitará
tres veces.
Nota: Si la cabeza de potencia del Primo se retira del domo, el Primo
se apagará.
Table of contents
Languages:
Other NuWave Grill manuals