NVE 4307 Series System manual

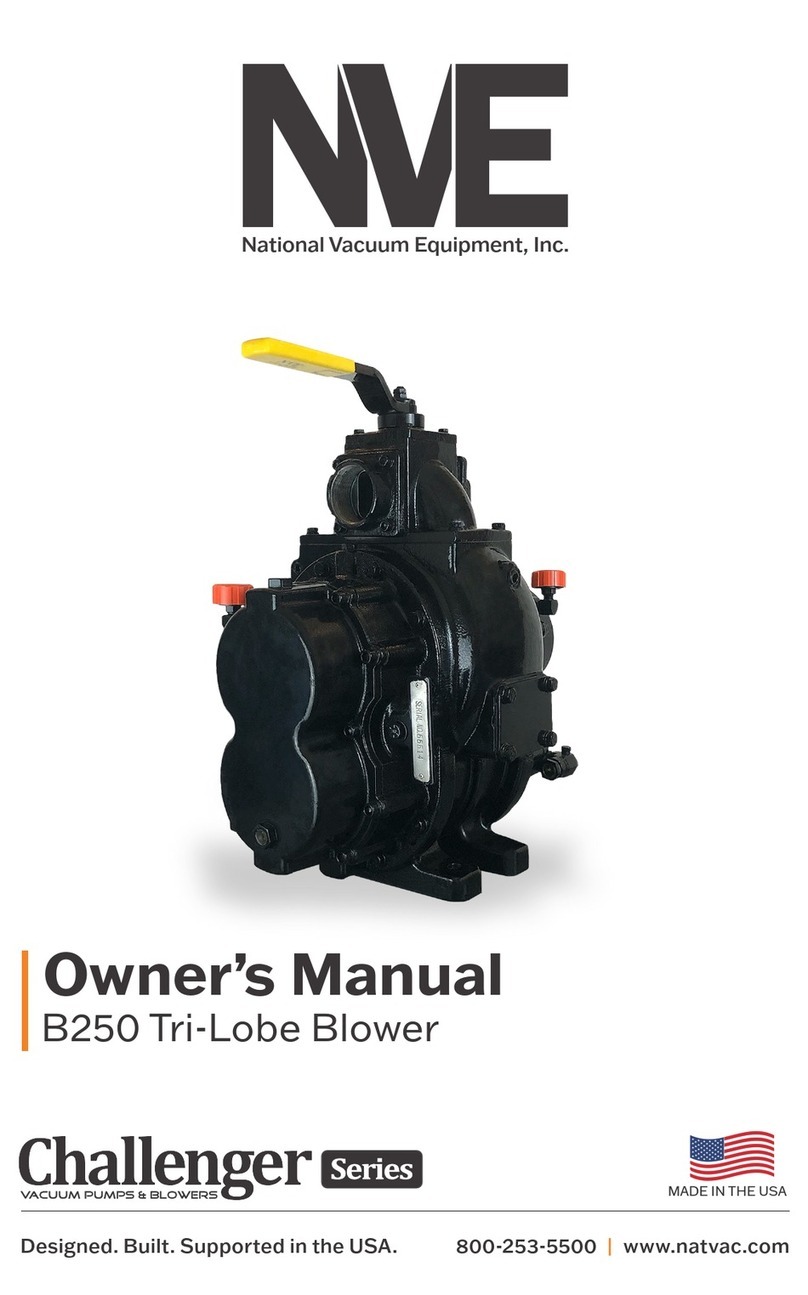
Owner’s Manual
&
Operating Instructions
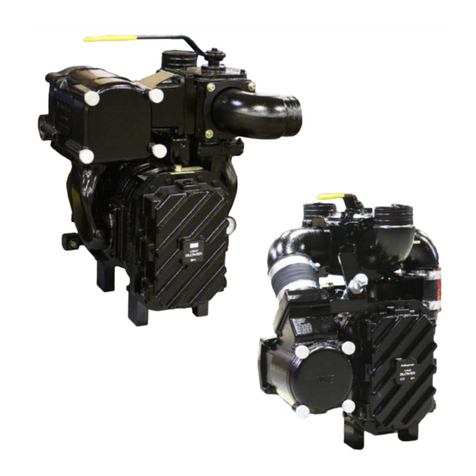
Models 4307 & 4310 Blower
MADE IN
THE USA
Visit our web site to download pump setup guides,
brochures and other technical information.
National Vacuum Equipment
888.814.9191 www.nvesalesrep.com

2| 4307 & 4310 Blower
© 2016 National Vacuum Equipment, Inc.
Revision: 6 (Released) June, 2016
No part of this manual may be reproduced without the written permission of
National Vacuum Equipment, Inc.
4307 & 4310 Blowers
Owner’s Record
Date of Purchase: _________________________
Purchased from: __________________________
Serial Number: ____________________________

4307 & 4310 Blower | 3
Table of Contents
Introducon
About Naonal Vacuum Equipment, Inc...............................................................5
Our History ..............................................................................................................5
Limited Warranty
Warranty ..................................................................................................................6
Warranty Procedures..............................................................................................7
Overview
General Blower Operaon .....................................................................................8
General Blower Construcon.................................................................................8
Locaon of Serial Number .....................................................................................9
Specicaons
Operang Environment ..........................................................................................9
Operang Limits ......................................................................................................9
Performance (Reference Only) ............................................................................10
Dimensions ............................................................................................................11
Air Flow Control ....................................................................................................11
Sound Level ...........................................................................................................11
Limitaons on Use ................................................................................................12
Storage
Unpacking Blower .................................................................................................13
Handling ................................................................................................................13
Preservaon ..........................................................................................................13
Installaon
Rotaon and Airow ............................................................................................14
Diesel Engine Precauons ....................................................................................14
Direct Coupler Installaon & Alignment .............................................................15
Belt Drive ...............................................................................................................15
Drive Sha .............................................................................................................16
Hydraulic Drive ......................................................................................................16
PTO Drive ...............................................................................................................16
Plumbing and Piping .............................................................................................16
nvesalesrep.com | 888.814.9191

4| 4307 & 4310 Blower
Recommended Accessories
Exhaust Silencer ....................................................................................................17
Tunable Ballast Silencer ........................................................................................17
Inlet Filter ...............................................................................................................17
4-Way Valve and Hoses ........................................................................................17
Pressure Relief Valve .............................................................................................18
Vacuum Relief Valve..............................................................................................18
Check Valves ..........................................................................................................18
Primary Shuto .....................................................................................................18
Secondary Shuto/Moisture Trap .......................................................................18
Bag House ..............................................................................................................18
Operaon
Inial Start Up Preliminary Checks ......................................................................19
Starng the Blower ...............................................................................................19
Operang ..............................................................................................................20
Stopping the Blower .............................................................................................20
Cold Weather Operaon ......................................................................................20
Maintenance
Maintenance Schedule .........................................................................................21
Oil Capacies and Recommendaons ................................................................22
Rebuilding ..............................................................................................................22
Gear Casing Lube ..................................................................................................22
Clean Out Procedure If Flooded ..........................................................................23
Blower Oil Capacity ...............................................................................................23
Gearbox Lubricant ................................................................................................23
4307 Blower Maintenance ...................................................................................24
4307 Parts Diagram ..............................................................................................26
4310 Parts Diagram ..............................................................................................27
4307 & 4310 Parts List ........................................................................................28
4307 4-Way Intake Manifold Parts Diagram & Parts List ...................................30
4310 4-Way Intake Manifold Parts Diagram & Parts List ...................................34
Troubleshoong ........................................................................................................36
nvesalesrep.com | 888.814.9191

4307 & 4310 Blower | 5
Introduction
General Information
About National Vacuum Equipment
Congratulations! You now own a quality vacuum/pressure pump proudly
manufactured in the U.S.A. by National Vacuum Equipment, Inc. You
have not only acquired a superior piece of equipment from a qualied
dealer, you have hired a team of vacuum experts. We stand ready to
work with your dealer to answer your questions and provide you with the
information necessary to keep your equipment in peak working condition.
Thank you for putting your trust in National Vacuum Equipment.
Our Mission
We are dedicated to the production and wholesale distribution of quality
vacuum system products at a reasonable price, on a timely basis.
We are a “one-stop shop” for manufacturers and distributors of vacuum
equipment.
Our History
National Vacuum Equipment, Inc. was founded in 1980 by Bruce Luoma.
The Company started as a retailer of vacuum pumps. Soon after it
started, the Company secured the rights to exclusive distribution of the
Battioni vacuum pumps in North America. This helped the Company to
evolve into its current status as a wholesale supplier.
To reach the goal of becoming a full service supplier of vacuum system
components, the Company began fabrication of its own line of
components, purchased and developed its own line of vacuum pumps,
and began purchasing for resale, various valves and accessories.
Today, NVE has full service machine, fabrication and powder-coating
shops complete with CNC-controlled production equipment designed for
close tolerance work. The company has a highly trained staff, all of whom
are dedicated to quality.

6| 4307 & 4310 Blower
Limited Warranty
Warranty
Naonal Vacuum Equipment, Inc. guarantees that the product it provides is
free of manufacturer’s defects, including materials and workmanship. Properly
installed and maintained product is warranted for a period of one (1) year
subject to the following condions:
1. A properly completed warranty registraon card must be received by
us within 30 days of sale to end user for pump sales to be considered
warrantable. All pumps received for warranty consideraon must
retain the original NVE serial number tag.
2. The one (1) year period shall begin the day the product is shipped
from our warehouse, unless we are provided with an authenc copy
of the original resale invoice, in which case the one (1) year period
shall begin at such invoice date.
3. The covered product must be used in an applicaon for which it was
intended. We do not recommend our product for parcular uses or
applicaons.
4. Damage caused by improper use or lack of proper maintenance is
not warrantable.
5. Manufacturer’s liability under this or any other warranty, whether
express or implied, is limited to repair of or, at the manufacturers’ op-
on, replacement of parts which are shown to have been defecve
when shipped.
6. Manufacturer’s liability shall not be enforceable for any product
unl Naonal Vacuum Equipment, Inc. has been paid in full for such
product.
7. Except to the extent expressly stated herein, manufacturer’s liability
for incidental and consequenal damage is hereby excluded to the
full extent permied by law.
8. Manufacturer’s liability as stated herein cannot be altered except in
wring signed by an ocer of Naonal Vacuum Equipment, Inc.
9. Certain products provided by Naonal Vacuum Equipment, Inc. are
covered by their respecve manufacturer’s warranes (e.g., engines
used in the NVE engine drive packages). These products are not
covered by the Naonal Vacuum Equipment, Inc. Manufacturer’s
Warranty.
nvesalesrep.com | 888.814.9191
4307 & 4310 Blower | 7
Warranty Procedures
Should a potenal warranty situaon arise, the following procedures must be
followed:
· Contact your dealer immediately upon the occurrence of the event
and within the warranty period.
· Customer must receive a return goods authorizaon (RGA) before
returning product.
· All serial-numbered products must retain the NVE serial number tag to
be qualied for warranty.
· Product must be returned to NVE intact for inspecon before
warranty will be honored.
· Product must be returned to NVE freight prepaid in the most
economical way.
· Credit will be issued for material found to be defecve upon our
inspecon, based upon prices at the me of purchase.
nvesalesrep.com | 888.814.9191
8| 4307 & 4310 Blower
Overview
General Blower Operation
The NVE BLOWERS are severe duty vacuum
pumps, designed to be used in liquid waste
pumping systems where extended operaon
is desired. The pump incorporates a ballast
air cooling system to provide superior cooling,
allowing for extended operaon.
The air enters the intake under vacuum or at
atmospheric pressure. As the rotors rotate, a xed volume of air is moved along
the wall of the cylinder towards the exhaust where the pressure and temperature
of the volume of air increases. If the intake air is below atmospheric pressure,
cooling air will be drawn in when the rotor p passes the ballast port.
The airow capacity of the machine (in ACFM) is nearly proporonal to the speed
of the machine and is nearly constant with changes in inlet or outlet pressures.
General Blower Construction
BALLAST INJECTION
BALLAST INJECTION
INTAKE
EXHAUST
BLOWER HOUSING
DRIVE ENDPLATE
NON-DRIVE ENDPLATE
DRIVE OIL
TANK
DRIVE ROTOR
IDLER ROTOR
DRIVE BEARINGS NON-DRIVE BEARINGS
OIL SLINGER
OIL SLINGER
TIMING GEARS
SEAL SLEEVE
SEAL RINGS
SEAL VENT
nvesalesrep.com | 888.814.9191

4307 & 4310 Blower | 9
Sereial Number
Location of Serial Number
Each blower should have a brass colored tag with an embossed serial number. In
addion, the serial number and blower direcon as assembled at the factory are
stamped into the top of the housing as shown:
Specifications
Operating Environment
The 4307 and 4310 blowers are
designed to move atmospheric
air. Do not use to move explosive
or corrosive gasses or operate the
blower in an area with explosive
gases. Any materials in the intake
air must be ltered and separated from the air by means of an intake lter, mois-
ture trap and/or a cyclonic lter.
The ballast inlet must be posioned and protected from ingesng debris, uid or
explosive gases.
Operating Limits
The blower must be operated within all limits at all mes. This typically means
the blower performance is limited by the exhaust temperature and temperature
rise over ambient for the blower.
*Exhaust temp and temp rise limited, †Pressure rise is from inlet to outlet, ‡Temperature rise is
exhaust minus ambient temperature surrounding blower (note if enclosed)
InletVac
Pressure
Rise†
(psig)
Exhuast
Pressure
(psig)
Inlet
Temp
(°F)
Exhuast
Temp
(°F)
Temp.
Rise‡
(°F)
BallastInlet
Temp
(°F)
Max Min Max Max Max - Max Max -
4307 4000 2000 FULLVAC 14 10 * 300 235 *
4310 4500 2400 FULLVAC 14 10 * 380 260 *
RPM
Size
nvesalesrep.com | 888.814.9191

10 | 4307 & 4310 Blower
Performance (Reference Only)
ACFM - Actual CFM generated on the vacuum or pressure side of the machine
B.O. - Blanked O
Vacuum (Inches of Mercury) Pressure (PSI)
RPM 0 9 15 18 21 24 27 510 15 18
2000 HP 2.0 7.4 11.0 12.8 14.6 16.4 - 8.1 14.2 20.3 24.0
CFM 280 171 114 77 26 - - 183 143 113 97
2500 HP 2.5 9.2 13.7 16.0 18.2 20.5 - 10.1 17.7 25.4 29.9
CFM 349 241 184 147 96 17 - 253 213 183 167
3000 HP 3.0 11.1 16.5 19.2 21.9 24.6 27.3 12.1 21.3 30.4 35.9
CFM 419 311 254 217 166 87 - 323 283 253.0 237.0
3500 HP 3.5 12.9 19.2 22.4 25.5 28.7 31.8 14.2 24.8 35.5 41.9
CFM 489 381 324 286 236 157 - 393 353 322.0 307.0
4000 HP 4.0 14.8 22.0 25.6 29.2 32.8 36.4 16.2 28.4 40.6 47. 9
CFM 559 451 394 356 306 227 57 463 423 392 376
When installing a NVE 4307 blower we recommend a normal R.P.M. range from 2700 to 4000. Other speeds are o.k. as long as
exhaust gas temperatures read on the supplied thermometer do not exceed 290 degrees F over ambient temperature.
4307
0 18 24 27 10
2 17.8 23.1 - 24.8
500 407 255 - 324
4 35.6 46.1 51.4 39.7
826 661 528 182 631
4.5 40 51.9 57.8 44.7
931 763 660 270 733
RPM
2400 Hp.
CFM
Pressure (PSI)Inches of Vacuum (Hg)
4000
4500 Hp.
CFM
Hp.
CFM
Maximum 4500 RPM Intermittent Operation Only.
The maximum allowable operating
vacuum will vary depending on R.P.M.,
ambient temperature, altitude and
time running. The basic principle to
keep in mind is - faster R.P.M., higher
air temperature and longer run time all
equal more heat in the pump. When
installing an NVE 4310 blower we
recommend a normal R.P.M. of 4000.
Other speeds are o.k. as long as exhaust
gas temperatures read on the supplied
thermometer do not exceed 375
degrees F.
4310
nvesalesrep.com | 888.814.9191

4307 & 4310 Blower | 11
Dimensions
Air Flow Control
The airow rate on the blower can be adjusted by changing the speed of the blower.
This can be accomplished by changing the PTO rao, gearbox rao, belt drive pulley
diameters or engine speed.
Sound Level
It is recommended the operator monitor the blower while running and listen for
resonances (increased levels of noise) that may occur at certain RPM’s and operate
the blower at speeds above or below the resonance speeds to reduce excess noise.
The noise level of the blower may increase with higher levels of vacuum and RPM. To
minimize noise, operate the blower at the minimum speed and vacuum level required
to achieve the desired performance results.
131-4310-LDB
CW ROTATION
SCALE 1 / 4
131-4310-LSB
CCW ROTATION
SCALE 1 / 4
DIMENSIONS SYMMETRICAL TO LDB BLOWER
DETAIL C
SCALE 1 / 2
1
1
2
2
3
3
4
4
5
5
6
6
7
7
8
8
A A
B B
C C
D D
NVE National
Vacuum
Equipment, Inc.
2670 Aero Park Drive, Traverse City, MI 49686
Phone: (231) 941-0215 Fax: (231) 941-2354
TOLERANCES UNLESS OTHER WISE SPECIFIED
One place (.X) ±.1
Two places (.XX) ±.01
Three places (.XXX) ±.005
Angles ±1°
All machined surfaces 125 RMS max.
Remove all burrs and sharp edges.
CAD drawing - NO manual changes.
All dimensions in inches unless specified.
This document may contain confidential trade
secret information which is the exclusive
property of National Vacuum Equipment. Any
information on this drawing is not to be
disclosed to anyone not having a "Need to
Know." The information contained herein is to
be used only in accordance with the best
interests of National Vacuum Equipment.
PART NAME:
MATERIAL:
DRAWN BY:
SCALE:
CHECKED BY:
DATE:
BOB
PART NO.SHEET
2131-4310LDB AND LSB
2of
1/4
SEE BOM
APPROX. WT.
CAD FILE LOCATION: P:\Data\CAD - Production\131-4310-LDB & LSB.idw
SHEET SIZE D
333 LBS
BLOWER, 4310 CW & CCW W/ BALLAST
C
.13 .40
.250
STAMP DIRECTION
AND SERIAL NUMBER
INTO HOUSING AS
SHOWN
(6.710)
(1.499)
(.375)
SQ KEY
(1.657)
(.157)
(2.375)
(1.250)
(3.350)
(6.700)
(12.625) (9.805)
1/2-13 UNC - 2B .750
(17.701) (7.326)
(7.693)
(9.875)
(17.690)
(15.813)
(6.000) (6.313)
1/2-13 UNC - 2B .875
(8.500)
(8.875)
OIL FILL PORT
DRIVE END
9/16" HEX
OIL FILL PORT
NON-DRIVE END
9/16" HEX
OIL DRAIN PORT
DRIVE END
9/16" HEX
OIL DRAIN PORT
NON-DRIVE END
9/16" HEX
(5.920) BC
1/2-13 UNC - 1B 1.250
(4.000)
PILOT
(13.943)
REVISION HISTORY
REV DATE DESCRIPTION APPROVED ZONE
F10/22/2010
CHD'D FRONT OIL TANK, BRNG
RETAINER TO 1/4" FASTENER,
CORRECTED NOTE 6 (262 WAS
620)
ECN 1120 B4
G11/10/2010
P/N LDB AND LSB WAS LD AND
LS, ADDED CAST ALUM
BALLAST MANIFOLDS AND
SEALING WASHERS,
LENGTHENED BALLAST BOLTS
1/4", CHG'D HOSE CLAMPS.
ECN 1186 A1
(6.915)
nvesalesrep.com | 888.814.9191

12 | 4307 & 4310 Blower
Limitations on Use
Limitaon on Use Reason for Limitaon and/
or Risk
Correcve Acons
Operaon of the blower in an
explosive environment
Fire and/or explosion can
result
DO NOT USE
Using blower to move explo-
sive, toxic or dangerous gases
Fire and/or explosion can
result
Polluon of the environment
Health risks to operators
Liquid drawn into blower
intake
Blower seizure, damage to
blower and ejecon of parts
Install a moisture trap or
cyclonic separator on the
intake nozzle of the blower.
Operaon with the exhaust
or ballast blocked o.
Overheang Remove the blockage and
minimize restricon in the
exhaust or ballast circuits
Rotang blower in wrong
direcon
Damage to blower Change the direcon of ro-
taon of the drive or order
correct rotaon of blower.
Operang in excess of recom-
mended speed
Seizure of blower, damage to
blower and ejecon of parts Operate the blower within
recommended speed range
Operang blower below
minimum speed
Seizure of blower, damage to
blower and ejecon of parts
Exceeding the maximum
pressure rise from blower
inlet to outlet
Overheat of Blower
Fire
Seizure of blower, damage to
blower and ejecon of parts
Check inlet and exhaust
restricons and reduce as
necessary.
Operang at excessively hot
inlet or ballast temperatures
Overheang
Fire
Seizure of Blower, damage to
blower and ejecon of parts
Monitor the inlet tempera-
ture and make correcons
to the system to bring tem-
perature within limits.
Operang at excessively cold
inlet temperatures.
Seizure of Blower, damage to
blower and ejecon of parts
Review precauons in cold
weather condions. Use
recommended lubricaon.
Operang above the exhaust
temperature upper limit
Overheang
Fire
Seizure of Blower, damage to
blower and ejecon of parts
Reduce the vacuum level in
high ambient condions.
Reduce the blower speed.
Remove restricons in the
intake and exhaust circuits.
Operang in excess of the
specied temperature rise
across the blower
Seizure of Blower, damage to
blower and ejecon of parts
Reduce the vacuum or pres-
sure level to bring within
limits.
nvesalesrep.com | 888.814.9191

4307 & 4310 Blower | 13
Storage
Unpacking Blower
When unpacking the blower or blower
package from the skid, verify the packing list
matches the product supplied and that no
visible damage has occurred during shipping.
In the event damage has occurred, rst le a
claim with the carrier and then contact NVE
for assistance.
Keep all intake, exhaust and ballast ports
covered to prevent accidental ingeson of
materials into the blower.
Handling
Use an appropriately sized li strap for liing the blower. Thread two 1/2-13 UNC
x 4” LG grade 8 bolts into the ange holes as shown.
Preservation
Keep all intake, exhaust and ballast port coverings in place to prevent debris or
liquids from entering blower. Reapply rust preventave oil to all metal parts,
including the compression chamber every 6 months or more frequently if the
relave humidity is greater than 80%.
While in storage, rotate the sha three to four revoluons every two weeks to
keep gears coated in oil.
Before installing a blower that has been stored for any length of me, remove
the intake and exhaust covers and inspect the rotors and cylinders to insure the
absence of rust. In addion, remove the oil ll plug on drive oil tank and inspect
the gear for absence of rust.
Model Weight(lbs)
4310LD 318
4310LDB 338
4310LDM 426
4307LD 270
4307LDM 412
4310
4307
nvesalesrep.com | 888.814.9191

14 | 4307 & 4310 Blower
131-4310-LDB
CW ROTATION
SCALE 1 / 4
131-4310-LSB
CCW ROTATION
SCALE 1 / 4
DIMENSIONS SYMMETRICAL TO LDB BLOWER
DETAIL C
SCALE 1 / 2
1
1
2
2
3
3
4
4
5
5
6
6
7
7
8
8
A A
B B
C C
D D
NVE National
Vacuum
Equipment, Inc.
2670 Aero Park Drive, Traverse City, MI 49686
Phone: (231) 941-0215 Fax: (231) 941-2354
TOLERANCES UNLESS OTHER WISE SPECIFIED
One place (.X) ±.1
Two places (.XX) ±.01
Three places (.XXX) ±.005
Angles ±1°
All machined surfaces 125 RMS max.
Remove all burrs and sharp edges.
CAD drawing - NO manual changes.
All dimensions in inches unless specified.
This document may contain confidential trade
secret information which is the exclusive
property of National Vacuum Equipment. Any
information on this drawing is not to be
disclosed to anyone not having a "Need to
Know." The information contained herein is to
be used only in accordance with the best
interests of National Vacuum Equipment.
PART NAME:
MATERIAL:
DRAWN BY:
SCALE:
CHECKED BY:
DATE:
BOB
PART NO.SHEET
2131-4310LDB AND LSB
2of
1/4
SEE BOM
APPROX. WT.
CAD FILE LOCATION: P:\Data\CAD - Production\131-4310-LDB & LSB.idw
SHEET SIZE D
333 LBS
BLOWER, 4310 CW & CCW W/ BALLAST
C
.13 .40
.250
STAMP DIRECTION
AND SERIAL NUMBER
INTO HOUSING AS
SHOWN
(6.710)
(1.499)
(.375)
SQ KEY
(1.657)
(.157)
(2.375)
(1.250)
(3.350)
(6.700)
(12.625) (9.805)
1/2-13 UNC - 2B .750
(17.701) (7.326)
(7.693)
(9.875)
(17.690)
(15.813)
(6.000) (6.313)
1/2-13 UNC - 2B .875
(8.500)
(8.875)
OIL FILL PORT
DRIVE END
9/16" HEX
OIL FILL PORT
NON-DRIVE END
9/16" HEX
OIL DRAIN PORT
DRIVE END
9/16" HEX
OIL DRAIN PORT
NON-DRIVE END
9/16" HEX
(5.920) BC
1/2-13 UNC - 1B 1.250
(4.000)
PILOT
(13.943)
REVISION HISTORY
REV DATE DESCRIPTION APPROVED ZONE
F10/22/2010
CHD'D FRONT OIL TANK, BRNG
RETAINER TO 1/4" FASTENER,
CORRECTED NOTE 6 (262 WAS
620)
ECN 1120 B4
G11/10/2010
P/N LDB AND LSB WAS LD AND
LS, ADDED CAST ALUM
BALLAST MANIFOLDS AND
SEALING WASHERS,
LENGTHENED BALLAST BOLTS
1/4", CHG'D HOSE CLAMPS.
ECN 1186 A1
(6.915)
· Use a rust preventave oil with a ash point over 400°F
· Dispose of used rust preventave oil according to local regulaons
Installation
Rotation and Airow
Diesel Engine Precautions
· DO NOT OPERATE BLOWER WITH A DIESEL ENGINE RUNNING AT
LOW RPM’S AS TORQUE PULSES CAN CAUSE ROTOR LOBE CONTACT
AND DAMAGE TO THE BLOWER.
When directly driving the blower with Diesel engine, bring the engine up to oper-
ang RPM and then engage the blower via the clutch. Be sure to start the blower
under no load condions.
Use cauon when using a Diesel engine that is signicantly oversized for the
operang point of the blower. Doing so can result in an ineral mismatch, excess
torsional vibraons at low RPM’s and blower lobe contact.
Direct Coupler Installation and Alignment
Slide the couplers onto the blower sha and prime mover sha using appropriate
tools.
CW Blower CCW Blower
131-4310-LDB
CW ROTATION
SCALE 1 / 4
131-4310-LSB
CCW ROTATION
SCALE 1 / 4
DIMENSIONS SYMMETRICAL TO LDB BLOWER
DETAIL C
SCALE 1 / 2
1
1
2
2
3
3
4
4
5
5
6
6
7
7
8
8
A A
B B
C C
D D
NVE National
Vacuum
Equipment, Inc.
2670 Aero Park Drive, Traverse City, MI 49686
Phone: (231) 941-0215 Fax: (231) 941-2354
TOLERANCES UNLESS OTHER WISE SPECIFIED
One place (.X) ±.1
Two places (.XX) ±.01
Three places (.XXX) ±.005
Angles ±1°
All machined surfaces 125 RMS max.
Remove all burrs and sharp edges.
CAD drawing - NO manual changes.
All dimensions in inches unless specified.
This document may contain confidential trade
secret information which is the exclusive
property of National Vacuum Equipment. Any
information on this drawing is not to be
disclosed to anyone not having a "Need to
Know." The information contained herein is to
be used only in accordance with the best
interests of National Vacuum Equipment.
PART NAME:
MATERIAL:
DRAWN BY:
SCALE:
CHECKED BY:
DATE:
BOB
PART NO.SHEET
2131-4310LDB AND LSB
2of
1/4
SEE BOM
APPROX. WT.
CAD FILE LOCATION: P:\Data\CAD - Production\131-4310-LDB & LSB.idw
SHEET SIZE D
333 LBS
BLOWER, 4310 CW & CCW W/ BALLAST
C
.13 .40
.250
STAMP DIRECTION
AND SERIAL NUMBER
INTO HOUSING AS
SHOWN
(6.710)
(1.499)
(.375)
SQ KEY
(1.657)
(.157)
(2.375)
(1.250)
(3.350)
(6.700)
(12.625) (9.805)
1/2-13 UNC - 2B .750
(17.701) (7.326)
(7.693)
(9.875)
(17.690)
(15.813)
(6.000) (6.313)
1/2-13 UNC - 2B .875
(8.500)
(8.875)
OIL FILL PORT
DRIVE END
9/16" HEX
OIL FILL PORT
NON-DRIVE END
9/16" HEX
OIL DRAIN PORT
DRIVE END
9/16" HEX
OIL DRAIN PORT
NON-DRIVE END
9/16" HEX
(5.920) BC
1/2-13 UNC - 1B 1.250
(4.000)
PILOT
(13.943)
REVISION HISTORY
REV DATE DESCRIPTION APPROVED ZONE
F10/22/2010
CHD'D FRONT OIL TANK, BRNG
RETAINER TO 1/4" FASTENER,
CORRECTED NOTE 6 (262 WAS
620)
ECN 1120 B4
G11/10/2010
P/N LDB AND LSB WAS LD AND
LS, ADDED CAST ALUM
BALLAST MANIFOLDS AND
SEALING WASHERS,
LENGTHENED BALLAST BOLTS
1/4", CHG'D HOSE CLAMPS.
ECN 1186 A1
(6.915)
nvesalesrep.com | 888.814.9191

4307 & 4310 Blower | 15
· DO NOT USE A HAMMER TO SLIDE THE COUPLERS ONTO THE SHAFT AS
THIS MAY RESULT IN BLOWER DAMAGE
· Failure to properly align the couplers can cause premature wear
of the blower bearings and coupler sleeve.
· Couplers must be guarded to prevent entanglement.
Belt Drive
All NVE blower input shas are equipped with an outboard roller bearing which
allows the use of V-belt.
The driving pulley from the prime mover must be mounted on the intake side of
the blower to prevent unloading of the blower bearings.
Use a narrow hub sheave and insure that the inner hub face is not more than 1/4”
from the face of the gearbox. Be sure to also use an adjustable belt tensioning
system to allow compensaon for belt wear.
· Excessive belt tension could damage the blower and prime mover.
· Belts and pulleys must be guarded to prevent entanglement.
Use matched sets of V-belts to insure uniform torque transmission. If a belt goes
out, replace the whole set.
· Use a rust preventave oil with a ash point over 400°F
· Dispose of used rust preventave oil according to local regulaons
Installation
Rotation and Airow
Diesel Engine Precautions
· DO NOT OPERATE BLOWER WITH A DIESEL ENGINE RUNNING AT
LOW RPM’S AS TORQUE PULSES CAN CAUSE ROTOR LOBE CONTACT
AND DAMAGE TO THE BLOWER.
When directly driving the blower with Diesel engine, bring the engine up to oper-
ang RPM and then engage the blower via the clutch. Be sure to start the blower
under no load condions.
Use cauon when using a Diesel engine that is signicantly oversized for the
operang point of the blower. Doing so can result in an ineral mismatch, excess
torsional vibraons at low RPM’s and blower lobe contact.
Direct Coupler Installation and Alignment
Slide the couplers onto the blower sha and prime mover sha using appropriate
tools.
nvesalesrep.com | 888.814.9191

16 | 4307 & 4310 Blower
Drive Shaft
U-Joint operang angles at each end of the sha should always be at least 1°to
prevent yoke bearing failure, but do not exceed the manufacturers maximum
recommended angles for the operang RPM.
U-Joint operang angles on each end of a drivesha should always be equal within
1° of each other to cancel an angle vibraon.
For more driveline installaon detail, please see the Dana-Spicer Driveline Instal-
laon Document J3311-1-DSSP available free from hp://www2.dana.com/pdf/
J3311-1-DSSP.pdf.
· Use a drive sha loop to catch sha in the event of failure.
· It is suggested that overload protecon be used on the blower driveline.
Hydraulic Drive
The blower can be driven with an appropriately sized hydraulic system ulizing a
hydraulic motor with an SAE B or C, 4-bolt or 2-bolt ange by purchasing a hydrau-
lic mount (purchased separately) and appropriate couplers.
PTO Drive
PTO’s must be properly sized to drive the blower. For more informaon on driving
blowers with PTO’s, please see the Chelsea Blower Torque Guide Bullen HY25-
0075-B1-US available at www.parker.com .
· Improper use of “Hot Shi” (i.e. clutch type, constant mesh) PTO’s can
result in severe damage to the blower driveline and blower. Take extra
precauons to operate PTO’s within the manufacturer’s recommendaons
Plumbing and Piping
Do not hang plumbing from blower anges. Use isolang anges or isolang hose
to couple blower to piping to prevent dead weight from hanging o blower and
to allow for thermal expansion. Failure to do so may result in rotor contact with
housing. Use only clean piping insuring it is free of dirt, scale, cungs, weld spat-
ter, and foreign materials of any kind.
nvesalesrep.com | 888.814.9191

4307 & 4310 Blower | 17
The intake and exhaust system can be plumbed with 4” or 6” hose. Four inch hose
will provide a more compact system while the 6” hose will maximize the eciency of
the system.
The ballast system should be plumbed using 4” hose minimum. Be sure to locate the
ballast inlet away from heat, debris and uid sources as exposure to these may result
in damage to the blower.
Recommended Accessories
Exhaust Silencer
Posive displacement blowers are inherently noisy due to their design. NVE oers
compable silencers for the exhaust to reduce decibel levels in the operang environ-
ment.
If using a non-OEM silencer, it should be tested for eecveness by blanking o the
inlet and monitoring exhaust gas temperature with the blower running for at least
one hour. The blower should not exceed specied exhaust gas temperatures.
Tunable Ballast Silencer (4310 Blower)
A tunable ballast silencer provides for eld tuning of the ballast circuit to minimize the
noise for customer specic operang points.
If using a non-OEM silencer, it should be tested for eecveness in the same fashion
as described above for exhaust silencers.
Inlet Filter
The intake lters are designed to ensure maximum airow eciency why keeping out
unwanted debris. The lters supplied by NVE use a stainless steel screen and can be
cleaned.
Four Way Valve and Hoses
If it is intended to operate the blower in the pressure mode, a four way valve will be
required. The 4-way valve size should match the hose size used in the applicaon.
nvesalesrep.com | 888.814.9191

18 | 4307 & 4310 Blower
4-Way Plug Adjustment Procedure:
Use at inial installaon or for adjustment use steps 6 to 10.
1. Remove all hardware from center thread
2. Install Brass washers and place handle into proper t posion based on your
installaon direcon.
3. Install cup washer and adjusng nut and secure to at least nger ght.
4. Turn the adjusng nut a half to ¾ turn to pull the plug o seat posion
5. Test valve movement: Valve should move freely
6. If valve does not move freely, review for other obstrucons or ghten adjusng
nut by ¼ turn unl free movement occurs.
7. Once free movement is established install jam nut unl nger ght
8. Use two wrenches and ghten jam nut while holding adjustment nut steady
9. Test valve movement: Valve should move freely
10. Valve is now adjusted and ready for installaon.
Note: Use narrow wrench to hold adjusng nut while ghtening jam nut.
Dry Lubed Bronze
Thrust Washer
Adjusting Nut
Jam Nut
Four Way Valve cont.
Pressure Relief Valve
If the blower is intended to be used in pressure mode then a pressure relief valve
is required. NVE recommends the use of Kunkle pressure relief valves as they have
been proven to work well and have sucient ow capacity.
Picture 1. 1. Unscrew the lock nut “A”
2. Turn the spring-tightener “B”
Picture 2. Once obtained the desired pressure, screw down the lock nut “A”
Picture 3. Fix the setting, using the rings “C” Situated on the body and on the spring
tightener
Pressure Relief Valve
Setting Instructions
Pressure Relief Valve
Via delle Acacie 8 - Z.I. D4 - P.O. Box 64 - 28075 GRIGNASCO (N0) ITALY
Export dept. +39 - 0163 - 415 221 /222 Fax. +39 - 0163 - 411 914
Web www.riv-vg.com www.velattagroup.com E-mail e x p or t.s a les@riv- vg. c o m
PRESSURE RELIEF VALVES - SETTING INSTRUCTION
Picture 1
1) Unscrew the lock nut"A”
2) Turn the spring-tightener“B”,
Clockwise to increase the pressure.
Anti-clockwise toreduce the pressure
Picture 2
Once obtained the desired pressure, screw
down the lock nut “A”
Picture 3
Fix the setting, using the rings “C”
Situated on the bodyandon the spring-
tightener
B
123
A A
C
nvesalesrep.com | 888.814.9191

4307 & 4310 Blower | 19
Check Valves
For vacuum only setups, the blower system will need to have an appropriately
sized check valve on the inlet side of the blower.
If the blower is to be operated in a pressure mode, a check valve will need to be
used on both the ballast air system and the intake side of the blower. Note that
the ballast circuit normally draws air into the blower.
Use the same size check valve as the hose used to plumb the system.
Primary Shutoff
A primary shuto is to be used with the blower as a rst line of defense to prevent
liquid from entering the blower. It is crical that an appropriately sized primary
shut o is used. Contact NVE for assistance with selecng the shuto.
Secondary Shutoff/Moisture Trap
The secondary shuto or moisture trap should also be appropriately sized for the
air ow applicaon. Contact NVE for assistance with selecng the shuto.
Bag House
Bag houses are typically used in systems where dry material is being pumped.
Specicaon of a proper bag house depends on the frequency and type of dry
material being pumped. Consult the factory for assistance in selecng a bag
house.
Operation
Initial Start Up Preliminary Checks
Before operang a blower that has been stored for any length of me, remove the
intake and exhaust covers and inspect the rotors and cylinders to insure the
absence of rust. In addion, remove the oil ll plug on the drive oil tank and
inspect the gear for absence of rust.
Verify the blower spins freely by hand.
Verify all connecons between the plumbing system and the blower anges are in
place and ght.
nvesalesrep.com | 888.814.9191

20 | 4307 & 4310 Blower
Initial Start Up Preliminary Checks Cont.
Verify oil levels through sight eyes. If addional oil is required, see the
maintenance secon for details.
Verify the blower is set-up to spin the correct direcon, especially when using a
gearbox.
Verify all guards are in place.
· Insure personnel wear hearing protecon as noise levels can exceed 85 dB.
· Do not rotate the blower in the reverse direcon.
Starting the blower
HOT Shi PTO’s - Do not engage “Hot Shi PTO’s” outside of manufacturers
specicaons as damage to the PTO, driveline or blower may occur. Slowly ramp
the blower up to speed to prevent shocking the system.
Increase the vacuum level slowly unl the rated level is reached. During the rst 8
hours of operaon, check that there are no vacuum leaks, oil leaks, vibraons or
strange noises.
Operating
Start the blower and check the appropriate parameters as listed in the mainte-
nance schedule under the Maintenance secon.
Stopping the Blower
When stopping the blower, if possible, remove all vacuum and pressure from the
blower.
nvesalesrep.com | 888.814.9191
Other manuals for 4307 Series
2
This manual suits for next models
6
Table of contents
Other NVE Blower manuals
Popular Blower manuals by other brands

Husqvarna
Husqvarna 596 28 87-01 instruction manual

Ametek
Ametek DR633 Service and parts manual

Craftsman
Craftsman 79481 - Professional 28cc 2 Cycle Gas Blower Operator's manual

Reliable
Reliable Steamboy T2 instruction manual

Thermador
Thermador VTR1330W installation instructions

Black & Decker
Black & Decker BEBL7000 user manual