NW Explorations Aquila User manual

“Aquila”
A 42’ Grand Banks Classic Yacht
Operating Manual
Edition of May 16, 2015
Copyrighted. See notice next page.
Section Contents
1Introduction & General Description
2Important Vessel Numbers
3Operating Checklists & Maneuvering Suggestions
4Specic Discussion of Boat Systems
5“What to Do” for Some Specic Concerns
6EMERGENCY PROCEDURES
7 Index

Warning!
This notice is a part of this manual, and is placed here to warn you as an owner, crew member or
passenger on this vessel that the author of this manual assumes no responsibility for any errors or
omissions herein, and represents only that the writings and illustrations herein represent his “best
efforts” to provide a comprehensive overview of the vessel, so that it can be operated by a person who
has the necessary experience and/or training to operate such a vessel given the additional information
herein.
You should be aware that this operating manual is provided as a convenience to the owner(s),
crew
members
and
passengers
on this
vessel,
and is not
complete
in
every
detail.
Given
the complexity of
this boat and its systems, there is no way that all
conditions, contingencies,
and operating details can
be covered, both because of space limitations and because of ordinary oversight as contingencies are
speculated upon by the author. Likewise, it is possible either through oversight and/or changes in the
vessel as a result of additions, modications, or deletions to or of equipment since publication of this
manual, that items discussed will operate differently than described, be absent from the vessel, or be
added to the vessel without discussion in this volume.
As a vessel owner, crew member or passenger on this vessel, you are here at your own risk, and the
author of this manual has no responsibility for your actions whatsoever. If you do not feel competent to
undertake any or all operations detailed herein, do not undertake it/them; get help from a competent
person.
I thank you, (and my lawyer thanks you.)
Copyright 2012 Joseph D. Coons
This manual was written for this boat’s owner and its charter company by Joseph D. Coons,
All rights reserved. This manual may not be quoted, copied, or duplicated, in whole or in
part, in printed or electronic form, without express written consent from the author.
About the Author
Joe Coons is a retired AM-FM broadcasting station owner and computer systems corporate executive who
throughout his life was involved in communications and mechanical, electrical, and electronic systems. He
cruised his own boat on the Hudson River and Lake Champlain when a teen and in his early twenties, and
during the 70’s and 80’s accumulated some 2,500 hours as an instrument-rated private pilot. Beginning in
1986 he became seriously involved in boating as a boat owner, subsequently working in a “retirement career”
as a broker, also commissioning vessels, operating a charter eet, checking out boat
charterers,
and training
new power boaters. He has held a 50-ton Coast Guard Master’s license, and operated his own boats and
a substantial number of others from 26 to 70 feet in the near- coastal waters of Washington State, British
Columbia, and Alaska. His “helm time” exceeds 8,000 hours. In addition, he has trained hundreds of boaters in
the skills of vessel operation.
NW Explorations AQUILA OPERATING MANUAL | 1
Section 1: Introduction & General Boat Description
1A: About This Manual
1A1: Manual Objective and Limitations
This manual is intended to introduce you to “Aquila”, its systems, and features, allowing you to operate it with
the condence and self-assurance necessary to enjoy your cruising vacation to it
s
f
ullest.
It is not intended
to replace a basic understanding of seamanship, including navigation skills, weather interpretation or boat
handling. You are expected to have an understanding of these subjects obtained through other sources,
including training, seminars, reading and perhaps most important, experience.
There is no way that a small manual like this one can answer every question or give you a solution to every
circumstance, foreseen or unforeseen. If you have a question which limits your understanding or handling of
this vessel, ask your NWE checkout skipper or contact the ofce for details (you might make a list of questions
as you read the manual, saving them all up to ask at one time).
1A2: How the Manual is Organized
The manual is divided into six sections numbered “1” to “6” plus an index (Section 7). Within each section are
subsections lettered “A” to “Z” as required.
In section 4, which deals with the specic information about the vessel’s equipment and systems, the manual is
organized by major categories, such as “Anchor”, “Dinghy, Davit & Outboard”, “Fresh Water System”, etc.
Note that within
“Electrical
Syst
ems
”
are the
“Electrical
System-AC
”
and
“Ele
ctr
ical
System-DC”
as
sub-categories,
and within them are such items that are a part
of
each, such as
“Inverter”, “Generator”,
etc.; Likewise, all
electronic equipment
is
in
the
“Electronics”
sect
ion.
A complete index is at the back of the manual in Section 7.

2| AQUILA OPERATING MANUAL NW Explorations
1B: General Description of this Vessel
1B1: Exterior
Flybridge, Cockpit,
Side & Forward Decks
The Grand Banks 42’ Classic is a traditional yacht
design, with berglass hull, cabin, and ybridge
structures, a teak swim step, teak decks, rails,
and gunwhale caps, and stainless steel welded
ttings and handrails. The window frames are
of painted wood with sliding glass panes, while
the windshield frame is of the same material
with hardware that allows for adjustable center-
opening for ventilation.
Of particular note are the easy walk-around
decks, enabling safe, secure passage about
the boat by passengers and crew. A roomy
cockpit section with a storage lazarette
beneath is useful for shing and dinghy
handling it is launched. A swim shower outlet is
provided in the cockpit.
On the side decks are the two fuel lls, one
port-side and the other starboard. A holding
tank pump-out deck tting is to starboard. The
water tank lls are in the lazarette on each of
the three tanks. Fresh and salt water faucets
are at the bow.
Forward on the bow deck is the anchor
windlass, with foot switches, allowing chain
movement both “up” and “down” electrically. The
anchor is retracted into the bow pulpit which
hangs out over the bow to give better chain
clearance from the hull than otherwise possible.
The pulpit is strong and braced,easily supporting
not only the anchor during hauling but also
an attending crew member if necessary. After
passing over the winch, the chain goes below
decks via a hawse pipe in the foredeck. Sea and
fresh water hose faucets are provided.
There are shore power connections (with an
adjacent fuse holder) at both the bow and stern,
selected by the shore power switch in the electric
panel; when this cable is to be disconnected, the
switch should rst be turned to the “off” position
to avoid arcing which could damage the plug
contacts.
(Above) Cockpit hatches open to
spacious lazarette.(Below) Anchor,
Windlass, Shore Power & Faucets
The wide starboard side deck.

NW Explorations AQUILA OPERATING MANUAL | 3
The boat’s 50-amp shore power cable is 50 feet
long and stays with the boat when away from its
home dock.
The deck up three steps above the aft side decks
is the “sun deck”. Here you will nd the dinghy
davit, dinghy, and barbeque and its propane tank.
Extra chairs are provided to use on the sundeck or
ybridge.
Up three steps from the sun deck is the ybridge,
with seating for crew and passengers, and the
upper helm station. In addition to the helm’s
instruments and controls, the console has storage
for the ship’s canvas covers, and a space for
ybridge electronics.
On the ybridge are tandem seats port and
starboard seating four and two passengers
respectively. Within the storage compartments
beneath the seats you will nd a complement
of life jackets (on the starboard side) and the
propane tanks for the ship’s galley stove (to port).
Note: You will notice that the ybridge seats have
cushions. The seat cushions (not the backs), when
not in use, should be placed zipper side down in
front of port seat and on top of a wooden drain
board found inside the y bridge console. If this is
not done, the cushions will soak up dew and rain
water until they are no longer useful. This simple
procedure will ensure that you will always have dry
seat cushions and will help protect the cushions
against mildew.
Looking down at the sundeck. Notice the BBQ, just aft of the handrail
on right.
Flybridge forward. There are tandem seats each side seating six; a
sliding panel door protects another navigation data display and VHF
radio.
The ybridge aft end has plenty of room for comfortable lounging on
the provided chairs.

4| AQUILA OPERATING MANUAL NW Explorations
1B2: Interior
Main Deck
The boat is entered by either of
two doors. A starboard side door
is adjacent to the lower helm
station, and should be closed
when underway except at very
low speeds in calm waters to
avoid getting salt water inside the
doorway. A second access is door
at the aft end of the salon, which
opens onto the side decks; with
its window and especially when open, it helps make the salo
place.
Salon
Just forward of the starboard door is
a professional-quality helm station
with electric switch panels adjacent
and electronics panel above;
on the helm itself are the ship’s
Radar/GPS/Plotter, etc.
Just aft of the starboard door is
the custom helm seat with three
drawers and a cushioned top; the
helm seat drawers have storage for manuals, tide tables,
navigation tools, ashlights, etc. There is a cabinet door
adjacent to the cabin starboard side door. Just aft of this is a dry bar with icemaker below. Aft of this cabinet is
tted an L-settee to starboard. Under this settee are miscellaneous items. A table in front of the settee is used
for dining/cocktails.
Above & right: The salon
to starboard.
Above & right: The salon
to port.

NW Explorations AQUILA OPERATING MANUAL | 5
To port aft in the salon is the TV and stereo system atop
a freezer (that could be set for use as a refrigerator if
desired). Forward of this is a small settee.
The salon has as many amenities as you can imagine. As
the old boater’s saying goes, this vessel easily “drinks”
ten, “feeds” six
or eight,
and sleeps four in comfort!
Galley
The galley has a propane cooktop; microwave/convection
oven; a large sink; a refrigerator; and copious storage. (A
freezer is in the aft end of the salon.)
There is extensive storage under and over the counters;
more storage is in the top surface under the port
windshield, and in a cabinet at the top of the forward
stateroom steps. The stove burners have a push-button
“igniter” to light them.
The helm is impressive, with convenient,
modern instrumentation.
The cabinet behind the helm seat is actually a
dry bar” for bottles & glasses.
Galley storage is copious. The refrigerator is to
left. The cabinets to the right of the stove under
the windshield holds dishes, etc.

6| AQUILA OPERATING MANUAL NW Explorations
Forward Stateroom
The forward stateroom includes a large V-berth with
an insert (stowed under the mattress), a hanging
locker, and drawers/cabinets for crew clothing. A large
overhead hatch in addition to side opening portlights,
plus overhead and reading DC lighting provide for
plenty of light.
Forward Head/Shower Compartment
Moving aft from the stateroom to starboard is the
forward head compartment with its shower xture
and Vacu- ush head and basin with vanity. A shower
curtain which surrounds the wetted area keeps the
rest of the compartment including the toilet dry when
showering.
Looking into the forward stateroom. The insert that
ts between the berths to make them a double is resting
at the forward end;the hanging locker is on the left.
Another look at the hanging locker, galley-use cabinet
and the companionway steps; they lift up to
provide alternate engine room access.
Forward head/shower compartment. The shower curtain when
closed keeps the toilet and counter dry. There are plenty of stor-
age compartments; the head is a Master Flush unit.

NW Explorations AQUILA OPERATING MANUAL | 7
Aft/Master Stateroom
The aft (master) stateroom is down a few steps from the port end of
the salon. This stateroom features a queen-sized island berth, beneath
which are drawers including a spacious and efcient chart drawer. To
each side of the berth are tables
with cabinets beneath, as well as
storage lining the vessel’s exterior
walls on each side.
A vanity/desk is aft to port beneath
the emergency exit hatch.
Master Stateroom Head &
Shower Compartments
Forward to port in this stateroom
is a head compartment with toilet,
sink/vanity, and numerous cabinets
and drawers; to starboard opposite
in the cabin is the stall shower.
Between these two compartments
are a huge hanging locker for
clothing and the salon passageway.
Looking down into the Master Stateroom
from the salon. It’s attractive and bright.
The port side of the M/S/R has cabinet and
a desk/vanity...to the right is the door to the
toilet room with basin and vanity cabinet.
On the starboard side (not shown) a dress-
er runs the entire length of the wall. There
are also bed table cabinets on each side of
the master berth.
At the M/S/R forward side is the hanging
locker, shower (door on extreme right of
picture) and the steps to the salon. At the
closet top is a depth sounder display.
Shower compartment.

8| AQUILA OPERATING MANUAL NW Explorations
1B3: Engine Room
Preferred access to the engine room is through the oor
hatch by the lower helm centered in the salon in front of
the galley. Engine room lighting is turned on by breakers in
the ship’s DC and AC power panels by the helm.
(There is also a door to the engine room under the forward
companionway steps in the forward stateroom that is not
used except for emergency access to the battery switches;
it is somewhat blocked by a miscellaneous supplies
storage box in the engine room and is awkward to use
except in emergencies.)
The engines are to each side. On the forward bulkhead
are the DC battery main switches and paralleling relays,
and the ship’s main wiring harness. (There are a number
of equipment and engine pictures throughout this manual.)
On the starboard side from forward aft are a plastic spares
storage and tool boxes, house batteries in boxes, head
system pump and vacuum generator for the forward head,
and engine mufer, all outboard of the starboard engine
stringer. Aft of these is the fuel tank.
Aft of the starboard John Deere Diesel engine, is the
Y-Valve for the forward head and the sight gauge for the starboard fuel tank. On the side of the starboard fuel
tank are the Racor fuel lters for the starboard engine and the generator. (The fuel tanks’ sight gauges are in
addition to their electric
gauges at the helm.) All the way aft at the rear bulkhead alongside the starboard fuel tank is the holding tank
overboard pump.
Down the center of the engine room from the forward end are a removable teak oorboard grid over the
seawater valves/strainers, and all the way aft, the generator seawater intake and valve, the oil change system,
the Onan 9KW generator (with its battery below), the holding tank (under the generator), and a plastic supply
box.
To port in the engine room from the forward end are the battery charger, inverter and inverter battery switch on
the forward bulkhead; the built-in re protection system; the water pump and water pressure accumulator tank;
ands, outboard of the port John Deer Diesel engine, the water heater. Then aft of the water heater is the aft
head vacuum accumulator/pump, and then the engine and generator mufer, the Diesel Furnace fuel lter, and
the “Y Valve” for the aft head. Next is the port fuel tank sight gauge. On the midships side of this fuel tank are
mounted the port engine’s Racor Filters.
Of course, at the rear of each engine is its transmission.
The engine shafts lead from the transmission couplings through the hull via virtually maintenance-free shaft
logs/packing glands.
Hatch to engine room.

NW Explorations AQUILA OPERATING MANUAL | 9
1B4: Dinghy
The boat is equipped with a 10.3 foot Zodiac rigid-Hull, inatable-pontoon boat and tted with a Honda 9.9
horsepower four-cycle electric start outboard motor using a portable fuel tank.
1B5: Deck Equipment
The boat has mooring lines; a stern/shore line 300’ long; an appropriate all-purpose anchor with 300’ of all-
chain rode plus an emergency anchor with chain and rope rode; fenders/bumpers; four deck chairs; an ice
chest; a crab pot or ring with line, oat, and bait rigging; a hose for fresh water tank lling and boat washing;
and a boat hook.
1B6: Safety Equipment
Anchors
There is a permanently-rigged anchor on the bow pulpit and a spare anchor in the lazarette locker that can use
the stern/shore line as a rode.
Carbon Monoxide Monitor
There is a CO monitor in the salon — Not installed at the time of this manual.
Fire Extinguishers
There are three handheld extinguishers in the forward and aft staterooms (in the hanging lockers) and the
salon (under the helm seat in the cabinet by the door). A re suppression system is in the engine room with
automatic thermal release; this automatic system has automatic engine shutdown protection controlled at each
helm.
First Aid Kit
In the Master Stateroom Head Compartment cabinet.
Flares
These are in the “Emergency Drawer” under the aft “L” of the salon settee.
Life Preservers/PFD’s
There are two wearable vests in each stateroom’s hanging locker, and there are standard vests in two packs
under the ybridge console.
A heaving line and life ring are in a hanger on the aft railing of the ybridge.
Pumps
Manual diaphragm-type in the salon starboard door step, plus three electric pumps.
VHF Radios
There is a VHF radio at each helm.

10 | AQUILA OPERATING MANUAL NW Explorations
Section 2: Important Vessel Numbers
Vessel Name Aquila
Vessel Ofcial Number 1113629
Hull ID Number GNDD1478E101
Capaci
ti
es
Sleeps four: Two in each stateroom
Fuel: 600 Gallons in two 300 gallon tanks
Fresh water: 265 Gallons in three tanks in lazarette
Holding Tank: 40 Gallons
Dim
ensi
ons
Length on deck: 43 feet 3 inches
Length Waterline: 41 feet 1 inches
Beam: 14 Feet 1 inches
Draft: 4 Feet 2 inches
Displacement:
39,000 Pounds
Flui
ds
Motor Fuel: #2 Diesel
Motor Oil, mains: 15W-40 Chevron Delo Multigrade
Transmission
Oil: 30-weight Chevron Delo
Engine Coolant: 50-50 mix, ethylene glycol & water; corrosion inhibitor added
Operating Parameters
(
Esti
mated):
RPM
Spee
d
Fuel
Consumption
Naut.
Miles
/Gal
lon
1200 5.5 Knots 2.2 GPH 2.5
1400 7.0 2.9 GPH 2.4
1600 8.5 4.0 GPH 2.13
1800 10.0 5.5 GPH 1.82
2200 11.0 9.0 GPH .82
2400 11.5 15.0 GPH .77

NW Explorations AQUILA OPERATING MANUAL | 11
Section 3: Checklists & Maneuvering Suggestions
3A: Operating Checklists - Aquila
First Thing Each
Day
—Check engine oil, coolant.
—Check under-engine oil pads. Okay?
—Check fuel tank levels
—Check holding tank indicator. Need pumping?
—Turn off anchor light if illuminated.
Starting
Engines
—All lines clear of propellers and on deck.
—Items running on AC evaluated vis-a-vis the Inverter and Generator.
—Throttles retarded to idle, shift levers in “neutral”.
—Engine power switches “On”, start engines in turn.
—If engines do not turn over, see “What to Do If”.
Leaving Dock (Only 3-4 minute engine warmup required!]
—Shore power switch “Off”.
—Shore power cord removed, stowed on board.
—Step stool aboard, if used.
—Lines removed as appropriate.
—Fenders hauled aboard and stowed.
—Lines and other deck gear secure/stowed.
—Doors and hatches closed and secured as appropriate.
Underw
ay
—Helmsperson on watch at all times.
—RPM under 1400 until engines warm to 140°; RPM never to exceed 2400 RPM.
—Wake effects always in mind.
Approaching Dock
—Fenders out on appropriate side.
—Bow line OUTSIDE stanchions and bloused around toward midships.
—Engines dead slow, wheel centered for engine-only maneuvering.
—Mate ready to secure stern rst (in most circumstances).
—Trim Tabs Up (“Bow Up”).

12 | AQUILA OPERATING MANUAL NW Explorations
Arriving
at Dock in
Ma
ri
na
—
Lines secure, including spring lines.
—Trim Tabs Up (“Bow Up”).
—Step stool out, if needed.
—Water heater breaker off until Inverter current settles (see “Inverters” below).
—Shore power cord connected, shore power switch “On” to appropriate power location.
—Shore power conrmed on meters, Inverter “On”.
—Electric use monitored for current capacity of shore facilities.
Arriving
at Mooring
Buo
y
—Trim Tabs Up (“Bow Up”).
—Skipper puts starboard end of swim step, with mate on it, next to buoy.
—Mate loops 20’ or so line, such as bow line, through buoy ring.
—Mate holds two ends together, walks up side of boat to bow of boat.
—With buoy held close to bow, line secured to each bow cleat through hawsepipe.
Mooring at
A
nchor
—Anchor is lowered from pulpit while boat is backed up slowly away from anchor.
—When desired chain length out (4:1 or 5:1 scope), windlass is stopped.
—Engines reversed for “count of ve” until chain pulls up virtually straight. Note: The boat is not held
in reverse against a taught anchor chain!
Generator
Star
ti
ng/St
oppi
ng
—Be sure “generator” breaker is “On”
—Move the “generator” breaker in the AC Power Panel to “On”. Then press the “Preheat-Stop” button for
15 seconds. Release the preheat button and press “Start” for a maximum of 3 or 4 seconds.
—Check port side exhaust for water ow.
—After one minute for warmup, turn power selector from “Off” to “Gen”.
—Stopping: Turn power selector from “Gen” to “Off”, wait one minute for cool-down.
—Hold “Stop” switch until stopped.
Overnight Checklist
in
M
ari
na
—Shore power “On”.
—Inverter “On”.
Overnight
at Anchor or
Buoy
—Anchor light “On”.
—DC electrical items all “Off” including radios, extra lights, etc.
Upon
A
ri
sing
—Start generator if necessary for battery charging.
—Inverter “On” if shore power available or generator running.
—Turn on heat if necessary.
—Go to top of this Aquila checklist.

NW Explorations AQUILA OPERATING MANUAL | 13
3B: Maneuvering Suggestions
3B1: Docking & Undocking
Usually it’s easier to dock bow in. Have your
mate at the side rail opening, ready to step off
and secure the stern line, against which you
can pull to swing the bow in toward the dock.
By having your mate ready to disembark when
close to the dock, he/she will not have to jump
to the dock, risking a turned ankle or falling
overboard. It is the skipper’s job to put the boat
next to the dock so the mate needn’t jump, but
merely step off!
Approaching a dock, have fenders out as required and have the bow line already rigged, passed through its
hawse pipe, and draped back on the side of the boat between the stanchions so it can be reached from the
dock. Never put a line from a cleat over a rail: the boat’s weight will bend or break the rail if it pulls against the
line! When the mate’s ashore, the line can be easily reached!
If dock clearance permits, spring the boat forward so that it pulls f
orward on
the stern line. This will bring the
stern close to the dock. Let the bow line out enough so that the boat can rest against the stern and midships
fenders.
3B2: Maneuvering in a Harbor
With its twin screws, you’ll do best if you center the rudder and steer with the engines only! The props are
so large that the boat will respond well except in high winds just with use of the propellers in forward and/
or reverse. Take your time, and keep the boat running “dead slow” so that you can plan each approach. You
shouldn’t need to use the throttles at all.
Filling the Fuel Tanks
With the large fuel tanks, you can fuel the boat pretty fast using a standard hose and nozzle (like those on auto
gas pumps). Fuel each tank, taking the hose around the fore-or-aft deck to reach the outside ll pipe (don’t
drag the hose over the decks or teak rails: have someone help you handle it). Fill both the tanks completely
but do not spill fuel! You can control the ow rate by sound, as the ll pipes make the characteristic “getting to
the top of the bottle” pitch change when the ll pipes begin to f
ill
when
the tanks themselves are full. (The tank
vents will gurgle before the tanks are full, so when the vents begin gurgling, slow down until you hear the ll
pipes’ pitch change.)
You can tell fuel levels in two ways: By the sight gauges in the engine room on each tank (accurate); and by
the gauges on the electronics panel above the galley cabinets and windshield to left of the lower helm.

14 | AQUILA OPERATING MANUAL NW Explorations
3B3: Anchoring
Anchoring can be accomplished safely with a minimum of fuss if you are prepared. Or, if you are not ready, it
can be stressful and dangerous for you or the boat.
Before attempting to anchor, select an anchorage with a soft bottom such as sand, mud, or gravel, if possible.
Look at the charts and cruising guides for tips on good locations. Then, choose the spot in the anchorage
where you have room to “swing” on the anchor without disturbing other boats. Remember, responsibility for
leaving room goes to each successive boat to arrive, for the rst boat has priority in the anchorage!
Here in the Northwest, because of the deep waters, all-chain rodes and small bays, we anchor a little
differently than in the Gulf of Mexico or Carribean, for example. First, except in severe weather we use anchor
chain scopes of only 4-to-1 or 5-to-1. For example, in water that is 40 feet at low tide in the typical anchorage,
we might use 160 feet of chain unless the weather was to be gale force or greater winds.
Second, because of the small bays and steep bottoms, we often rig a shore line from the
stern of
the boat
to shore. The best example of this would be at Todd Inlet at Butchart Gardens: Here is
a bay
that can
accommodate 8 - 10 boats, yet it is only about 150’ wide and 200’ long! Boats attach their bows to the mooring
buoys or, in a few cases, anchor; and then their sterns are secured to rings provided in the steep cliffs
overlooking the bay. Boats are thus perhaps only 15-20’ apart, side to side.
Third, boats often will “raft” side by side in busy marinas, although this is not very common.
Fourth, courteous boaters will call vessels coming into busy bays and offer to let them raft to the same buoy, if
signs on the buoys do not limit usage to only one boat depending upon length.
Anchoring safely requires two persons, one at the helm maneuvering the boat and one on the bow operating
the anchor. Putting the bow of the boat over the spot where the anchor is to be placed after checking the depth
on the depth sounder, the windlass foot-switches are used to lower the anchor slowly toward (but not onto) the
bottom, by watching the chain markings.
The 300’ chain is measured by marks on the chain as follows (shown on a plaque at the lower helm):
10’ Red-Yellow-Red Strip
50’ Yellow Stripe 100’ Red Stripe
150’ Yellow Stripe 200’ Red Stripe
250’ Yellow Stripe 290’ Red-Yellow-Red Stripe
When the anchor is about to reach bottom, the boat is backed away by putting the engines into reverse for 5
seconds: eddies from the chain indicate motion. Resume lowering the anchor while drifting backwards (watch
the eddies and add another burst or reverse if necessary!) until the desired amount of chain is out. Stop paying
out chain. Engage reverse for ve seconds at a time until t
he chain
starts to pull straight off the bow toward the
anchor. A straight chain indicates a “set” anchor!
NEVER pull on the chain for more than ve seconds, and never at any
engi
ne
RPM other than
idle! Putting the boat’s weight plus its
horsepower
on the
c
hain
forcefully
even at idle will
bend the anchor and/or damage the
mooring g
ear!
If while checking the set, the chain rumbles and clunks, and seems to release in bursts, it
means
you’re
anchoring on a rocky bottom and the anchor is not holding. Be patient: it may not set on the rst try, and you’ll
have to repeat the process sometimes to get a good “set”.

NW Explorations AQUILA OPERATING MANUAL | 15
3B4: Shore Lines
When a shore line is required,
anchors are set 75 - 100 feet
from shore, with the boat backing
toward shore during anchor-
setting. The stern line is put
around a tree, and brought back
to the boat. During this process,
be sure to keep clear of rocks
near the shore, and allow for our
Northwest tides, occasionally
twelve feet, and sometimes 20
feet when further north! Check the present tide, and high and low tides before beginning anchoring: No sense
anchoring in 15 feet of water if you’re at the “top” of a 15 foot tide!
To get to the shore, you will need to have a dinghy down, and then have your mate keep the boat’s stern
toward shore with short bursts of reverse gear. Sometimes a helpful boater already anchored will help you by
taking your line to shore for you with his dinghy, a neat “good deed” that you might reciprocate. We’ve met
some nice boaters this way!
The shore line is in the lazarette, and is long enough to usually allow taking it to a tree, around it, and back
to the boat so you don’t have to go ashore to untie when leaving. With a crew member keeping the boat in
position, take the dinghy to shore pulling the end of the shore line with you. Pass it around a tree, and pull it
back to the boat if you can, since then to get away in the morning all you have to do is release the bitter end
from the boat, and pull it aboard. Pull the line tight, as long as you’ve got over 100’ total of line out: there is
plenty of sag/stretch, and we want to keep the boat in its area! If necessary, put a crab pot oat or fender on
the line to warn others it’s there!
Here is a sketch of a properly anchored boat with a shore line (In this drawing, S=Scope, which should be at
least 4 x DL, the Depth at Low Tide):

16 | AQUILA OPERATING MANUAL NW Explorations
3B5: Trim Tabs
The boat is tted with a set of Bennett Trim Tabs. These are wide “aps” attached to the aft end of the boat,
under the swim step at the trailing edge of the hull, operated hydraulically under the control of the skipper by
rocker switches with indicators at each helm station.
At low speeds, up to approximately six knots, the tabs do little, and should be left in the “Bow Up” position (see
below). But at speeds over this range, the tabs begin to take effect and will help the operator lower the bow for
more efcient cruising.
The best way to adjust the tabs is to lower them while watching the “Speed” indicator to get the highest speed
at a given throttle setting by adjusting “Bow Down”. If the tabs are “Bow Down” too much, the steering will get
mushy and speed may drop off a little, and the tabs should be adjusted
“Bow
Up” a little. Note that it will take
time to make these adjustments; when the buttons are depressed, they need to be held 2-5 seconds each
time for change to be felt and observed (the best way to see the effect of the tabs is by the knot meter and by
observing the height of the bow relative to the horizon, most easily seen from the lower helm station).
Because the trim tabs are so large, THEY MUST BE IN THE FULLY-BOW-UP POSITION WHENEVER THE
BOAT IS TO BE OPERATED IN REVERSE, otherwise the great water forces against the tabs may damage
them severely, even tearing them off the hull!

NW Explorations AQUILA OPERATING MANUAL | 17
4A: Anchor & Ground Tackle
4A1: Anchor Bridle
There is an anchor bridle stowed in the forward deck box. Use it when anchoring overnight, as it accomplishes
three goals:
• It takes the strain of the anchor off the windlass, pulpit, and pulpit pulley and directs it to the bow
cleats which are more suited to hold it;
• It reduces substantially the “chain noise” transmitted to the occupants of the forward cabin;
• It allows the anchor rode to have a lower angle relative to the sea bottom, thus increasing the
anchor’s holding power.
To use the bridle:
1. Lower the anchor normally (see page 4.2) then, after it is set,
2. Hook the bridle on the chain just in front of the anchor pulpit bow roller;
3. Then secure the bridle rope ends through the side-coaming hawse pipes, to the bow cleat on
each side so the bridle lines are equal in length and as long as possible;
4. Last, operate the windlass to pay out anchor chain so the chain slacks and is supported by the
bridle, the chain forming a loop right in front of the boat’s bow.
If you wish, you can pay out additional chain to form a long hanging loop between the boat and bridle, which
weights the chain down in front of the boat well below its normal path; thus the chain itself becomes a “kellet”
or “sentinel”, lowering the chain angle more than the bridle alone. The weight “drooping” the chain down like
this then forms a an even more effective “snubber”, so the boat is gently held against the pressures if wind and
tide.
Section 4: Specic Boat Systems & Operations
This section of the operating manual will discuss each of the boat’s systems. The systems and major
components discussed are in alphabetical order as follows:
4A: Anchor & Ground Tackle
4B: Barbeque
4D: Bilge Blowers
4E: Dinghy, Davit & Outboard
4F: Electrical Systems, AC
4G: Electrical System, DC
4H: Electronics
4J: Engines & Transmissions
4K: Fresh & Waste Water Systems
4L : Fuel System
4M: Furnace
4N: Galley & Appliances
4P: Head Systems
4Q: Running Gear (Props & Shafts)
4R: Safety Equipment
4S: Sea Strainers & Thru Hulls
4T: Warning Lights, Alarms & Wipers

18 | AQUILA OPERATING MANUAL NW Explorations
4A2: Anchor Chain Locker & Anchor Jams
Anchor Handling:
The anchor is forward on the bow pulpit. It is raised and lowered by the electric windlass. The chain goes from
the windlass into the chain lockers through the chain pipe behind the chain wheel (“wildcat”). From here, the
chain goes into a compartment just forward of the bow locker.
Be careful when dealing with the chain! If a crew member is
operating
t
he
windlass
be
especially
careful to
keep ngers, hands, arms, etc. away
f
rom
the
chai
n!
Use the foredeck
footswitches,
not the helm switch, so you can see
w
here
the chain is going and be sure it is
clear of the boat
properly
when
rai
sing
or
lowering
the
a
nchor!
Lowering anchor:
If the chain jams while lowering anchor, it is because one loop of the chain on top of the pile
has fallen inside another loop of chain when the chain pile may have fallen over or shifted. There is no way
the chain can be tangled so that you will ever need to disconnect it! One easy way to disentangle the chain is,
while wearing gloves, grasp the chain on the forward side of the windlass, and, while lifting it above the wildcat
manually, rapidly yank it up and down. This will usually free it.
If, on the other hand, this “yanking” technique fails, look into the chain locker to un-overlap the layers of chain
in the pile.
Hauling anchor:
Be careful when dealing with the chain! If a crew member is
operating
t
he
windlass
while a
person is
accessing
the chain locker, be
especially
careful
to
keep that
person’s
ngers,
hands, arms, etc. away from the chain! Use a
windlass
handle or
broomstick
to deal with the
chai
n.
4A3: Anchor Chain Measurement
The chain is measured by marks on the chain. The markings are as follows:
10’ Red-Yellow-Red Strip
50’ Yellow Stripe 100’ Red Stripe
150’ Yellow Stripe 200’ Red Stripe
250’ Yellow Stripe 290’ Red-Yellow-Red Stripe
Table of contents
Other NW Explorations Boat manuals

NW Explorations
NW Explorations HELE MAI A 46 User manual

NW Explorations
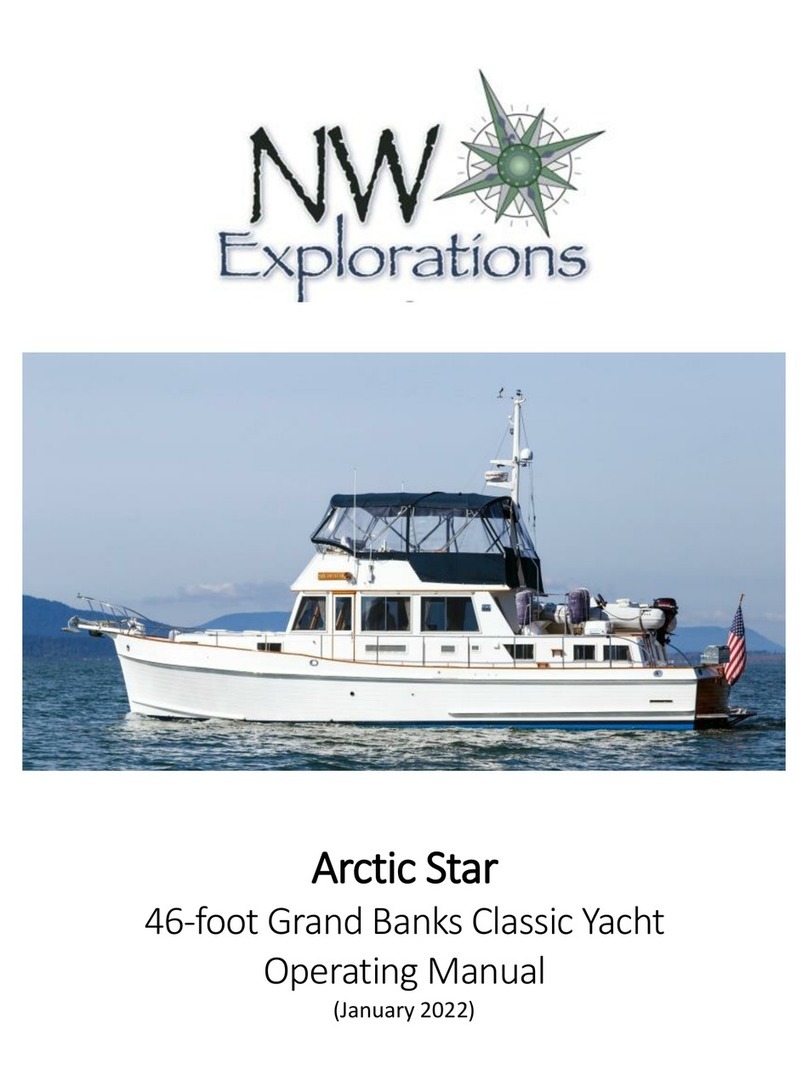
NW Explorations Arctic Star User manual

NW Explorations
NW Explorations Navigator User manual

NW Explorations
NW Explorations Morveren User manual

NW Explorations
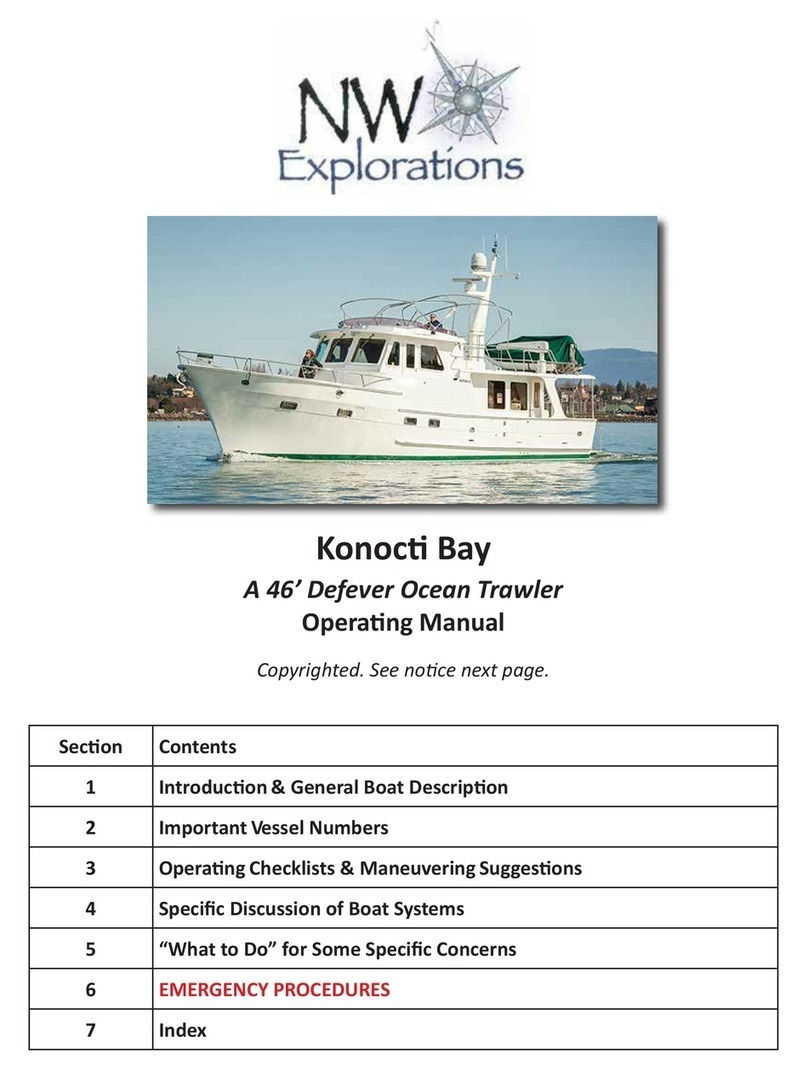
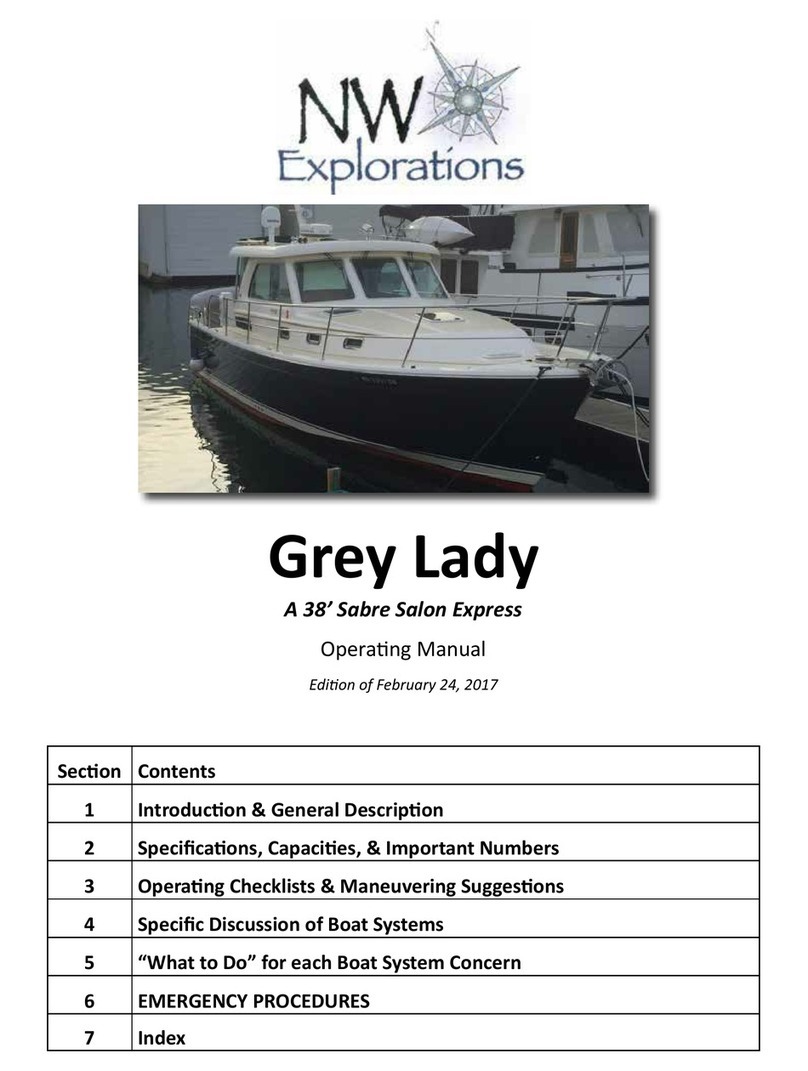
NW Explorations Grey Lady User manual

NW Explorations
NW Explorations Konocti Bay User manual

NW Explorations
NW Explorations Patos User manual

NW Explorations
NW Explorations AnamCara User manual

NW Explorations
NW Explorations Eldean User manual

NW Explorations
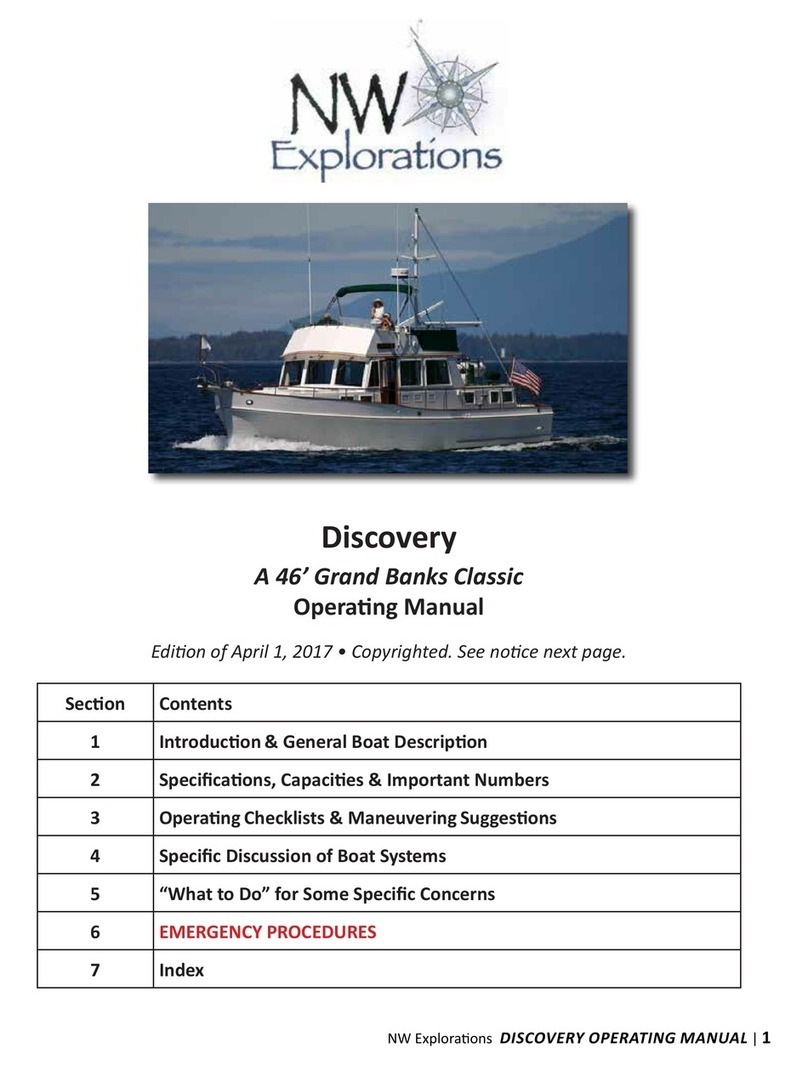
NW Explorations Discovery User manual