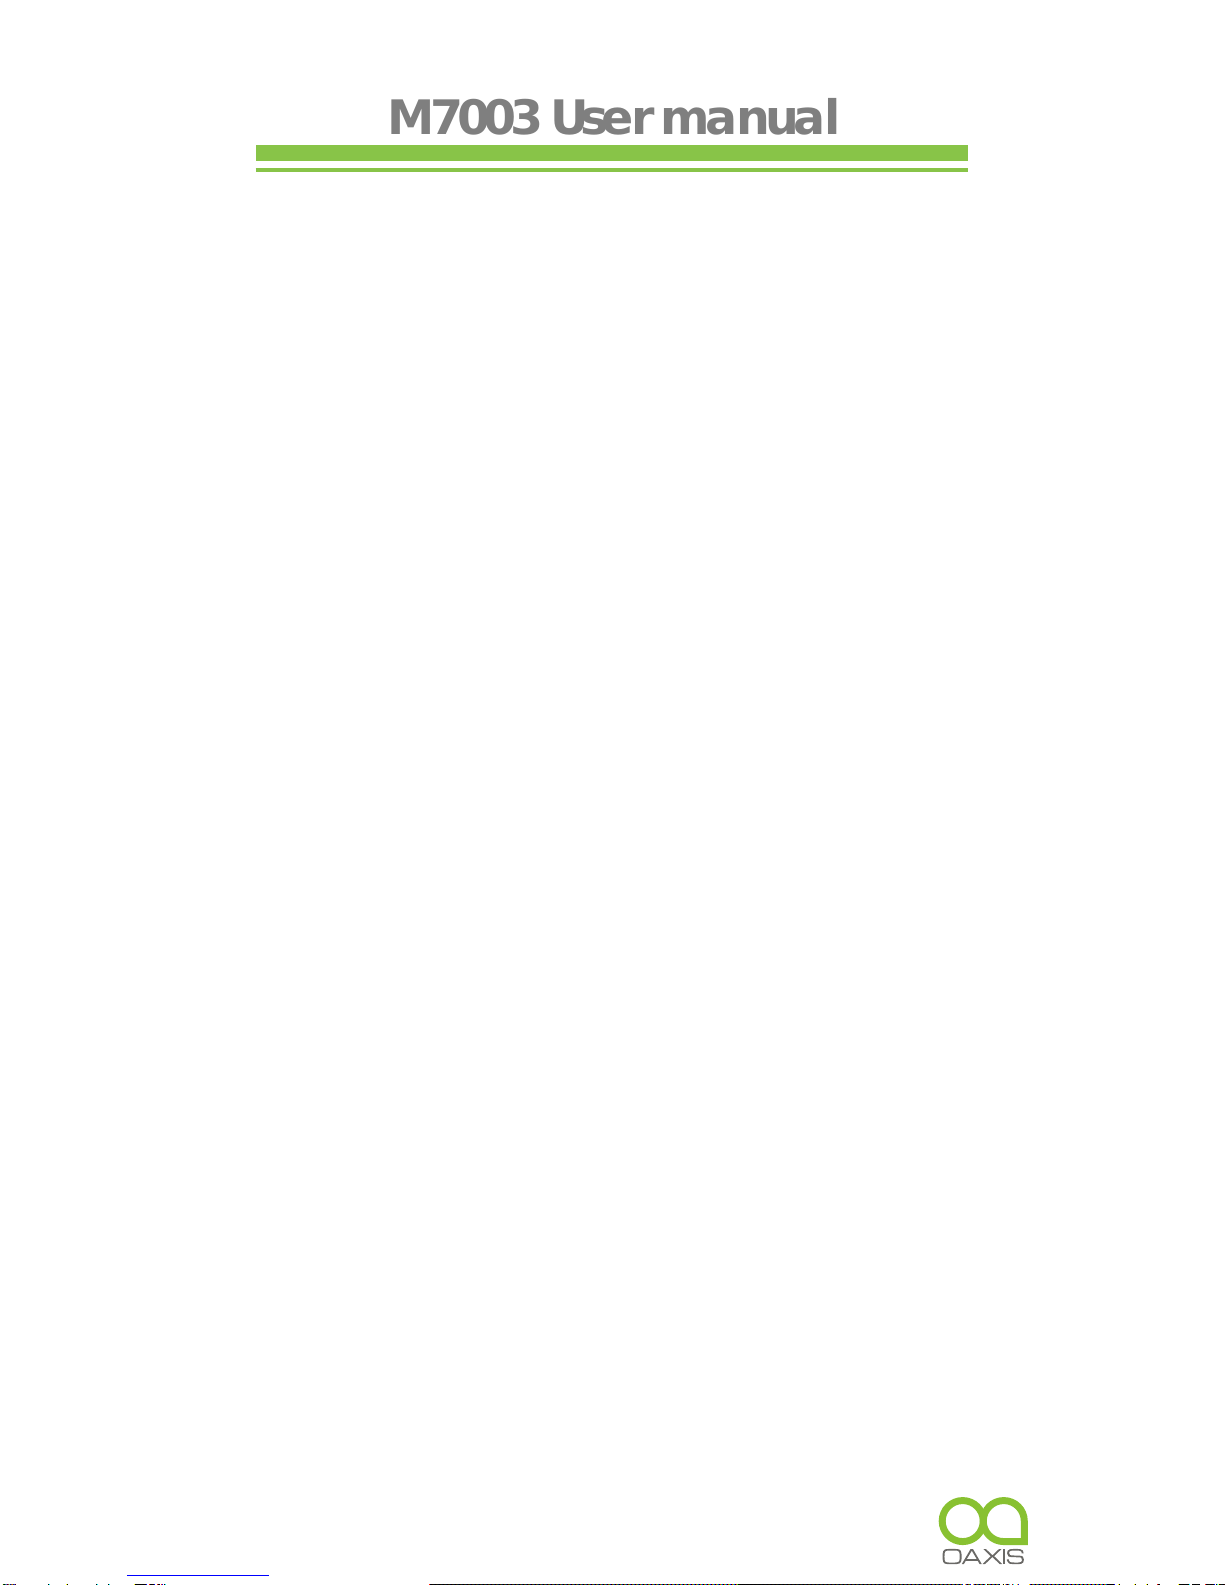
Oaxis XpringSurf 703 M7003 User manual

XpringSurf 703 7" Tablet
(Model No.: M7003)
User Manual

M7003 User manual
Safety Precautions
On Battery
•Charge the battery only in temperature that ranges from 0
℃to 35 ℃.
•Do not charge Tablet PC if the battery is found damaged
or leaking.
On Operation
•Never subject Tablet PC to extremes of light, temperature,
moisture or vibration.
•Do not use or store Tablet PC in a location subject:
A. Extreme high temperature, such as in a sun-heated car.
B. Direct sunlight.
C. High humidity or places with corrosive substances.
D. Sub-zero condition, especially during winter.
On Micro SD card
•After inserted a Micro SD card, if the device has no
response, please take out and insert again.
•Do not remove Micro SD card or turn off Tablet PC during
data writing or reading to prevent damage to data and to
the device.
•Make sure the Micro SD card is unlocked before writing or
deleting data in the card.
•Backup your files and data before formatting the Micro SD
card. Please format the Micro SD card in FAT.
Ⅰ

M7003 User manual
Contents
SAFETY PRECAUTIONS ………………………………………
CONTENTS ……………………………………………………
CHAPTER 1 BASICS …………………………………………
PARTS AND CONTROL …………………………………………………
PACKET CONTENTS………………………………………………………
POWER ON AND OFF THE DEVICE ……………………………………
CHARGING THE DEVICE ………………………………………………
TRANSFERRING CONTENTS ……………………………………………
STAND BY /WAKE UP MODE ……………………………………………
HOME SCREEN ……………………………………………………………
MAIN MENU ………………………………………………………………
TOUCH SCREEN OR BUTTONS …………………………………………
ONSCREEN KEYBOARD ………………………………………………
CONNECTING TO THE INTERNET ………………………………………
SWITCHING SCREEN ORIENTATION ……………………………………
CHAPTER 2 GETTING STARTED ……………………………
WEB BROWSER……………………………………………………………
WATCHING VIDEOS ……………………………………………………
PLAYING MUSIC …………………………………………………………
VIEWING PHOTOS ………………………………………………………
SOUND RECORDING……………………………………………………
E-MAIL ……………………………………………………………………
I
II
1
1
2
2
2
3
4
5
7
7
8
8
9
10
13
16
20
21
23
10
Ⅱ

M7003 User manual
FILE EXPLORER …………………………………………………………
MANAGING THIRD PARTY APPLICATIONS …………………………
MORE APPLICATIONS …………………………………………………
CHAPTER 3 SETTINGS ………………………………………
WIRELESS & NETWORKS ………………………………………………
SOUND SETTINGS ………………………………………………………
DISPLAY SETTINGS ……………………………………………………
LOCATION & SECURITY…………………………………………………
APPLICATIONS……………………………………………………………
PRIVACY SETTING ………………………………………………………
STORAGE SETTINGS ……………………………………………………
LANGUAGE & KEYBOARD ……………………………………………
DATE& TIME ………………………………………………………………
TOUCH PANEL CALIBRATION …………………………………………
ABOUT THE DEVICE ……………………………………………………
CHAPTER 4 TROUBLESHOOTING …………………………
CHAPTER 5 APPENDIX ………………………………………
MAINTENANCE……………………………………………………………
PRODUCT SPECIFICATIONS ……………………………………………
CERTIFICATION INFORMATION…………………………………………
COPYRIGHTS AND TRADEMARK NOTICE ……………………………
DISPOSAL AND RECYCLING INFORMATION…………………………
DISCLAIMER ………………………………………………………………
25
28
29
31
31
32
32
32
32
32
32
32
33
33
33
34
35
35
35
37
38
39
39
Ⅲ

Chapter 1 Basics
M7003 is a Tablet PC with touch LCD. It supports Wi-Fi function
and third party software.
Parts and Control
1. Power button
– Press and hold for 3 seconds to turn on.
2. Volume + button
– Press to decrease volume.
3. Volume - button
– Press to increase volume.
4. Speaker
5. Menu button
– Press to display option menu.
6. Return button
– Press once to return to previous screen, long
press to return to home screen.
7. Home button
8. Charging indicator
– When the device is being charged,
red light is on, when fully charged, the red light will go out.
9. Earphone jack
10. Memory card slot
11. Microphone jack
12. USB jack
13. DC-in jack
14. Reset button
1
123
45
67
8
9
10
11
12
13
14

Chapter 1 Basics
Packet Contents
•1x Tablet PC
•1x Power cable
•1x USB cable
•1x User Manual
Power On and Off the Tablet PC
•Press and hold the Power button for 3 seconds to
turn the Tablet PC on.
•It may take a few moment for the device to turn on
and load.
•Press and hold the Power button for 3 seconds to select
Power off, then it will a appear a confirmation window,
tap OK to turn off the device.
Charging the Tablet PC
•You need to charge the device prior to use it for the first
time or when battery power is low.
•Charge the device using AC adapter with output 9V,1.5A.
•Please turn the device to standby mode to shorten the
charging process.
•Generally, It will take about 5 hours to fully charge the
device in standby mode (LCD off).
•When the power cable is connected to the device for
charging, the device will enter into standby mode after
remains idle for 60s. Press the Power button to wake up the
device.
•The battery status is displayed at the top of the screen.
2

Chapter 1 Basics
Transferring Contents
From Computer
• The device supports USB Mass Storage Device function.
•To import contents (ebooks, video, audio, photo etc) into
the device, connect the device to PC via the supplied USB
cable.
•Upon successful connection to PC, turn to the M7003,
touch and hold the USB connection icon on status bar,
drag downwards to display an ongoing list.
•Select “USB connected”, then tap on “Turn on USB
storage” to enter USB mode and all operation will be
halted.
•Go to [My Computer], double click on the device’s disk
to open.
•Perform normal file management operation like
other USB device.
3
Battery
full Battery
low
Charging

Chapter 1 Basics
From memory card
This unit supports Micro SD card up to 32 GB
To insert a Memory card
Insert the card correctly with the
contact pin facing downwards as
illustrated below. Pushing the card in,
then you should hear a click when the card is seated correctly.
You may damage the card and the device if Micro SD card is
not inserted correctly.To remove Micro SD card, push the card
once again until it clicks.
•When a Micro SD card is inserted in or ejected from the
device, it may take few seconds for the device to update
the content.Please avoid inserting or ejecting Micro SD
card when other operation is running as this may cause the
system hang.
•Do not remove the card if the content inside the card is
being played. This will halt the operation of the device and
cause the device to restart.
•If the system is not responding, press the Reset button to
reset.
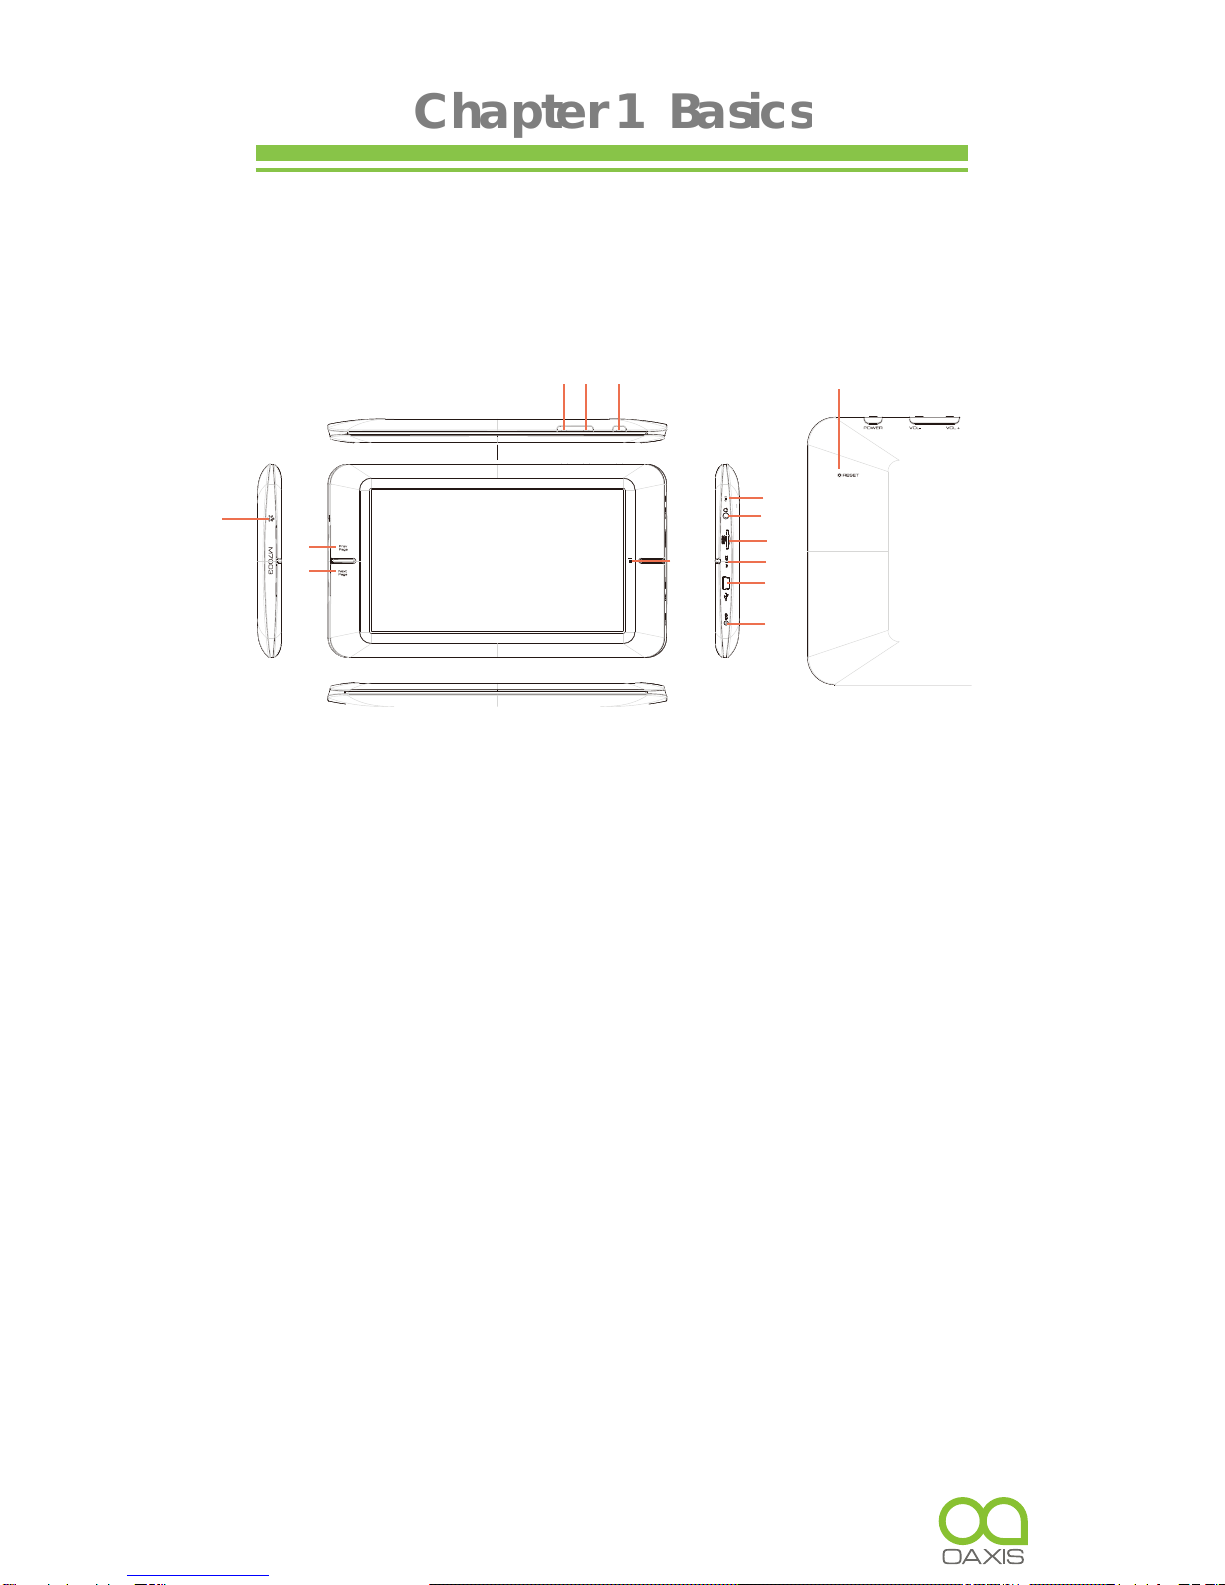
Stand by / Wake up mode
Press Power button to enter Stand by mode, then the device
locks automatically.
Locking the device turns off the display to save your battery and
to prevent unintended operation of the device. wrap
To wake up the device, press Power button again, then press
the Lock button and drag the slider.
4
SD

Chapter 1 Basics
Home screen
When the device is turned on, it will enter into the home screen.
A. Home button B. USB connection
C. USB debugging D. Time Display
E. Wi-Fi connection F. Battery indicator
G. Volume – button H. Volume + button
I. Return button J. Menu button
K. Search bar for web browser
L. Navigation bar
M. Widget & Shortcut button
N. Indication for additional home screens
5

Chapter 1 Basics
Customizing Home screen
Adding icons on homescreen
You can add shortcuts, widgets or folders to home screen.
Tap , select the desired options to add to homescreen.
Moving icons on the home screen
1. Touch and hold an icon to be moved until the icon is
zoomed in.
2. Drag the icon to the desired place.
Removing icons on home screen.
Touch and hold the desired icon to be removed until it appear
the icon, then drag the icon on , when the icon turns
red, release it to remove.
Setting wallpaper for homescreen
Tap Wallpaper, select the desired picture as
wallpaper.
About the additional home screen
You can use up to five screens. The number of dots at the bottom
of screen shows the number of screens you have, and indicates
which screen you are viewing.Turn to another Home screen: Flick
left or right, or tap to the dots.
Go to the first Home screen: Press the Home button.
6

Chapter 1 Basics
Main menu
All application icons are on the Main menu.
•On home screen, tap to show the Main menu.
•Tap an icon on the Main menu to launch the desired
application.
Touch screen or buttons
• Tap an icon to launch an application.
• Press the Return button on the unit or tap anytime
to return to previous screen, press and hold to return to
Home screen.
• Tap anytime to return to Home screen.
• Press the Menu button on the unit or tap on the
screen anytime to display the option menu.
7

Chapter 1 Basics
Scrolling
• Drag your finger up and down to scroll file list.
• Flick to scroll quickly.
• On webpage, drag up and down to scroll around the
page(be care for so as not to click the link).
• Tap or touch anywhere on the screen to stop it
immediately.
Onscreen keyboard
Use the onscreen keyboard to enter text, such as text
messages or web addresses.
• Tap a text field to bring up the keyboard.
• Touch and hold on the text field to select an input
method.
Uppercase key Backspace key
Numeric/punctuation/symbol key
Connecting to the internet
Turn on Wi-Fi: From Main menu choose Settings Wireless &
networks Wi-Fi.
Join a Wi-Fi network: Tap Wi-Fi Settings, then from the
detected network list, select a network. If necessary, enter a
password and tap Connect to save the settings for the
encrypted connection and connect to Wi-Fi(networks that
require a password appear with a lock icon.
8

Chapter 1 Basics
Once you’ve joined a Wi-Fi network manually, it automatically
connects to it whenever the network is in range.
Switching Screen orientation
Screen orientation can be set to vertical or horizontal via the
built-in G sensor.
•From Main menu, tap
Settings Display
, select
Auto
-
rotate screen
.
• Rotate the unit and the screen rotates too, automatically
adjusting to fit the screen.
9

Chapter 2 Getting Started
Web browser
View a webpage
• From Main menu, tap Browser to launch web browser.
• Tap the address bar at the top of the screen.
• On address bar, type the web address and tap Go.
• Tap the link on the webpage to open a new webpage.
• Drag up and down to scroll around the webpage.
• Drag on the webpage to display the zoom control button,
then tap or to zoom in or zoom out.
•In zoom mode, drag left, right, up,down to move the
webpage.
•To return to the previous page, tap the button.
Notice:
•To switch screen orientation, rotate the unit.
•Browser start page always defaults to Google home page.
Using the option menu
Tap to display the browser option menu.
10

Chapter 2 Getting Started
New Window:
Open a new window at browser start page.
Bookmarks
11

Chapter 2 Getting Started
• Bookmarks
List all bookmarks, tap a bookmark to open the webpage.
Touch and hold to display the option menu for bookmark.
Tap Add Bookmark to add last visited webpage as new
bookmark.
• Most visited
Tap to display the most visited website list.
• History
Access to view history lists. To remove these lists, tap , then
select Clear history.
Show the multiple webpage windows opened at a time.
tap on the desired window to enlarge to full screen mode.
• Refresh/Stop
Tap the Refresh to refresh on the current page, tap Stop
to stop loading the current page.
• Forward
Tap Forward to go to the next visited webpage.
• More
Use more available function, including Add bookmark, Find
on page, Select text, Page information, Share page,
Downloads.
12

Chapter 2 Getting Started
Watching Videos
Playing videos
• On the Main menu, tap Video to open video player.
• Drag up and down to scroll through the file list.
• Tap to select a video file for playback.
• Touch and hold on the selected video file to delete it.
13

Chapter 2 Getting Started
Controlling Video Playback
when playing video, tap on the screen to pop up control toolbar.
14
Play or Pause a video
Play previous/next video
Fast rewind or fast forward
Skip to any point in a video
Adjust the volume level.
Add a bookmark in the
current playback position
Adjust screen brightness
Adjust the screen
size: full screen,16:9,4:3
Display video menu
Return to the video browser screen
Tap / .
Tap .
Tap .
Tap .
Tap .
Tap .
Tap / .
Touch and hold / .
Tap anywhere or drag the
playheadon the progress bar.
Tap / or use the
buttons on the side of M7003.

Chapter 2 Getting Started
Notices:
• If a bookmark is added, it allows you to continue playing
from the bookmark when you open the video file next time.
• Video player supports subtitle file, please load the subtitle
file to be displayed on the current video, unless the subtitle
is integrated into the video itself.
• The Tablet PC supports subtitle of sub, ssa, srt, lrc
format,encoded in UTF8 format.
• The file name of the subtitle must be identical to that of the
video file. The subtitle will be loaded automatically during
video playback
Using video playback menu
During the video playback, tap on the lower right to display
the Playback menu.
•Delete the bookmark to start playing from the beginning.
•Delete bookmark: tap to delete the bookmark.
•Play Mode: set the playback mode-Single, Repeat one,
Repeat all.
•Help: tap to display help information
•Return: close the menu.
15

Chapter 2 Getting Started
Playing Music
About music library
From Main menu, tap Music to enter into music library
Sorting by artist Sorting by album
All songs Sorting by Playlist
Return to Now playing screen
16
This manual suits for next models
2
Table of contents
Other Oaxis Tablet manuals