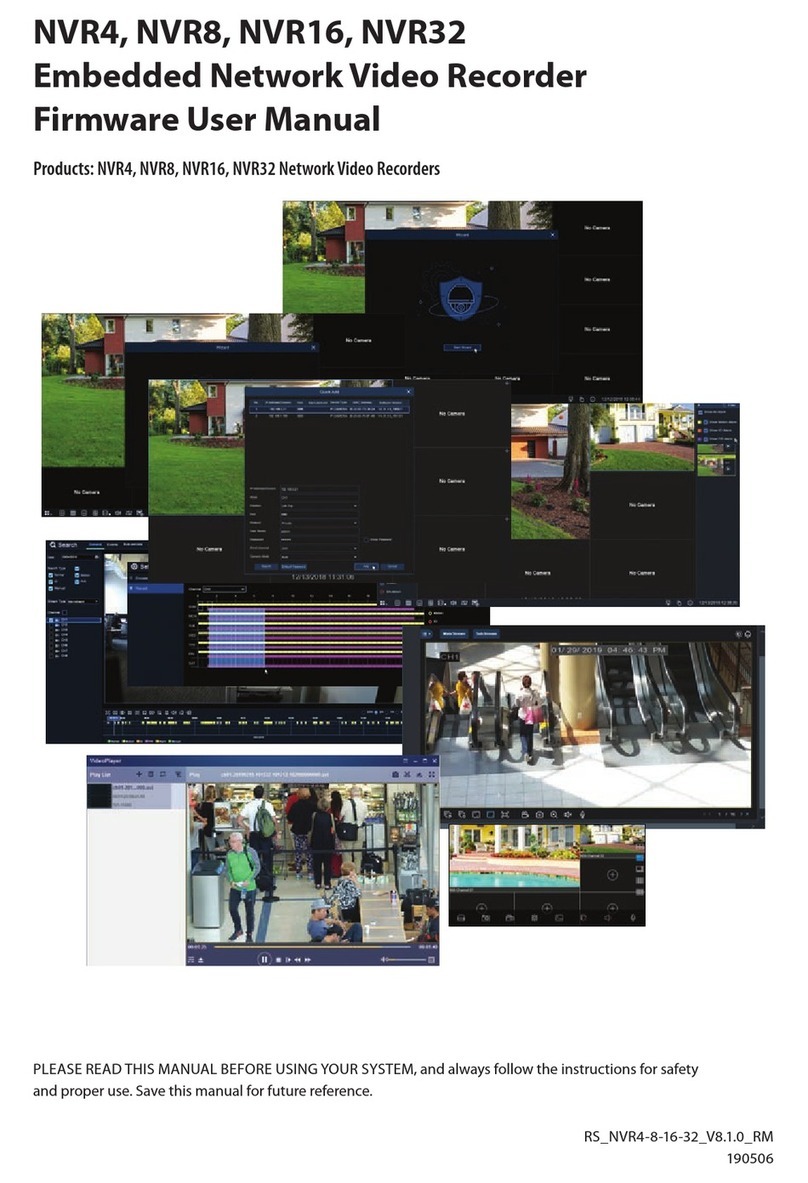
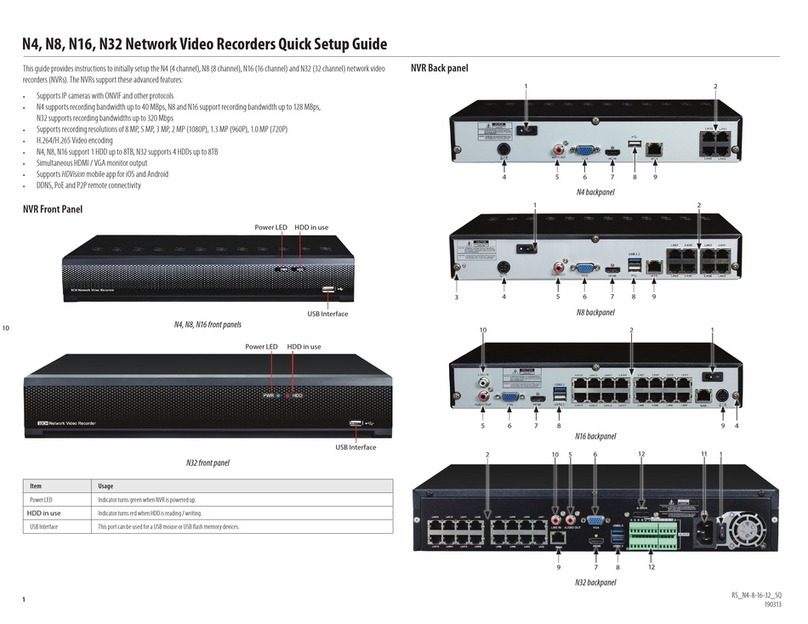
Observint N4 User manual

N4, N8, N16, N32 Embedded Network Video
Recorder User Manual
Products: N4, N8, N16, N32 Network Video Recorders
PLEASE READ THIS MANUAL BEFORE USING YOUR SYSTEM, and always follow the instructions for safety
and proper use. Save this manual for future reference.
RS_N4-8-16-32_V8.1.0_RM
190312

ii www.Observint.com
About this manual
This manual supports the N-series Network Video Recorders (NVRs). It describes usage of the startup Wizard, and the parameters
used in the embedded rmware screens. It also includes a basic approach to accessing the NVR across an Ethernet network and via
the smartphone app HDVision Mobile.
LEGAL NOTICE
Observint Technologies (Observint) products are designed to meet safety and performance standards with the use of
specic Observint authorized accessories. Observint disclaims liability associated with the use of non-Observint
authorized accessories.
The recording, transmission, or broadcast of any person’s voice without their consent or a court order is strictly
prohibited by law.
Distributing, copying, disassembling, reverse compiling, reverse engineering, and exporting, in violation of
export laws, the software provided with Alibi video recorders is expressly prohibited.
Observint makes no representations concerning the legality of certain product applications such as the making,
transmission, or recording of video and / or audio signals of others without their knowledge and / or consent.
We encourage you to check and comply with all applicable local, state, and federal laws and regulations before
engaging in any form of surveillance or any transmission of radio frequencies.
Microsoft, Windows, and Internet Explorer are either registered trademarks or trademarks of Microsoft Corporation in
the United States and / or other countries. Android is a trademark of Google Inc. Use of this trademark is subject to
Google Permissions. Apple, iPhone,iPod touch, and iPad are registered trademarks of Apple Inc.
Other trademarks and trade names may be used in this document to refer to either the entities claiming the marks
and names or their products. Observint disclaims any proprietary interest in trademarks and trade names other than
its own.
No part of this document may be reproduced or distributed in any form or by any means without the express written
permission of Observint Technologies.
© 2019 by Observint Technologies. All Rights Reserved.
15505 Long Vista Dr, Suite 250, Austin, TX 78728
For Sales and Support, please contact your distributor.

iiiN4, N8, N16, N32 NVR V8.1.0 User Manual
TABLE OF CONTENTS
Table of Contents
SECTION 1 Systems Overview...................................................................1
1.1 Using the mouse.....................................................................3
SECTION 2 Initial Setup........................................................................6
2.1 Activation...........................................................................6
2.2 Using theWizard for initial conguration ................................................8
SECTION 3 Channel - Live Display ..............................................................19
3.1 Live display ........................................................................19
3.2 LiveView screen controls .............................................................23
3.2.1 Channel - Live screen............................................................23
3.2.2 Channel - Channel menu ........................................................23
3.2.3 Channel - Protocol Manage menu.................................................24
3.2.4 Channel - Live menu ............................................................25
3.2.5 Channel - Image Control menu ...................................................27
3.2.6 Channel - PTZ menu ............................................................28
3.2.7 PTZ control panel ...............................................................28
3.2.8 Channel - Privacy Mask menu ....................................................29
3.2.9 Channel - Motion menu .........................................................30
3.2.10 PIR ...........................................................................32
SECTION 4 Record ...........................................................................35
4.1 Encode ............................................................................35
4.2 Record ............................................................................36
4.2.1 Record Schedule................................................................37
SECTION 5 Alarm Conguration ...............................................................39
5.1 Motion alarm handling ..............................................................39
5.2 PIR. . . . . . . . . . . . . . . . . . . . . . . . . . . . . . . . . . . . . . . . . . . . . . . . . . . . . . . . . . . . . . . . . . . . . . . . . . . . . . . .40
5.3 IO alarm menu .....................................................................41
5.4 PTZ Linkage alarm menu.............................................................41
5.5 Exception ..........................................................................43
SECTION 6 Network Conguration .............................................................44
6.1 General settings ....................................................................44
6.1.1 PPPoE settings .................................................................45
6.1.2 Port Conguration ..............................................................46
6.2 DDNS settings ......................................................................46

iv www.Observint.com
TABLE OF CONTENTS
6.3 Email setup ........................................................................48
6.3.1 Email Schedule.................................................................49
SECTION 7 Device Conguration ...............................................................50
7.1 Disk...............................................................................50
7.1.1 Disk Group ....................................................................52
7.1.2 S.M.A.R.T. data .................................................................52
7.2 Cloud settings ......................................................................53
SECTION 8 System Settings ...................................................................55
8.1 General settings ....................................................................55
8.1.1 Date and Time .................................................................55
8.1.2 Output Conguration ...........................................................58
8.2 Multi-User setup....................................................................60
8.3 Maintenance .......................................................................64
8.3.1 Log...........................................................................65
8.3.2 Load Default ...................................................................66
8.3.3 Upgrade ......................................................................67
8.3.4 Parameter Management ........................................................67
8.3.5 Auto Reboot ...................................................................69
8.4 IP Camera Maintain .................................................................69
8.4.1 Upgrade ......................................................................69
8.4.2 Load Default ...................................................................70
8.4.3 Reboot IPC ....................................................................71
8.5 Information ........................................................................71
8.5.1 Channel Information ............................................................72
8.5.2 Record Info ....................................................................72
8.5.3 Network Status.................................................................73
SECTION 9 Search, Playback, Backup and Tags ...................................................74
9.1 Using Search Features ...............................................................74
9.1.1 Search, Playback and Backup video................................................75
9.1.2 Event Search, Playback and Backup................................................78
9.1.3 Event Playback Control ..........................................................79
9.1.4 Sub-periods Playback ...........................................................80
9.1.5 Smart Search and Playback ......................................................81
9.1.6 Smart Search Area ..............................................................81
9.1.7 Tags ..........................................................................83

vN4, N8, N16, N32 NVR V8.1.0 User Manual
TABLE OF CONTENTS
SECTION 10 Remote Login .....................................................................87
10.1 System Requirements ...............................................................87
10.2 Remote login.......................................................................87
10.2.1 Remote login with Surveillance Plugin installation ..................................88
10.3 Live screen .........................................................................90
10.4 Playback screen.....................................................................92
10.5 Remote Settings ....................................................................93
10.6 Local Settings ......................................................................94
SECTION 11 HDVision Mobile App for Remote Access ...............................................95
11.1 Getting Started .....................................................................95
11.2 Help screens. . . . . . . . . . . . . . . . . . . . . . . . . . . . . . . . . . . . . . . . . . . . . . . . . . . . . . . . . . . . . . . . . . . . . . . .97
11.2.1 Overview .....................................................................97
11.2.2 Live (View) ....................................................................98
11.2.3 (Remote) Playback .............................................................98
11.2.4 Record (Local Playback) .........................................................99
11.2.5 Image (Manager)...............................................................99
11.2.6 Remote Setting ...............................................................100
11.2.7 Alarm .......................................................................100
11.2.8 Device (Manager). . . . . . . . . . . . . . . . . . . . . . . . . . . . . . . . . . . . . . . . . . . . . . . . . . . . . . . . . . . . . .101
SECTION 12 Using Video Player Software ........................................................102
12.1 Installation on Windows ............................................................102
12.2 Play video le .....................................................................104
12.2.1 Capture image ................................................................105
12.2.2 Save clip .....................................................................106
APPENDIX A Troubleshooting ..................................................................109
A.1 System troubleshooting ............................................................109
A.2 Best Practices .....................................................................111

vi www.Observint.com
NOTES

1N4, N8, N16, N32 NVR V8.1.0 User Manual
SECTION 1: SYSTEM OVERVIEW
SECTION 1
Systems Overview
Congratulations on purchasing your new Embedded NVR security system! Your system includes the following key features:
General
• Connectable to network cameras, network dome and encoders
• Connectable to third-party network cameras that are ONVIF compatible (includes Alibi)
• Connectable to smart IP cameras
• H.265 / H.264 video formats
• PAL / NTSC adaptive video inputs
• Each channel supports dual-stream
• Up to 4 / 8 / 16 / 32 network cameras can be added to the recorder up to the capacity of the NVR.
• Independent conguration for each channel, including resolution, frame rate, bit rate, image quality, etc.
• The quality of the input and output record is congurable
Local Monitoring
HDMI / VGA outputs provided
• HDMI video output at up to 4K resolution
• Multi-screen display in live view is supported, and the display sequence of channels is adjustable
• Live view screen can be switched in groups. Manual switch and auto-switch are provided and the auto-switch interval is
congurable
• Custom window-division live view layout conguration
• 3D positioning in live view
• Congurable main stream and sub-stream for the live view
• Quick setting menu is provided for live view
• Motion detection, video tampering, video exception alert and video loss alert functions
• Privacy mask
• Supports Pelco D, Pelco P, presets and cruise
• Zooming in by clicking the mouse and PTZ tracing by dragging mouse
HDD Management
• N4, N8 and N16 support 1 internal SATA HDD, N32 supports up to 4 internal HDDs and 1 eSATA devices
• Up to 8 TB storage capacity for each disk supported (refer to the specications for your recorder for hardware capabilities)
• S.M.A.R.T. and bad sector detection
• HDD group management
• Supports HDD standby function
• HDD property: redundancy, read-only, read / write (R / W)

2www.Observint.com
• HDD quota management; dierent capacities can be assigned to dierent channels
• Disk clone to the eSATA disk
• HDD health monitoring
Recording, Capture and Playback
• Continuous and event video recording parameters
• Multiple recording types: manual, continuous, alarm, motion, IO
• Pre-record and post-record for alarm, motion detection for recording, and pre-record time for schedule and manual recording
• Searching record les and captured pictures by events (alarm input / motion detection)
• Tag adding for record les, searching and playing back by tags
• Locking and unlocking record les
• Local redundant recording
• Normal / Smart / Tag video playback mode
• Searching and playing back record les by channel number, recording type, start time, end time, etc.
• Supports playback by main stream or sub stream
• Smart search for the selected area in the video
• Zoom in during playback
• Reverse playback of multi-channel
• Supports pause, play reverse, speed up, speed down when playback, and locating by dragging the mouse
• Supports thumbnails view and fast view during playback
• Up to 16-ch synchronous playback at 1080p real time. See specications for you NVR
• Supports playback by transcoded stream
• Manual capture, continuous capture of video images and playback of captured pictures
Files Management
• Search and export vehicle detection les and human appearance les
• Export video data by USB or eSATA device
• Export video clips during playback
• Alarm and Exception
• Congurable arming time of alarm input / output
• Alarm for illegal login, network disconnected, HDD error, and HDD full
• Alarm triggers full screen monitoring, audio alarm, sending e-mail and alarm output
Other Local Functions
• Operable by mouse, remote control, or control keyboard
• Two-level user management; admin user is allowed to create many operating accounts and dene their operating permission,
which includes the limit to access any channel
• Admin password resetting by exporting / importing a system conguration le
• Operation, alarm, exceptions, and log recording and searching
SECTION 1: SYSTEM OVERVIEW

3N4, N8, N16, N32 NVR V8.1.0 User Manual
SECTION 1: SYSTEM OVERVIEW
• Manually triggering and clearing alarms
• Import and export device conguration information
Network Function
• Self-adaptive 10M / 100M / 1000 Mbps network interface
• TCP/IP protocol, DHCP, DNS, DDNS, NTP, SADP, SMTP, NFS, and iSCSI are supported
• TCP, UDP and RTP for unicast
• Auto / Manual port mapping by UPnPTM
• Remote Web browser access by HTTPS ensures high security
• Remote reverse playback via RTSP
• Supports accessing the platform via ONVIF
• Remote search, playback, download, locking and unlocking of the record les, and supports downloading les upon broken
transfer resume
• Remote parameters setup; remote import / export of device parameters
• Remote viewing of the device status, system logs and alarm status
• Remote keyboard operation
• Remote HDD formatting and program upgrading
• Remote system restart and shutdown
• RS-485 transparent channel transmission
• Alarm and exception information can be sent to the remote host
• Remotely start / stop recording
• Remotely start / stop alarm output
• Remote PTZ control
• Remote JPEG capture
• Two-way audio and voice broadcasting
• Embedded Web server
1.1 Using the mouse
Mouse control
A standard 3-button (left / right / scroll-wheel) USB mouse can also be used with this NVR. To use a USB mouse:
1. Plug the USB mouse into the either the front panel or back panel USB connector of the NVR.
2. When the recorder is powered on, the mouse will be automatically detected. If the mouse is not detected, the mouse may not
be compatible with the NVR. Please refer to the recommended device list from your provider.

4www.Observint.com
Using the mouse
1. Left Button:
—Click to select menu options.
—During live viewing in split-screen view, double-click on a channel to view it in full-screen. Double-click the channel
again to return to split-screen viewing.
—Click upon a channel on Live Viewing screen to open Camera Quick Toolbar.
—Click and hold to drag sliders and scales on menu mode
2. Right Button:
—Click once to open the task bar on the Live Viewing screen.
—In menus, click to go back or close the menu.
3. Scroll Wheel:
—In menus, scroll to move up / down through the menu content.
—While hovering over the volume control wheel, scroll to turn system volume up / down.
Using the Remote Control
3
5
11
14
16
9
1
6
4
2
10
13
15
12
7
8
9
No. Icon Description
1 1-8 Numeric keys
Press to display channel 1~8
2 9, 0 Numeric keys
3 ALL Press to display all channels
Multiple display mode
4 Menu Press to enter or exit the Main Menu
5 Mute Mute On/o
6 Submenu Go to submenu
7 Up arrow key; Volume increase
8 SEL Press to enter the selected menu item and edit the setting
9 Left/Right key; Decrease/increase parameter value of control bar.
10 Down arrow key; Volume decrease
11 Press to rewind during video playback
12 Press to fast forward during video playback
13 Press to play recorded video or enter the recording search menu
14 Press to start manual recording
15 Press to stop manual recording or stop the video playback
16 | | Press to pause the video playback or enter frame-playback mode
SECTION 1: SYSTEM OVERVIEW

5N4, N8, N16, N32 NVR V8.1.0 User Manual
SECTION 1: SYSTEM OVERVIEW
Using the Virtual Keyboard
When you click in an editable data entry eld, a virtual keyboard will appear. Click on the character in the keyboard to enter it into
the eld. When the data entry is complete, click the Enter key in the lower right corner.
Move cursor
left, right Enter
Click to
delete
previous
character
Click for
upper,
lower case

6www.Observint.com
SECTION 2
Initial Setup
When the NVR is rst powered on, it must be activated. Activation sets the admin user password and a Lock Pattern if used.
After Activation, you can use the Wizard to setup the basic conguration of the system, including network parameters, time,
cameras, etc.
2.1 Activation
When the NVR powers on, a “SYSTEM INITIALIZING” splash screen normally appears within 3 minutes. If it is the rst time
powering on the recorder, an activation screen will open. You must use this menu to setup an admin password for the system, and
an Unlock Pattern, if preferred, for quickly accessing the conguration menus if the recorder.
1. In the screen shown above, enter your admin password in the New Admin Password and Conrm Password elds (see
below). Ensure that the Password Strength of your password is at least Medium (preferably Strong).
NOTE If you forget your password, you will be unable to login the system, please contact your vendor to reset the password.
SECTION 2: INITIAL SETUP

7N4, N8, N16, N32 NVR V8.1.0 User Manual
SECTION 2: INITIAL SETUP
2. If you want to use an Unlock Pattern to access the conguration menus, open the Unlock Enable drop down list, and then
click Enable. Click Apply to continue.
3. Click the Draw button to open the Set Unlock Pattern window.
4. In the Set Unlock Pattern window, drag the mouse cursor across a pattern of circles, then release the mouse.
5. Repeat the pattern you entered, and then click Apply to save the conguration. The conguration Wizard initial screen will
open.

8www.Observint.com
2.2 Using the Wizard for initial conguration
Use the Wizard to setup the basic conguration of your system. Advanced conguration options are available in the Setup menus.
Refer to the rmware user manual (to be provided) for your recorder for more information.
1. When the initial Wizard window appears, click Start Wizard to continue.
2. The next Wizard screen is used to congure the network settings of the recorder. Initially, the recorder acquires network using
DHCP (Dynamic Host Conguration Processor) which usually exists somewhere on your LAN. DHCP provides network settings
that are compatible with other devices on your LAN.
SECTION 2: INITIAL SETUP

9N4, N8, N16, N32 NVR V8.1.0 User Manual
SECTION 2: INITIAL SETUP
a. It is preferred to have xed network settings instead of dynamic settings, however. To change from dynamic network
settings to xed settings, copy the settings found through DHCP for the Local Connection and DNS, uncheck the DHCP
select box near the top of the menu, then re-enter the DHCP Local Connection and DNS settings. You can also enter your
own network settings for the recorder (these must be compatible with other devices on the LAN). If you choose to enter
your own network parameters, consider the following:
IP Address: The IP address identies the NVR in the network. It consists of four groups of numbers between 0 to 255,
separated by periods. For example, “192.168.001.100”.
Subnet Mask: Subnet mask is a network parameter which denes a range of IP addresses that can be used in a
network. If IP address is like a street where you live then subnet mask is like a neighborhood. The subnet address also
consists of four groups of numbers, separated by periods. For example, “255.255.000.000”.
Gateway: This address allows the NVR to access the Internet. The format of the Gateway address is the same as the IP
Address. For example, “192.168.001.001”.
DNS1/DNS2: DNS1 is the primary DNS server and DNS2 is a backup DNS server. Usually should be enough just to enter
the DNS1 server address.
b. You can also congure the ports the NVR. If you need to change the port numbers of your NVR, consider the following:
Web Port: This is the port that you will use to log in remotely to the NVR (e.g. using the Web Client). If the default port
80 is already taken by other applications, please change it.
Client Port: This is the port that the NVR will use to send information through (e.g. using the mobile app). If the default
port 9000 is already taken by other applications, please change it.
RTSP Port: This is the port that the NVR will be allowed to transmit real-time streaming to other device (e.g. using a
streaming Media player.).
HTTPS: HTTPS is the secure version of HTTP, the protocol over which data is sent between your browser and the website
that you are connected to. If you want to log in remotely to the NVR using Web Client, you need to complete the port
forwarding in your router. The default port number is 0443.
PPPoE: PPPoE is an advanced protocol that allows the NVR to connect to the network more directly via DSL modem.
Check the Enable PPPOE box, and then enter the User name and Password of the PPPoE.
c. Click Next to continue.
3. Use the Date/Time menu to set the Date, Time, Date Format, Time Format, Time Zone, NTP and DST (daylight savings time).

10 www.Observint.com
a. When changing parameters in the Date and Time tab, consider the following:
Date: Click on the calendar icon to set the system date.
Time: Click to set the system time.
Date Format: Choose from the drop down menu to set preferred date format.
Time Format: Choose time format between 24-hour and 12-hour.
Time Zone: Set the correct time zone.
b. Click the NTP tab. To use a Network Time server to automatically set the date and time in your recorder, check the Enable
NTP box, and then select a Server Address from the drop down list. Click Update Now to acquire the current Date and
Time information.
c. Click the DST (Daylight Savings Time) tab. Setup the values in the DST menu to match your local DST custom, if preferred.
SECTION 2: INITIAL SETUP

11N4, N8, N16, N32 NVR V8.1.0 User Manual
If changing the DST settings, consider the following:
DST: Enable if Daylight Saving Time (DST) is observed in your region.
Time Oset: Select the amount of time to oset for DST
Time Mode: Choose to set the daylight saving time in weeks or in days
Start Time/End Time: Set the start time and end time for daylight saving.
4. Click Next to continue.
5. In the IP Camera menu, the Wizard automatically lists all cameras connected to the channel RJ-45 connectors on the back
panel. If some channels are unused, you can add compatible network IP cameras to the NVR up to the capacity of the NVR. For
instance, if you have an 8-channel NVR and have four cameras plugged into the backpanel channel connectors, you can add 4
additional IP cameras that are installed on the network, for a total of 8.
SECTION 2: INITIAL SETUP

12 www.Observint.com
To use this menu:
a. If you are NOT adding network IP cameras to the NVR for monitoring, click Next to continue, and to to the step: “6. In the
Disk menu... on page 13.
b. To add network cameras to the NVR for monitoring:
i. Click the icon in the Edit column for a channel where a camera is not assigned. In the example above, channels 2
through 8 are not assigned.
ii. In the Edit Connection Information menu, open the Switch Mode drop down list, and then select Manual
Mode. Click OK to close this menu.
iii. In the IP Camera Wizard window, click the Search button in the lower left corner. A list of compatible IP
cameras installed on the network will appear in the left frame.
iv. To add a network camera from the search results list, check the select box for the camera you want to add, and
then click the Add button (blue right arrow button) in the middle of the window. An Add IP Camera menu will
open.
SECTION 2: INITIAL SETUP

13N4, N8, N16, N32 NVR V8.1.0 User Manual
v. The IP Camera menu will open showning the camera you added listed in the right frame. You can click the icon
for the camera in the State column to see live video from the camera.
NOTE For the camera you added, if the icon in the State column is not green (like that shown for CH1 above), click the Edit
icon and correct any parameters that are in error before continuing.
vi. Repeat this procedure to add additional network cameras to you NVR.
vii. Click Next to advance to the next Wizard menu.
6. In the Disk menu, you can congure how your disk (HDD) will be used. The Overwrite (Auto) feature enables you to always
keep a previous, optional number of days of data written to the HDD when the disk becomes full, and Format initializes the
HDD for use in the recorder and erases all data on the disk. If you installed HDDs in your recorder, it is strongly advised to
format these drives before using your recorder.
SECTION 2: INITIAL SETUP

14 www.Observint.com
SECTION 2: INITIAL SETUP
a. To congure the HDD for Overwrite:
viii. Check the select box for the HDD you want to congure from the list above.
ix. Open the Overwrite drop down list, and then select Auto.
b. To format an HDD:
i. Check the select box for the HDD you want to Format from the list above.
ii. Click the Format button. Allow the format operation to complete before continuing.
7. Click Next to continue.
Use the Resolution menu to select an output resolution that matches your monitor. The NVR automatically adjusts the output
resolution during start up to match the highest resolution of your monitor.
This manual suits for next models
3
Table of contents
Other Observint Network Hardware manuals