Ocean Breeze OBZ-W36UJ User manual

OWNER’S MANUAL
Air Purifier
OBZ-W36UJ
Read this owner’s manual thoroughly
before operating the appliance and keep
it handy for reference at all times.
www.oceanbreezeairpurifier.com

TABLE OF CONTENT

Statement
Warning
READ AND SAVE THESE INSTRUCTIONS
- This product meets the relevant requirements of AHAM, ETL,
and Energy Star.
- With the technological innovation and improvement of the
product, the product manual contents of the same model as
this product may be changed, and the updated part will not
further notify.
- All the illustrations shown in this manual are based on the
appearance of the standard model air purifier. They are for
illustrative purposes only. The actual appearance of the air
purifier is subject to the purchased product.
- Due to product improvement, some of the parameters may be
changed. The changed parameters have no retroactive effect
on this product.
- This appliance has a polarized plug (one blade is wider than the other).
- To reduce the risk of electric shock, this plug is intended to fit in a
polarized outlet only one way. If the plug does not fit fully in the outlet,
reverse the plug. If it still does not fit, contact a qualified electrician. Do
not attempt to defeat this safety feature.
- To reduce the risk of fire or electric shock, do not use this air purifier with
any solid-state speed control device.
- Skin or eye damage may result from directly viewing the light produced
by the lamp in this apparatus. Always disconnect power before replacing
a lamp or servicing. Never replace the UV lamp without an authorized
technician.
2

Important safety instructions
Maintenance
- Always unplug the air purifier before moving, opening the grille,
changing filters, cleaning, or whenever the air purifier is not in use.
Be sure to pull by the plug and not the cord.
- If the supply cord is damaged, it must be replaced by the
manufacturer or its service agent or similarly qualified persons in
order to avoid a hazard.
- Be sure to change your filters according to the recommended filter
replacement schedule. This helps keep your air purifier running in
top condition.
Use
- Do not operate with wet hands.
- Do not press hard on the control panel located on the top of your air
purifier.
- Do not place any objects on top of your air purifier.
- Do not allow foreign objects to enter the ventilation or exhaust
openings.
Use Restrictions
- Prohibit the storage of flammable and explosive gases where the air
purifier is being used.
- Do not expose your air purifier to direct sunlight for a long time.
- Place the unit in a location that allows air to circulate freely in, out,
and around the unit. Do not place the unit:
1. Where the surface is uneven or on a slope.
2. Directly on or against soft furnishings, such as bedding or
curtains.
3. Near sources of heat, such as radiators, fireplaces, or ovens.
4. Near wet areas, such as bathrooms or laundry rooms, where it
may come into contact with water.
5. Outdoors.
3

Product Specifications and Parts
Back cover
NOTE: Activated Carbon Pre-Filter and HEPA Filter are packed together.
Control Panel
Carrying Handle
Air outlet
Power cord
True HEPA Filter
Activated Carbon
Pre-Filter
4

Installation
1Remove the back cover
You must turn off and unplug the unit when changing the filters.
2Install the Filter
Grasp the top of the back cover and pull outwards to remove the back cover.
Hold and pull the drawstrings
on the top and bottom of the
filter assembly and remove
the filter assembly.
Remove the protective
covering from the filter.
Place the filter assembly back into the air purifier
housing. Ensure that the drawstrings and the
Activated Carbon Pre-Filter are facing outward.
3Install the back cover
Replace the back cover by placing the tabs on the bottom of the back cover into the slots on the air purifier.
Gently push the top of the back cover to secure in place.
5
NOTE: Filter assembly is the Activated Carbon Pre-Filter plus the True HEPA Filter

Filter Replacement
Filter life time
TRUE HEPA Activated Carbon
Pre-Filter
12
Months
3
Months
*Filter life depends on many factors.
Our recommended replacement timing is
a guide only and can be longer or shorter
depending upon your environment.
NOTE: To order replacement filters for your air purifier, please go to
www.oceanbreezeairpurifier.com or call 1-844-545-1110.
The blue light on the UV button flashes continuously to remind you that it is time to replace your
filter.
1. Please select replacement filters that will fit your air purifier model. You may be able to purchase
the replacement filter for your air purifier at the store where you purchased your air purifier or our
website at oceanbreezeairpurifier.com.
2. For more details on the installation of the filter, please refer to the “Installation” section.
3. Press and hold the UV button for 3 seconds to reset the system and restart the timer.
6
Months

Months
1. The Activated Carbon Pre-Filter is attached to the True HEPA Filter.
2. Please disassemble the used Activated Carbon Pre-Filter (feels like a black sponge) from the
True HEPA Filter.
Months
3. Please re-attach the new Activated Carbon Pre-Filter to the True HEPA Filter.
True HEPA Filter
Activated
Carbon
Pre-Filter
How to remove and install the Activated Carbon Pre-Filter from the True HEPA Filter
7

Operation
Power button
Turns the unit on or off.
Fan speed button
UV button
Control and Status Display Panel
Press to cycle through and set the desired fan speed (LOW, MED, HIGH). The fan
speed indicator light illuminates to show the current fan speed.
Press the UV button to activate or deactivate the UV function.
When UV function is active, the UV indicator will illuminate blue light to show that
the UV lamp is on.
NOTE: The blue light on the UV button will flash continuously indicating that it is time to
replace your filter. Replace the filters according to the directions (Page 5). After the filter
replacement is completed, press and hold the UV button for 3 seconds to reset the system.
8

Where to use
Correct placement
more than 12in
more than 12in
more than 20in
To achieve a better cleaning effect, please ensure that the air purifier is more than 12 in. away from
the wall and other obstructions when using it.
Allow 15 – 20 in. of space between TVs, radios, and other electronic products as electromagnetic
interference from certain electronics may cause product malfunction.
Note: Make sure to select firm, level, hard, and flat location for the air purifier.
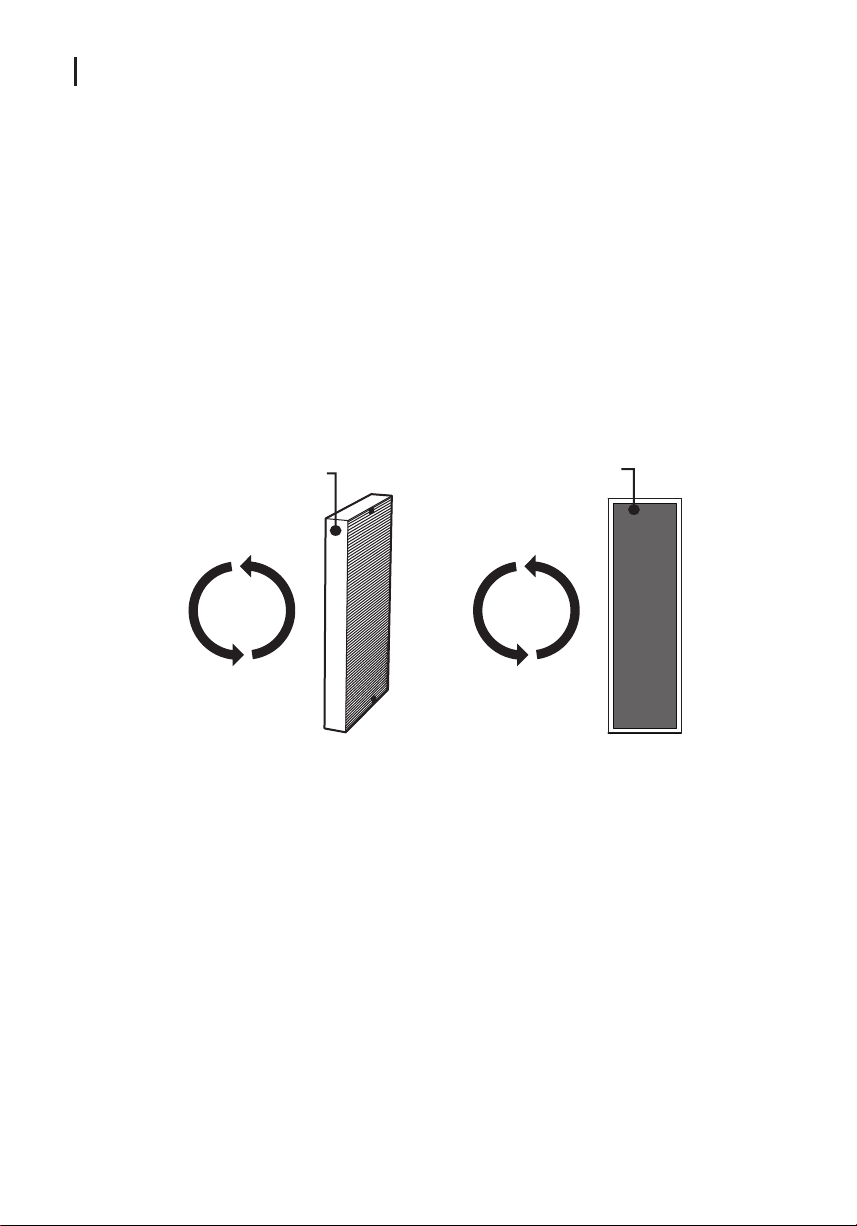
- It is recommended to clean the filter twice a week.
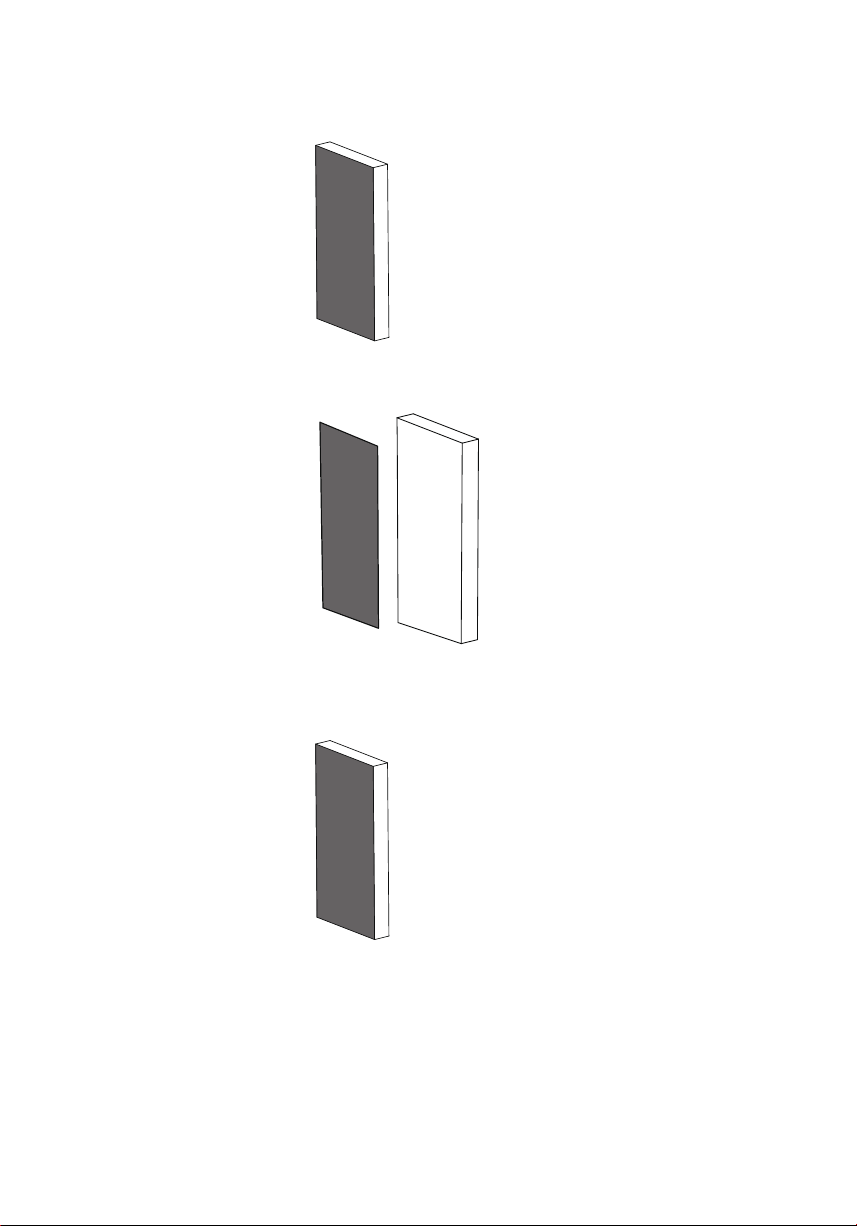
Depending on operation conditions, the True HEPA filter should be replaced every 12 months,
and the Activated Carbon Pre-Filter every 3 months, especially if there have been heavy odors and
particles in the home.
- Do not use water to wash the filter.
- Smaller soft brushes or household vacuum cleaners are recommended for filter cleaning.
- When using the brush to clean, it should be brushing horizontally along the filter to avoid
damaging the filter.
- When cleaning with a vacuum cleaner, keep the suction outlet 5-10 mm away from the surface of
the filter to prevent damage to the filter.
- When used under the strong odor produced by cigarettes, barbecues, etc., the filter may have an
odor in a matter of weeks or months. Please clean the filter according to the instruction. If you still
cannot eliminate the odor, replace the filter.
Maintenance
Cleaning
WARNING: RISK OF ELECTRIC SHOCK
These servicing instructions are for use by qualified personnel only. To reduce the risk of electric
shock, do not perform any servicing other than that contained in the operating instructions unless
you are qualified to do so!
9

Troubleshooting Guide
Problem Possible cause Solution
Air purifier does
not eliminate
smoke and odors
effectively.
Air Purifier does
not operate.
The blue light on
the UV button is
flashing
continuously.
- This is to indicate that it is
time to replace the filter.
- Replace the filters
according to the directions
(Page 5). After the filter
replacement is completed,
press and hold the UV
button for 3 seconds to
reset the system.
10

Warranty
11

12
Table of contents
Popular Air Cleaner manuals by other brands

Philips
Philips AC1214 user manual

Trion
Trion HE Plus 1400 Installation operation & maintenance

ECOVACS ROBOTICS
ECOVACS ROBOTICS ATMOBOT PRO instruction manual

Flanders
Flanders FFI Alpha 2000 Specification sheet

Holmes
Holmes HAP9242 owner's guide

Clean Air Optima
Clean Air Optima Smart CA-510Pro user manual