Ocean Rodeo 2011 Free Ride Bar User manual


Important note
Read this manual thoroughly before using your
kite bar. This is not a kiteboarding instruction
manual, nor does it eliminate the necessity for
obtaining professional instruction in the sport of
traction kiting.
The user is therefore advised to obtain such
instruction as well as familiarizing him/herself with
the information contained in this manual prior to
using this bar. For information on lessons in your area
visit www.oceanrodeo.com.
Take a lesson!
Before you launch any kite, it is imperative to
take certified kiteboarding lessons.
For Information on lessons in your area go to
www.oceanrodeo.com.
2

Table of contents
Caution _____________________________________________________________________ 6
Tuning the lines ________________________________________________________ 7
Back line length adjustment____________________________________ 9
Attaching the kite leash to your harness ______________ 10
Kite leash attachment ___________________________________________ 11
Back line re-ride _____________________________________________________ 11
Kite safety leash release cuff tension__________________ 12
Trim loop release cuff activation ___________________________ 13
Trim loop reset after activation _____________________________ 14
Using a lock in tube________________________________________________ 15
Trim line adjustment ______________________________________________ 18
Adjustable tension bar stopper _____________________________ 17
Adjust bar length____________________________________________________ 19
Line storage bungees ____________________________________________ 20
Storing and caring __________________________________________________ 21
Warranty_________________________________________________________________ 21
The crew is for you! ________________________________________________ 22

E
E
K
G
G
H
I
J
S
R
Q
P
O
NM
4
C
C
L

A
B
E
E
AFront line swivel assembly.
BTrim line.
CBack line re-ride handle.
EBack line leader.
GBar float.
HBar.
IKite leash.
JAdjustable bar stopper.
LTrim cleat.
MTrim loop body.
NPush away trim loop release.
ORetractable bungee line holder.
PTrim line pull end.
QTrim loop
RLock in tube.
SKite leash release cuff.
5

•Getinstructionspecifictothetypeofkitepower
craft.
•Obtainfirstaidtrainingandcarryfirstaidand
safety/rescue devices.
•Consultyourphysicianpriortobeginningkite
powered sports training.
•Alwayswearanationallyapprovedpersonal
flotation device when using a kite on water.
•Dressappropriatelyforweatherconditions;
cold water and/or cold weather can result in
hypothermia.
•Checkyourequipmentpriortoeachuseforsignsof
wear or failure.
•Neverkitealone.
•Donotkiteinoverpowered,gustywindconditions.
•Donotkiteinoffshorewindconditions.
•Beforelaunchingfromanunfamiliarsitebeaware
of any dangers (rocks, reefs, currents, changeable
weather, etc).
•Scoutunfamiliarsitesbeforelaunching.Never
launch from an area with any obstacles closer than
2 line lengths downwind (people, rocks, etc).
•Donotkitenearpowerlines!
•Donotaskanon-kitertoassistinthelaunchingor
landing of a kite.
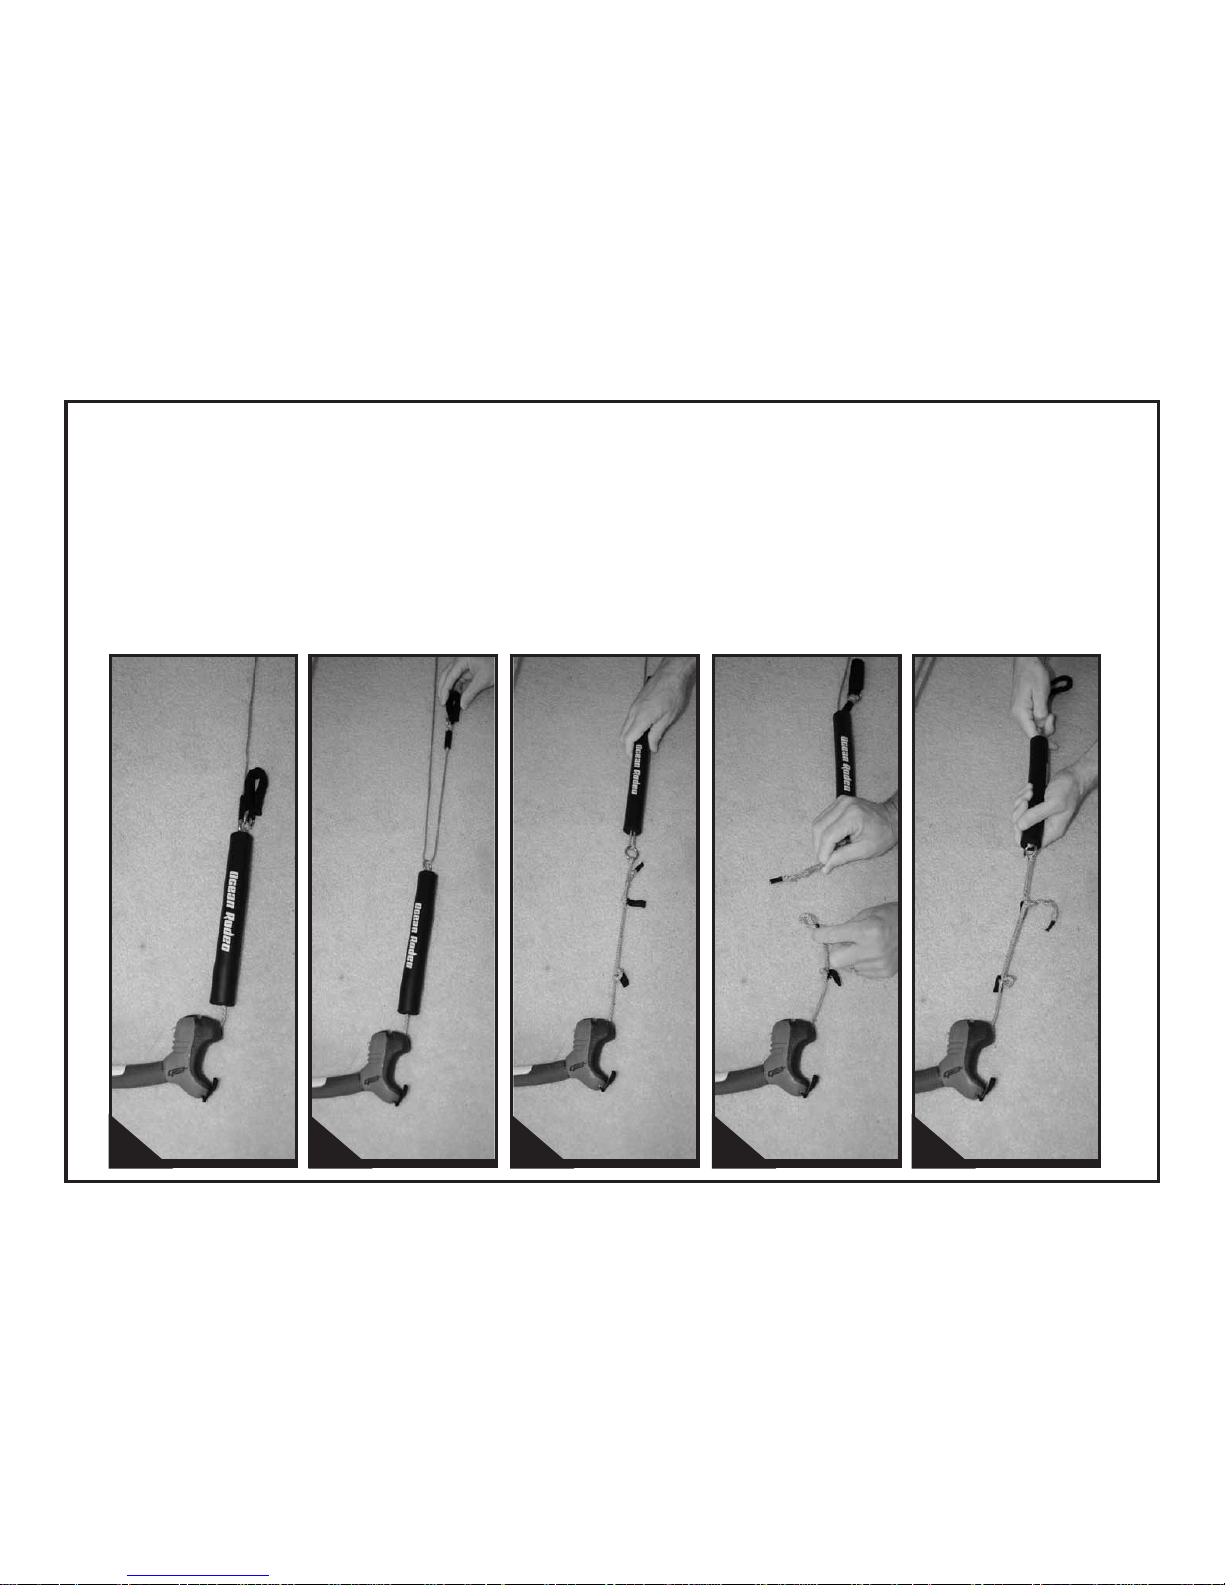
•Alwaysusethekiteleash.
•Alwayspreventkitesfrominadvertentlylaunching
on land by weighting with sand, gravel, etc.
•Alwaysannouncewhenyouaregoingtolaunch
your kite so people can be prepared to move in the
event of a gust or a problem.
•Disableanunattendedkitebyremovingthelines,
and then placing the kite leading edge down, facing
the wind and weighting with sand, gravel, etc.
•Donotexceedyourkitingability;behonestwith
yourself.
•Youmustnotusealcoholormindalteringdrugs
prior to using this product.
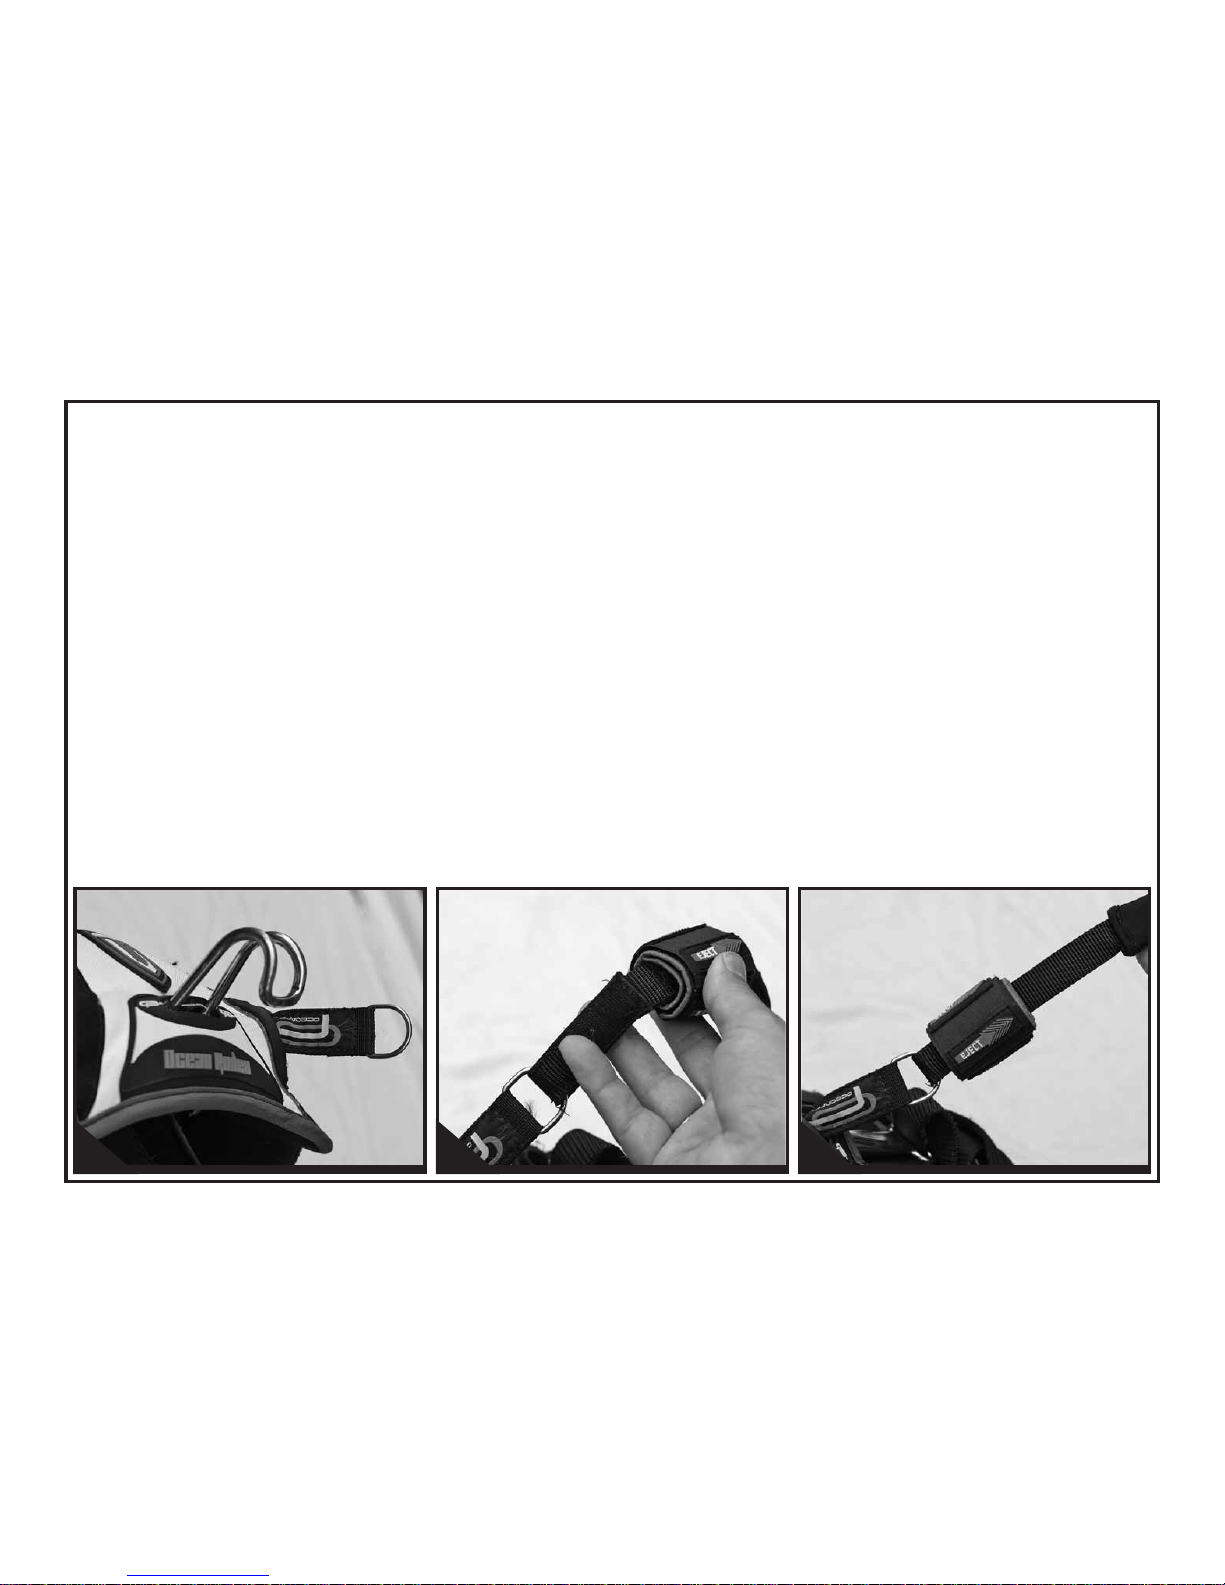
•Donotmodifyorremoveanyreleasesystems.
•Stopuseimmediatelyifyourreleasesystemsare
not fully functional.
Caution Safety Warning: kite powered sports can be very dangerous and physically demanding. The user of this
product should understand that participating in kite powered sports may involve serious injury or death and agree to
observe the following safety precautions:
6

Tuning the lines
It is very important that your lines are tuned properly.
Make a habit of checking your line lengths regularly.
Attach all four lines to an immovable object (nail or
screwdriver pushed into the ground etc.)
Pick up the kite bar and make sure the trim strap
isfullyextended(un-cleattheropeandletitpull
through the cleat so the stopper knot is touching the
cleat.) (1)
Nowpullonthebartocheckyourrearoutsidelines.
Ifthebarisnotsquare(perpendicular)tothecenter
lines then adjust the length using the knots on the
leader line. (2)
All Lines Equal Length!
Withyourtrimstrapfullyextended(stopperknot
touching the cleat) your back lines and front lines
mustbeequalinlength.Ifatanytimeyourrear
lines are shorter than your front lines your kite will
not fly properly. Lines stretch so please check them
regularly!(3) >>
1
7
Back lines
2

Overall all lines
equal length
3
8

Back Line length Adjustment
Yourbackflyinglinescanbeadjustedlongeror
shorter by sliding the bar floats up and adjusting the
larks head knots. (1)
Move the larks head connection up or down to correct
uneven back line lenghts. (2)
Whenyourlinelengthsareequalslidethebarfloats
down covering the loose ends of the back leader lines.
(3)
9
21 31 2

IMPORTANT!
The kite leash release cuff must always be located at your
body and within easy reach! Never attach the release cuff
on the bar end as the release cuff will be out of reach in an
emergency!
WARNING!
Always attach the release cuff to the front of your harness
spreader bar with a strong secure connection. Some
harnesses come with a handle pass line located at the
back of the harness. This back attachment is designed
for high level riders performing advanced tricks. A back
mounted kite leash may come under substantial load
during a emergency kite release which may rotate you
facing away from the kite and make it difficult to reach the
release cuff on the kite safety leash.
ATTACHING THE KITE LEASH TO YOUR HARNESS
Locate a secure attachment point on harness
spreader bar. (1)
Thread the webbing release tab through the stainless
ring mounted on you harness speader bar. (2)(3)
Attaching the kite leash to your harness
2 31
10

Kite Leash Attachment
TheFreeStyleBarhastwodifferentsafetymodes.
The Center Safety Line and the Back Line Re-ride.
Center Line Safety Mode.
Attach the carabiner through the large stainless ring
located at end of the center safety line. (1)
Back line re-ride
Youmustbeunhookedorreleasedfromyourchicken
loop and your leash must be disconnected from your
harness before activating the back line re-ride. (2)
The back line re-ride can be a useful safety tool in some
emergency situations such as self landing.
Warning! Never put your fingers through the webbing loop
of the re-ride handle. When activated the kite can still
deliver a strong pull untill it settles on the surface.
11
1
2

KITE LEASH RELEASE CUFF ACTIVATION
To activate the kite leash release cuff, firmly grasp
the release cuff and push away. (4)(5)(6)
Warning: By releasing your kite leash your kite is now out
of your control and a potential hazard to others. A loose
kite can cause serious injury or death to others.
Kite safety leash
Release cuff tension
The Velcro release cuff
can be wrapped tighter or
looser if required.
Test your release cuff
tension before launching
your kite. Too loose
and the release might
releaseaccidentally.Tootightanditmightrequiretoo
much force to release. (1)
5 64
1
12

To separate yourself from the trim
loop in an emergency situation,
push the orange release cuff
located on the chicken loop hub
away from you with force. (1)(2)
(3)(4)(5)
Providing your kite leash is
attached to the center line leash
attachment the control bar will
ride up the center safety line and
provide depower.
TRIM Loop Release Cuff Activation
13
21
3 4

trim Loop reset after activation
Flexthetrimlooptubing,allowing
the looped end to thread over the
webbing release tab. (1)(2)
Push the orange release cuff up
andsqueezethewebbingrelease
tab up against the body of the
chicken loop hub. (2)(3)
The orange release cuff is fitted
with elastic shock cord that will
snap the release cuff back into
riding position.
Make sure the orange release cuff
is sitting flush against the back
trim loop hub before riding.(4)
14
21
3 4

Using a Lock in tube
The lock in tube helps keep your trim loop hooked in
if you have slack or minimal tension on your lines
while riding.
Tousethelockintubesimplyflexthetubingintothe
head of the harness, under the trim loop.
2 3
1
15

Trim line Adjustment
Un-cleat the trim line to change the trim or pitch of
your kite. Pull in, or toward you to de-power. Allow the
line out, or away from you to add power. (1)
To un-cleat the trim line pull 1st down and then away
from the cleat. To re-cleat the trim line push the trim
line in toward the cleat with the line under load. (2)
1
2
16

Adjustable tension bar stopper
The adjustable tension bar stopper allows the rider to
set the bar throw to a preferred position and sliding
tension.
POSITIONING THE BAR STOPPER
Manually slide the bar stopper up and down the trim
line to find a comfortable setting. By positioning the
bar stopper higher up the trim line you will have more
available depower while riding.
WARNING!
A bar stopper that is positioned too low on the center line will
restrict the depower potential of the kite when hooked in.
SETTING THE TENSION OF THE BAR STOPPER
By moving the orange clip up or down over the black
stopper you can adjust the sliding tension of the
stopper from easy to hard. The more the orange clip
extends,theeasierthestopperwillslide.
We recommend always having the bar stopper set at
easy sliding position.(1)
For beginners or higher wind conditions we recommend
the bar stopper being pushed all the way to the trim
strap.Thissettingallowsmaximumtrimdepowerifyou
let go of the bar while still hooked in. (2)
1
2
17
Recommended
setting

WARNING!
Some advanced riders prefer the bar stopper to be locked
in place. This setting will not allow the kite to depower if
you let the bar go. (3)
WARNING!
If you ride without the orange clip your bar stopper will
not slide when the bar makes contact. During a hard fall
it is preferable to have your bar stopper slide up as it will
depower the kite.(4)
Always use the orange clip on your bar stopper.
Toadjusttheorangeclipflexitapartandslideitupor
down the black bar stopper. (5)
3
4 5
X
18
X

Adjust bar length
YourFreeRidebarcanbeeasily
adjusted to work in two lengths.
To shorten or lengthen the bar
length undo the bar end leader line
(1)(2)(3)
Pull bar end leader through to
oppisite side and re attach flying
lines. Repeat on opposite bar end.
(4)(5)
3
21
4 4
19

Line storage bungees
Use bar end line bungess to secure your kite lines for
tangle free storage.
1
1
20
Table of contents
Popular Toy manuals by other brands

Mega Construx
Mega Construx POKEMON WONDER BUILDERS GCN12 manual

LeapFrog
LeapFrog Leaping Letters Parents' guide

Fisher-Price
Fisher-Price SPINNYOS CMN80 manual

Trix
Trix E10.12 Series manual

Eduard
Eduard EF-2000 Typhoon Single Seater S.A. Assembly instructions

Compass
Compass 3D Plus Nitro Powered Helicopter Assembly manual