3
Ofcine Gullo
TABLE OF CONTENTS
TAOG05L.....................................................................4
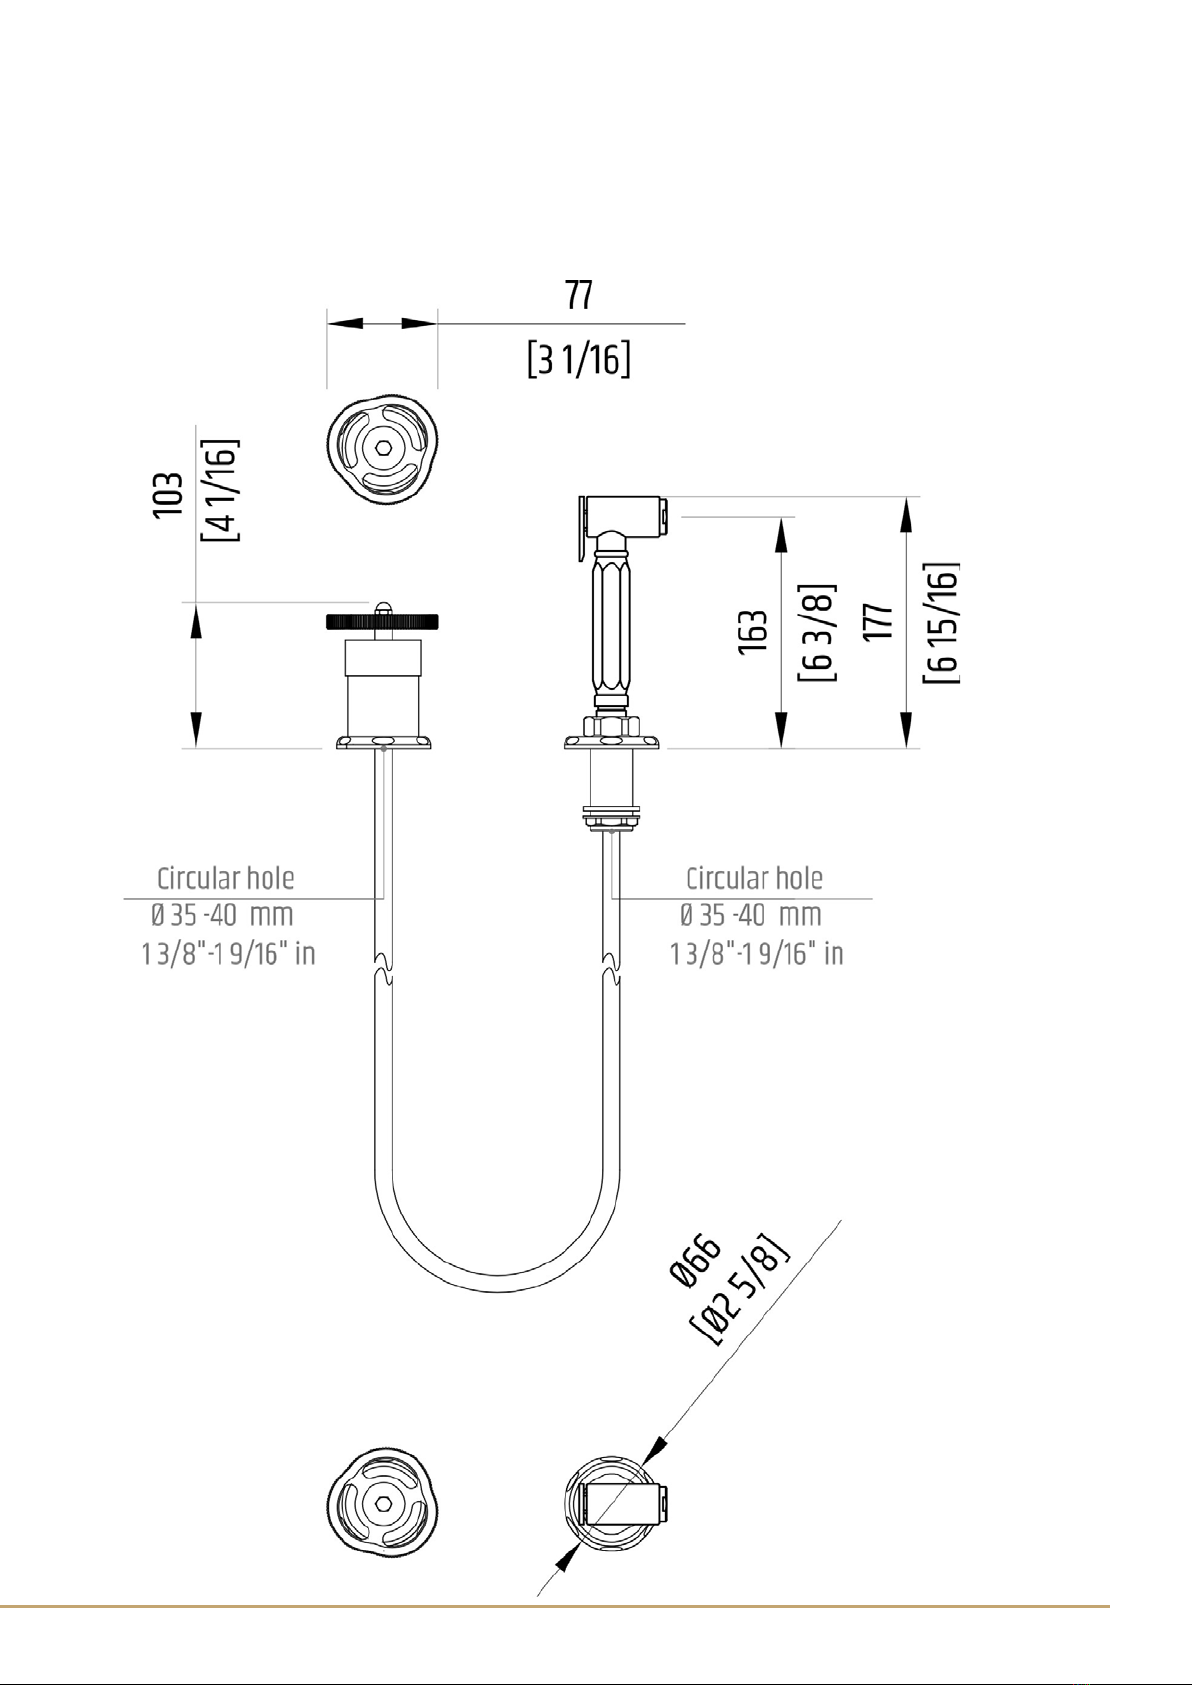
PRODUCT DIMENSIONS......................................................................................................4
DIMENSIONI PRODOTTO.....................................................................................................4
PRODUCT APPEARANCE ......................................................................................................5
IMMAGINI DEL PRODOTTO ..................................................................................................5
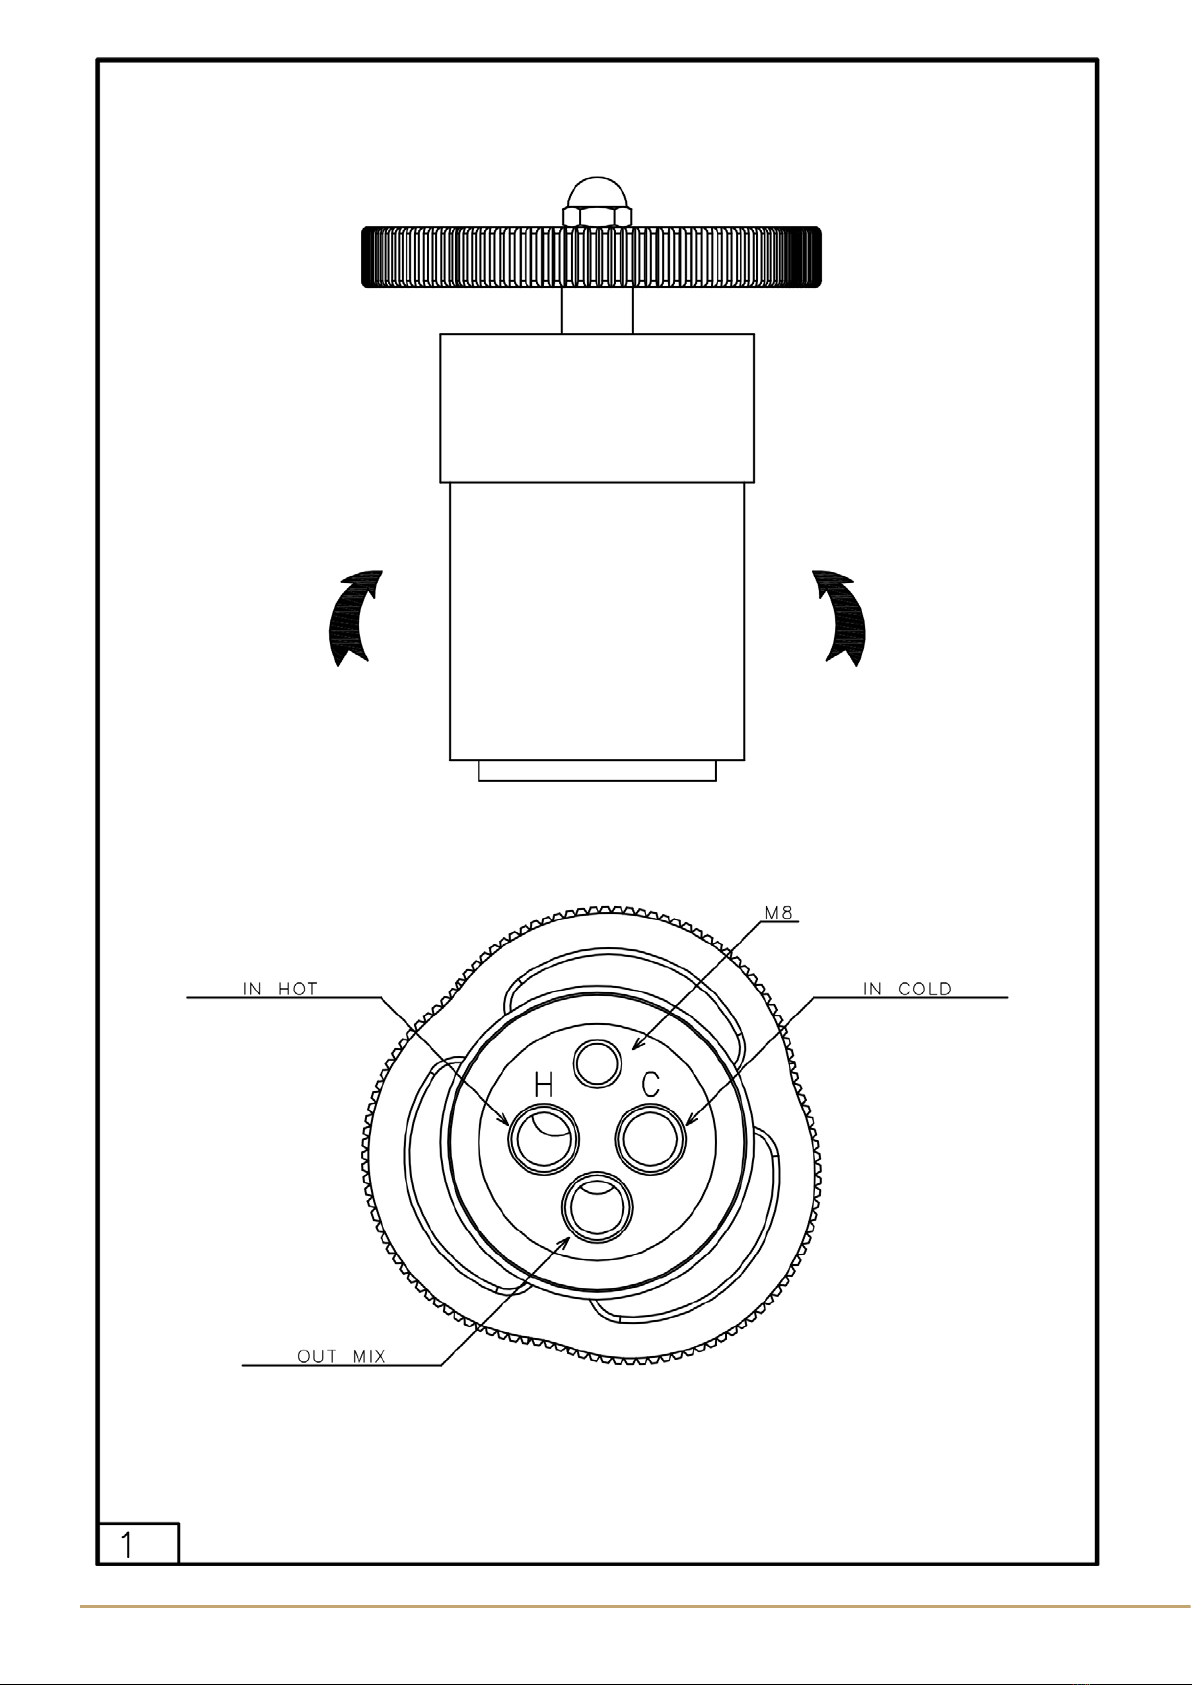
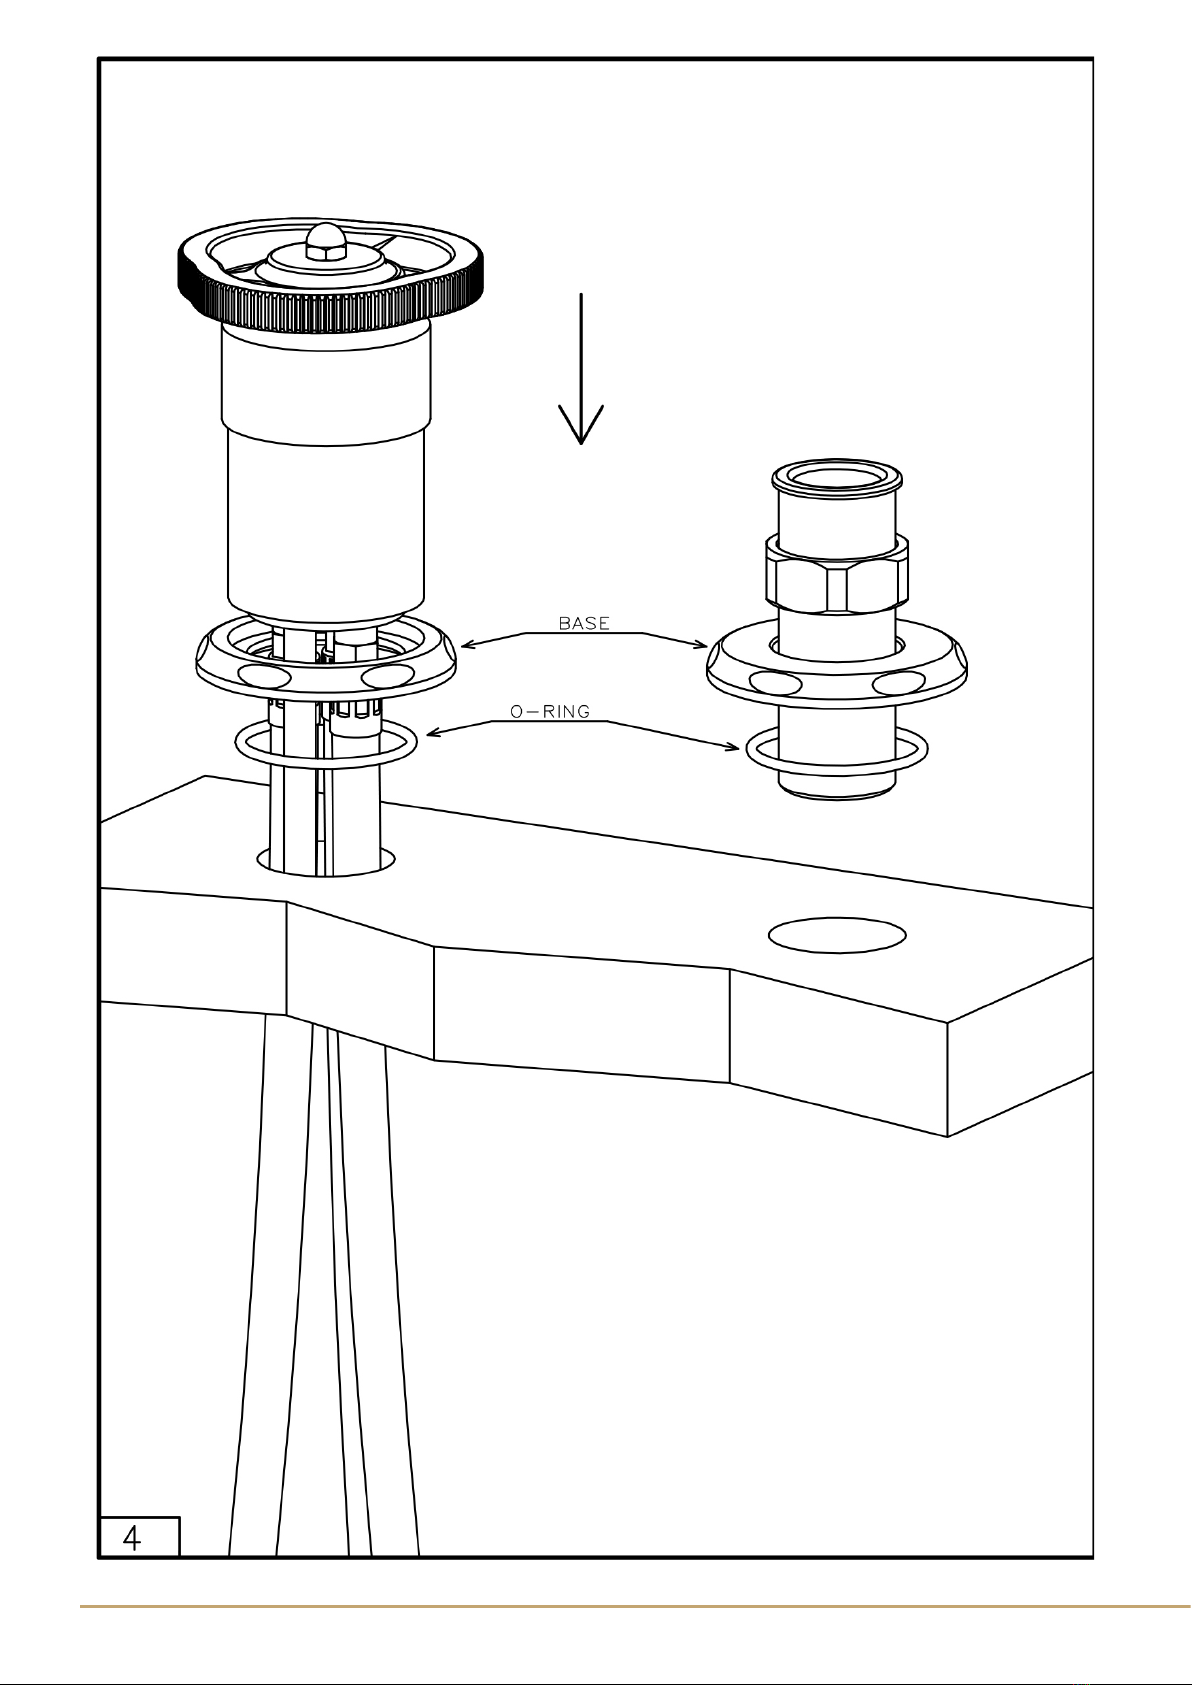
INSTALLATION GUIDELINES...................................................................................................6
INSTALLAZIONE ..................................................................................................................
6
SPARE PARTS .......................................................................................................................14
RICAMBI ............................................................................................................................14
TAOG05P.....................................................................16
PRODUCT DIMENSIONS......................................................................................................16
DIMENSIONI PRODOTTO.....................................................................................................16
PRODUCT APPEARANCE ......................................................................................................17
IMMAGINI DEL PRODOTTO ..................................................................................................17
INSTALLATION GUIDELINES...................................................................................................18
INSTALLAZIONE ..................................................................................................................18
SPARE PARTS .......................................................................................................................26
RICAMBI ............................................................................................................................26
TAOG05C....................................................................28
PRODUCT DIMENSIONS......................................................................................................28
DIMENSIONI PRODOTTO.....................................................................................................28
PRODUCT APPEARANCE ......................................................................................................29
IMMAGINI DEL PRODOTTO ..................................................................................................29
INSTALLATION GUIDELINES...................................................................................................30
INSTALLAZIONE ..................................................................................................................30
SPARE PARTS .......................................................................................................................38
RICAMBI ............................................................................................................................38
DETAILS........................................................................41
DATI TECNICI ...............................................................41
CARE AND CLEANING INSTRUCTIONS.........................42
GENERAL CLEANING GUIDELINES ........................................................................................42
PULIZIA E MANUTENZIONE..........................................43
INDICAZIONI GENERALI ......................................................................................................43