Okki Nokki Record Cleaning Machine User manual

Gebruiksaanwijzing
Owner’s Manual
Bedienungsanleitung
Manuel d’utilisation
Manuel Utente
Russian
UK
NL
DE
FR
IT
pag. 2 - 8
pag. 9 - 15
seit. 16 - 22
pag. 23 - 29
pag. 30 - 36
pag. 38 - 43
Record Cleaning Machine
Okki Nokki
RU

Okki Nokki
2
Gebruiksaanwijzing
NL
Januari
2015
Platenwasmachine

Gebruiksaanwijzing
3
Belangrijk! Lees deze gebruiksaanwijzing aandachtig door voordat het apparaat in
gebruik wordt genomen!
Introductie
Gefeliciteerd met de aanschaf van de Okki Nokki Record Cleaning Machine of kort-
weg de RCM.
Indien u deze gebruiksaanwijzing zorgvuldig leest en de aanwijzingen opvolgt, zult u
nog vele jaren van een goed werkende RCM kunnen genieten.
De platenreiniger is er in een uitvoering voor 115 Volt of 230 Volt. Voor veiligheids-
redenen is het altijd aan te bevelen de machine op een geaard stopcontact aan te
sluiten. Gebruik de machine niet in een vochtige omgeving. De machine is eenvoudig
in gebruik.
Uitpakken
Na het openen van de verpakking en verwijderen van de met lucht gevulde bescher-
mende verpakking, eerst de accessoires uitpakken. Dit zijn een witte enveloppe, een
flesje met Okki Nokki platenwasmiddel en een netsnoer. Hierna tilt u de machine met
beide handen uit de verpakking. Til de machine nooit aan het plateau op! Verwijder
(indien aanwezig) de 2 stukken witte piep schuim bescherming die zich tussen het
plateau en de Okki Nokki bevinden. Bewaar de verpakking voor eventuele toekomsti-
ge verzending.
Accessoires
Bijgeleverd zijn een standaard 12 inch kunststof afzuigarm, een geiten haren appli-
catieborstel, een flesje reinigingsvloeistof, een zwarte aluminium platenklem en een
geaard netsnoer.
NB: het flesje reinigingsvloeistof is een concentraat en dient met gedestilleerd water
vermengd te worden. Gedestilleerd water is bij de drogist verkrijgbaar. Als de vloei-
stof eenmaal gemengd is, kan het op een koele en donkere plaats bewaard worden.
Het kleine flesje kan gebruikt worden om de vloeistof op de elpee aan te brengen.
Installatie
Plaats de platenreiniger op een vrij, droog en schoon oppervlak. Zorg ervoor dat de
machine stevig en stabiel staat en zich op een comfortabele werkhoogte bevindt.
Houd er rekening mee dat de mogelijkheid bestaat dat reinigingsvloeistof gemorst
kan worden. Het kan handig zijn een handdoek of andersoortig absorberend mate-
riaal onder het apparaat te plaatsen, om het oppervlak waarop het apparaat staat te
beschermen. Zorg te allen tijde voor voldoende ventilatie om het apparaat. Waarschu-
wing!
Afbeeldingen 1 / 2: positie van de afzuigarm

Gebruiksaanwijzing
4
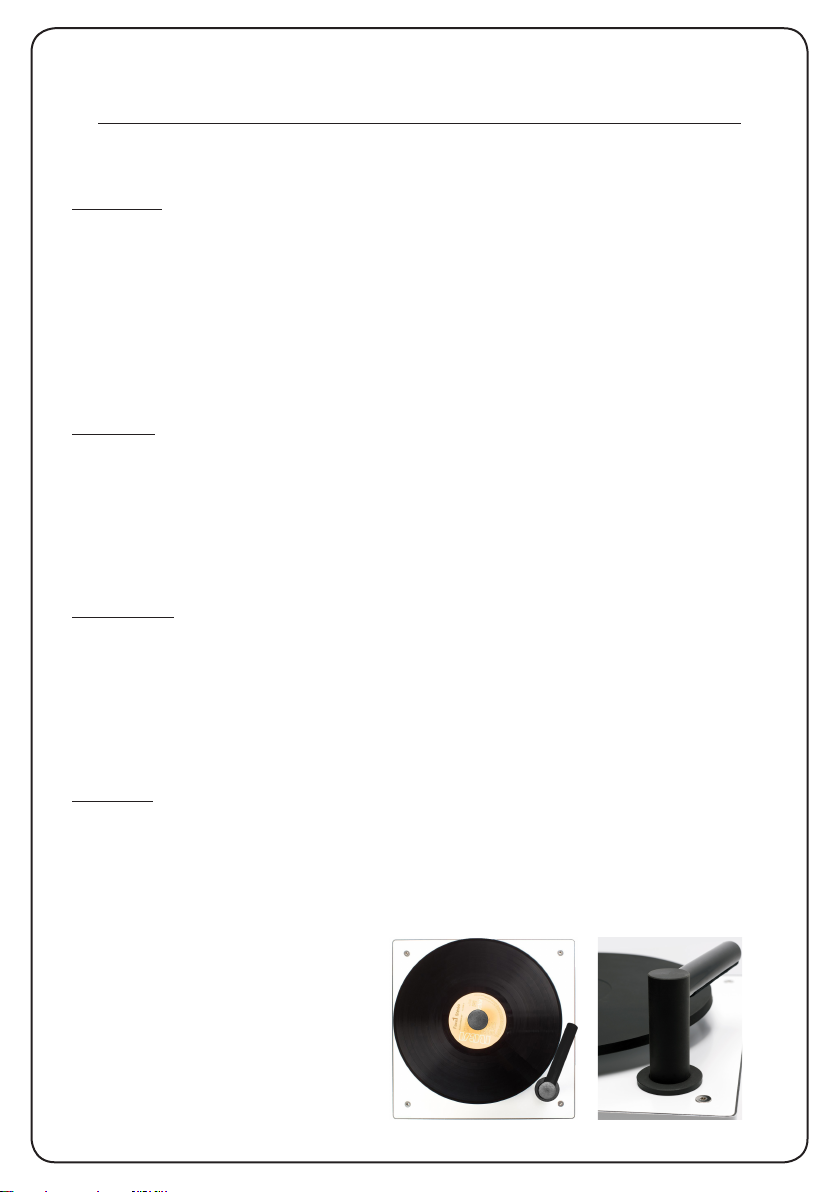
Kunststof afzuigarm / vacuümarm
Plaats de afzuigarm in de daarvoor bedoelde opening, het zo genoemde “vacuüm la-
ger” aan de rechter voorzijde van de machine.
Plaats de arm parallel aan de zijkant, wijzend naar de achterkant van de machine (afb.
1 / 2).
Let erop dat de uitstekende pen aan één zijde van de afzuigarm in de corresponderen-
de opening wordt gezet.
Let op; Verwijder na het gebruik van de Okki Nokki, aan het eind van elke was sessie,
altijd de kunststof afzuigarm / vacuümarm uit het vacuüm lager. Leg de afzuigarm te
drogen plat op het plateau van de Okki Nokki. Indien u dit niet consequent na elke
was sessie doet en de vacuüm arm in het lager laat zitten, vervalt de garantie op de
afzuigarm / vacuüm arm.
De machine aansluiten
Maak uzelf bekend met de bediening voordat u het apparaat aansluit op het net
Bediening beide motors
U ziet 2 schakelaars aan de voorzijde van de machine. De bovenste schakelaar ge-
naamd “Motor” moet op de middelste stand “0” staan. Door de schakelaar op de bo-
venste stand “-” te zetten, zorgt u ervoor dat het plateau met de klok mee gaat draaien
. Wanneer u de schakelaar op de onderste stand “=” zet, dan zal het plateau tegen de
klok in draaien. De motor zal enig geluid produceren, het geen normaal is. De tweede,
onderste schakelaar genaamd “Vacuüm” bedient de afzuigmotor.
De bovenste “I” stand laat een geluid klinken als een ouderwetse stofzuiger. In de
onderste “0” stand is de vacuüm motor uitgeschakeld. De platenreiniger is nu gereed
voor gebruik!
Stroomvoorziening
Sluit het netsnoer aan op de stroomaansluiting aan de achterzijde van het apparaat
en steek vervolgens het netsnoer in het stopcontact (230 V AC– 50 Hz). U dient vervol-
gens de schakelaar aan de achterzijde van de Okki Nokki op “1” te zetten. Hierdoor
wordt de stroom aanvoer aangezet.
Aftapslang
Check of de aftapslang aan de achterzijde van de platenreiniger afgesloten is met de
transparante silicone stop.
Waarschuwing!
Bedien de machine nooit zonder afdichting van de aftapslang met de transparante
silicone stop. Probeer onder geen beding de machine te gebruiken met een continue
aftap door de slang in een opvangbak te hangen. In een dergelijk geval komt de garan-
tie per direct te vervallen.
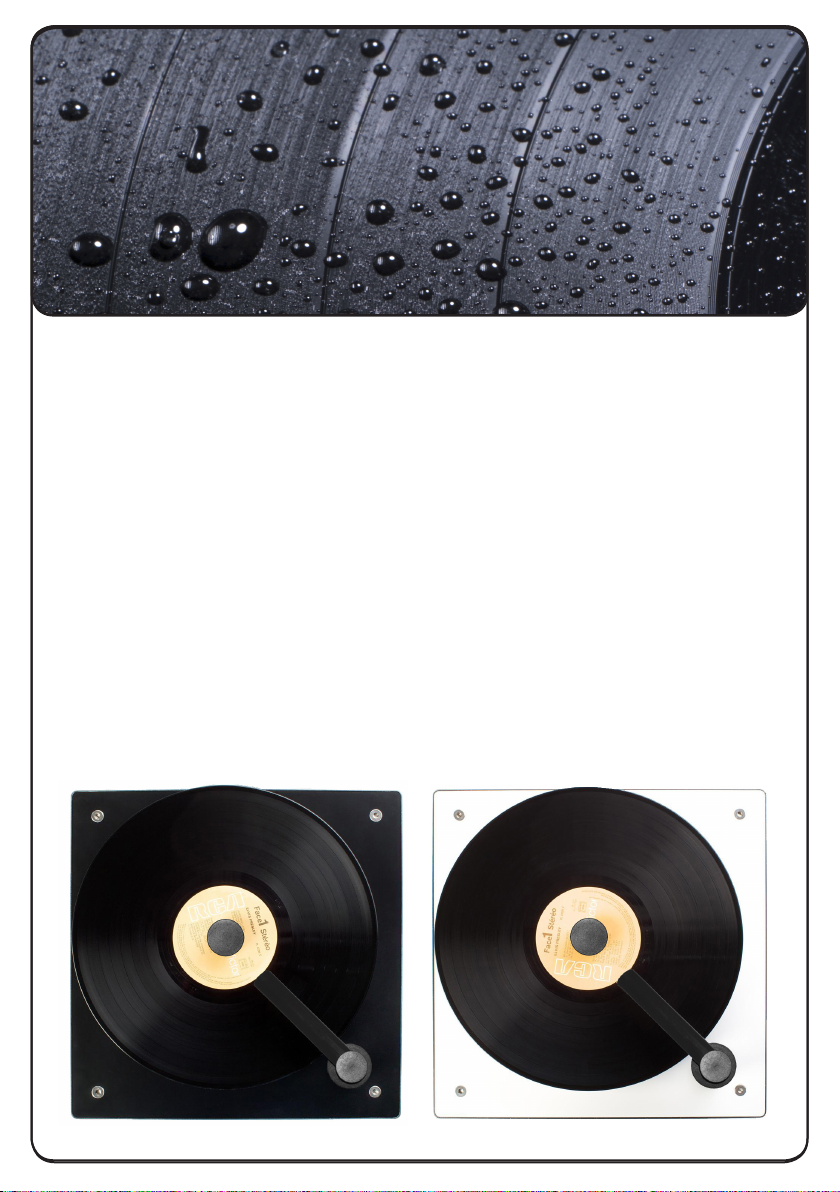
Reinigingstest
Wij bevelen een testronde aan op een oude, onbelangrijke elpee om er zeker van te
zijn dat de machine goed is ingesteld en juist werkt en natuurlijk om bekend te worden
met de reinigingsprocedure.

Gebruiksaanwijzing
5
Bediening voor het reinigen
Leg de elpee op het plateau en plaats vervolgens de aluminium platenklem.
Voor het aanbrengen van de vloeistof wordt aanbevolen eerst de plaat stofvrij te ma-
ken met een standaard platenborstel (maar niet met de applicatieborstel). Zet het pla-
teau aan (draairichting met de klok mee) en breng voorzichtig een aantal druppels
reinigingsvloeistof aan. Verspreid deze vervolgens met de applicatieborstel (afb.3).
Exact de juiste hoeveelheid reinigingsvloeistof aanbrengen is een kunst op zich en
behoeft enige oefening. Een goede vuistregel is: bedek de plaat en niet de hele machi-
ne... Niet teveel en niet te weinig dus.
Afb.3 de reinigingsvloeistof verspreiden
Zorg ervoor dat de vloeistof in gelijke mate over het oppervlak wordt verdeeld, voeg
indien nodig meer vloeistof toe. Als u eenmaal tevreden bent met het resultaat, kunt
u de borstel voorzichtig omlaag duwen. Op deze manier haalt u vuil uit de groeven.
Vervolg deze handeling 3 of 4 omwentelingen en doe hierna hetzelfde in de tegenge-
stelde draairichting. U hoeft niet meer vloeistof toe te voegen. Probeer het platenlabel
droog te houden, verwijder gemorste vloeistof onmiddellijk.
Bediening voor het zuigen
U bent nu klaar om zowel vuil als vloeistof te verwijderen met behulp van het vacuüm
systeem.
Het afzuigen van de LP dient alleen plaats te vinden als de plateau motor met de klok
mee draait. Zorg ervoor dat de schakelaar van de plateau motor in de bovenste stand
staat. Zet vervolgens de zuigmotor aan. De afzuigarm zal zich nu automatisch naar
beneden begeven totdat hij zich boven de elpee bevindt en naar het midden wijst,
richting de aluminium platen clamp (afb.4 volgende bladzijde).
Wellicht dient u de vacuüm arm een klein tikje te geven / hem een beetje te helpen tot
hij zich op de LP bevindt. De arm blijft automatisch omlaag zolang de vacuüm motor
is ingeschakeld.
Twee omwentelingen zijn normaliter voldoende om alle vloeistof op te zuigen. Meer is
niet nodig. Vermijd te lang afzuigen.
Zet de vacuüm motor uit, de veer in de arm zorgt ervoor dat hij omhoog gaat. Beweeg
de afzuigarm richting achterzijde van het apparaat en zet de motor van het plateau
stil. Onthoud goed: zet eerst de zuigmotor uit en dan de motor van het plateau. Ver-
wijder de platen klem, draai de elpee om en herhaal deze procedure voor de andere
kant van de elpee.

Gebruiksaanwijzing
6
Het reservoir voor de reinigingsvloeistof legen
Nadat 30 LP’s gereinigd zijn, moet de afvalvloeistof uit het reservoir gehaald worden.
Het niet regelmatig legen van het reservoir kan schade aan de machine veroorzaken
en laat de garantie vervallen. Haal voorzichtig de afvoerslang uit de achterzijde van
het apparaat. Forceer niets. Stop bij enige weerstand, het eind van de slang is daar!
De slang kan er maar een paar centimeter uitgetrokken worden. Wellicht is hij er al
voldoende uitgetrokken.
Verwijder de transparante silicone stop en plaats de slang in een fles of opvangbak.
Kantel de machine ongeveer 15 centimeter (afb. 5). Houd de machine in deze positie
totdat er geen vloeistof meer uit de slang loopt. Vergeet niet de transparante silicone
stop weer terug te plaatsen op de slang.
Noot: Soms komt er weinig of geen vloeistof uit de afvoerslang. Dit kan komen om-
dat u een mengsel op alcoholbasis gebruikt dat in de machine door de lucht snelheid
reeds is verdampt. Dit is geen excuus om de afvalvloeistof niet te verwijderen.
Waarschuwing; Uw garantie vervalt indien u deze instructie niet navolgt!
Afb.4 positie afzuigarm gedurende het zuigproces
Afbeelding 5: reservoir afvalvloeistof legen
Veiligheidsvoorzieningen
• U dient na het reinigen van 30 LP’s het vloeistof reservoir the legen. Dit is zeer be-
langrijk. Indien u dit verzuimd, dan zal er op een gegeven moment water in de machine
lopen. Het water kan dan in de vacuüm motor lopen, iets wat natuurlijk onacceptabel
is.
Mocht u verzuimen het reservoir tijdig te legen, dan vervalt per direct de garantie op
uw Okki Nokki.
Gelieve het reservoir altijd op tijd als hierboven beschreven te legen.

Gebruiksaanwijzing
7
Noot
• Zorg ervoor dat de Okki Nokki altijd is losgekoppeld van de stroom kabel / het stroom-
net als u het reservoir leegt.
• Het apparaat is gereed voor gebruik als de tank geleegd is. Herhaal bij voorkeur de
standaard procedure elke keer na het reinigen van 40 elpees.
• De vacuümmotor heeft een ingebouwde temperatuursensor. Als de temperatuur te
hoog wordt, zorgt hij ervoor dat de motor automatisch afslaat. Schakel in dit geval de
machine helemaal uit en wacht minimaal 30 minuten voor verder gebruik.
Nuttige hints en aanbevelingen
•Verwijder na het gebruik van de Okki Nokki altijd de kunststof afzuigarm / vacuü-
marm uit het vacuüm lager. Leg de afzuigarm te drogen plat op het plateau van de
Okki Nokki.
• Houd de RCM schoon! Verwijder vloeistof die op het apparaat terechtkomt.
• Reinig de applicatieborstel in warm water. Laat geen stof achter.
• Onderhoud de fluwelen strips op de afzuigbuis. Controleer regelmatig op vuil, slijta-
ge en beschadigingen. Let erop dat zich geen vuil ophoopt en veeg af na gebruik met
de vingertoppen of zachte tandenborstel. Vervang de strips na het reinigen van circa
100 LP’s en vaker indien noodzakelijk.
• Zeer oude en vervuilde elpees dienen meerdere malen een schoonmaakbeurt te krij-
gen.
• Vervang altijd de binnen hoes van een elpee bij de eerste reiniging.
• Wij adviseren het gebruik van de speciale, geconcentreerde Okki Nokki reinigings-
vloeistof.
• Gebruik NOOIT een reinigingsvloeistof met een alcoholgehalte van meer dan 25%.
• Gebruik NOOIT een reinigingsvloeistof op alcoholbasis voor 78 toerenplaten, shel-
lac of acetaten.
• Geen open vlammen of roken bij gebruik van op alcohol gebaseerde mengsels. Ge-
vaar!
• Zorg voor voldoende ventilatie bij gebruik van op alcohol gebaseerde mengsels.
• Wij raden het gebruik van een aparte afzuigarm aan bij het reinigen van 78 en 45
toeren platen.
• Let op; de voetjes kunnen zwart afgeven op de tafel waar u de machine plaatst.
• Trek nooit de afzuigbuis uit de machine als de zuigmotor in werking is!
• Gebruik nooit een vloeistof die sterk schuimt!
Onderhoud
Neem het oppervlak van de Okki Nokki af met een vochtige doek.
Vanaf nu zullen uw elpees Okki Nokki klinken!

Gebruiksaanwijzing
8
Garantiebepalingen
Uw Okki Nokki RCM heeft 2 jaar garantie. Bewaar de originele factuur / bewijs van
aankoop; deze bepaalt de ingangsdatum van de 2-jarige garantieperiode.
• De garantie op de machine vervalt bij onjuist gebruik of gebruik niet zoals beschre-
ven in deze gebruiksaanwijzing
• Neem contact op met uw dealer indien de machine niet meer of onjuist werkt
• Open onder geen enkele omstandigheid de machine om zelf reparaties uit te voeren
of op andere manier wijzigingen aan te brengen
• Er dienen geen reparaties uitgevoerd te worden door ongeautoriseerd personeel
• Er wordt geen enkele wijze van aansprakelijkheid aanvaard voor beschadigingen
aan elpees veroorzaakt door gebruik van deze machine
• Neem contact op met uw dealer voor meer informatie
Accessoires voor uw Okki Nokki
RTC-N12 inch vacüüm arm RTC-N10 inch vacüüm arm RTC-N7 inch vacüüm arm
RTF record cleaning fluid RCB-G goathair brush RCB wood brush
RCC aluminum record clamp
RCS velvet strip set RCD dustcover

Okki Nokki
9
9
Owner’s Manual
UK
January
2015
Record Cleaning Machine

Owner’s Manual
10
Photo 1/2: position of the suction arm
IMPORTANT!
READ THIS OWNER’S MANUAL CAREFULLY, BEFORE USING THE MACHINE!
Introduction
You are now the owner of an Okki Nokki Record Cleaning Machine ( RCM ).
It is very simple and easy to use and will give good service if you read and follow this
instruction manual. Look after the machine and it will look after your records for many
years to come. The record cleaner is suitable for 115 Volts or 230 Volts AC. For safety
reasons it is advisable to always plug the machine into an earthed wall socket
Do not operate the machine in damp conditions.
Unpacking
After opening the inner cardboard box, remove the top layer of protective packaging,
take out the supplied accessories – a padded bag and bottle of fluid which are laying
on top of the Okki Nokki. Put both hands under the machine and lift out of the box. On
no account, lift the machine by the turntable. Take the machine out of its protective
plastic bag and remove any support material from under the turntable. You will find an
earthed IEC mains cable situated beneath the Okki Nokki.
We recommend that you keep all the packaging for any subsequent shipping.
Accessories
Accessories supplied with the machine are : standard plastic LP suction arm, goat
hair cleaning brush, cleaning fluid concentrate, aluminum record clamp and an
earthed IEC mains cable. NB. The small bottle of cleaning concentrate is soap based
and requires mixing with a litre of purified or distilled water which is available from
most chemists. Battery or steam iron top-up and tap water are not suitable. When
mixed, the fluid should be kept in a cool, dark place. The small bottle which contained
the concentrate can be used to apply the fluid to the record.
Installation
Place the record cleaner on a clear, clean dry surface. Make sure that the cleaner is
in a stable position on a sturdy table or stand. Position the cleaner in such a way as to
ensure that it is situated at a comfortable working height. You will have to keep in mind
that there may be the possibility of a leakage of fluid onto the table or other base. It
might help to place a towel or similar absorbent material under the cleaner, in order to
protect the surface underneath. Please provide ample ventilation around the machine
at all times and ensure that the ventilation vent underneath is not covered.

11
Owner’s Manual
Suction arm
Place the suction arm in the aperture provided for it, at the right hand, front side the
machine. Place the arm parallel with the right side, and the top end of the arm facing
towards the rear of the machine (photo 1 /2). Note that there is a lug protruding at the
top of the tube that sits in the aperture.
You will also see, a corresponding cut-out which will accept the lug in the top of the
aperture. By gently pushing down on the arm, you will see that the lug follows the
grove cut into the aperture and the arm twists as it goes down bringing it to a position
facing across the turntable.
After each cleaning session with your Okki Nokki, please ensure that you:
Remove the vacuum tube and place on the turntable or other convenient place to al-
low to dry. Do not leave in normal upright operating position.
Connecting the machine for operation
BEFORE SWITCHING ON AT THE MAINS, BECOME AQUAINTED WITH THE CONTROLS.
There are 3 rocker switches on the Okki Nokki.
1. On-Off switch, situated at the rear of the unit just above the IEC mains input socket.
Please note that this switch / socket is fitted with a 20mm Slow Blow 5 amp 230V fuse
which is located in a pull-out tray located between the socket and switch.
2. Turntable switch, situated at the front of the unit at the top
3. Vacuum motor switch, situated beneath the turntable switch.
Plug the mains lead into the socket at the rear of the machine, then insert the plug in
an earthed wall socket. Note the on/off switch. Locate the two switches at the front
of the machine. The top rocker type switch marked “Motor” should be in the centre “
OFF” (0) position. Switching it to the upper position (-) will make the platter move in a
forward / clockwise direction. Repeat this with the switch in the lower position (=) and
the platter will now move in a reverse / anti-clockwise direction. Some noise from the
mo¬tor will be heard, this is normal. The second, lower switch governs the vacuum
motor. In the down position (0) it is “ OFF”. Place in the upwards “ON” (I) position and
you will hear the noise of an old fashioned vacuum cleaner. Your cleaning machine is
now ready for operation.
Drain Down hose
Check that the drain down hose at the rear of the cleaner is in the closed position with
transparent silicone end cap in place. Never operate the machine without the end cap
in place. On no account, should you try “continuous drain down” by hanging the tube
into a receptacle whilst using the machine. This will instantly void the warranty. The
drain down hose is fixed and no attempt should be made to push it in or pull it further
out.
Cleaning test
We recommend a practice run on an old unwanted LP in order to ensure that the ma-
chine is set up and working correctly and to acquaint yourself with the correct cle-
aning procedure.

Owner’s Manual
12
Photo 3: distributing the cleaning fluid
Cleaning operation
Place a record on the turntable and secure in position to with the locking clamp. Do
not over tighten. Note: never force the clamp on, ensure that the clamp engages the
threaded spin¬dle correctly. Do not cross thread. Before applying fluid, it is advisable
to remove any obvious foreign substances from the LP surface with a standard record
brush but NOT the brush you use for spreading the fluid and scrubbing.
Turn on the turntable in a forward motion and carefully apply a few drops of cleaning
fluid and spread with the brush. Applying the correct amount of cleaning fluid is an
art in itself and needs attention. A good rule is “cover the record – not the cleaning
machine.” Not too little – not too much.
Make sure that the fluid is evenly distributed over the entire surface, add more fluid
if necessary. Once you are happy with the result then you can push down gently and
flex the bristles of the brush. You are trying to lift some of the dirt out of the grooves.
Use a scrubbing motion if you wish. Try 6-8 revolutions in the forward direction and
the same in the reverse mode. It is up to you how long you do this for. The important
thing is to make sure that the record is still covered in cleaning fluid and does not dry
out. Try to prevent the record label from getting wet, wipe off any spilled fluid imme-
diately.
Vacuum Operation
You are now ready to clean off both dirt and fluid. Vacuuming is normally done in the
forward motion only. So make sure that the motor switch is in the top position. Swivel
the suction arm until the lug on the vertical section of the suction arm is right abo-
ve the notched cut out of the suction arm aperture. Gently push down the arm and
at the same time, switch on the vacuum motor. You will soon find that you do this in
one smooth operation. The arm will move down across the centre of the record and
be held down by the vacuum whilst the record revolves. 2-3 revolutions are normally
sufficient and recommended to suck up all the fluid – any more may damage your
records.
Switch off the vacuum and the spring in the arm will lift it off the record and it should
swing back to its original, starting position. Switch off the turntable motor.
Remember – switch vacu¬um off first, then turntable.
Remove the clamp, turn the record over and now repeat the process on side 2.

13
Owner’s Manual
Photo 4: position of suction arm during vacuum process
Photo 5: draining the cleaning liquid
Emptying the cleaning liquid reservoir
After having cleaned 30 LPs, the waste liquid has to be drained from the reservoir.
Failure to drain the reservoir on a regular basis, may cause damage to the machine
and could void your warranty.
You will need to lift or prop up the front of the machine about 15 centimetres (photo 5).
You will also need a bottle or similar receptacle to catch the dirty fluid in. Remove the
end silicone cap of the drain down hose and place in your bottle. Keep the machine in
this position until there is no liquid flowing from the drainage tube. Always replace the
end silicone cap on the tube and make sure it is secured and fully closed.
Note: sometimes when you check the drain down tube, there will be little or no fluid.
This is because there is a lot of heat generated inside the machine and the fluid often
evaporates particularly if you are using an alcohol based mix. However this is no ex-
cuse for not attempting to drain down the surplus fluid as per the above instructions
and it must be done.
It is advisable to switch off the mains electricity or disconnect your mains lead during the
drain down procedure. Once the procedure is complete, you may carry on cleaning.
The vacuum motor has a built in thermal sensor and should temperatures get too high
within the unit, it will shut down. You must switch off the machine and wait at least 30 minu-
tes before starting up again.

Owner’s Manual
14
Maintenance
The turntable should be cleaned regularly with a household vacuum cleaner. Wipe the
surface clean with a damp cloth.
Conditions of warranty
You have a one-year warranty on your Okki Nokki RCM. Always keep your original
invoice / receipt of purchase; this determines your warranty period.
• The warranty on the machine will be void if you fail to operate this machine in a
responsible manner as advised in this manual!
• Should the machine fail to operate, please contact your dealer.
• Under no circumstances must you open the machine and attempt repairs or alter the
machine in any way.
• No repairs may be carried out by an unauthorized service agent
• No responsibility is accepted for damage to records if the machine is used in an
incorrect or improper way.
• Please contact your dealer for any questions, complaints or comments.
Useful hints and recommendations
• It is most important that you remove the vacuum tube from its normal upright ope-
rating position after each cleaning session and allow to dry. You can place on the
turntable mat if you wish.
• Keep your RCM clean! Mop up any excess fluid that goes onto the top off the unit.
• Rinse out the cleaning brush in warm water. Avoid any build-up of dirt.
• Maintain the velvet strips on the vacuum tube. Regularly check for dirt, wear and da-
mage. Make sure there is no build-up of debris and after each cleaning session, brush
off with your finger or a soft child’s toothbrush, is ideal. Change strips after approx.
100 LPs – more often if required.
• Really old and dirty records will benefit from being cleaned several times.
• Always replace the inner sleeve, the FIRST time you clean a record.
• We recommend the use of Okki Nokki’s specialized cleaning concentrate.
• Never use a cleaning fluid that contains more than 25% alcohol.
• Never use an alcohol based fluid on 78s, shellac or acetates.
• NO naked flames or smoking when using alcohol based mixes. DANGER !!
• Always ventilate well when using alcohol based mixes.
• We recommend the use of a separate vacuum tube when cleaning 78s.
• Never take out the vacuum arm tube while the machine is switched on. This can se-
verely damage the machine.
• Always use recommended cleaning fluids. Do not use excessive alcohol mixes. Do
not use foaming type cleaning fluids.
From now on, your records will sound Okki Nokki!

15
Owner’s Manual
RTC-N12 inch vacuum tube RTC-N10 inch vacuum tube RTC-N7 inch vacuum tube
RTF record cleaning fluid RCB-G goathair brush RCB wood brush
RCC aluminum record clamp
RCS velvet strip set RCD dustcover
Accessories for your Okki Nokki

Okki Nokki
16
Bedienungsanleitung
DE
Januar
2015
Plattenwaschmaschine

17
Bedienungsanleitung
Abbildung 1 / 2: Position des Absaugarms
Einleitung
Herzlichen Glückwunsch zum Kauf der Okki Nokki Plattenwaschmaschine. Die Benut-
zung dieser Maschine garantiert Ihnen jahrelang äußerst saubere Langspielplatten,
wenn Sie die nachfolgenden Anweisungen in dieser Anleitung befolgen.
Die Plattenwaschmaschine ist geeignet für 115 Volt oder 230 Volt AC. Benutzen Sie
aus Sicherheitsgründen immer geerdete Steckdosen zum Anschließen! Benutzen Sie
die Maschine nicht in feuchten Räumen.
Auspacken
Nehmen Sie nach dem Öffnen und Entfernen der luftgefüllten Schutzverpackung, zu-
erst das Zubehör aus dem Karton. Heben Sie danach mit beiden Händen die Platten-
waschmaschine sehr vorsichtig aus dem Karton. Heben Sie die Maschine Nie an dem
Plattenteller hoch! Entfernen Sie (wenn vorhanden) den Styroporschutz zwischen
Plattenteller und Gehäuse. Bewahren Sie die Verpackung für einen eventuellen Trans-
port auf.
Zubehör:
Absaugarm 12-Zoll aus Kunststoff, Plattenreinigungsbürste, Reinigungskonzentrat
und ein geerdetes Netzkabel. Das kleine Fläschchen Reinigungskonzentrat wird mit 1
Liter destilliertem Wasser verdünnt. Die gemischte Flüssigkeit sollte an einem dunk-
len und kühlen Platz aufbewahrt werden. Das kleine Fläschchen in dem das Konzen-
trat war, kann danach für das Auftragen der Reinigungsflüssigkeit
auf die Schallplatten benutzt werden.
Aufstellen
Stellen Sie die Plattenwaschmaschine auf eine saubere und trockene Oberfläche.
Vergewissern Sie sich, dass die Plattenwaschmaschine fest und sicher steht. Stellen
Sie die Okki Nokki so auf, dass Sie immer leichten und sicheren Zugang haben. Las-
sen Sie nie die Möglichkeit außer Acht, dass Flüssigkeit aus der Maschine auslaufen
kann. Es ist daher ratsam, immer ein Handtuch parat zu halten oder eine geeignete
Unterlage zu wählen, um den Untergrund der Plattenwaschmaschine zu schützen.
Bitte lassen Sie um die Maschine reichlich Platz zur Belüftung.
Wichtig! Bitte lesen Sie unbedingt vor der Inbetriebnahme der
Plattenwaschmaschine diese Anleitung sorgfältig durch.

18
Bedienungsanleitung
Absaugarm aus Kunststoff
Platzieren Sie den Absaugarm in die dafür vorgesehene Öffnung auf der rechten Seite
der Maschine. Setzen Sie den Arm ein (siehe Abbildung 1 und 2).
Überprüfen Sie den Arm generell vor Benutzung: die schwarzen Samtstreifen soll-
ten frei von fettigen Substanzen wie z.B. Fingerabdrücken sein. Achten Sie auch auf
Staub, Schmutz und mögliche Beschädigungen. Staub und Schmutz können einfach
mit einer trockenen und sauberen Bürste entfernt werden (eine weiche Zahnbürste
reicht hier vollkommen aus).
Warnung: Bitte entfernen Sie den Absaugarm nach jeder Benutzung aus der Öffnung
und legen Sie ihn flach auf den Plattenteller zum trocknen. Bei Nichtbeachtung er-
lischt die Garantie für den Absaugarm.
Anschließen der Maschine
Benutzen Sie zur Stromzufuhr die dafür vorgesehene Buchse auf der Rückseite der
Okki Nokki mit dem beigelegten Netzkabel. Benutzen Sie das Gerät ausschließlich
mit einer geerdeten Steckdose mit 230 Volt AC – 50 Hz. Schauen Sie sich die beiden
Schalter an der Front an. Der obere Schalter mir der Bezeichnung “Motor” sollte sich
in der mittleren “O“-Stellung befinden. Schalten Sie ihn hoch in die “-” Stellung, dreht
sich die Platte linksherum. Probieren Sie dies nun mit der “=” Stellung, die Platte soll-
te sich nun in die entgegengesetzte Richtung drehen. Der Motor ist deutlich hörbar,
das ist normal. Bringen Sie den Schalter wieder in die mittlere Ausgangsstellung, um
den Drehteller anzuhalten. Aktivieren Sie den Absaugmotor indem sie den Schalter
“Vakuum” auf “O” umlegen. Sie hören nun das Geräusch des Vakuumsaugers. Ihre
Plattenwaschmaschine ist betriebsbereit!
Abflussschlauch
Stellen Sie sicher, dass der Abflussschlauch am Ende mit den transparenten Siliko-
nen Kappe sicher verschlossen ist.
WARNUNG: Benutzen Sie niemals die Maschine ohne den Abflussschlauch sicher ver-
schlossen zu haben.
Reinigungstest
Wir empfehlen Ihnen einen Testdurchlauf an einer nicht mehr benötigten Schallplatte
durchzuführen, um sich zu versichern, dass die Maschine ordnungsgemäß eingestellt
ist und korrekt funktioniert, und um sich mit der Reinigungsprozedur vertraut zu ma-
chen.

19
Bedienungsanleitung
Abbildung 3: Verteilen der Reinigungsflüssigkeit
Reinigungsbetrieb
Entfernen Sie die Klemmschraube von der Drehspindel, legen Sie eine Schallplatte
auf den Drehteller, achten Sie dabei darauf, dass die Platte genau zentriert auf der
Spindel liegt. Setzten Sie die Klemmschraube wieder auf die Spindel und schrauben
Sie diese fest, um sicherzustellen, dass die Schallplatte später nicht verrutscht. Be-
vor die Reinigungsflüssigkeit aufgetragen werden kann, sollte man sich vergewissern,
dass die Oberfläche der Platte frei von grobem Schmutz ist. Bringen Sie den Schalter
für den Motor in die obere Position; der Drehteller wird sich linksherum drehen. Tra-
gen Sie die richtige Menge der Reinigungsflüssigkeit auf den bespielten Abschnitt
der Platte auf. Setzen Sie die mitgelieferte Reinigungsbürste auf und verteilen Sie mit
deren Hilfe wie auf den Bildern gezeigt die Flüssigkeit gleichmäßig auf dem gerillten
Abschnitt (Abbildung 3). Lassen Sie die Schallplatte solange drehen, bis alle Rillen mit
der Reinigungsflüssigkeit gefüllt sind. Achten Sie stets darauf, dass das Etikett der
Schallplatte trocken bleibt. Wischen Sie unverzüglich jede verschüttete Flüssigkeit
vom Etikett ab.
Absaugung Betrieb
Starten Sie den Absaugmotor, und drehen Sie den Absaugarm über die Platteno-
berfläche. (Abbildung 4) Drücken Sie den Absaugarm leicht nach unten.
Zwei Umdrehungen sind erforderlich und empfohlen, um die ganze Flüssigkeit abzus-
augen – weitere Umdrehungen könnten Ihre Schallplatten beschädigen.
Schalten Sie den Saugmotor aus, die eingebaute Feder hebt nun den Absaugarm von
der Plattenoberfläche ab. Drehen Sie nun den Absaugarm wieder zum Rand der Plat-
tenwaschmaschine zurück. Bei stark verschmutzten Schallplatten wiederholen Sie
diese Aktion auch in die entgegengesetzte Drehrichtung. Die erste Seite der Platte ist
nun trocken und sauber. Entfernen Sie die Klemmschraube und wiederholen Sie die
Prozedur für die andere Seite der Schallplatte.
Abbildung 4: Position der absaugarm während das Vakuum Prozess

20
Bedienungsanleitung
Abbildung 5: Abfließen lassen der Flüssigkeit
Leeren des Behälters mit der benutzten Reinigungsflüssigkeit
Nach Reinigung von 30 Platten muss der Behälter mit der aufgesaugten Flüssigkeit
geleert werden.
Die Reinigung von mehr als 30 Platten ohne Leeren des Behälters kann zur Beschädi-
gung der Okki Nokki und zum Erlöschen der Garantie führen!
Entfernen sie die Verschlusskappe vom Abflussschlauch und leiten Sie dessen In-
halt in eine Flasche oder einen ähnlichen Behälter. Heben Sie den vorderen Teil der
Maschine um 15 cm an (Abbildung 5). Halten Sie nun diese Stellung so lange, bis keine
Flüssigkeit mehr aus dem Abflussschlauch ausfließt. Achten Sie immer darauf, dass
den transparenten Silikonen Verschlusskappe den Abflussschlauch sicher versch-
ließt.
Garantie Warnung!
Es kann vorkommen, dass - wenn Sie den Abflussbehälter überprüfen - dort nur wenig
oder gar keine Flüssigkeit vorhanden ist. Dies kann folgende Ursache haben: Sie ver-
wenden eine Mischung auf Alkoholbasis, die dazu neigt, durch die Wärme, die von der
Maschine entsteht, zu verdunsten. Dies ist jedoch keine Entschuldigung dafür, den
Behälter nicht nach Reinigung von 30 Schallplatten zu entleeren.
Hinweis
Stellen Sie sicher, dass Sie den Okki Nokki immer vom Netz trennen wenn Sie den
Tank leeren. Das Gerät ist betriebsbereit, wenn der Tank leer ist. Unbedingt nach 30
Schallplatten diese Prozedur wiederholen. Der Vakuummotor verfügt über einen in-
tegrierten Temperatursensor. Bei einer Überhitzung schaltet der Motor automatisch
ab. Warten Sie in diesem Fall mindestens 30 Minuten vor einer weiteren Verwendung.
Other manuals for Record Cleaning Machine
2
Table of contents
Languages:
Popular Other manuals by other brands

CAKEWALK
CAKEWALK sonar x3 reference guide

Task Force Tips
Task Force Tips Crossfire with Safe-Tak 1250 Base INSTRUCTIONS FOR SAFE OPERATION AND MAINTENANCE

EMAC
EMAC SoM-210FS user manual

MadgeTech
MadgeTech HiTemp140-M12 user guide

Time Machines
Time Machines TM2000A Installation and operation manual

EMG
EMG EMG-ZW Series Installation information