Okki Nokki ONE User manual

NEDNED GEBRUIKSAANWIJZING pag. 02 - 08
ENGENG OWNER’S MANUAL pag. 09 - 15
GERGER BEDIENINGSANLEITUNG seit. 16 - 22
FRAFRA MODE D’EMPLOI pag. 23 - 29
ITAITA MANUALE UTENTE pag. 30 - 36
ALL NEW REINVENTEDALL NEW REINVENTED RECORD CLEANING MACHINERECORD CLEANING MACHINE
OKKI NOKKI ONEOKKI NOKKI ONE

2
Gebruiksaanwijzing
PlatenwasmachinePlatenwasmachine
2020
voor technische support en vragen

Gebruiksaanwijzing
3
Belangrijk!
Lees deze gebruiksaanwijzing aandachtig door voordat het apparaat in gebruik wordt genomen!
Introductie
Gefeliciteerd met de aanschaf van de Okki Nokki ONE Record Cleaning Machine.
Indien u deze gebruiksaanwijzing zorgvuldig leest en de aanwijzingen opvolgt, zult u nog vele jaren van
een goed werkende Okki Nokki ONE kunnen genieten.
De Okki Nokki ONE is er in een uitvoering voor 115 Volt of 230 Volt. Voor veiligheidsredenen is het altijd
aan te bevelen de machine op een geaard stopcontact aan te sluiten. Gebruik de machine niet in een
vochtige omgeving. De machine is zeer eenvoudig in gebruik.
Uitpakken
Na het openen van de verpakking en verwijderen van de bovenste met lucht gevulde beschermende
verpakking, tilt u de machine met stofkap in één keer uit de doos. Na het verwijderen van de folie en de
stofkap, treft u in de EPE foamverpakking met vakverdeling de volgende accessoires aan;
1. 50 ml flesje met Okki Nokki geconcentreerd platenreinigingsmiddel
2. applicatieborstel / opbrengborstel
3. netsnoer dat geschikt is voor het in uw land geldende voltage
4. rvs platenklem
5. zwarte aluminium adapter schijf voor singles
6. label-cover
7. extra 7 inch plateau
8. alles-in-één vacuüm / afzuig arm 12 inch – 10 inch – 7 inch
Til de machine nooit aan het plateau op. Verwijder de 2 stukken witte foambescherming die zich tussen
het plateau en de Okki Nokki bevinden. Ziet u deze 2 foambescherming niet, dan dient u eerst het plateau
te verwijderen. Dit doet u eenvoudig door het plateau van de machine te trekken. Doe dit trekken altijd
aan beide zijdes tegelijkertijd met dezelfde kracht. Bewaar de verpakking voor eventuele toekomstige
verzending.
NB: het flesje reinigingsvloeistof is een concentraat en dient met 1 liter gedestilleerd of gedeminera-
liseerd water vermengd te worden. Gedestilleerd, dan wel gedemineraliseerd water is bij de drogist
verkrijgbaar. Als de vloeistof eenmaal gemengd is, kan het op een koele en donkere plaats bewaard worden.
Het kleine flesje kan gebruikt worden om de vloeistof op de plaat aan te brengen.
Installatie
Plaats de platenreiniger op een vrij, droog en schoon oppervlak. Zorg ervoor dat de machine stevig en
stabiel staat en zich op een comfortabele werkhoogte bevindt. Houd er rekening mee dat de mogelijkheid
bestaat dat reinigingsvloeistof gemorst kan worden. Het kan handig zijn een handdoek of andersoortig
absorberend materiaal onder het apparaat te plaatsen, om het oppervlak waarop het apparaat staat te
beschermen. Zorg te allen tijde voor voldoende ventilatie om het apparaat.
Afbeelding 1: bijgeleverde accessoires
1
8
32
5
4
6
7

Gebruiksaanwijzing
4
Afzuigarm / vacuümarm
Plaats de afzuigarm in de daarvoor bedoelde
opening, het zo genoemde “vacuüm lager”
aan de rechter voorzijde van de machine.
Plaats de arm parallel aan de zijkant, wijzend
naar de achterkant van de machine.
Let erop dat de afzuigarm in 2 verschillende
posities in de corresponderende opening
kan worden gezet. Een “rust” positie, de arm
steekt een beetje naar rechts achter, en de
“werk” positie, de arm is over de plaat gepositioneerd, en naar de spindel toe gericht.
Let op; Verwijder na het gebruik van de Okki Nokki, aan het eind van elke was sessie, altijd de kunststof
afzuigarm / vacuümarm uit het vacuüm lager. Leg de afzuigarm te drogen plat op het plateau van de Okki
Nokki. Indien u dit niet consequent na elke was sessie doet en de vacuüm arm in het lager laat zitten,
vervalt de garantie op de afzuigarm / vacuüm arm.
De machine aansluiten
Maak uzelf bekend met de bediening voordat u het apparaat aansluit op het net.
Stroomvoorziening
Sluit het netsnoer aan op de stroomaansluiting aan de achterzijde van het apparaat en steek vervolgens
het netsnoer in het stopcontact (230 V AC– 50 Hz). U dient vervolgens de schakelaar aan de achterzijde
van de Okki Nokki op “1” te zetten. Hierdoor wordt de stroom aanvoer aangezet.
Bediening beide motors
U ziet 1 multifunctionele draai-druk schakelaar aan de linker bovenzijde van de machine. Met de buitenste
zwarte kunststof ring, kunt u het plateau bedienen. Draait u deze draaiknop naar links, dan draait het plateau
links om. Draait u deze draaiknop geheel naar rechts, dan draait het plateau rechts om. In de midden-
stand staat het plateau stil. Eenvoudiger kan niet. De motor zal op de verre achtergrond zeer weinig
geluid produceren, hetgeen normaal is.
Met de rvs drukschakelaar in het centrum van de multifunctionele schakelaar, zet u de vacuümmotor
aan, hij laat een geluid klinken als een ouderwetse stofzuiger. De schakelaar is tijdens het afzuigen in de
ingedrukte stand. Door nogmaals deze schakelaar in te drukken, zorgt u er voor dat u de vacuum motor
weer uit zet. De schakelaar is nu in de uitgedrukte stand. Deze nieuw ontwikkelde combinatie draai / druk
knop werkt zeer intuïtief en vanzelfsprekend.
De platenreiniger is nu gereed voor gebruik!
Afval water - aftapslang
Check of de aftapslang aan de rechterzijde van de platenreiniger afgesloten is met de zwarte rubber stop.
Waarschuwing!
Bedien de machine nooit zonder afdichting van de aftapslang met de zwarte rubber stop.
Probeer onder geen beding de machine te gebruiken met een continue aftap door de slang in een opvang-
bak te hangen. In een dergelijk geval komt de garantie per direct te vervallen.
Afbeelding 2&3: positie van de afzuigarm

Gebruiksaanwijzing
5
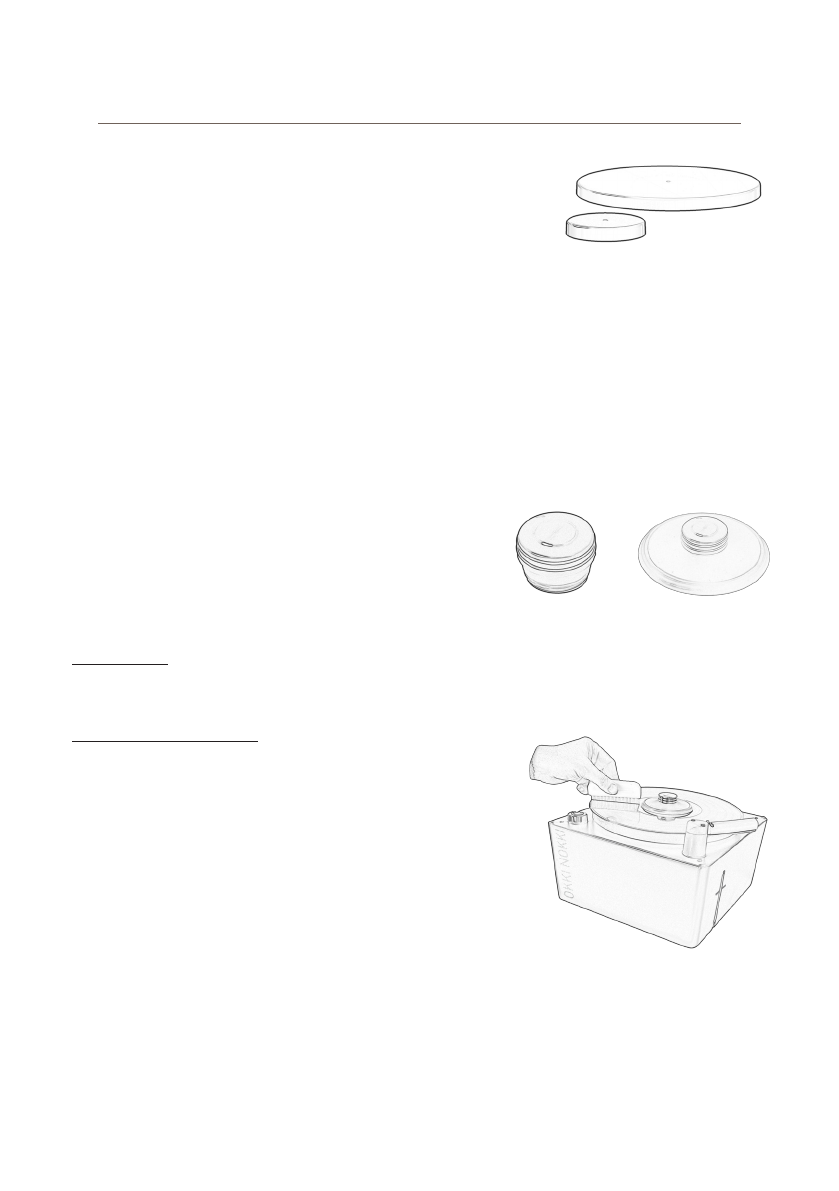
U treft in het leveringspakket, zowel een klein 7 inch als een groot
12 inch plateau aan. U kunt zelf kiezen welk plateau u gebruikt.
U kunt voor 10 en 12 inch platen zowel het kleine als het grote
plateau gebruiken. Voor het omwisselen van de plateaus dient
u het plateau dat op de Okki Nokki zit (bij levering zit het grote
12 inch plateau standaard op de Okki Nokki bevestigd) van de as van
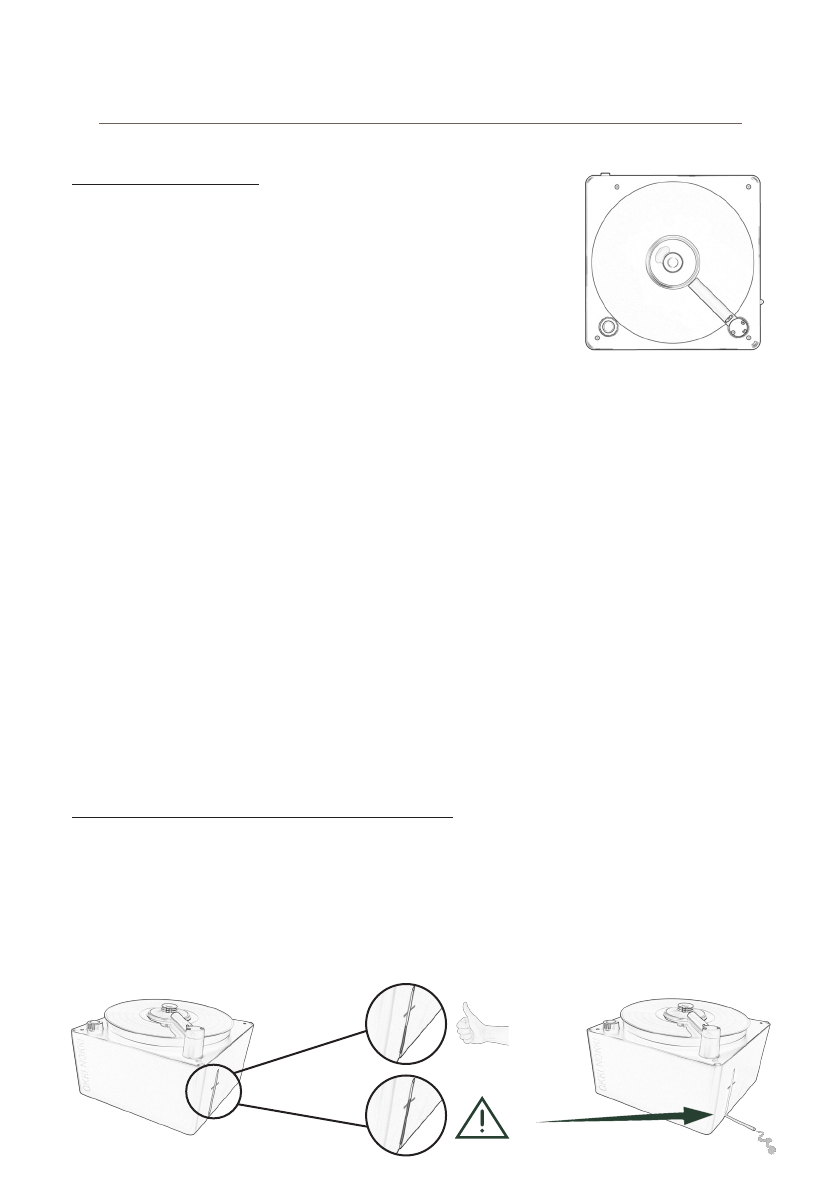
de plateaumotor verwijderen door hem van de Okki Nokki af te trekken. Dit doet u eenvoudig door het
plateau van de machine te trekken. Doe dit trekken altijd aan beide zijdes tegelijkertijd met dezelfde kracht.
Hiervoor kan het zijn dat u enige kracht moet gebruiken. Wees niet bang, het plateau kan onmogelijk
krom
worden door deze handeling. Het plateau is ongelofelijk sterk en altijd recht!
Met het grote plateau heeft u meer controle over wat u doet, u heeft meer “feeling” met het vinyl.
Tevens kunt u, gebruik makend van het grote plateau “enige” druk uit oefenen op het vinyl met bijvoor-
beeld de Okki Nokki RCBN velvet brush. Deze is als extra accessoire aan te schaffen. Voor singels raden
wij u aan, het kleine plateau te gebruiken.
U kunt uw platen met dan wel zonder de labelcover reinigen.
Net wat u het fijnst vind. De labelcover kunt u eenvoudig op
en af de rvs platenklem “klikken”. Bij het zorgvuldig opbrengen
van de reinigingsvloeistof, met in achtneming van het droog
houden van het label, is de labelcover niet echt nodig, hij zit
tijdens het gebruik wellicht meer in de weg dan dat hij nuttig
is. Echter sommige gebruikers zweren er bij, dus vandaar dat
hij nu standaard in het leveringspakket zit.
Reinigingstest
Wij bevelen een testronde aan op een oude, onbelangrijke elpee om er zeker van te zijn dat de machine
goed is ingesteld en juist werkt en natuurlijk om bekend te worden met de reinigingsprocedure.
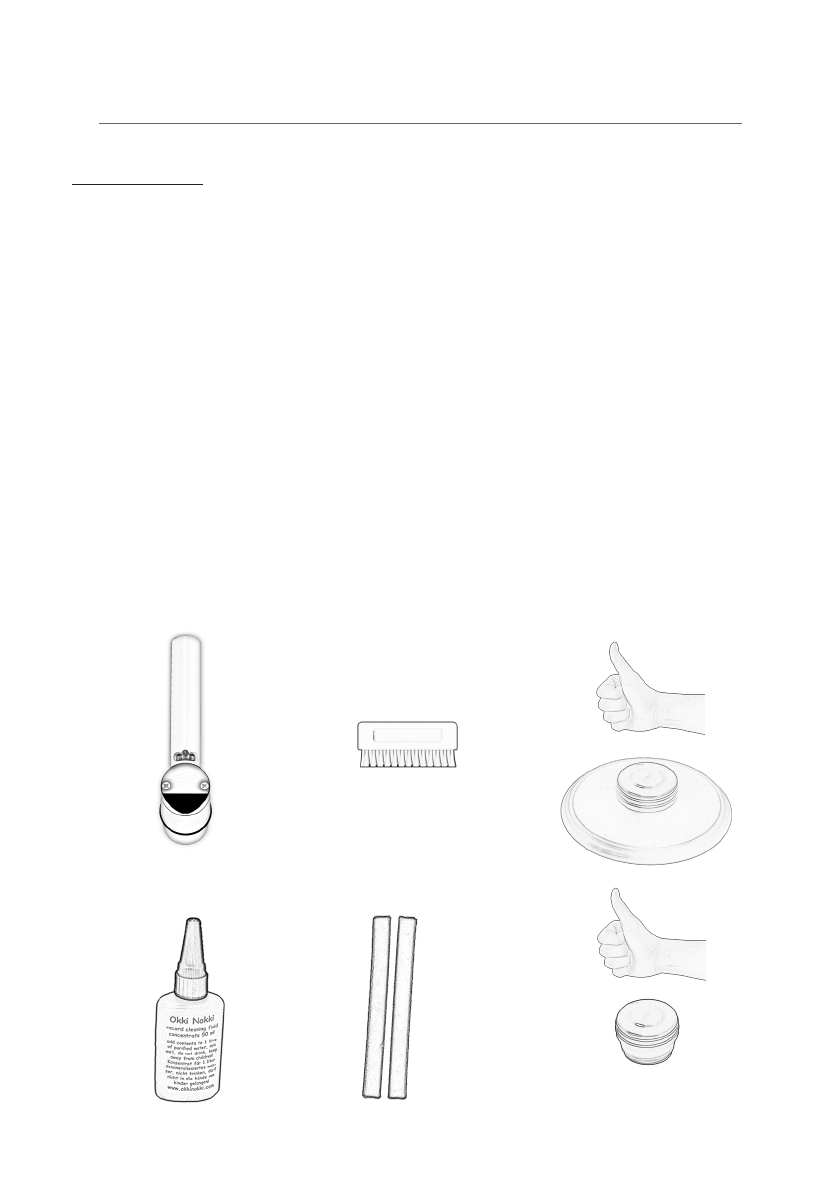
Bediening voor het reinigen
Leg de elpee op het kleine dan wel op het grote plateau en plaats
vervolgens de rvs platenklem, met of zonder de labelcover.
Voor het aanbrengen van de vloeistof wordt aanbevolen eerst de
plaat stofvrij te maken met een standaard platenborstel, zoals
bijvoorbeeld de Okki Nokki RCBN velvet brush (maar niet met de
applicatieborstel). Zet het plateau aan door de draaiknop rechts-
om te draaien (draairichting met de klok mee) en breng voorzichtig
een druppelsgewijs de reinigingsvloeistof aan. Verspreid deze
vervolgens met de applicatieborstel. Exact de juiste hoeveelheid
reinigingsvloeistof aanbrengen is een kunst op zich en behoeft
enige oefening. Een goede vuistregel is: bedek de plaat en niet
de hele machine... Niet teveel en niet te weinig dus.
Zorg ervoor dat de vloeistof in gelijke mate over het oppervlak wordt verdeeld, voeg indien nodig meer
vloeistof toe. Als u eenmaal tevreden bent met het resultaat, kunt u de borstel voorzichtig omlaag duwen.
Op deze manier haalt u vuil uit de groeven. Vervolg deze handeling 3 of 4 omwentelingen en doe hierna
hetzelfde in de tegengestelde draairichting, door de draaiknop linksom te draaien. U hoeft niet meer vloei-
stof toe te voegen. Probeer het platenlabel droog te houden, verwijder gemorste vloeistof onmiddellijk.
Gebruik eventueel de labelcover.
Afbeelding 6: de reinigingsvloeistof
verspreiden
Afbeelding 4: 7 en 12 inch plateaus
Afbeelding 5: rvs platenklem met
en zonder labelcover

Gebruiksaanwijzing
6
Bediening voor het afzuigen
U bent nu klaar om zowel vuil als vloeistof te verwijderen met behulp
van het vacuüm systeem. Het afzuigen van de LP mag plaatsvinden in
beide draairichtingen van het plateau, zowel linksom als rechtssom.
Draai de vacuüm-afzuig arm over de plaat, richting de spindel, de rvs
platen clamp (afb.6) en plaats de vacuüm-afzuigarm op de plaat. Zet
vervolgens de vacuümmotor aan. Eén of twee rotaties van het plateau
moeten voldoende zijn om de plaat droog te zuigen. De velvet strips
aan de onderzijde van de vacuüm-afzuigarm zullen droog dan wel na-
genoeg droog blijven door de hoge zuigkracht van dit nieuwe model
Okki Nokki ONE. Het reinigen van het vinyl door gebruik te maken
van het laten rusten van de vacuüm-afzuigarm op de plaat, tijdens
het reinigingsproces, raden wij sterk af. Door deze werkwijze zorgt
u er namelijk voor dat de velvet strips aan de onderzijde van uw vacuüm-afzuigarm drijfnat worden.
Hierdoor zal het afzuigen en droog krijgen van de plaat veel moeizamer worden en veel meer rotaties
behoeven. Totaal niet gewenst. Gebruikt u deze handelswijze toch, dan dient u er rekening mee te houden
dat de garantie op de Okki Nokki vervalt. Wilt u toch op deze wijze de plaat willen reinigen, dan behoort
een andere werkwijze wel tot de mogelijkheden. U dient in dat geval een 2e vacuüm-afzuigarm als extra
accessoire aan te schaffen en deze te gebruiken als reinigingsborstel. Deze 2e vacuüm-afzuigarm kunt
u dan bij het afzuigen van de plaat steeds omwisselen met de andere 1e, nog droge, vacuüm-afzuigarm
die standaard bij uw Okki Nokki geleverd is. Met deze werkwijze heeft u geen applicatieborstel meer in
de hand.
Eén of twee omwentelingen zijn normaliter voldoende om alle vloeistof op te zuigen. Meer is niet nodig.
Vermijd te lang afzuigen.
Zet de vacuüm motor uit, door de rvs drukschakelaar nogmaals in te drukken. Beweeg de afzuigarm
richting achterzijde, enigszins naar rechts, van de Okki Nokki, tot hij in de daarvoor bestemde rustpositie
iets naar beneden valt. Zet hierna de motor van het plateau stil, door de draaischakelaar in de midden-
positie te plaatsen. Onthoud goed: zet eerst de vacuümmotor uit en daarna de motor van het plateau.
Verwijder de platenklem, eventueel tezamen met labelcover, draai de plaat om en herhaal deze procedure
voor de andere kant van de plaat.
Het reservoir voor de vervuilde reinigingsvloeistof legen
Nieuw aan de Okki Nokki ONE is dat het afvalwater niveau aan deze rechter zijde met behulp van de slang
is af te lezen. Leeg het reservoir tijdig, laat het niveau nooit oplopen tot boven de helft van deze slang!
Het niet op tijd legen van het reservoir kan schade aan de machine veroorzaken en laat de garantie
vervallen. Niet aan de afvoerslang trekken. Indien de slang er toch van de machine losraakt, kunt u de
machine om keren en de slang weer op de machine duwen. Verwijder de zwarte rubber, trek de slang
vervolgens uit de daarvoor dienende holte en plaats de slang in een fles of opvangbak.
Afbeelding 7: positie afzuigarm
gedurende het zuigproces
Afbeelding 8: reservoir afvalvloeistof legen

Gebruiksaanwijzing
7
U hoeft de machine niet te kantelen. Het reservoir loopt geheel leeg als de machine gewoon verticaal
staat. Doe hierna de rubber dop weer op de slang en plaats de slang weer terug in de daarvoor bestemde
uitsparing in de zijkant van de machine.
Noot: Soms komt er weinig of geen vloeistof uit de afvoerslang. Dit kan komen omdat u een mengsel op
alcoholbasis gebruikt dat in de machine door de luchtsnelheid reeds is verdampt. Dit is geen excuus om
de afvalvloeistof niet te verwijderen.
Waarschuwing; Uw garantie vervalt indien u deze instructie niet navolgt!
Veiligheidsvoorzieningen
• U dient het reservoir te legen, vóórdat het vloeistof niveau in het reservoir is opgelopen tot maximaal
de helft van de slang. Dit is zeer belangrijk.
Indien u dit verzuimd, dan zal de machine niet goed meer kunnen functioneren.
M
ocht u verzuimen het reservoir tijdig te legen, dan vervalt per direct de garantie op uw Okki Nokki ONE.
Gelieve het reservoir altijd op tijd zoals hierboven beschreven, te legen.
• Zorg ervoor dat de Okki Nokki altijd is losgekoppeld van de stroom kabel / het stroomnet als u het
reservoir leegt.
• Het apparaat is gereed voor gebruik als de tank geleegd is. Herhaal bij voorkeur de standaard proce-
dure elke keer na het reinigen van ongeveer 40 wasbeurten.
• De vacuüm motor heeft een ingebouwde temperatuursensor. Als de temperatuur te hoog wordt, zorgt
hij ervoor dat de motor automatisch afslaat. Schakel in dit geval de machine helemaal uit en wacht
minimaal 30 minuten voor verder gebruik. Dit kan alleen gebeuren indien u foutief de machine gebruikt.
Immers, als u uw vinyl wast op de hierboven beschreven wijze, heeft u aan één of twee rotaties van
het plateau voldoende om uw vinyl droog te krijgen. Deze handelswijze volgend, kan de vacuüm motor
nooit of te nimmer oververhit raken.
Nuttige tips en aanbevelingen
• Verwijder na het gebruik van de Okki Nokki altijd de kunststof afzuigarm / vacuümarm uit het vacuüm
lager. Leg de afzuigarm te drogen plat op het plateau van de Okki Nokki.
• Houd de RCM schoon! Verwijder vloeistof die op het apparaat terechtkomt.
• Reinig de applicatieborstel met een licht vochtige doek met een beetje warm water. Laat geen stof erop
achter.
•
Onderhoud de fluwelen strips op de afzuigbuis. Controleer regelmatig op vuil, slijtage en beschadigingen.
Let erop dat zich geen vuil ophoopt en veeg de strips af na gebruik met de vingertoppen of zachte tanden-
borstel. Vervang de strips na het reinigen van circa 100 Lp’s en vaker indien noodzakelijk.
• Zeer oude en vervuilde elpees dienen meerdere malen een schoonmaakbeurt te krijgen.
• Vervang altijd de binnen hoes van een elpee bij de eerste reiniging.
• Wij adviseren het gebruik van de speciale, geconcentreerde RCF Okki Nokki reinigingsvloeistof.
• Gebruik NOOIT een reinigingsvloeistof met een alcoholgehalte van meer dan 25%.
• Gebruik NOOIT een reinigingsvloeistof op alcoholbasis voor 78 toerenplaten, shellac of acetaten.
• Geen open vlammen of roken bij gebruik van op alcohol gebaseerde mengsels. Gevaar!
• Zorg voor voldoende ventilatie bij gebruik van op alcohol gebaseerde mengsels.
• Trek nooit de afzuigbuis uit de machine als de vacuüm motor in werking is!
• Gebruik nooit een reinigingsvloeistof die sterk schuimt!
Onderhoud
Neem het oppervlak van de Okki Nokki af met een vochtige doek.
Vanaf nu zullen uw elpees Okki Nokki klinken!

Gebruiksaanwijzing
8
Garantiebepalingen
Uw Okki Nokki ONE heeft 2 jaar garantie. Bewaar de originele factuur / bewijs van aankoop;
deze bepaalt de ingangsdatum van de 2-jarige garantieperiode.
• De garantie op de machine vervalt bij onjuist gebruik of gebruik niet zoals beschreven in deze gebruiks-
aanwijzing
• Neem contact op met uw dealer indien de machine niet meer of onjuist werkt
• Open onder geen enkele omstandigheid de machine om zelf reparaties uit te voeren of op andere
manier wijzigingen aan te brengen
• Er dienen geen reparaties uitgevoerd te worden door ongeautoriseerd personeel
• Er wordt geen enkele wijze van aansprakelijkheid aanvaard voor beschadigingen aan elpees veroor-
zaakt door gebruik van deze machine
• Neem contact op met uw dealer voor meer informatie
Accessoires voor uw Okki Nokki
RTC-N12 All In One vacuüm arm
RCF platenreinigvloeistof
Applicatieborstel
RCS velvet stripset
Rvs platenklem en labelcover

9
Owner’s Manual
2020
Record Cleaning MachineRecord Cleaning Machine
for technical support or questions:
USA: [email protected]
CAN: [email protected]a
other Countries:
find your distributor / dealer in your country:
www.okkinokki.com

Owner’s Manual
10
Important!
Read this manual carefully, before using the device!
Introduction
Congratulations on purchasing the Okki Nokki ONE Record Cleaning Machine.
If you read this manual carefully and follow the instructions, you will be able to enjoy a properly working
Okki Nokki ONE for many years to come.
Important safety information
The Okki Nokki ONE record cleaning machine is available in a 115 Volt or 230 Volt version.
Please make sure you have the correct version for your country – the UK is 230 Volt.
Always connect the machine to a grounded electrical outlet. Do not use the machine in a damp environment.
Always use in a well ventilated area. Never lift the machine by the platter. Never use the machine without
its drain plug in place. Empty the machine in accordance with the advice in these instructions.
Unpacking
Open the box and remove the top air-filled protective packaging. Lift the whole machine complete with
dust cover and accessories out of the box in one go. Then after removing the foil and the dust cover, you
will find the following accessories in the EPE foam packaging underneath;
1. 50 ml bottle with Okki Nokki concentrate record cleaning fluid
2. application brush
3. power cord suitable for the voltage in your country
4. stainless steel record clamp
5. black aluminum adapter disc for singles
6. label-cover
7. extra 7 inch platter
8. all-in-one vacuum-arm 12 inch - 10 inch - 7 inch
Remove the 2 pieces of white EPE protection foam from between the platter and the top of the machine.
If you can’t see the 2 pieces of foam, then remove the platter first. You can simply pull off the platter from
the centre spindle (pull from both sides with equal force) to reveal the 2 pieces of foam laying under the
platter. Keep the packaging for future shipping.
Note: The record cleaning fluid bottle is a concentrate and should be mixed with one litre distilled or
demineralized water. Once mixed, the liquid should be stored in a cool and dark place.
The small bottle can be used to apply the liquid to the record.
Installation
Place the record cleaning machine on a dry and clean surface with the multifunction control at the front on
the left. Make sure the machine is stable and at a comfortable working height. Keep in mind that there is a
possibility that cleaning fluid can be spilled. It may be helpful to place a towel or other absorbent material
under the machine to protect the surface. Do not place the Okki Nokki on an expensive table that can be
damaged by water. Provide adequate ventilation to the unit at all times. Familiarize yourself with the
operation before connecting the appliance to the mains.
Figure 1: included accessories
1
8
32
5
4
6
7

Owner’s Manual
11
Vacuum Arm:
Place the vacuum-arm in the opening provided for this purpose (the “vacuum bearing”) on the front right
of the machine. Place the arm pointing towards the rear of the machine. Please note that when seated in
its corresponding opening, the vacuum-arm can be placed in 2 different positions: A “rest” position where
the arm protrudes slightly to the right back, and the “work” position where the arm is positioned over the
platter facing the spindle.
Attention:
After using the Okki Nokki, always remove the plastic vacuum-arm from the vacuum bearing at the end
of each washing session. Place the vacuum-arm to dry flat on the platter of the Okki Nokki. If you do not
do this consistently after every washing session and leave the vacuum-arm in the bearing, the warranty
on the vacuum-arm is void.
Motor Operations:
You will see the multifunctional rotary/pushbutton control on the front left corner of the machine.
This newly developed combination rotary / push button switch works very intuitively.
The outer black plastic ring operates the platter. By turning this rotary knob clockwise, the platter will
rotate clockwise. Turn it counter clockwise, and the platter will rotate counter clockwise. In the middle
position, the platter is stationary. It couldn’t be simpler. As the platter turns, some low level motor noise
will be evident.
Using the stainless steel pushbutton switch in the center of the multifunctional control turns the vacuum
on and off. Some motor noise will inevitably be heard.
Waste water - drain hose:
Make sure the drain hose on the right side of the record cleaner is closed with the black rubber stopper
on top of it.
WARNING!
Never operate the machine without sealing the drain hose with the black rubber stop. Under no circum-
stances should you try to use the machine with a continuous drain by hanging the hose in a tank. In such
a case, the warranty becomes void immediately.
Figure 2&3: position of the vacuum arm

Owner’s Manual
12
Platter Options:
You will find in the delivery package, both a small 7 inch and a large
12inchplatter.Youcanchoosewhichplatteryouuseandeitherissuitable
for both 10” and 12” records. To exchange the platters, remove the
platter that is on the Okki Nokki (the large 12-inch platter is fitted
to the Okki Nokki as standard) by pulling it off the centre spindle.
For this you may need to use some force. Always do this pulling
on both sides of the platter at the same time with the same force.
Do not be afraid, the platter cannot be bent by this action. The platter is
incredibly strong and always straight!
With the large platter you have more control over
what you do, you have more “feeling” with the vinyl.
You can also, using the large platter, “exert” some pressure on
the vinyl with, for example, the Okki Nokki RCBN velvet brush.
This can be purchased as an extra accessory. When cleaning
singles, we recommend that you use the small platter.
You can clean your records with or without using the label cover, it’s your choice. You can easily “click” the
label cover on and off the stainless steel record clamp. When carefully applying the cleaning fluid on
the record, keeping the label dry, the label cover is not really necessary, it may get in the way more than
it is useful during use. However, some users swear by it, so for that reason it is now standard in the
package.
Cleaning test
We highly recommend a test run on an old record which is not important to you, to ensure that the machi-
ne is properly set up and working properly and of course to become familiar with the cleaning procedure.
Power supply
Connect the power cord to the power connector on the back of
the device, and then plug the power cord into an electrical outlet
(230 V AC – 50 Hz). You must then set the switch on the back of
the Okki Nokki to “1”. This turns on the power.
Operation for cleaning:
Place the LP on the small or large platter and then lock the re-
cord to the platter using the stainless steel record clamp, with
or without the label-cover.
Before applying the liquid, first dust the record with a standard
record brush, such as the Okki Nokki RCBN velvet brush (but
NOT with the application brush). Then turn the rotary control
clockwise and carefully apply the cleaning liquid drop by drop. Applying just the right amount of cleaning
fluid is an art in itself and requires some practice. Start with a small amount and add more if required –
better than having overspill on the top of the machine.
Make sure the liquid is evenly distributed on the surface using the application brush, adding more liquid
if necessary. Once you are satisfied with the result, gently add pressure to the brush to clean the grooves.
Figure 6: to spread the cleaning fluid
Figure 4: 7 en 12 inch platters
Figure 5: stainless steel plate clamp with
and without label cover

Owner’s Manual
13
Continue this operation for 3 or 4 revolutions and then do the same in
the opposite direction by turning the rotary knob counter clockwise.
You don’t need to add more liquid. Try to keep the record label dry, remove
any spilled liquid immediately. Use the label cover if necessary.
You are now ready to remove both dirt and liquid using the vacuum system.
We strongly advise against resting the vacuum-arm on the record during
the cleaning process. This makes the velvet strips on the bottom of your
vacuum-arm soaking wet, wears them out more quickly and also makes
the drying section much more difficult putting unnecessary strain on the
machine. If you really want to use a microfibre method to clean your vinyl,
you should purchase a second vacuum-arm as an extra accessory and use
it as a cleaning brush. This second vacuum-arm should then exchanged
when vacuuming the record with the other (first and still dry) vacuum-arm
that is supplied as standard with your Okki Nokki.
Operation for vacuuming:
Vacuuming the LP may be done in either direction of rotation. Rotate the vacuum-arm over the vinyl,
towards the spindle, then turn on the vacuum motor. One or two rotations of the platter should be
sufficient to vacuum the record dry. The velvet strips on the bottom of the vacuum-arm will remain
dry or almost dry due to the high suction power of this new model Okki Nokki ONE. Avoid vacuuming
for longer than necessary. Switch off the vacuum motor by pressing the stainless steel switch again.
Move the vacuum-arm towards the rear, slightly to the right, of the Okki Nokki, until it sits in the designated
rest position. Then turn off the platter motor by switching the rotary control to the centre position.
Remember, turn off the vacuum motor first and then the platter motor. Remove the record clamp/label
cover, turn the record over and repeat this procedure for the other side of the record.
Empty the waste cleaning fluid reservoir:
New to the Okki Nokki ONE is that the waste water level can be read-off from the hose on the right side
of the Okki Nokki. Empty the reservoir in time, never let the level rise above half the length of this hose!
Failure to empty the reservoir in time can damage the machine and will void the warranty. Do not pull
on the drain hose. If the hose does come off the machine, you can turn the machine over and push the
hose back onto the machine. Remove the black rubber, then pull the hose out of the appropriate cavity
and place the hose in a bottle or container. You do not have to tilt the machine. The reservoir empties
completely if the machine is simply sat on its feet. Then put the rubber cap back on the hose and put the
hose back in the recess in the side of the machine.
Note: Sometimes little or no liquid comes out of the drain hose. This may be because you are using an
alcohol-based mixture that has already evaporated in the machine due to the air velocity. This is not an
excuse for not checking / removing the waste fluid.
Warning; Your warranty becomes void if you do not follow this instruction!
Figure 7: vacuum arm position
during the suction process
Figure 8: empty the waste liquid reservoir

Owner’s Manual
14
Safety Precautions:
• You must empty the reservoir before the liquid level in the reservoir has risen to a maximum of half of
the hose. This is very important because if you fail to do this, the machine will no longer function at its
best. If you fail to empty the reservoir in time, the warranty on your Okki Nokki ONE will immediately be
void. Always empty the container in time as described above.
• Make sure that the Okki Nokki is always disconnected from the power cable / mains when emptying the
reservoir.
• The device is ready for use when the tank is emptied. Preferably repeat the standard procedure every
time after cleaning about 40 records.
• The vacuum motor has a built-in temperature sensor. If the temperature gets too high, it causes the
machine to stop automatically. In this case, switch off completely and wait at least 30 minutes before
continuing. This can only happen if you use the machine incorrectly. After all, if you wash your vinyl in
the manner described above, one or two rotations of the platter will suffice to dry your vinyl. Following
this correct procedure, the vacuum motor can never overheat.
Useful tips and recommendations
• Always remove the vacuum-arm from the vacuum bearing after using the Okki Nokki.
Place the vacuum-arm to dry flat on the platter of the Okki Nokki.
• Keep the RCM clean! Remove any liquid that spills on the device.
• Clean the application brush in warm water. Does not leave any dust on it.
• Maintain the velvet strips on the vacuum arm. Regularly check for dirt, wear and damage.
Make sure that no dirt accumulates and wipe the strips after use with the fingertips or soft toothbrush.
Replace the strips after cleaning approximately 100 records and more often if necessary.
• Very old and dirty LPs should be cleaned several times.
• Always replace the inner cover of an LP during the first cleaning.
• We recommend the use of the special, concentrated Okki Nokki cleaning fluid.
• NEVER use a cleaning fluid with an alcohol content of more than 25%.
• NEVER use an alcohol-based cleaning fluid for 78 rpm records, shellac or acetates.
• No open flames or smoking when using alcohol-based mixtures. Danger!
• Provide adequate ventilation when using alcohol-based mixtures.
• Never pull the vacuum arm out of the machine when the vacuum motor is running!
• Never use a cleaning liquid that foams strongly!
Maintenance
Wipe the surface of the Okki Nokki One with a damp cloth.
From now on, your records will sound Okki Nokki!

Owner’s Manual
15
RTC-N12 All In One vacuüm arm
RCF record cleaning fluid
Application brush
RCS velvet strip set
stainless steel plate clamp
with label cover
Warranty conditions
Your Okki Nokki ONE has a 2 year warranty. Keep the original invoice / proof of purchase; this determines
the starting date of the 2-year warranty period.
• The warranty on the machine will lapse in case of improper use or use as described in this manual
• Contact your dealer if the machine no longer functions or functions incorrectly
• Do not open the machine under any circumstances to make repairs or make changes in any other way
• No repairs should be made by unauthorized personnel
•
No liability is accepted for damage to records caused by the use of this machine
• Contact your dealer for more information
Accessories for your Okki Nokki

16
Bedienungsanleitung
2020
PlattenwaschmaschinePlattenwaschmaschine
für technische Unterstützung und Fragen
GER: info@wittmann-hifi.de

Bedienungsanleitung
17
Wichtig:
Lesen Sie diese Gebrauchsanleitung sorgfältig durch, bevor Sie das Gerät verwenden!
Einführung
Herzlichen Glückwunsch zum Kauf der Okki Nokki ONE Plattenwaschmaschine.
Wenn Sie diese Gebrauchsanleitung sorgfältig lesen und die Anweisungen befolgen, werden Sie viele
Jahre lang Freude an einer ordnungsgemäß funktionierenden Okki Nokki ONE haben.
Der Okki Nokki ONE ist in einer 115 Volt- oder 230 Volt-Version erhältlich. Aus Sicherheitsgründen wird
immer empfohlen, die Maschine an eine geerdete Steckdose anzuschließen. Verwenden Sie die Maschine
nicht in feuchter Umgebung. Die Maschine ist sehr einfach zu bedienen.
Auspacken
Heben Sie die Maschine mit Staubhaube nach dem Öffnen der Verpackung und dem Entfernen der oberen
luftgefüllten Schutzverpackung auf einmal aus der Verpackung. Nach dem Entfernen der Folie und der
Staubhaube finden Sie das folgende Zubehör in der EPE-Schaumverpackung mit Fachaufteilung:
1. 50 ml-Flasche konzentriertem Schallplattenreiniger von Okki Nokki
2. Bürste
3. Netzkabel, das für die Spannung in Ihrem Land geeignet ist
4. Edelstahlplattenklemme
5. Schwarze Aluminium-Adapterscheibe für Singles
6. Labelabdeckung
7. zusätzlicher 7-Zoll-Teller
8. All-in-One-Vakuum-Absaugarm 12 Zoll - 10 Zoll - 7 Zoll
Heben Sie die Maschine niemals an dem Teller an. Entfernen Sie die 2 weißen EPE-Schaumschutzstücke
zwischen Teller und Okki Nokki
Gehäuse. Wenn Sie diese Schaumschutzstücke nicht sehen bzw. finden,
dann müssen Sie zuerst den Teller entfernen.
Sie können dies einfach tun, indem Sie den Teller von der Maschine
abziehen. Ziehen Sie immer auf beiden Seiten des Tellers gleichzeitig mit der gleichen Kraft.
Bewahren Sie die Verpackung für den zukünftigen Versand auf.
Hinweis: In der Flasche mit dem Reinigungsmittel befindet sich ein Konzentrat, das mit 1 Liter destillier-
tem oder demineralisiertem Wasser gemischt werden sollte. Destilliertes oder demineralisiertes Wasser
ist in der Drogerie erhältlich. Nach dem Mischen sollte die Flüssigkeit an einem kühlen und dunklen Ort
aufbewahrt werden. Mit der kleinen Flasche kann die Flüssigkeit auf die Platte aufgetragen werden.
Installation
Stellen Sie den Schallplattenreiniger auf eine freie, trockene und saubere Oberfläche. Stellen Sie sicher,
dass die Maschine stabil und in einer angenehmen Arbeitshöhe steht. Beachten Sie, dass möglicherweise
Reinigungsflüssigkeit verschüttet werden kann. Es kann hilfreich sein, ein Handtuch oder ein anderes
saugfähiges Material unter das Gerät zu legen, um die Oberfläche zu schützen, auf der das Gerät steht.
Sorgen Sie jederzeit für ausreichende Belüftung des Geräts.
Bild 1: mitgeliefertes Zubehör
1
8
32
5
4
6
7

Bedienungsanleitung
18
Saug-Vakuumarm
Setzen Sie den Absaugarm in die dafür vorgese-
hene Öffnung, das sogenannte „Vakuumlager“,
rechts vorne an der Maschine.
Bitte beachten Sie, dass der Absaugarm in zwei
verschiedenen Positionen in der entsprechenden
Öffnung platziert werden kann.
In der “Ruhe”-Position ragt der Arm leicht nach
rechts hinten hervor, und in der “Arbeits”-
Position befindet sich der Arm über der Platte
und zeigt zur Spindel.
Achtung: Entfernen Sie nach der Verwendung des Okki Nokki am Ende jeder Waschsitzung immer den
Kunststoff-Saug-Vakuumarm vom Vakuumlager. Legen Sie den Arm zum Trocknen flach auf den Teller
des Okki Nokki. Wenn Sie dies nicht nach jeder Waschsitzung konsequent tun und den Vakuumarm im
Lager belassen, erlischt die Garantie für den Saug-Vakuumarm.
Schließen Sie die Maschine an. Machen Sie sich mit der Bedienung vertraut, bevor Sie das Gerät an das
Stromnetz anschließen.
Netzteil
Schließen Sie das Netzkabel an den Netzanschluss auf der Rückseite des Geräts an und stecken Sie das
Netzkabel in eine Steckdose (230 V AC - 50 Hz). Sie müssen dann den Schalter auf der Rückseite des Okki
Nokki auf „1“ stellen. Dadurch wird die Stromversorgung eingeschaltet.
Betrieb beider Motoren
Oben links an der Maschine sehen Sie einen multifunktionalen Drehdruckschalter.
Mit dem äußeren schwarzen Kunststoffring können Sie den Teller bedienen. Wenn Sie diesen Drehknopf
nach links drehen, dreht sich der Teller nach links. Wenn Sie diesen Drehknopf ganz nach rechts drehen,
dreht sich der Teller nach rechts. In der mittleren Position ist der Teller im Ruhezustand. Einfacher geht
es nicht. Der Motor erzeugt im Hintergrund sehr wenig Geräusche, was normal ist.
Mit dem Edelstahl-Druckschalter in der Mitte des Multifunktionsschalters schalten Sie den Vakuummotor
ein, er klingt wie ein altmodischer Staubsauger. Der Schalter befindet sich während der Extraktion in
der gedrückten Position. Durch erneutes Drücken dieses Schalters schalten Sie den Vakuummotor aus.
Diese neu entwickelte Kombination aus Dreh- und Druckknopf funktioniert sehr intuitiv und natürlich.
Der Plattenreiniger ist jetzt einsatzbereit!
Abwasser - Ablaufschlauch
Überprüfen Sie, ob der Ablaufschlauch auf der rechten Seite des Schallplattenreinigers mit dem schwarzen
Gummistopfen verschlossen ist.
Warnung!
Betreiben Sie die Maschine niemals, ohne den Ablaufschlauch mit dem schwarzen Gummistopfen
abzudichten. Versuchen Sie unter keinen Umständen, die Maschine mit kontinuierlichem Abfluss zu
verwenden, indem Sie den Schlauch in einen Behälter hängen. In diesem Fall erlischt die Garantie sofort.
Bild 2&3: Position des Vakuumarms

Bedienungsanleitung
19
Im Lieferpaket finden Sie sowohl einen kleinen 7-Zoll- als auch einen
großen 12-Zoll-Teller. Sie können auswählen, welchen Teller Sie ver-
wenden. Sie können sowohl den kleinen als auch den großen Teller
für 10- und 12-Zoll-Platten verwenden. Um die Teller auszutauschen,
entfernen Sie den Teller (der große 12-Zoll-Teller ist standardmäßig
an der Okki Nokki One angebracht) von der Welle des Tellermotors.
Sie können dies einfach tun, indem Sie den Teller von der Maschine abziehen. Ziehen Sie immer auf beiden
Seiten gleichzeitig mit der gleichen Kraft. Dazu müssen Sie möglicherweise etwas Kraft anwenden.
Haben Sie keine Angst, der Teller kann durch diese Aktion nicht gebogen werden.
Der Teller ist unglaublich stark und immer gerade!
Mit dem großen Teller haben Sie mehr Kontrolle darüber, was Sie tun. Das Vinyl gibt weniger nach und
Sie haben beim Reinigen mit der Bürste einen definierten Druckpunkt. Wir empfehlen Ihnen, für Singles
immer den kleinen Teller zu nutzen.
Sie können Ihre Schallplatten mit oder ohne Labelabdeckung
reinigen, wie es Ihnen am besten gefällt. Sie können die
Etikettenabdeckung der Edelstahlplattenklemme einfach
durch Klicken anbringen und auch wieder entfernen.
Wenn Sie die Reinigungsflüssigkeit vorsichtig auftragen
und das Etikett trocken halten, ist die Labelabdeckung nicht
unbedingt erforderlich. Sie kann auch beim Gebrauch etwas
stören, einige Benutzer schwören jedoch
darauf, so dass sie
nun zum Standard im Lieferumfang gehört.
Reinigungstest
Wir empfehlen einen Testlauf auf einer alten, unwichtigen LP, um sicherzustellen, dass die Maschine
ordnungsgemäß eingerichtet ist und ordnungsgemäß funktioniert und um sich mit dem Reinigungs-
verfahren vertraut zu machen.
Reinigung
Legen Sie die LP auf den kleinen oder großen Teller und set-
zen Sie dann die Edelstahlplattenklemme mit oder ohne
Etikettenabdeckung ein. Vor dem Auftragen der Flüssigkeit wird
empfohlen, die Platte zunächst mit einer Standardplattenbür-
ste wie der Okki Nokki RCBN-Samtbürste (jedoch nicht mit der
Applikationsbürste) zu entstauben. Schalten Sie den Teller ein,
indem Sie den Drehknopf im Uhrzeigersinn drehen und tragen
Sie die Reinigungsflüssigkeit vorsichtig tropfenweise auf.
Dann mit der beigelegten Bürste verteilen. Das Auftragen
der richtigen Menge Reinigungsflüssigkeit ist eine Kunst für
sich und erfordert etwas Übung. Eine gute Faustregel lautet:
Decken Sie die Schallplatte und nicht die gesamte Maschine ab.
Stellen Sie sicher, dass die Flüssigkeit gleichmäßig auf der Oberfläche verteilt ist, und fügen Sie bei Bedarf
mehr Flüssigkeit hinzu. Sobald Sie mit dem Ergebnis zufrieden sind, können Sie die Bürste vorsichtig nach
untendrücken.Auf dieseWeiseentfernen Sie Schmutzaus denRillen. SetzenSie diesen Vorgang für3 oder 4
Umdrehungen fort und machen Sie dasselbe in entgegengesetzter Drehrichtung, indem Sie den Dreh-
knopf gegen den Uhrzeigersinn drehen.
Bild 6: die Reinigungsflussigkeit verteilen
Bild 4: 7 und 12 Zoll Teller
Bild 5: Edelstahlplattenklemme mit und
ohne Etikettenabdeckung

Bedienungsanleitung
20
Sie brauchen keine Flüssigkeit mehr hinzufügen. Versuchen Sie, das Platten
etikett trocken zu halten, und entfernen Sie verschüttete Flüssigkeit sofort.
Verwenden Sie gegebenenfalls die Labelabdeckung.
Absaugung
Sie können jetzt sowohl Schmutz als auch Flüssigkeit mit dem Vakuum-
system entfernen. Das Absaugen der LP kann in beiden Drehrichtungen
sowohl gegen den Uhrzeigersinn als auch im Uhrzeigersinn erfolgen.
Drehen Sie den Vakuum-Absaugarm über die Platte in Richtung Spindel,
(Abb. 4) und setzen Sie den Vakuum-Absaugarm auf die Platte. Schalten
Sie dann den Vakuummotor ein. Eine oder zwei Umdrehungen des Tellers
sollten ausreichen, um die Platte trocken zu saugen. Die Samtstreifen an
der Unterseite des Vakuum-Absaugarms bleiben aufgrund der hohen Saugkraft dieses neuen Modells
Okki Nokki ONE fast trocken. Wir raten dringend davon ab, das Vinyl zu reinigen, indem Sie den Vakuum-
Absaugarm während des Reinigungsvorgangs auf die Platte legen. Diese Methode führt dazu, dass die
Samtstreifen an der Unterseite Ihres Vakuum-Absaugarms nass werden. Dies erschwert das Absaugen
und Trocknen der Platte erheblich und erfordert viel mehr Umdrehungen. Wenn Sie dieses Verfahren
anwenden, sollten Sie berücksichtigen, dass die Garantie für die Okki Nokki erlischt. Wenn Sie die Platte
dennoch auf diese Weise reinigen möchten, ist eine andere Methode möglich. In diesem Fall sollten Sie
einen zweiten Vakuum-Absaugarm als zusätzliches Zubehör kaufen und als Reinigungsbürste verwenden.
Dieser zweite Arm kann dann immer ausgetauscht werden gegen den ersten, noch trockenen Arm,
der standardmäßig mit Ihrer Okki Nokki geliefert wird. Mit dieser Methode können Sie ohne Bürste reinigen.
Eine oder zwei Umdrehungen reichen normalerweise aus, um die gesamte Flüssigkeit aufzunehmen.
Mehr ist nicht nötig. Vermeiden Sie zu langes Saugen.
Schalten Sie den Vakuummotor aus, indem Sie den Edelstahldruckschalter erneut drücken.
Bewegen Sie den Absaugarm leicht nach rechts, bis er in die vorgesehene Ruheposition fällt.
Stoppen Sie dann den Tellermotor, indem Sie den Drehschalter in die mittlere Position bringen.
Denken Sie daran: Schalten Sie zuerst den Vakuummotor und dann den Tellermotor aus. Entfernen Sie
die Plattenklemme, möglicherweise zusammen mit der Labelabdeckung, drehen Sie die Platte um und
wiederholen Sie diesen Vorgang für die andere Seite der Schallplatte.
Leeren des kontaminierten Reinigungsflüssigkeitsbehälters
Neu bei der Okki Nokki ONE ist, dass der Abwasserstand auf der rechten Seite mit dem Schlauch
abgelesen werden kann. Leeren Sie den Vorratsbehälter rechtzeitig und lassen Sie den Füllstand
niemals über die Hälfte dieses Schlauchs steigen! Wenn der Behälter nicht rechtzeitig entleert wird,
kann die Maschine beschädigt werden, und die Garantie erlischt. Ziehen Sie nicht am Ablaufschlauch.
Wenn sich der Schlauch von der Maschine löst, können Sie die Maschine umdrehen und den Schlauch
wieder auf die Maschine schieben. Entfernen Sie die schwarze Gummikappe, ziehen Sie den Schlauch aus
dem entsprechenden Hohlraum und legen Sie den Schlauch in eine Flasche oder einen Behälter.
Bild 7:Vakuum niedrige Position
während des Saugvorgangs
Bild 8: Entleeren Sie den Reinigungsflüssigkeitsbehälter
This manual suits for next models
2
Table of contents
Languages:
Other Okki Nokki Turntable manuals