7
6
If the low voltage indicator on the back of the unit is red, it indicates insuffic-
ient voltage and unit needs to be charged.
C. To Charge the built in rechargeable battery.
Connect the power socket of the unit and AC power socket with the supplied
cable.
The charge indicator will turn from red to green meaning it has the sufficient
voltage.
The charge time should be 8-10 hours.
2. For DVD PLAYER
Turn on the amplifier and the red indicator will be lit.
Turn on DVD PLAYER and the red indicator comes on.
Open the compartment of DVD by pressing OPEN/CLOSE button and
insert the disc.
Connect the VIDEO output jack on either side of the unit and TV, the picture
will be transferred from DVD to TV screen.
Adjust main volume controls of the amplifier and DVD/TAPE to the desired level.
Adjust treble control and bass control to the desired level.
Press the previous button for previous song.
Press the next button for next song.
Press pause button for pause.
Press stop button for stopping.
Press track button to combine with Karaoke.
3. For TAPE/PLAYER
Press STOP/EJECT button and insert tape into cassette holder, Press PLAY to
begin playing.
Adjust volume controls of the amplifier and DVD/TAPE to the desired level.
Adjust treble and bass to desired level.
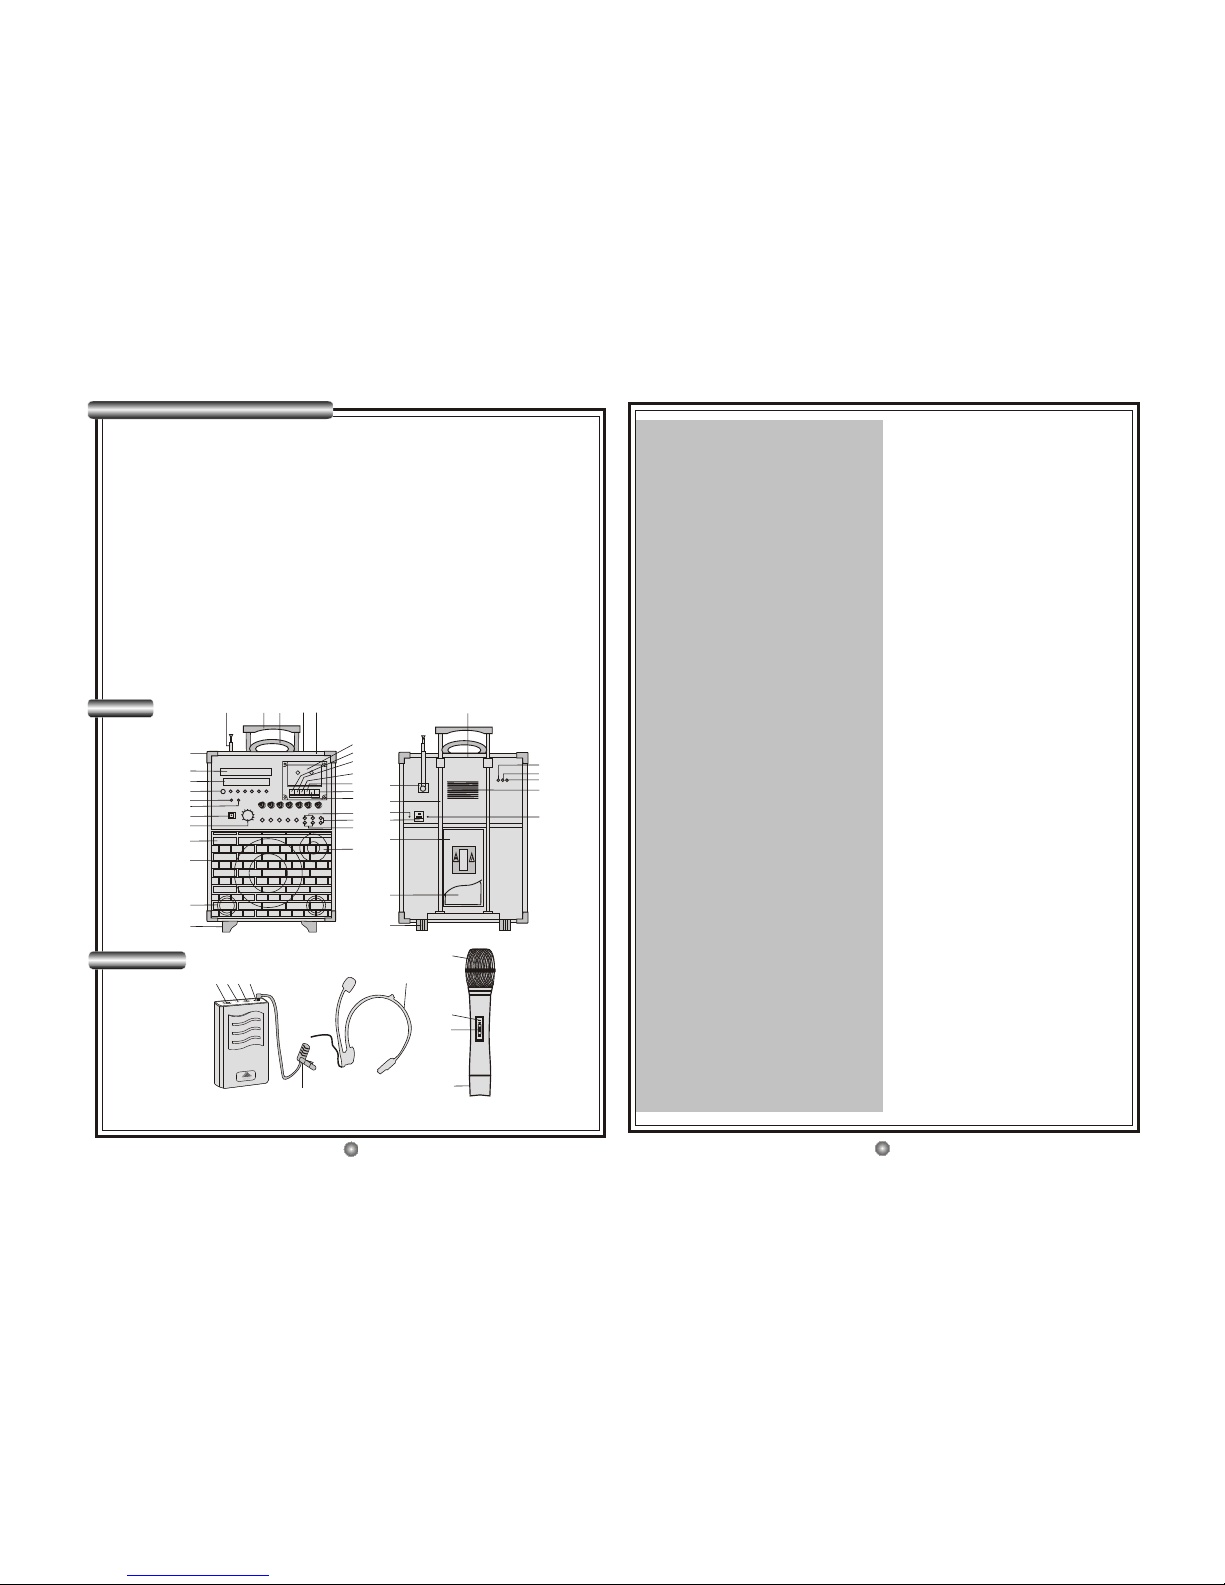
4. For wire mic
Unit is equipped with three Mic jacks to use three wired mics simultaneously.
Adjust echo control to the desired level.
Use the control knobs located at each jack to adjust the volume for each mic.
11
5. For wireless mic
Once the switch is turned on, the receiver will immediately begin to feedback
signals from the wireless mic.
For headset mic, Insert a 9V battery into the bodypack transmitter and turn on
switch. The power indicator as well as RF indicator of the system will be lit.
Adjust echo control, treble and bass to the desired level.
Turn the volume control of Mic to the proper position.
6. Play and record by DVD and Player/Recorder
Open holder and insert tape.
Turn on amplifier.
Adjust the wired/wireless mic.
Turn on player.
If desired, sing along while music is being played.
To record, press REC & PLAY button simultaneously.
7. To play music from an outside source, plug cable into Line-in. Use the main
volume control to adjust the volume to the desired level.
8. For external audio/video appliance
This unit is equipped with two groups RCAaudio L+R/video output jacks
and one group RCAaudio L+R/video jack. DVD audio and video can be
output to other audio/video devices through RCA audio L+R/video output
jack. External audio and video can be input to this unit through audio
L+R/video input jack.