TOTAL POS SOLUTION COMPANY
OKPOS
Manual
Service
ZED POS
1. Configuration of Main Board
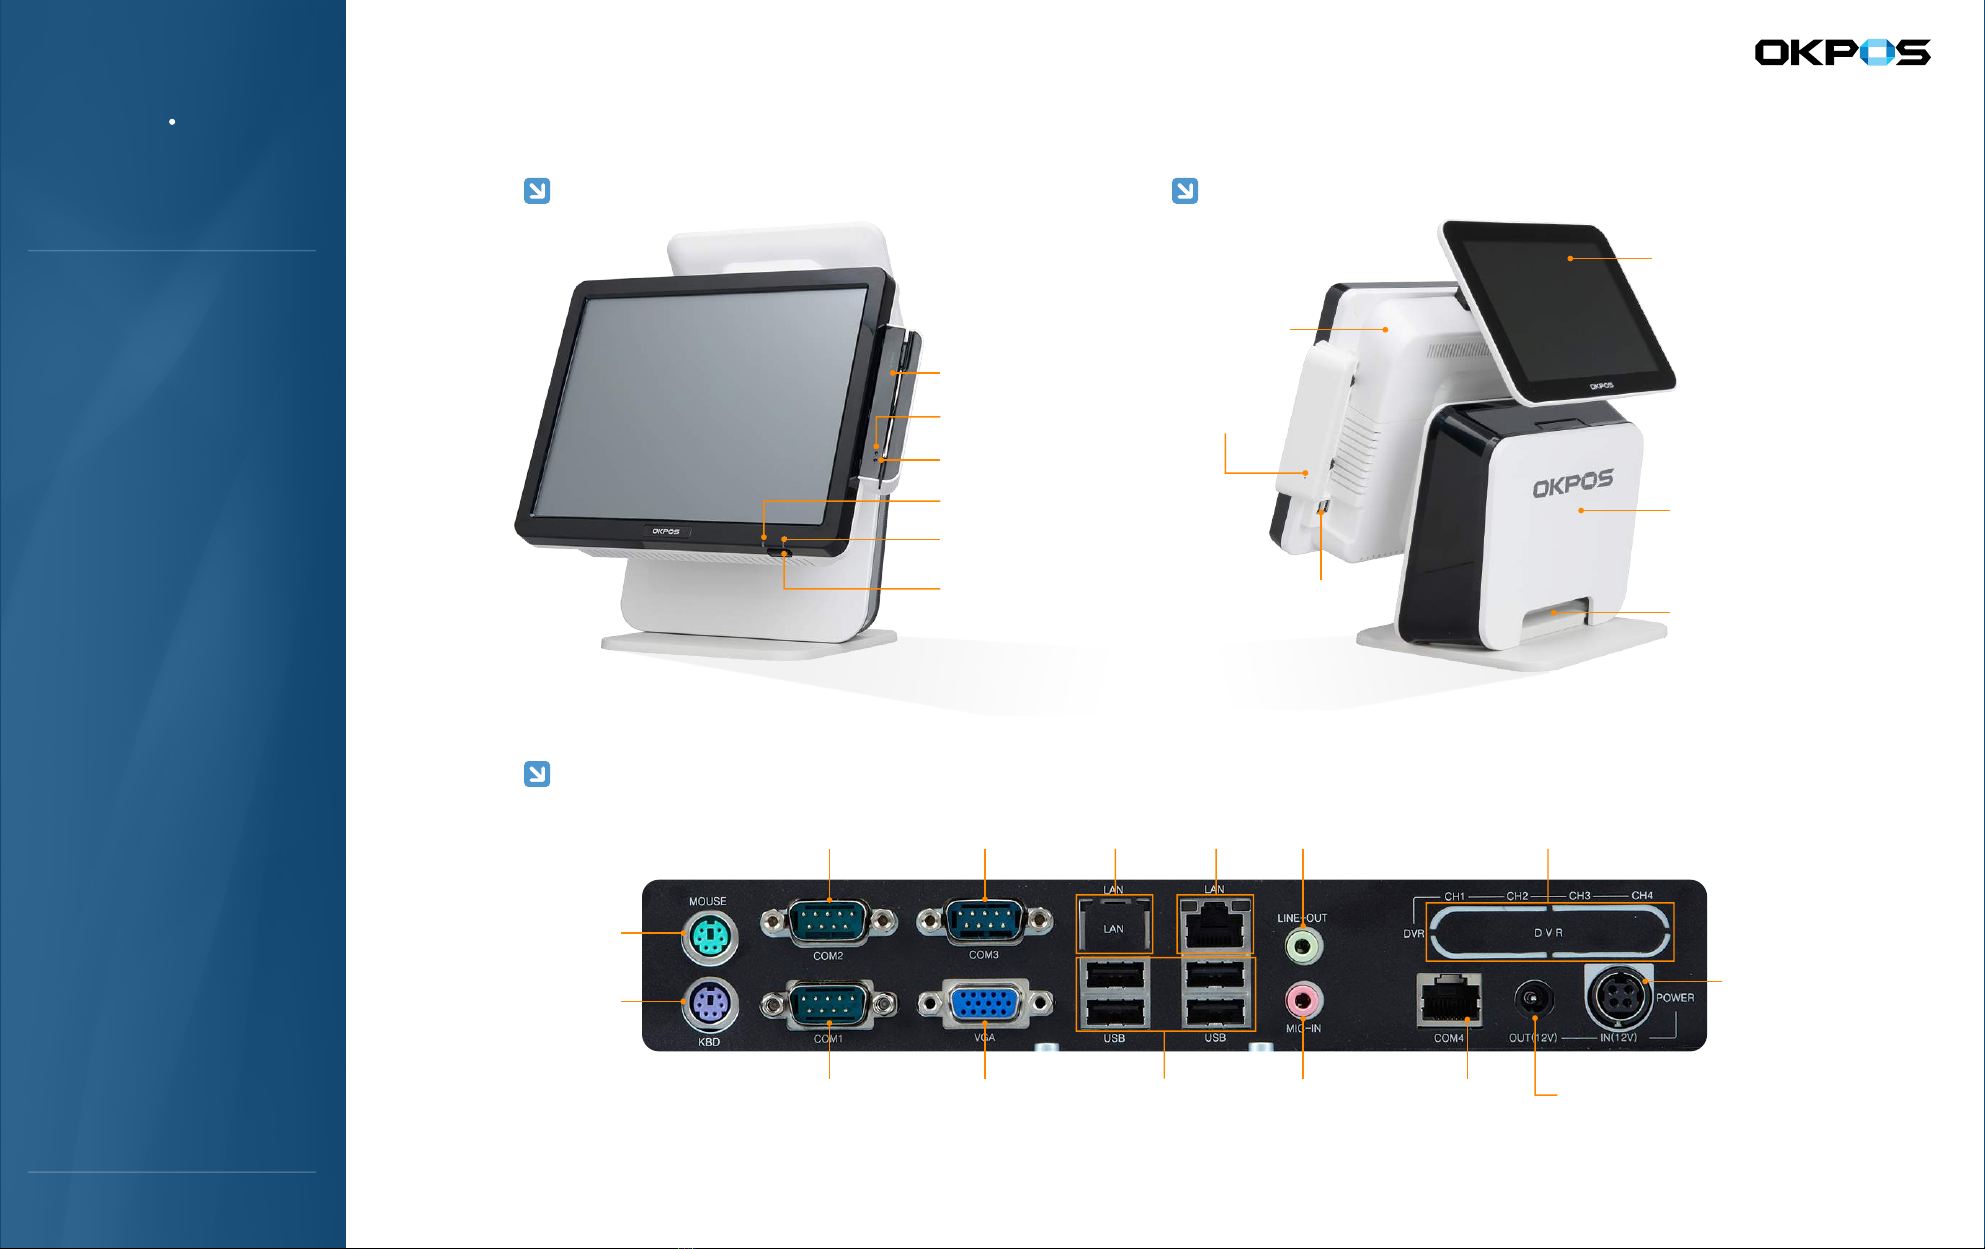
2. Configuration of Major I/O Ports
Appendix
1. Stand
2. Cable Cover
3. Rear Cover
4. Main Press
5. Internal System Configuration
6. Storage Replacement
Assembly / Disassembly
1. System On/Off
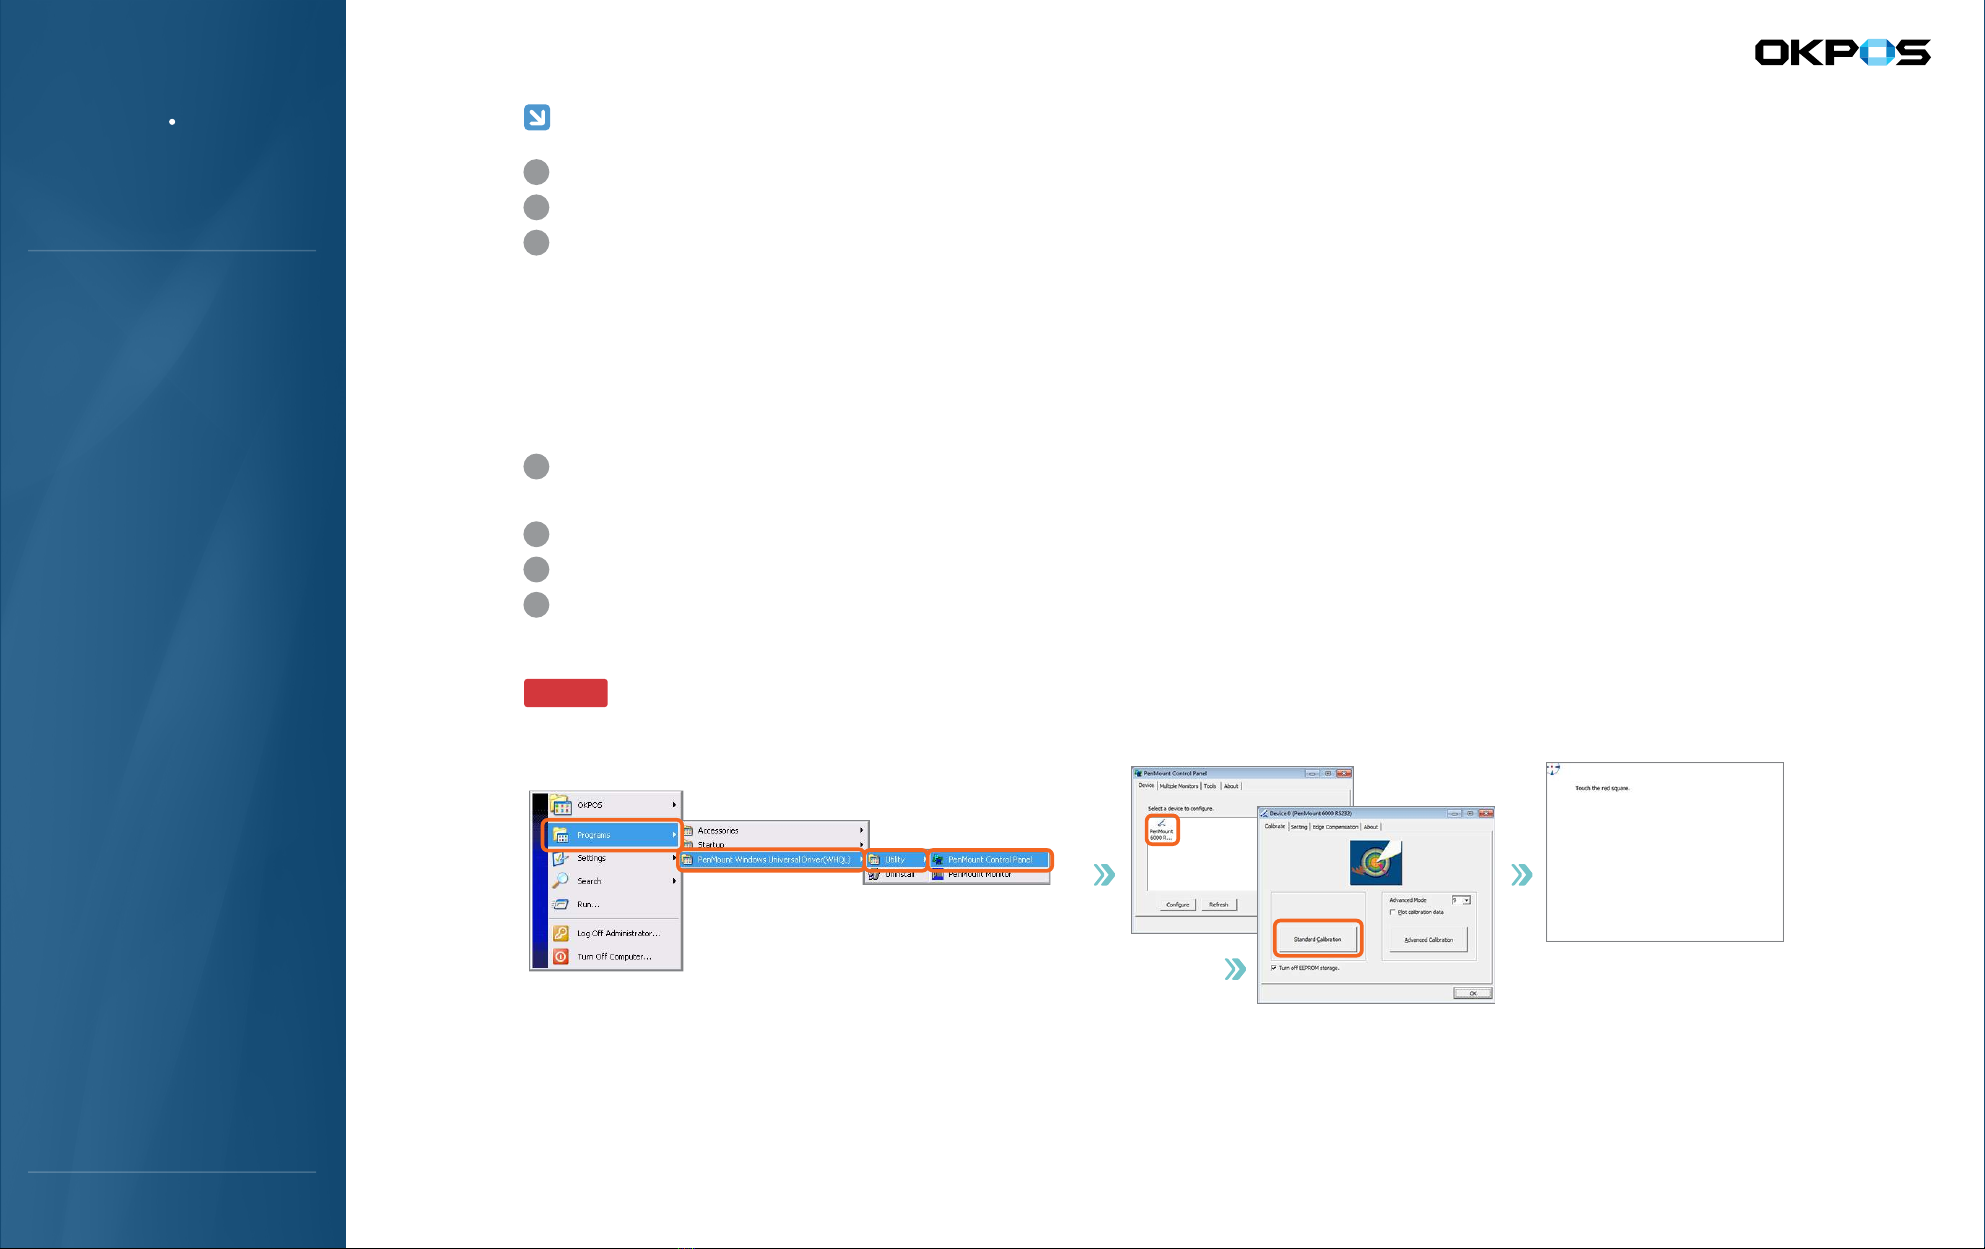
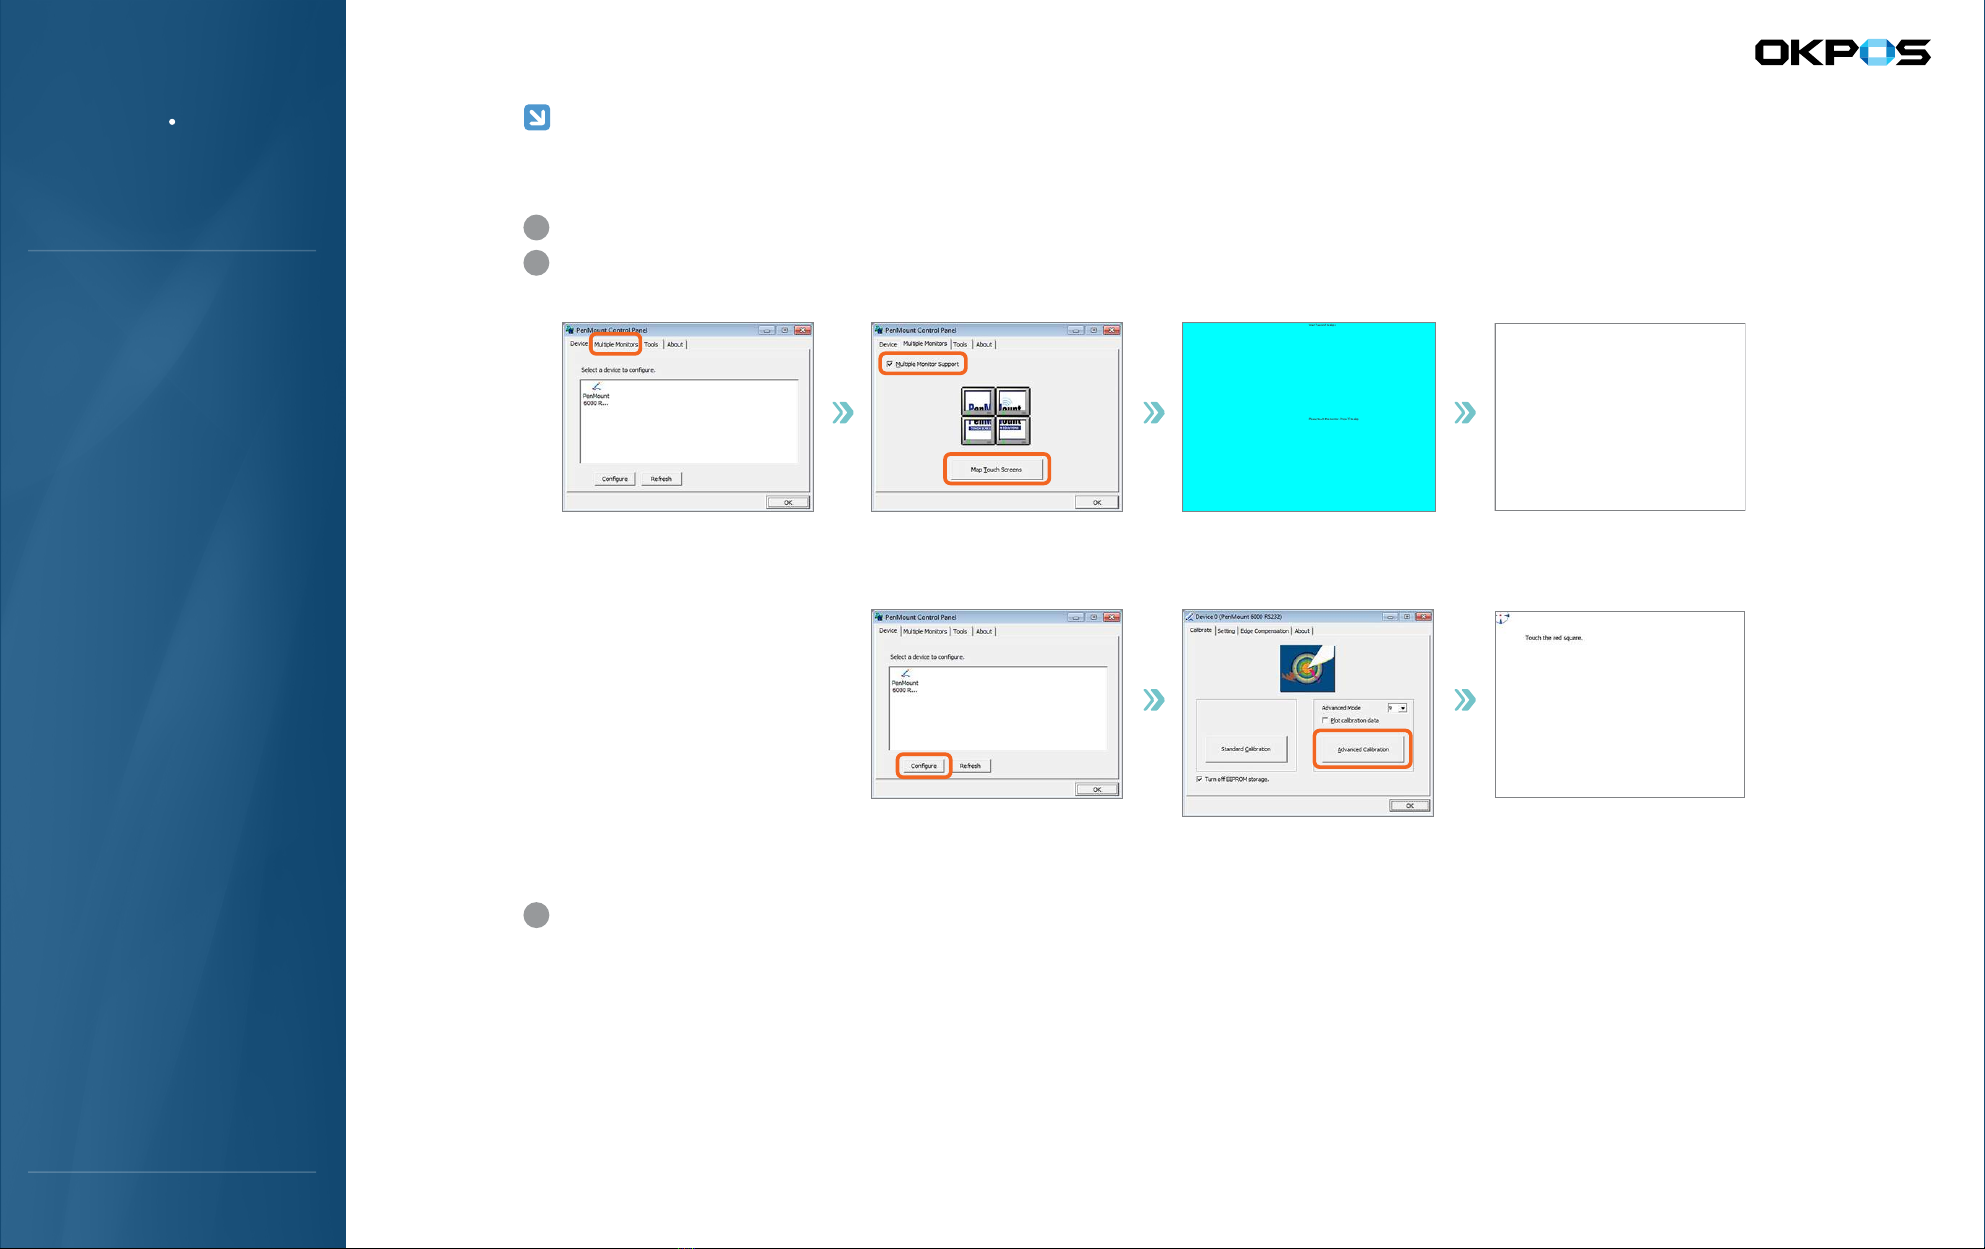
2. Touch Screen
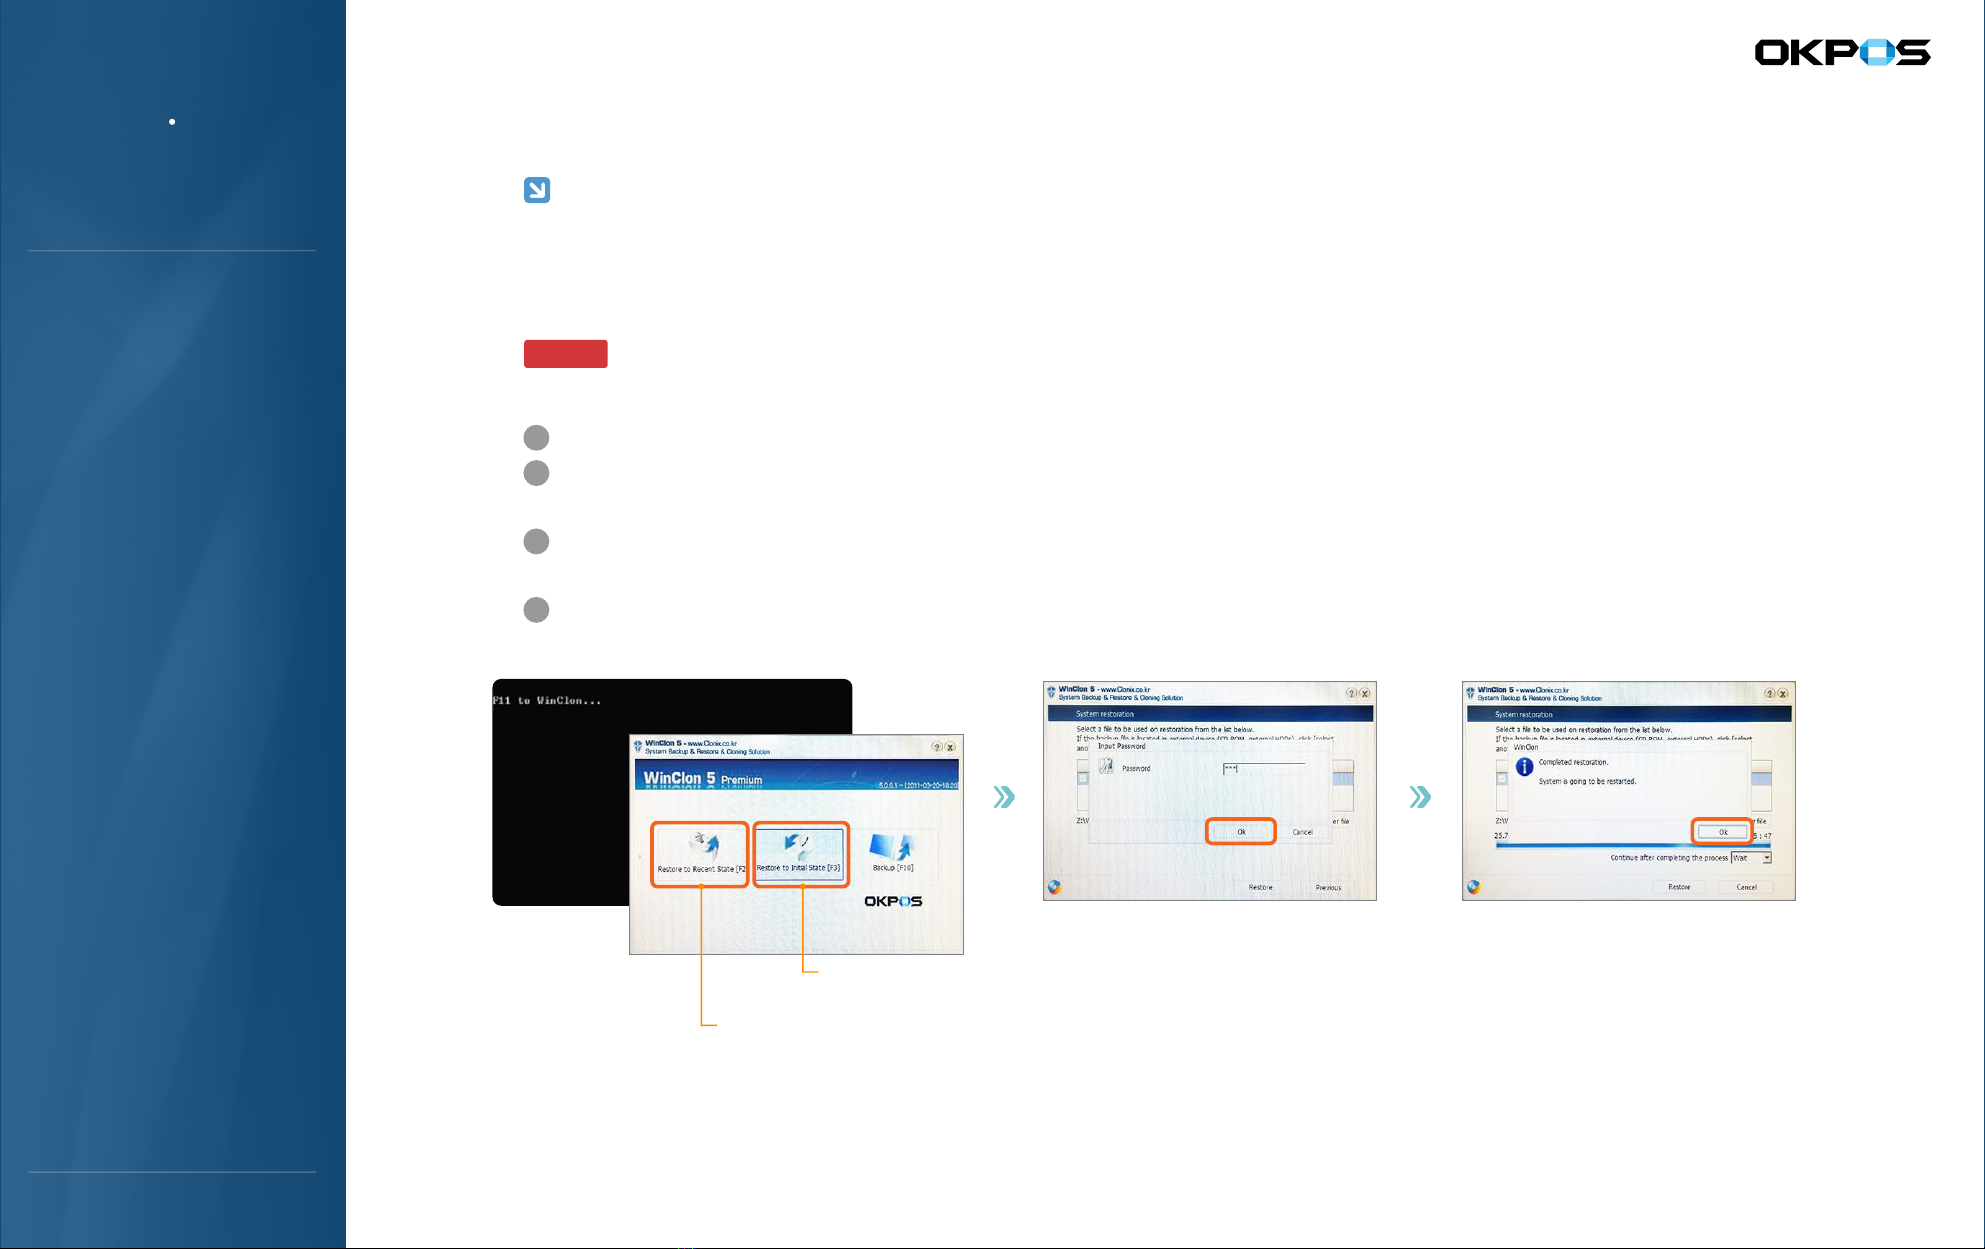
3. Disk back-up and Recovery
4. Dual monitor (Optional)
5. Magnetic Stripe Reader (Optional)
System Installation
and Usage
1. Preview
2. Features and Specifications
3. Parts Description
System Introduction
: Wall mount, DVR, 9.7-inch & 15-inch dual monitorVarious Option
: I/P ports are located on the upper part of the body
Easy Installation
: Easy assemble and disassemble with hand screw
Smart Structure
: Intel Atom dual-core installed. no-noise, low energy consumptionStable System
Features
● ● ● ● ● ● ● ● ● ● ● ● ● ● ● ● ● ● ● ● ● ● ● ● ● ● ● ● ● ● ● ● ● ● ● ● ● ● ● ● ● ● ● ● ● ● ● ● ● ● ● ● ● ● ● ● ● ● ● ● ● ● ● ● ● ● ● ● ● ● ● ● ● ● ● ● ● ● ● ● ● ● ● ● ● ● ● ● ● ● ● ● ● ● ● ● ● ● ● ● ● ● ● ● ● ● ● ● ● ● ● ● ● ● ● ● ● ● ● ● ● ● ● ● ● ● ● ● ● ● ● ● ● ● ● ● ● ● ● ● ● ● ● ● ● ● ● ● ● ● ● ● ● ● ● ● ● ● ● ● ● ● ● ● ● ● ● ● ● ● ● ● ● ● ● ● ● ● ● ● ● ● ● ● ● ● ● ● ● ● ● ● ● ● ● ● ● ● ● ● ● ● ● ● ● ● ● ● ● ● ● ● ● ● ●
2. Features and Specifications
This Class-A-digital device is developed for use in commercial, industrial, business environment
and is aimed at being used in public places not in homes.
Class-A-digital device
Product Designs and specifications are subject to change without prior notice.
Contents of this manual may vary depending on model type.
Highly recommended to use standard parts of this product and full operation procedures and precautions familiarization are advised prior to use.
■
■
■
Manual is designed for the safe and convenient use of the system and includes technical information such as assembly, installation
and disassembly of this product.
● ● ● ● ● ● ● ● ● ● ● ● ● ● ● ● ● ● ● ● ● ● ● ● ● ● ● ● ● ● ● ● ● ● ● ● ● ● ● ● ● ● ● ● ● ● ● ● ● ● ● ● ● ● ● ● ● ● ● ● ● ● ● ● ● ● ● ● ● ● ● ● ● ● ● ● ● ● ● ● ● ● ● ● ● ● ● ● ● ● ● ● ● ● ● ● ● ● ● ● ● ● ● ● ● ● ● ● ● ● ● ● ● ● ● ● ● ● ● ● ● ● ● ● ● ● ● ● ● ● ● ● ● ● ● ● ● ● ● ● ● ● ● ● ● ● ● ● ● ● ● ● ● ● ● ● ● ● ● ● ● ● ● ● ● ● ● ● ● ● ● ● ● ● ● ● ● ● ● ● ● ● ● ● ● ● ● ● ● ● ● ● ● ● ● ● ● ● ● ● ● ● ● ● ● ● ● ● ● ● ● ● ● ● ●
1. Preview
This Product is classified as an industrial equipment named POS system and is a credible product which obtained electromagnetic waves certification.
System Introduction