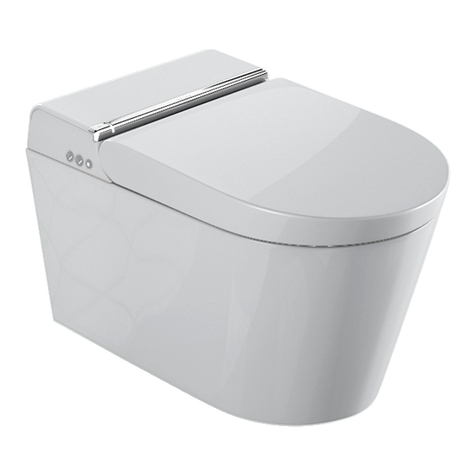
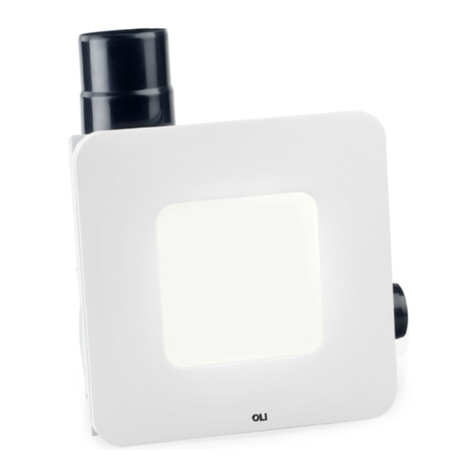
OLI eLINE 880876 User manual

AC10000883589.1
eLINE
USER MANUAL
BEDIENUNGSANLEITUNG
ИНСТРУКЦИЯ ПО ПРИМЕНЕНИЮ


4
4
4
5
5
6
6
7
10
13
14
15
21
EN
1 - ЦЕЛЕВАЯ АУДИТОРИЯ
2 - ОБЯЗАТЕЛЬНО ДЛЯ ОЗНАКОМЛЕНИЯ
3 - БЕЗОПАСНОСТЬ И СИМВОЛИКА
4 - ПЕРЕД УСТАНОВКОЙ
5 - УСЛОВИЯ СБОРКИ НА МЕСТЕ
6 - ПРОДУКТ
7 - ТЕХНИЧЕСКИЕ ХАРАКТЕРИСТИКИ
8 - ПЕРВОЕ ИСПОЛЬЗОВАНИЕ
9 - ПРИНЦИП ДЕЙСТВИЯ
10 - ВЫЯВЛЕНИЕ НЕИСПРАВНОСТЕЙ
11 - НЕОБХОДИМЫЕ МЕРЫ ПРЕДОСТОРОЖНОСТИ
12 - ДОПОЛНЕНИЯ
13 - ОФИЦИАЛЬНОЕ УВЕДОМЛЕНИЕ
22
22
22
23
23
24
24
25
28
31
32
33
39
40
40
40
41
41
42
42
43
46
49
50
51
57
DE
RU
1 - ANWENDER
2 - NOTWENDIGE INFORMATIONEN
3 - SICHERHEIT UND SYMBOLE
4 - VOR DER MONTAGE
5 - MONTAGEBEDINGUNGEN VOR ORT
6 - PRODUKT
7 - TECHNISCHE EIGENSCHAFTEN
8 - ERSTE NUTZUNG
9 - FUNKTIONSPRINZIP
10 - FEHLERBEHEBUNG
11 - NOTWENDIGE VORSICHTSMASSNAHMEN
12 - ERWEITERUNGEN
13 - RECHTLICHE PUNKTE
1 - TARGET AUDIENCE
2 - MANDATORY READING
3 - SAFETY AND SYMBOLOGY
4 - BEFORE ASSEMBLY
5 - ON-SITE ASSEMBLY CONDITIONS
6 - PRODUCT
7 - TECHNICAL FEATURES
8 - FIRST-TIME USE
9 - OPERATING PRINCIPLE
10 - PROBLEM SOLVING
11 - NECESSARY PRECAUTIONS
12 - ADD-ONS
13 - LEGAL NOTICE

44
EN
DE
RU
1 - TARGET AUDIENCE
This user manual is intended for installation companies specialising in the field of sanitary products with an
electronic component.
2 - MANDATORY READING
The installation company commits to read, understand and observe the installation instructions, in particular,
the section on safety regulations. In case of any doubts, contact the manufacturer.
3 - SAFETY AND SYMBOLOGY
SAFETY WARNINGS
The pictograms and safety instruction signs, precautionary measures and warnings in these assembly
instructions have the following meanings:
Warning! Potentially damaging situation, can damage the product or something around it.
Important! User instructions and other useful informations which facilitate the use of the product
in accordance with the standards.
Be aware of humidity
Electrical hazard
Grid connected system – AC
Bluetooth connection system
Radio connection system

55
EN
DE
RU
4 - BEFORE ASSEMBLY
Before the start of the installation you should fully read and understand the assembly instructions supplied with
the product.
The system should be assembled, installed and connected only in accordance to these instructions.
Before installing your system, confirm the compatibility of the installation at www.oli-world.com.
When planning and installing sanitary equipment, local, national and international regulations and standards
should be observed and respected.
Examine the content of the product before beginning the assembly to check if it is complete or check for any
damages.
A product that is incomplete, damaged or has detectable faults should not be assembled. No liability will be
accepted for damage caused by innapropriate transportation or temporary storage.
If you wish to install this product’s Bluetooth accessory, please make sure you follow the correct
installation methodology available at page 15.
5 - ON-SITE ASSEMBLY CONDITIONS
Pressure 0,5bar to max of 10,0 bar.
Grid voltage
110-240V AC/50-60Hz with a main switch for all poles connected to the mains with a contact opening
capacity of 3mm.
Avoid direct exposure to sunlight.
Unobstructed space of 1200mm.

66
EN
DE
RU
Nº DESCRIPTION
1 INFRARED SENSOR
2ENGINE
3TRANSFORMER
4 ASSEMBLY INSTRUCTIONS
6 - PRODUCT
4
1
2
3
220
150
7,65
INFRARED eLINE
7-TECHNICAL FEATURES
TECHNICAL DATA
Nominal mains voltage 110 -24 0 V AC
Mains frequency 50-60 Hz
Type of grid connection FAST CONNECTION
Working pressure 0,5 - 10 bar
Power consumption 8 W
Stand-by power
consumption <0.1 W
eLINE
Automatic dual flush electronic system;
System with manual dual flush via sensor;
Infrared beam sensor with detection of up to 900mm;
Configurable hygienic flush (OFF - 24h);
Configurable pre-flush;
Frontal in stainless steel;
Statistical recording of flushes (APP);
Bluetooth connection and mobile application via
appropriate accessory;
Radio remote control via appropriate accessories;
ENVIRONMMENTAL CONDITIONS
Working and storage
temperature -5ºC - +70ºC

77
EN
DE
RU
CALIBRATION
To ensure the correct operation of the product in under various environmental and installation conditions, the
infrared sensor is equipped with an automatic calibration function.
The eLINE control plate’s infrared sensor system has a self-calibrating start-up routine that allows the user
to change the operating parameters of the control plate before it goes into full operation, ensuring that the
system users cannot tamper with the product.
After connecting the product to the mains, the infrared sensor will go into calibration which will be signalled
with a flash of the LED. Then, it will be available for manual parameterisation and after that period, a set of 3
consecutive flashes will signal the entry into normal operating mode.
8 - FIRST-TIME USE
MANUAL PARAMETRISATION
STAND BY
After the calibration period, it is possible to manually change some operating parameters of the system for 3
minutes.
- During the period of manual parameterisation of the system, the functions of: automatic flushing, manual
flushing, hygienic flushing, pre-flushing and cleaning mode will not be active and will come into operation after
the end this period.
After the manual parameterisation period is concluded, the system will do a small sensor recalibration and will
be ready to be used.
X3X1
CALIBRATION STAND BY
MANUAL
PARAMETERISATION

88
EN
DE
RU
2
1After connecting the control plate to the power supply, the plate will confirm it has power through 1 flash.
The control plate is now be available for
parameterisation for a period of 3 minutes.
After 20 seconds, you should see another
flash of the LED signalling the conclusion of
the calibration.
CLICK
2
CALIBRATION
1
Note: To ensure the correct operation of the product, the calibration must be made with the
sensor/control plate applied to the wall. If this step is not taken, the product may not detect the
user and unwanted flushes may occur. Should any of these situations happen, turn o the system
and restart the procedure.
X1
X1

99
EN
DE
RU
During the manual parameterisation period, place your
hand in front of the infrared sensor, covering it completely.
During this period the sensor will give feedback through the
LED.
*To complete the change, wait 3 minutes without interacting with the eLINE control plate.
MANUAL PARAMETERISATION
LED
FEEDBACK FUNCTION PROCEDURE INFORMATION LED
FEEDBACK
5’’ = 2’’ AF + +
AF - OFF
AF - Simple Flush
AF - Dual Flush
3x
1x
2x
10’’ = 2’’ HF + + HF - Activated (24h)
HF - Deactivated
1x
2x
15’’ = 2’’ + +
Flush volume: 6L/3L
Cleaning Mode: Active
Cleaning mode: 60s
Pre-flush: inactive
AF: dual flush
HF: inactive
HF: 24hr
Range: Medium
5x
To pass each parameterisation, it is necessary to interact with the control plate again.
Blinking light
Feedback light
Place hand over the sensor
Remove hand from the sensor
AF Automatic Flushing
HF Hygienic Flushing
Reset, resets to factory settings
The manual parameterisation of the infrared sensor operation has a period of 3 minutes*, which is renewable
at the end of each successful change.

1010
EN
DE
RU
9 - OPERATING PRINCIPLE
The infrared sensor of the eLINE control plate
automatically detects movements in its field of vision
in an intelligent way. This sensor has a field of vision
parameterised from factory set at 750mm, configurable
up to 900mm (APP), and is divided in two dierent
detection zones, designed to allow the user to flush
manually or to allow the equipment to make automatic
flushes.
SYSTEM OPERATION
A
AAutomatic FlushManual Flush
By placing the hand close to the
sensor, it is possible to make
complete or partial flushes.
With the Radio accessories, it is also possible to flush remotely with the respective remote control.
See “12 - ADD-ONS” for further details.
In intelligent detection mode, the system will automatically distinguish
between the complete or partial flush according to the user’s action,
without needing to interact with the system.

1111
EN
DE
RU
INTERACTION | MANUAL FLUSH
Partial flush
Complete flush
The sensor is activated by swiping
the hand.
The sensor is activated by placing
the hand.
The zone intended for the activation of manual flushes has a minimum range of 30mm and a maximum
range of 50mm from the sensor. To quickly trigger a flush, you only need to swipe the hand over the
sensor in less than 2” to make a partial flush. If a complete flush is desired, the user only needs to keep his
hand over the sensor for more than 2”.
Between 4” and 10” the sensor will not interact, and after 10” it will enter into cleaning mode.
In any of these activation modes, the sensor will flash the LED as soon as it detects the presence of the
hand or any other object.
0’’ - 2’’
2’’ - 4’’

1212
EN
DE
RU
x - 500mm 500 - 900mm
Partial flush
Complete flush
INTERACTION | AUTOMATIC FLUSH
A
In the short-range zone, the system will make a
complete or partial flush according to the user’s
length of stay.
In the long-range zone, the system will only make
partial flushes according to the user’s length of stay.
Minimum length of stay: 10”.
10’’ - 60’’
>60’’
>10’’
The eLINE control plate’s infrared sensor has a zone
to automatically detect the user’s action and a smart
processing to determine the correct flush. The automatic
detection is then divided in 2 dierent zones, short range
with 500mm, and long range up to 900mm, intended to
cover the toilet and the area in front of it.
eLINE is factory set at 750mm.

1313
EN
DE
RU
10 - PROBLEM SOLVING
OCCURRENCE PROBABLE CAUSE PROCEDURE
By interacting with the control
plate, the LED flashes with the
detection but does not flush
Software failure Restart the system**
Servomotor is not connected correctly
Check connections
Servomotor defect
Replace the servomotor
Absence of water in the tank
Check the wall tap
Check for any jamming of the inlet valve
Check the presence of water in the
network
By interacting with the control
plate, the LED does not flash with
the detection and does not flush
Software failure
Restart the system**
Incorrect connections Check connection to the transformer
Power outage
Check eletricity connection
Faulty transformer
Replace the transformer
Incorrect calibration
Restart the system and reset it to factory
settings
Faulty sensor
Replace the sensor
The LED flashes at 3-second
intervals and does not flush
Active cleaning mode Restart the system**
The cleaning of the ceramics is
not eective Flush volumes may be set incorrectly
Check flush mecanism configuration
Check correct functioning of the filling
mecanism
In the BLUETOOTH version, calibrate the
engine
Water flows continuosly in the
ceramic
Software failure
Restart the system**
Defective seal
Replace flush mecanism seal
Defective flush mecanism
Replace flush mecanism
Defective filling mecanism Replace filling mecanism
Water leakeage into the toilet after the
flush
In the BLUETOOTH version, calibrate the
motor
Unintended flushes
Hygienic flush activated
Check funtion parameter
Incorrect calibration
Restart the system**
Incorrect flushes
Software failure Restart the system**
Dirty or humid control plate
Check/clean the interior and the exterior
of the control plate
Incorrect calibration
Restart the system**
**To correctly restart the system:
- You must disconnect the sensor from the power supply identified with the red marker;
- You must wait for more than 30 seconds;
- Finally, you must reconnect the power supply and repeat the process described in the point “8 - First-Time Use”.

1414
EN
DE
RU
2
1
11 - NECESSARY PRECAUTIONS
CLEANING MODE
The control plate has a cleaning mode that allows the user to clean it without making an unwanted flush.
The cleaning mode function can be
initiated by covering the sensor for 10
seconds.
For 60 seconds, the cleaning mode is
active, flashing every 3 seconds.
After this period, the system returns to its
normal operating mode.
CONTROL PLATE CLEANING
The surface is easy to clean and maintain. Use a soft cloth and a soap and water based solution for regular
cleaning. Then, clean it with a dry cloth.
Avoid the use of abrasives ou solvents, which damage the control plate’s surface.
Damages caused by improper use or treatment, are not covered by the current warranty terms.
X1

1515
EN
DE
RU
12 - ADD-ONS
BT 4.0 Bluetooth Low Energy
Approx. 10 m (free field), depending on mobile device and
on installation
Bluetooth Range
Power Consumption
Bluetooth
15 x 35 x 24.5 mm
Approx. 12 mA permanent
Approx. 38 mA maximum
4 pole approx. 200 mm, KCC SK-2 female connector
compatible
Size
Cable
BT 4.0 Bluetooth Low Energy
Aprox. 10 m (campo livre), dependendo do dispositivo móvel
e da instalação
Alcance Bluetooth
Consumo de Energia
Bluetooth
15 x 35 x 24.5 mm
Aprox. 12 mA permanente
Aprox. 38 mA máximo
4 pólos, aprox. 200 mm, conector femea KCC SK-2
compatível
Cabo
Dimensões
PT
EN
POWER OFF
BLUETOOTH
This system has 2 sets of acessories that allow you to quickly expand its functionalities and with an easy
installation.
- Bluetooth
This product allows the access via Bluetooth technology to the configuration of all the sensor’s functionalities
and the statistical recording of the flushes through the installation of the appropriate receiver, compatible with
all versions of the product.
- Radio and Remote Control
This product allows you to flush remotely without having to contact the product directly, through a 868.4 MHz
radio connection and a remote control designed to facilitate usability in situations of constrained mobility. The
installation of the appropriate receiver is required.
1 2
Assemble the Bluetooth receiver in the
appropriate assembly point.
Disconnect the 2-pin connector, identified with
red marker, to ensure that the system is not
connected to the power grid.
The Bluetooth receiver allows Bluetooth access to the system with compatible devices. The installation of this
accessory should be carried out by accessing the inside of the tank and with the power supply disconnected.

1616
EN
DE
RU
5
1
OPEN
2
POWER ON
APP
INSTALAR | INSTALL
3
4
Then, connect the Bluetooth receiver cable (blue) to the appropriate connector on
the infrared sensor, both identified with a white marker and place the cables in the
respective available guides.
Reconnect the power cable identified with a red marker to start the system.
The system is ready to be used with the
application available in the respective
Stores.
IR WC eLINE / Pronto
Serial#_000000
Select the device you would like to
configurate from the list.

1717
EN
DE
RU
6
APPLICATION FUNCTIONALITIES TABLE
DEVICE NAME Allows you to change the name of the device
STATUS Allows you to see the status and informations of the system’s
various components
DEFINITIONS
Cleaning mode
Allows you to switch on and o (ON/OFF)
Allows you to set the time from 60" to 180".
Sensor’s range Allows you to define the maximum range to Short (500mm), Me-
dium (750mm) and Long (900mm).
Automatic pre-flush
Allows you to switch on and o (ON/OFF)
Automatic flush Allows you to set the flush mode as switched o (OFF), simple
flush (SIMPLE) ou dual flush (DUAL).
Hygienic flush Allows you to switch on and o (ON/OFF)
Allows you to set the time from 3h to 72h.
ENGINE
CONFIGURATIONS
Engine Calibration*
Allows you to calibrate the engine’s rest position
STATISTICS
It is possible to consult the statistics of the equipment usage such
as: total number of flushes, water consumption, total number of
hours of operation and average usage in the last 30 days.
Flush volume Allows you to choose the volume of the flush system in the
application.
With the device selected, the settings can be changed according to the table:
*ENGINE CALIBRATION - If necessary, it is possible to adjust the engine’s calibration, by adjusting its
rest position to the installation conditions. This mode is only accessible by entering the correct password
(1954).
When interacting with the application in this mode, the “+” and the “-” buttons allow the rest position to be
rotated in 0.5º increments in both directions. This setting will be permanently recorded in the engine.
ZOOCK!!
0º
CHECK
IR WC eLINE / Pronto
Lorem ipsum dolor sit amet, consectetuer
adipiscing elit, sed diam nonummy nibh euismod
tincidunt ut laoreet dolore magna aliquam erat
volutpat. Ut wisi enim ad minim veniam, quis
nostrud exerci tation ullamcorper suscipit lobortis
+-
IR WC eLINE / Pronto
Lorem ipsum dolor sit amet, consectetuer
adipiscing elit, sed diam nonummy nibh euismod
tincidunt ut laoreet dolore magna aliquam erat
volutpat. Ut wisi enim ad minim veniam, quis
nostrud exerci tation ullamcorper suscipit lobortis
+-

1818
EN
DE
RU
Frequency 868.4 MHz
Approx. 50 - 60 µA (closed current)
Approx. 5 - 6 mA (active)
Approx. 10 m (free field)
Approx. 35 x 15 x 28 mm (housing incl. button, without cable)
Operating temperature: 0°C ... 70°C
Storage temperature: -20°C ... +70°C
Range
Current Consumption
Environmental conditions
Measures
Frequência 868.4 MHz
Aprox. 50 - 60 µA (corrente fechada)
Aprox. 5 - 6 mA (activo)
Aprox. 10 m (sem interferência)
Aprox. 35 x 15 x 28 mm
Temperatura Operacional: 0°C ... 70°C
Temperatura de Armazenamento: -20°C ... +70°C
Extensão
Consumo Corrente
Condições Ambientais
Dimensões
PT
EN
RADIO
The Radio receiver allows the connection to the remote control for remote flushes. This accessory can be
installed on the product at any time but is only compatible with the Radio version of the product.
Adressing
Frequency 868.4 MHz
Individual 32 bit address, tuneable on receiver
Up to 10 m
3 V DC (2 x LR-1 alkaline)
Approx. 3 years or 100.000 flushings
Approx.105 x 65 x 19 mm
Via clips on the support rail
IP 54
Power Supply
Battery Life
Dimensions
Range
Protection Class
Assembly
Endereçamento
Frequência 868.4 MHz
Endereço individual de 32 bits, sintonizável no receptor
Até 10 m
3 V DC (2 x LR-1 alcalina)
Aprox. 3 anos ou 100.000 descargas
Aprox. 105 x 65 x 19 mm
Através de clipes nas barras de suporte
IP 54
Fornecimento de energia
Bateria
Dimensões
Extensão
Classe de Protecção
Montagem
PT
EN
O comando remoto Rádio permite a execução de descargas remotas quando emparelhado a um recetor
compatível.
1 2
Assemble the Radio receiver on the
appropriate assembly point.
Connect the Radio receiver cable to the
appropriate connector on the infrared sensor
and place the cables into the available guides.

1919
EN
DE
RU
5
x2
x2
1
2
OPEN
x2
1
2
3
4
Open the battery cover of the remote control and place the batteries in the correct setting.
To assemble the control unit on the supports bars, it is possible to use the intended accessories by
closing the flexible strips with the included screws.
PRESS
1
2
3
The system is ready to be used. To pair it with a remote control device, you must press the button on
the receiver, then press one of the buttons in the remote control. The pairing is confirmed by a flash of
the Radio Receiver’s LED indicator.

2020
EN
DE
RU
2x
PRESS
3sec.
8sec.
3sec.
8sec.
DELETE MEMORY
APAGAR MEMÓRIA
The remote flushing may take up to 3 seconds to be performed by the system, depending on the
conditions in the installation site.
Dozens of remote devices can be stored and configured on a single receiver. To erase the
configuration, press and hold the appropriate button on the receiver for 8 seconds, confirmed
with a double flash of the indicator LED.
This manual suits for next models
1
Table of contents
Languages:
Other OLI Plumbing Product manuals
Popular Plumbing Product manuals by other brands

VADO
VADO AXCES ASTRA AX-AST-106/CD-CP Instruction booklet

Grohe
Grohe MintaTouch 31 359 manual

Taco
Taco 005-0012 instruction sheet

A&E
A&E SALACIA Owner's manual and installation guide

Hans Grohe
Hans Grohe AXOR Select 18311181 Assembly instructions

Franke
Franke CMPX538RS Installation and operating instructions

KWC
KWC 10.031.003 Specifications

Brizo
Brizo Baliza Series manual

Delta Children
Delta Children MY SIZE SINK 11778 instruction manual

Symmons
Symmons Allura S-7602RP Installation and service instructions

Columbia Products
Columbia Products SANI-LAV ES2-507L operating manual

DOCOL
DOCOL 00469506 installation guide