Olin HVBTR?4800 User manual

Ref: HVBTR4800-002
OLIN Products: HVBTR-4800
HVBTR‐4800–RecordingtoexternalUSBHDD.
This document is a supplement to the HVBTR-4800 User Guide.
Connecting the external USB HDD
(For more information on the types of External USB Hard Disc Drives, refer to HVBTR1200-003C.pdf - HVBTR-
1200 / HVBTR-1400 / HVBTR-1600 / HVBTR-4800 - External drive and Flash Drive support notes under the
Product FAQs on www.olinlivenow.com.au )
HVBTR-4800
Connect USB HDD to the USB port on the front of the unit. Light on the HDD should indicate power.
The HVBTR-4800 should recognise the USB HDD and display on screen – USB device is inserted.

HVBTR4800‐002
2|Page
Three ways to record from the HVBTR-4800:
1. REC key – on demand Instant Recording.
2. EPG key – setting EPG Recording (EPG = Electronic Programming Guide).
3. EPG key – setting Timer Recording.
Appendix A. Time Shifting Live TV – recording via Time Shift
1. REC key – on demand Instant Recording.(Manual Page 24)
Press the REC key and the message “Enter Record,Waiting…” appears on the screen as it initialises the recording:
A recording symbol appears in the top left corner showing the progress.
Press INFO key on the top line of the RCU to display detailed information about the recording and your USB ext HDD.
Press INFO key again to clear the detailed information.

HVBTR4800‐002
3|Page
The HVBTR-4800 will continue recording until you press the STOP key on the RCU.
The system will then ask Do you want to stop record? [OK]:Yes [EXIT]:Cancel
Press the OK key to finish the recording.
TIP Watching other channels while recording.
HVBTR-4800 is not a dual tuner. However, you can watch other channels on the same Logical Channel Number (LCN)
that you are recording.
For example you can record ABC News 24 (C024) and watch ABC1 (C021), ABC2 (C022) and ABC3 (C023) etc. Note
it will tell you the channel that is recording in the top left corner - example C024.
But if you are recording ABC News 24 and try channels on other LCNs you will get the message
RECORD and it will tell you the channel that is recording in the top left corner.
Example of same LCN would be ONE HD / TEN Digital / ELEVEN or 7 Digital / 7TWO / 7mate and so on. You
would need to check your local transmission information for LCN details.

HVBTR4800‐002
4|Page
2. EPG key – setting EPG Recording (EPG = Electronic Programming Guide). (Manual Page 24)
Press the EPG key and use the up and down arrow keys to position on the program you wish to record.
Press the OK key to Book the program through the Event Add screen.
Use the down arrow key to move to the Mode and change it from View to Record with the right arrow key.
Note: Other data can be changed in this screen.
TIP: EPG is not always up to date and does not always take into account program overruns and so on. You
may want to change the Start Time to a few minutes earlier to allow for early starts and the Finish Time to a few
minutes later to allow for the program running over.

HVBTR4800‐002
5|Page
Press the OK key to confirm the recording.
Press the RETURN/EXIT key to return to the EPG screen. Note there is a red dot against the program you have set
to record.
Press the RETURN/EXIT key again to leave the EPG screen.
3. EPG key – setting Timer Recording.(Manual Page 25)
Useful if you know what time your program is on and you want to set options outside of the EPG information.
Press the EPG key to open the Program Guide:

HVBTR4800‐002
6|Page
Press the INFO key to open the Schedule screen
Press the red key to Add a new recording in the Event Add screen:
Change the Channel No to the channel you wish to record with the right arrow key:
Change the Start Time and End Time to the appropriate times. In the example below the short kids program runs
from 17:00 to 17:11. The Start Time has been set a little earlier and the End Time a little later to make sure the
whole program is recorded.

HVBTR4800‐002
7|Page
TIP: EPG is not always up to date and does not always take into account program overruns and so on. You
may want to change the Start Time to a few minutes earlier to allow for early starts and the Finish Time to a few
minutes later to allow for the program running over.
Change the Mode from View to Record. Press OK key to Confirm. The Schedule will list the Event.
Press RETURN/EXIT key to go back to the EPG Program Guide. Press RETURN/EXIT key to go back to viewing
the programs.
Reviewing your scheduled recordings
Press EPG key to enter the EPG screen. Press INFO key to enter the Schedule screen. This screen will show all
your scheduled recordings eg:
Recordings or Events can be added, edited or deleted from this screen.

HVBTR4800‐002
8|Page
4. EPG and Record Timer recording process
Usually you will have set the HVBTR-4800 to standby and probably turned the TV off after you have set an EPG or
Record Timer recording. When the Start Time is reached, the HVBTR-4800 will automatically come out of Standby
mode and begin recording. The HVBTR-4800 will stay on until you complete the recording . If your TV is off, you
do not see any of this activity. If you did have your TV on, this is the process you would see:
The HVBTR-4800 will wake up on the last channel it was tuned to. Book event time up indicates it is about to
perform a Timed Recording.
The recording will begin after the 10 second countdown. Before the countdown ends you can start by pressing the
OK key (or cancel the recording by pressing the RETURN/EXIT key). The channel will change to the channel to be
recorded. The message Enter Record,Waiting and a timer will display on the screen.
The timer will increase through the recording:
When the recording has finished you will see the message Recording Complete. Press RETURN/EXIT key to
return to normal viewing.
HVBTR4800‐002
9|Page
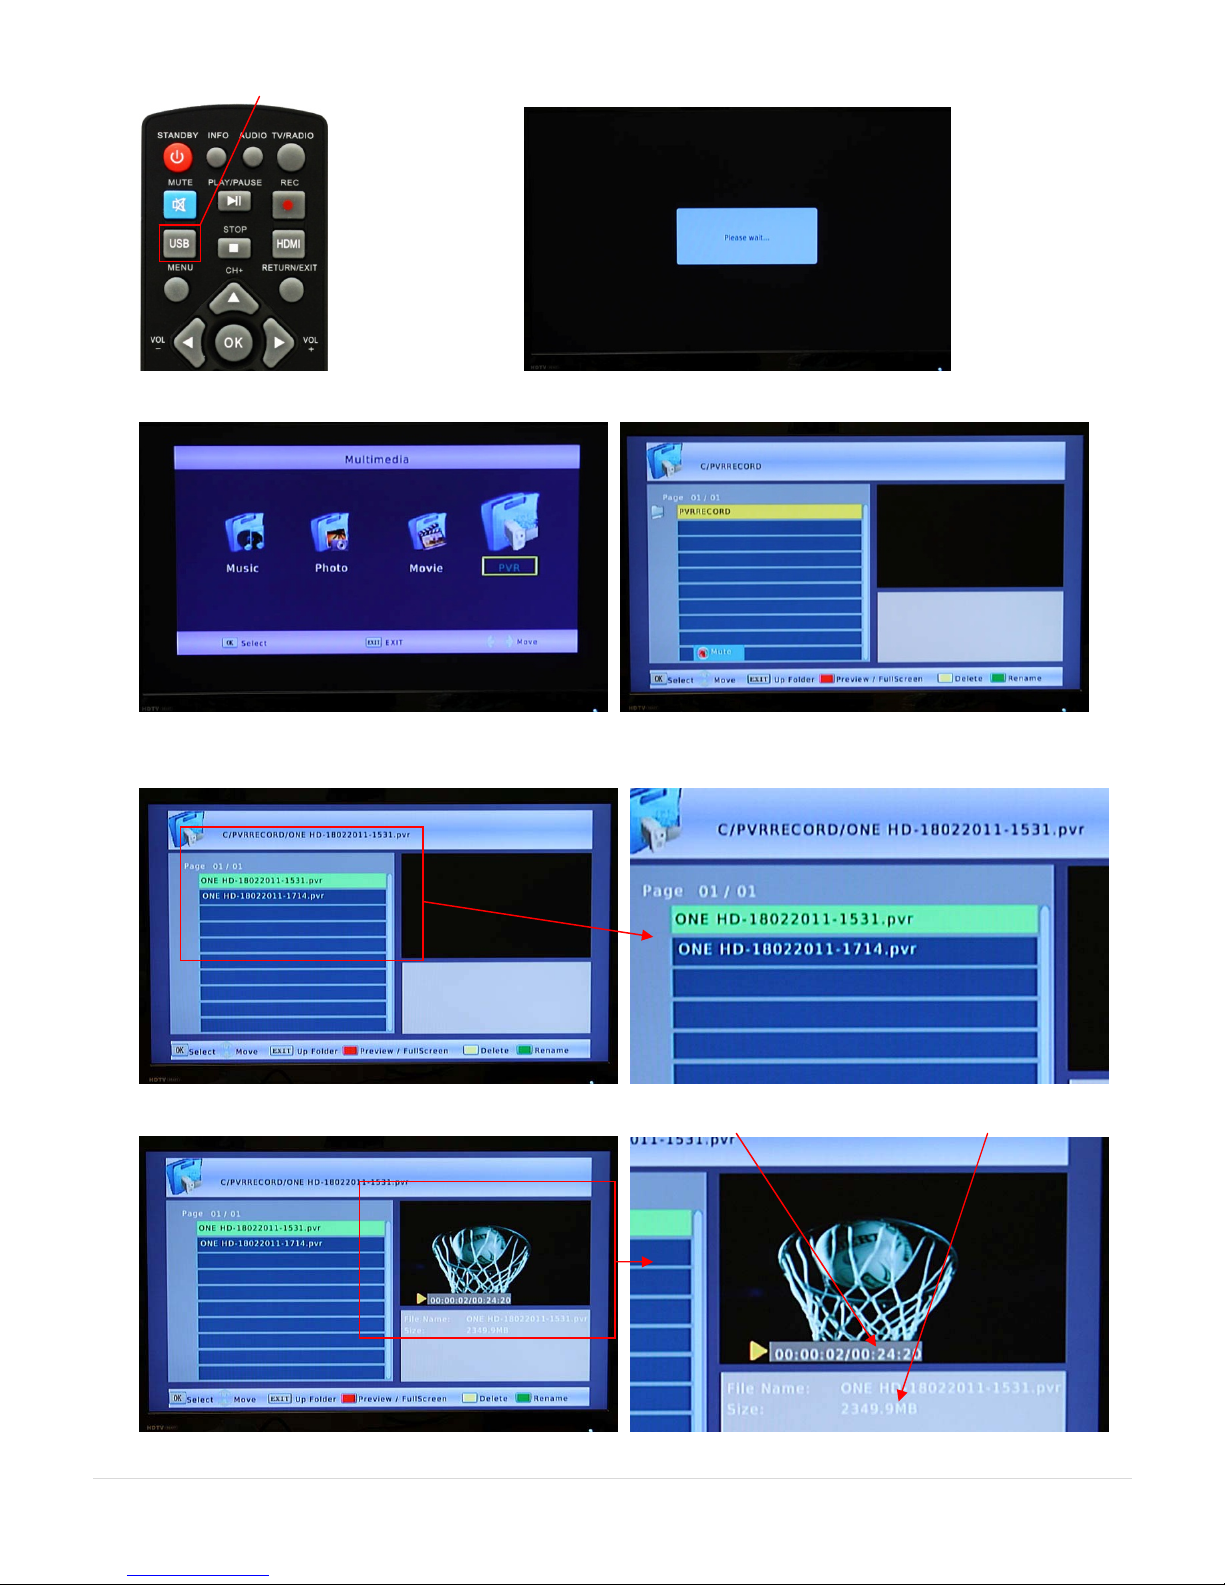
5. Playback Recorded Program(Manual Page 25)
Press the USB key to access the Multimedia menu.
Choose PVR and press the OK key to select. The PVRRECORD folder on the ext HDD will be displayed.
Press OK key and the recorded programs will be displayed. The recording filename shows the station recorded – date
of recording – time recording started.
Press OK key to show the preview. The preview screen shows the length of the recording and the file size.
HVBTR4800‐002
10|Page
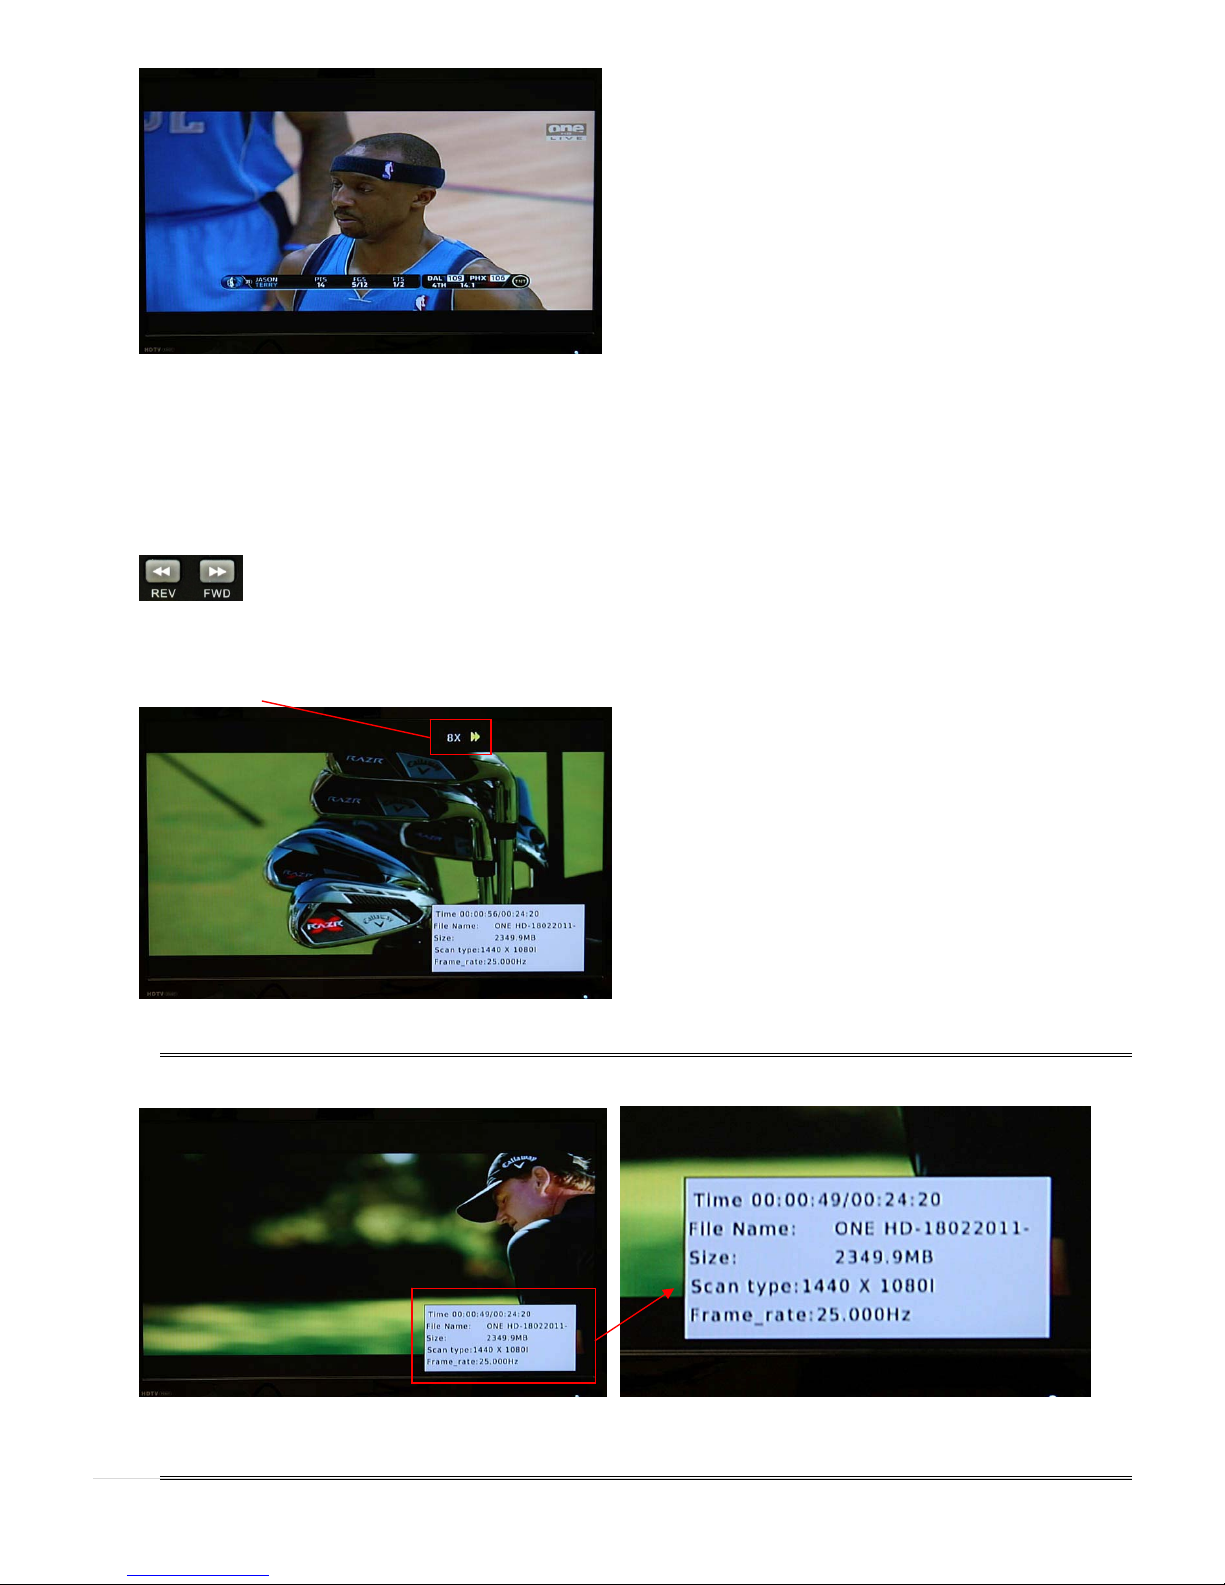
Press red key to enter FullScreen.
Note: pressing the red key again will return back to the Preview screen.
When a recording is finished, the recorded program screen will reappear.
Other keys:
STOP – recording will stop at any time.
REV (reverse) and FWD (forward) keys
Pressing the keys a number of times will increase the fast reverse or fast forwarding (ie 2X / 4X / 8X / 16X / 32X). After
32X times, recording will go back to normal play. Or use Play/Pause key to return to normal play.
Eg display of 8X with recording information on (see tip below).
TIP – displaying additional recording information - press the INFO key while watching a recording.
Includes the same information as the Preview screen plus Scan Type (resolution) and Frame Rate. The Time
function is very useful when fast forwarding etc. Press INFO key again to clear the information from the screen.
Table of contents
Other Olin TV Receiver manuals


