manuals.online logo
Brands
  1. Home
  2. •
  3. Brands
  4. •
  5. Olympus
  6. •
  7. Digital Camera
  8. •
  9. Olympus DP21-SAL User guide

Olympus DP21-SAL User guide

Other manuals for DP21-SAL

2

Other Olympus Digital Camera manuals

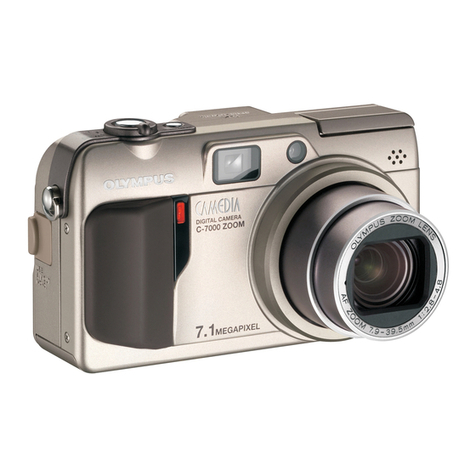
Olympus CAMEDIA C-730 Ultra Zoom User manual

Olympus

Olympus CAMEDIA C-730 Ultra Zoom User manual

Olympus SP-590 Installation guide

Olympus

Olympus SP-590 Installation guide

Olympus E620 - Evolt 12.3MP Live MOS Digital SLR... User manual

Olympus

Olympus E620 - Evolt 12.3MP Live MOS Digital SLR... User manual

Olympus FE-25 Instruction Manual

Olympus

Olympus FE-25 Instruction Manual

Olympus C-120 - CAMEDIA - Digital Camera User manual

Olympus

Olympus C-120 - CAMEDIA - Digital Camera User manual

Olympus C 725 - CAMEDIA Ultra Zoom Digital Camera Installation guide

Olympus

Olympus C 725 - CAMEDIA Ultra Zoom Digital Camera Installation guide

Olympus TG-4 User manual

Olympus

Olympus TG-4 User manual

Olympus XZ-1 User manual

Olympus

Olympus XZ-1 User manual

Olympus E-P1 - Digital Camera - Prosumer Mounting instructions

Olympus

Olympus E-P1 - Digital Camera - Prosumer Mounting instructions

Olympus FE-200 Installation guide

Olympus

Olympus FE-200 Installation guide

Olympus Stylus 770 SW Installation guide

Olympus

Olympus Stylus 770 SW Installation guide

Olympus CAMEDIA C-720 Ultra Zoom User manual

Olympus

Olympus CAMEDIA C-720 Ultra Zoom User manual

Olympus FE 370 - Digital Camera - Compact Mounting instructions

Olympus

Olympus FE 370 - Digital Camera - Compact Mounting instructions

Olympus VG-160 Instruction Manual

Olympus

Olympus VG-160 Instruction Manual

Olympus C-570 Installation guide

Olympus

Olympus C-570 Installation guide

Olympus Stylus 840 Installation guide

Olympus

Olympus Stylus 840 Installation guide

Olympus SP-320 Installation guide

Olympus

Olympus SP-320 Installation guide

Olympus FE-5050 Setup guide

Olympus

Olympus FE-5050 Setup guide

Olympus Camedia D-340R User manual

Olympus

Olympus Camedia D-340R User manual

Olympus Stylus 1040 User manual

Olympus

Olympus Stylus 1040 User manual

Olympus E-PL2 User manual

Olympus

Olympus E-PL2 User manual

Olympus CAMEDIA D-535 ZOOM User manual

Olympus

Olympus CAMEDIA D-535 ZOOM User manual

Olympus E-1 - Digital Camera SLR User manual

Olympus

Olympus E-1 - Digital Camera SLR User manual

Olympus Stylus 840 User manual

Olympus

Olympus Stylus 840 User manual

Popular Digital Camera manuals by other brands

Canon WP-DC35 user guide

Canon

Canon WP-DC35 user guide

Xiaomi 70mai Dash Cam Lite user manual

Xiaomi

Xiaomi 70mai Dash Cam Lite user manual

Samsung PL70 Quick start manual

Samsung

Samsung PL70 Quick start manual

GE E1680W user manual

GE

GE E1680W user manual

Canon EOS 1200D instruction manual

Canon

Canon EOS 1200D instruction manual

Tevion MD 86497 user guide

Tevion

Tevion MD 86497 user guide

Exakta VX Features

Exakta

Exakta VX Features

Kodak Digital Science DC120 user guide

Kodak

Kodak Digital Science DC120 user guide

Nikon FM3A Specifications

Nikon

Nikon FM3A Specifications

Vectra Fitness H1 Quick reference guide

Vectra Fitness

Vectra Fitness H1 Quick reference guide

Nikon COOLPIX 775 quick start guide

Nikon

Nikon COOLPIX 775 quick start guide

Samsung EC-L100ZBBA brochure

Samsung

Samsung EC-L100ZBBA brochure

FujiFilm FINEPIX BL01124-201 owner's manual

FujiFilm

FujiFilm FINEPIX BL01124-201 owner's manual

Panasonic DMC-L10KPP Service manual

Panasonic

Panasonic DMC-L10KPP Service manual

Hyundai Electric HYU-CC-CHBF12001 Quick installation guide

Hyundai Electric

Hyundai Electric HYU-CC-CHBF12001 Quick installation guide

Sony DSC-WX80 specification

Sony

Sony DSC-WX80 specification

Nikon Nuvis S - Point & Shoot instruction manual

Nikon

Nikon Nuvis S - Point & Shoot instruction manual

Teledyne Piranha4 user manual

Teledyne

Teledyne Piranha4 user manual

manuals.online logo
manuals.online logoBrands
  • About & Mission
  • Contact us
  • Privacy Policy
  • Terms and Conditions

Copyright 2025 Manuals.Online. All Rights Reserved.

DP21-SAL QUICK OPERATION GUIDE -- Recording -- AX8231-01
Connect a USB memory @.
Recording Procedure
Set the main switch of the camera head to ON.
Press the main switch ² to ON.
Initial setting
(Language setting: p.57, Scale setting: p.38)
REC AUTO mode selection
Press the MODE button ³ to switch the modes in
the order of REC AUTO PLAY REC MANUAL.
Microscope adjustment
· Set light path selector to camera (camera) path.
· Engage LBD filter in microscope light path.
· Adjust the microscope brightness.
Image check
Confirm the specimen focusing and framing (record-
ing area) on the monitor screen.
Recording
· Press the EXPOSE button |.
· The ACCESS LED 5blinks during recording.
Recording result check
· Select PLAY mode and check the recorded image
(see back side for details).
Main factory setups
· INFO display : ON (displayed)
· Recording mode : HQ (DP21)
2448x1920, JPEG-LOW (DP26)
· Exposure correction : ±0
· White balance : AUTO
· Metering mode : 30% average
· Sharpness : NORMAL
· ISO : 100
· Image color setting : COLOR1
}For details on the settings, refer to the instruc-
tion manual.
INFO display
· Press the cursor buttons ‡ to zoom into the image. Before zooming, be sure
to hide the MENU display (use the MENU button 9for view/hide switching).
· To scroll a zoomed image, press the cursor buttons ‡ while holding the SHIFT
button 6or SET/OK button 7depressed.
· Press the Shift + MENU buttons to hide the INFO display.
· If no image is displayed, first press the main switch ² and then press the MENU
button 9while the AE lock LED blights (for about 1 second) during startup. The
system will start up with the SVGA resolution (800x600).
CAUTION
· Do not connect a device other than the USB memory provided with the DP21-SAL
to the USB port of the hand switch (if a USB device with high power consumption
is connected, it may not function due to insufficient current supply).
· Always leave the main switch of the camera head to ON.
· After the system is turned OFF using the main switch ² of the control box, it cannot
be turned ON using the standby switch of the hand switch. The main switch ² of
the control box should be used in such a case (when the system is turned OFF
using the standby switch aof the hand switch, the system can be turned ON with
either switch.
Tips
1
2
3
4
5
6
a
9
7
8
(The page numbers below are those in the instruction manual.)
The screen shown below is the INFO display when combined with DP21.
No. of remaining
image (p.24)
Exposure time (p.28) White balance (p.35)
Image quality
(p.31)
Exposure
adjustment (p.27)
ISO speed
(p.32)
Scale setting
(p.38)
Scale display
area (p.40)
Metering area
(p.27)
Folder name (p.36) AE Lock (p.28) File name (p.36) Zoom (p.28)
b
A X 8 2 3 1
AX8231-01
Image No. Save folder name (p.57) White balance (p.35)
File name
(p.36) ISO speed
(p.32)
Date / Time
(p.56)
Image quality
(p.31)
Protect (p.55)Exposure time
(p.37)
Metering area
(p.27)
Exposure
adjustment (p.28)
Zoom (p.28)
DP21-SAL QUICK OPERATION GUIDE -- Playback --
Playback Procedure
1
2
3
9
87
4
5
Insert a USB memory @ containing recorded images.
Press the main switch ² to ON.
PLAY mode setting
Press the MODE button ³ to switch the modes in the
order of REC AUTO PLAY REC MANUAL.
1-image playback
· Press the SET/OK button 4(to switch the index
display to 1-image display).
· Press either cursor button 5to select an
image.
Played image zooming
Press either cursor button 5to select one of
“Index display” to “4x.”
1-image erasure
Erased image selection
· 1-image display: Use cursor button 5 .
· Index display: Place cursor on the desired image
using cursor buttons 5 .
Press the ERASE button 6.
When the confirmation message is displayed, press
the SET/OK button 4to enter selection.
All-image erasure
Press the MENU button 7to display the MENU dis-
play, select [ERASE ALL FILES] and press the SET/
OK button 4.
All-file
erasure
Formatting
When the confirmation message is displayed, press
the SET/OK button 4to enter selection.
INFO display
Tips
· Hide the MENU display before zooming an image (the display can be viewed or
hidden using the MENU button 7).
· To increase the zoom ratio, press cursor button 5.
(Each press of switches it in order of 1x 1:1 (equal size) 2x 4x.)
· To decrease the zoom ratio, press cursor button 5.
(Each press of switches it in order of 4x 2x 1:1 (equal size) 1x Index dislay.)
· To scroll an image during 2x or 4x zooming, press cursor buttons 5while holding
the SHIFT button 8or SET/OK button 4.
· To switch index display to 1-image playback display, select the desired image and
press the SET/OK button 4.
· To turn the INFO display off, Press the Shift + MENU buttons.
· To protect image data (erasure prohibition), select the desired image and press the
PROTECT button 9.
CAUTION
· The protected images cannot be erased. (They should be unprotected before at-
tempting erasure.)
· When FORMAT is selected, all of the files in the USB memory, including the pro-
tected images as well as document files, will be erased.
6
(The page numbers below are those in the instruction manual.)
The screen shown below is the INFO display when combined with DP21.