manuals.online logo
Brands
  1. Home
  2. •
  3. Brands
  4. •
  5. Olympus
  6. •
  7. Digital Camera
  8. •
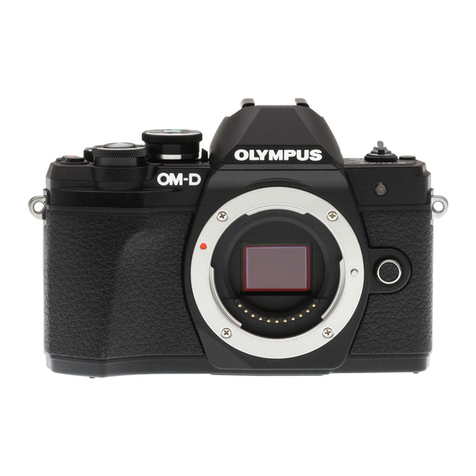
  9. Olympus E-PL3 User manual

Olympus E-PL3 User manual

PhotoTop Camera calibration file was created for a
combination of:
Camera S/N: ____________________________
Lens S/N: ______________________________
• 17mm Fixed focal length (non zoom)
••Never to be removed from camera body
••Do not interchange lens with other Olympus bodies
• Acceptable Focus Range – 1.0m to 3.0m (3 – 12 ft)
• Unique Camera setting: Auto Focus with Fill In Flash
PHOTOTOP®Calibrated Camera
by
Semi Pro Camera Guide
Olympus E-PL3 w/17mm Lens
Format Card
1. Turn camera on
2. Click MENU
3. Go to Shooting Menu 1 (top of list)
4. Click OK
5. Card Setup OK
6. Format OK
7. Yes OK
Camera Setup for PhotoTop
1. Turn camera on
2. Set to Manual Mode (M)
3. Select OK (within 4-way Command Section)
4. Flash Mode = Fill In
5. Flash +/- = +1.0
6. Meter = ESP
7. Focus = S-AF (single autofocus)
8. ISO = 640
9. Face Priority = Off
10. Movie = Off
11. Focal Length (Image Stabilizer) = Off
12. Color Mode = Natural
13. White Balance = WB Flash
14. Frames – Single
15. Ratio = 4:3
16. Resolution = M/N 2560 x 1920
17. Motion JPEG = 640 x 480
Shutter Speed & Aperture Set Up
Shutter Speed can only be set in Manual Mode
1. Push 4-Way Command Up – this will highlight the
Shutter/Aperture settings
2. Use up/down to set shutter speed to 200 or 250
NOTE: When Flash is engaged, the camera will
automatically set the shutter speed to 160.
3. Use left/right to set aperture to F8.0 (never set lower)
4. Press OK to accept settings
Initial Set Up
(only custom settings pertaining to PhotoTop are noted in this set up)
1. Click Menu (bottom right corner)
2. Push 4-way Command Down to Custom Menu
3. Click OK
4. AF/MF (Click OK)
a. MF Assist = On
b. Push 4-way Left 1x
5. DISP/PC (Click OK)
a. Push 4-way Down 7x
b. Live View Boost = ON
6. Lightly touch the shutter button to return to normal
operations mode.
Normal PhotoTop Operations
1. Remove Lens Cap
Check that lens is clean
2. Turn Camera on
3. Verify that Mode = M (manual)
4. Compare rear LCD screen info with image on back of page
Frame counter in lower right corner will typically not be
the same on your camera
5. Manually activate Flash
6. Point camera towards area of measurement
7. Push Shutter Release button half way (1/2) to ensure good
focus lock
If focus is not found then reposition camera to a object
with contrast and push shutter release button half way
until good focus point is selected
8. Compose image and push shutter release completely
To Delete One Photo
1. Select Image Review button (button with blue arrow in upper
left corner)
2. Use left/right command buttons to navigate thru the images
3. Click the RED TRASH can button next to the Image Review
button
4. Select YES
Normal (Non-PhotoTop) Camera Operations
If you wish to use the camera for taking additional site photos
then simply set the mode to either Auto or P. When finished
remember to set the mode back to Mfor normal PhotoTop usage.
FABRICATOR’S CHOICE, LLC . 1375 TROUT BROOK CIRCLE . ST PAUL . MN . 55117 . 888 299 8840 . 651 259 1310 fax . fabchoice.com
Highlighted items indicate Mandatory Settings that will affect the quality of your PhotoTop template.
Olympus E-PL3 Guide_Olypmus E-PL3 settings 4/22/2013 1:14 PM Page 1
FABRICATOR’S CHOICE, LLC . 1375 TROUT BROOK CIRCLE . ST PAUL . MN . 55117 . 888 299 8840 . 651 259 1310 fax . fabchoice.com
Custom Camera Usage
Extreme Low Light Conditions
If you find that the FILL IN Flash configuration is insufficient the
flash strength can be altered to Full, Half, Quarter or Sixteen mode
by going back to the Camera Setup Section of this guide.
Changes to the flash are within the up/down Setup Section when
using the camera in Manual Mode
Outdoor Use
PhotoTop does extremely well under most lighting conditions but
must be manually configured when the Flash is not the dominant
light source.
The area of most concern when photographing outdoors is
consistent and even lighting. The darkest and lightest sections of
the shoot need to be in similar lighting. The Marker Panels must
ALL be placed such that the light is evenly distributed across the
entire shoot/marker panels (a panel cannot be half in shade/light)
This will require a bit of experimentation to ensure that you have
the correct balance of both illumination and contrast, otherwise
the contrast will be too great and you will not get good exposures
on all of your marker panels and PhotoTop dots.
It is our recommendation that outdoor shoots be scheduled
early morning/evening when indirect sunlight is the dominant
light source as direct sunlight is not desirable.
Typical Settings for Outdoor
Flash is typically turned off, however, fill-in can be used if
necessary
Sunny Day
• ISO = 100
• Shutter Speed = 250
• Aperture = F11.0 (never set lower than F8.0)
High Shade or Light Overcast
• ISO = 100
• Shutter Speed = 200
• Aperture = F8.0 (never set lower)
Low Light or Heavy Overcast
• ISO = 400
• Shutter Speed = 250
• Aperture = F8.0 (never set lower)
NOTE: IN ALL CASES THE APERTURE MUST NEVER BE SET LOWER
THAN F8.0. IT IS OK TO CHANGE THE SHUTTER SPEED OR ISO IF
REQUIRED.
PHOTOTOP®Calibrated Camera
by
Semi Pro Camera Guide
Olympus E-PL3 w/17mm Lens
Flashing value to the right of F8.0 is normal when taking photos
Shutter Speed AUTOMATICALLY defaults to 160 when flash is activated
Version 2012.10.09
Olympus E-PL3 Guide_Olypmus E-PL3 settings 4/22/2013 1:14 PM Page 2

Other manuals for E-PL3

4

This manual suits for next models

1

Other Olympus Digital Camera manuals

Olympus Camedia C-300 ZOOM User manual

Olympus

Olympus Camedia C-300 ZOOM User manual

Olympus CAMEDIA D-550 Zoom User manual

Olympus

Olympus CAMEDIA D-550 Zoom User manual

Olympus CAMEDIA C-460 Zoom User manual

Olympus

Olympus CAMEDIA C-460 Zoom User manual

Olympus DP21-SAL User guide

Olympus

Olympus DP21-SAL User guide

Olympus E-M1 User manual

Olympus

Olympus E-M1 User manual

Olympus VISERA User manual

Olympus

Olympus VISERA User manual

Olympus SH-1 User manual

Olympus

Olympus SH-1 User manual

Olympus IR 300 - Digital Camera - 5.0 Megapixel Installation guide

Olympus

Olympus IR 300 - Digital Camera - 5.0 Megapixel Installation guide

Olympus Stylus Verve - Stylus Verve 4MP Digital... User manual

Olympus

Olympus Stylus Verve - Stylus Verve 4MP Digital... User manual

Olympus E-P2 - PEN 12.3 MP Micro Four Thirds Interchangeable Lens Digital... Instruction Manual

Olympus

Olympus E-P2 - PEN 12.3 MP Micro Four Thirds Interchangeable Lens Digital... Instruction Manual

Olympus E420 - Evolt 10MP Digital SLR Camera User manual

Olympus

Olympus E420 - Evolt 10MP Digital SLR Camera User manual

Olympus FE 280 - Digital Camera - Compact Configuration guide

Olympus

Olympus FE 280 - Digital Camera - Compact Configuration guide

Olympus X-750 User manual

Olympus

Olympus X-750 User manual

Olympus E620 - Evolt 12.3MP Live MOS Digital SLR... Instruction Manual

Olympus

Olympus E620 - Evolt 12.3MP Live MOS Digital SLR... Instruction Manual

Olympus CAMEDIA SP-500 UZ User manual

Olympus

Olympus CAMEDIA SP-500 UZ User manual

Olympus FE 250 - Digital Camera - Compact Installation guide

Olympus

Olympus FE 250 - Digital Camera - Compact Installation guide

Olympus CAMEDIA C-200Zoom Installation guide

Olympus

Olympus CAMEDIA C-200Zoom Installation guide

Olympus C-50 - Camedia 5MP Digital Camera User manual

Olympus

Olympus C-50 - Camedia 5MP Digital Camera User manual

Olympus E-30 User manual

Olympus

Olympus E-30 User manual

Olympus E-1 - Digital Camera SLR User manual

Olympus

Olympus E-1 - Digital Camera SLR User manual

Olympus i-SPEED User manual

Olympus

Olympus i-SPEED User manual

Olympus FE 340 - Digital Camera - Compact Installation guide

Olympus

Olympus FE 340 - Digital Camera - Compact Installation guide

Olympus STYLUS VERVE S Installation guide

Olympus

Olympus STYLUS VERVE S Installation guide

Olympus Camedia C-21 User manual

Olympus

Olympus Camedia C-21 User manual

Popular Digital Camera manuals by other brands

Bresser NATIONAL GEOGRAPHIC 90-81000 Quick start instructions

Bresser

Bresser NATIONAL GEOGRAPHIC 90-81000 Quick start instructions

Sanyo VPC-S885 instruction manual

Sanyo

Sanyo VPC-S885 instruction manual

JAI GO-5000M-PMCL user manual

JAI

JAI GO-5000M-PMCL user manual

Panasonic PalmCam PV-DC2090 operating instructions

Panasonic

Panasonic PalmCam PV-DC2090 operating instructions

Digital Watchdog Starlight B1363TIR user manual

Digital Watchdog

Digital Watchdog Starlight B1363TIR user manual

Samsung SAMSUNG ST66 user manual

Samsung

Samsung SAMSUNG ST66 user manual

FujiFilm GW690-III Service manual

FujiFilm

FujiFilm GW690-III Service manual

Genius D610 manual

Genius

Genius D610 manual

Panasonic LUMIX DMC-LX1GC operating instructions

Panasonic

Panasonic LUMIX DMC-LX1GC operating instructions

ZWO ASI715MC product manual

ZWO

ZWO ASI715MC product manual

JAI SP-25000M-CXP4A user manual

JAI

JAI SP-25000M-CXP4A user manual

Memorex NDC6005-SB - Npower Flash Micro SpongeBob Digital... user guide

Memorex

Memorex NDC6005-SB - Npower Flash Micro SpongeBob Digital... user guide

Panasonic Lumix DMC-SZ5 owner's manual

Panasonic

Panasonic Lumix DMC-SZ5 owner's manual

Sony Cyber-shot DSC-W7 Specifications

Sony

Sony Cyber-shot DSC-W7 Specifications

Vivitar ViviCam T327 user manual

Vivitar

Vivitar ViviCam T327 user manual

Panasonic Lumix DMC-FT25 operating instructions

Panasonic

Panasonic Lumix DMC-FT25 operating instructions

Sanyo Xacti VPC-S1 Service manual

Sanyo

Sanyo Xacti VPC-S1 Service manual

Pentax K1000 - K1000 user guide

Pentax

Pentax K1000 - K1000 user guide

manuals.online logo
manuals.online logoBrands
  • About & Mission
  • Contact us
  • Privacy Policy
  • Terms and Conditions

Copyright 2025 Manuals.Online. All Rights Reserved.